学习笔记(Android Studio)1
这里写自定义目录标题
- Android Studio下载与安装
- SDK Manager的下载与安装
- 安卓闹钟小程序
- MainActivity中的代码
- CallAlarm中的代码:
- AlarmAlert中的代码:
- activity_main.xml布局文件的代码:
- timeset.xml布局文件中的代码:
- string.xml中的代码:
- color.xml中的代码:
- AndroidManifest.xml中的代码:
- 其他用到的函数学习
Android Studio下载与安装
新电脑在下载Android Studio之前要先配置好Java环境
Java环境配置教程:https://jingyan.baidu.com/article/fd8044fa2c22f15031137a2a.html
在配置好Java环境后,进入Android Studio中文社区下载:http://www.android-studio.org/

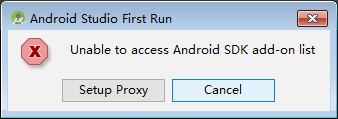
安装过程中可能遇到的问题:第一次安装,选择Do not import settings,弹出错误就选择cancel

SDK Manager的下载与安装
做Android开发时,免不了使用Android SDK Manager,安装需要的sdk版本、buildTools版本等等。
下载SDK Manager
链接: http://tools.android-studio.org/index.php/sdk/.
如下,我们选择压缩版下载:
图片:

下载好SDK Manager后直接打开安装并运行,下载需要的SDK即可

该图来至博文:https://www.cnblogs.com/kangjianwei101/p/5621238.html
大体上可以分为Tools、Platforms和Extras三部分。install需要的package后,Android Studio将在本地创建对应的文件目录,如图是安装了一些package之后,PC上的目录结构:

安卓闹钟小程序
Android文档中有自带的的AlarmManager(闹钟服务),可以通过它开发手机闹钟类的APP。AlarmManager在文档中的解释是:在特定的时刻为我们广播一个指定的Intent,简单说就是需要自己指定一个时间,然后当到达该时间时,AlarmManager会为我们广播一个我们设定好的Intent,比如时间到了,可以指向某个Activity或者Service。另外官方文档中有一些要注意的地方:值得注意一点的是,AlarmManager主要是用来在某个时刻运行写好的代码,即使指定APP在那个特定时间并没有运行!从API 19开始,Alarm的机制都是非准确传递的,操作系统将会转换闹钟,来最小化唤醒和电池的使用!某些新的API会支持严格准确的传递,见setWindow(int, long, long, PendingIntent)和setExact(int, long, PendingIntent)。targetSdkVersion在API 19之前应用仍将继续使用以前的行为,所有的闹钟在要求准确传递的情况下都会传递。 官方API文档:http://androiddoc.qiniudn.com/reference/android/app/AlarmManager.html
相关方法:
- set(int type,long startTime,PendingIntent pi):一次性闹钟
- setRepeating(int type,long startTime,long intervalTime,PendingIntent
pi):重复性闹钟,和3有区别,3闹钟间隔时间不固定 - setInexactRepeating(int type,long startTime,long
intervalTime,PendingIntent pi):重复性闹钟,时间不固定 - cancel(PendingIntent pi):取消AlarmManager的定时服务
getNextAlarmClock():得到下一个闹钟,返回值AlarmManager.AlarmClockInfo - setAndAllowWhileIdle(int type, long triggerAtMillis, PendingIntent
operation) 和set方法类似,这个闹钟运行在系统处于低电模式时有效 - setExact(int type, long triggerAtMillis, PendingIntent
operation):在规定的时间精确的执行闹钟,比set方法设置的精度更高 setTime(long
millis):设置系统墙上的时间 - setTimeZone(String timeZone):设置系统持续的默认时区
- setWindow(int type, long windowStartMillis, long windowLengthMillis,
PendingIntent operation):设置一个闹钟在给定的时间窗触发。类似于set,该方法允许应用程序精确地控制操作系统调整闹
钟触发时间程度。
相关参数讲解:
-
Type(闹钟类型): 有五个可选值: AlarmManager.ELAPSED_REALTIME:
闹钟在手机睡眠状态下不可用,该状态下闹钟使用相对时间(相对于系统启动开始),状态值为3;
AlarmManager.ELAPSED_REALTIME_WAKEUP
闹钟在睡眠状态下会唤醒系统并执行提示功能,该状态下闹钟也使用相对时间,状态值为2; AlarmManager.RTC
闹钟在睡眠状态下不可用,该状态下闹钟使用绝对时间,即当前系统时间,状态值为1; AlarmManager.RTC_WAKEUP
表示闹钟在睡眠状态下会唤醒系统并执行提示功能,该状态下闹钟使用绝对时间,状态值为0;
AlarmManager.POWER_OFF_WAKEUP
表示闹钟在手机关机状态下也能正常进行提示功能,所以是5个状态中用的最多的状态之一,该状态下闹钟也是用绝对时间,状态值为4;不过本状态好像受SDK版本影响,某些版本并不支持; -
startTime:闹钟的第一次执行时间,以毫秒为单位,可以自定义时间,不过一般使用当前时间。
需要注意的是,本属性与第一个属性(type)密切相关,如果第一个参数对应的闹钟使用的是相对时间
(ELAPSED_REALTIME和ELAPSED_REALTIME_WAKEUP),那么本属性就得使用相对时间
(相对于系统启动时间来说),比如当前时间就表示为:SystemClock.elapsedRealtime();
如果第一个参数对应的闹钟使用的是绝对时间(RTC、RTC_WAKEUP、POWER_OFF_WAKEUP),
那么本属性就得使用绝对时间,比如当前时间就表示 为:System.currentTimeMillis()。 -
intervalTime:表示两次闹钟执行的间隔时间,也是以毫秒为单位.
-
PendingIntent:绑定了闹钟的执行动作,比如发送一个广播、给出提示等等。
PendingIntent是Intent的封装类。需要注意的是,如果是通过启动服务来实现闹钟提
示的话,PendingIntent对象的获取就应该采用Pending.getService (Context c,int
i,Intent intent,int j)方法;如果是通过广播来实现闹钟 提示的话,PendingIntent对象的获取就应该采用
PendingIntent.getBroadcast (Context c,int i,Intent intent,int
j)方法;如果是采用Activity的方式来实 现闹钟提示的话,PendingIntent对象的获取就应该采用
PendingIntent.getActivity(Context c,int i,Intent intent,int j)方法。
运行效果如图所示:


具体代码如下:
MainActivity中的代码
package com.example.myapplication2;

import android.annotation.SuppressLint;
import android.app.Activity;
import android.app.AlarmManager;
import android.app.AlertDialog;
import android.app.PendingIntent;
import android.app.TimePickerDialog;
import android.content.DialogInterface;
import android.content.Intent;
import android.content.SharedPreferences;
import android.os.Bundle;
import android.view.KeyEvent;
import android.view.LayoutInflater;
import android.view.View;
import android.widget.Button;
import android.widget.EditText;
import android.widget.TextView;
import android.widget.TimePicker;
import android.widget.Toast;

import java.util.Calendar;

public class MainActivity2 extends Activity {
TextView setTime1;
TextView setTime2;
TextView setTime3;
Button mButton1;
Button mButton2;
Button mButton3;
Button m
1b023
Button4;
Button mButton5;
Button mButton6;

String time1String = null;
String time2String = null;
String time3String = null;
String defalutString = "目前无设置";

AlertDialog builder = null;
Calendar c=Calendar.getInstance();

@Override
public void onCreate(Bundle savedInstanceState)
{
super.onCreate(savedInstanceState);
setContentView(R.layout.activity_main2);

//取得活动的Preferences对象
SharedPreferences settings = getPreferences(Activity.MODE_PRIVATE);
time1String = settings.getString("TIME1", defalutString);
time2String = settings.getString("TIME2", defalutString);
time3String = settings.getString("TIME3", defalutString);

InitButton1();
InitButton2();
InitButton3();
InitButton4();
InitButton5();
InitButton6();

setTime1.setText(time1String);
setTime3.setText(time2String);
setTime2.setText(time3String);
}

public void InitButton1()
{
setTime1=(TextView) findViewById(R.id.setTime1);
mButton1=(Button)findViewById(R.id.mButton1);
mButton1.setOnClickListener(new View.OnClickListener()
{
public void onClick(View v)
{
c.setTimeInMillis(System.currentTimeMillis());
int mHour=c.get(Calendar.HOUR_OF_DAY);
int mMinute=c.get(Calendar.MINUTE);

new TimePickerDialog(MainActivity2.this,
new TimePickerDialog.OnTimeSetListener()
{
public void onTimeSet(TimePicker view,int hourOfDay,
int minute)
{
c.setTimeInMillis(System.currentTimeMillis());
c.set(Calendar.HOUR_OF_DAY,hourOfDay);
c.set(Calendar.MINUTE,minute);
c.set(Calendar.SECOND,0);
c.set(Calendar.MILLISECOND,0);

Intent intent = new Intent(MainActivity2.this, CallAlarm.class);
PendingIntent sender=PendingIntent.getBroadcast(
MainActivity2.this,0, intent, 0);
AlarmManager am;
am = (AlarmManager)getSystemService(ALARM_SERVICE);
am.set(AlarmManager.RTC_WAKEUP,
c.getTimeInMillis(),
sender
);
String tmpS=format(hourOfDay)+":"+format(minute);
setTime1.setText(tmpS);

//SharedPreferences保存数据,并提交
SharedPreferences time1Share = getPreferences(0);
SharedPreferences.Editor editor = time1Share.edit();
editor.putString("TIME1", tmpS);
editor.commit();

Toast.makeText(MainActivity2.this,"设置闹钟时间为"+tmpS,
Toast.LENGTH_SHORT)
.show();
}
},mHour,mMinute,true).show();
}
});
}

public void InitButton2()
{
mButton2=(Button) findViewById(R.id.mButton2);
mButton2.setOnClickListener(new View.OnClickListener()
{
public void onClick(View v)
{
Intent intent = new Intent(MainActivity2.this, CallAlarm.class);
PendingIntent sender=PendingIntent.getBroadcast(
MainActivity2.this,0, intent, 0);
AlarmManager am;
am =(AlarmManager)getSystemService(ALARM_SERVICE);
am.cancel(sender);
Toast.makeText(MainActivity2.this,"闹钟时间删除",
Toast.LENGTH_SHORT).show();
setTime1.setText("目前无设置");

SharedPreferences time1Share = getPreferences(0);
SharedPreferences.Editor editor = time1Share.edit();
editor.putString("TIME1", "目前无设置");
editor.commit();
}
});
}

public void InitButton3()
{
setTime3=(TextView) findViewById(R.id.setTime5);
mButton3=(Button)findViewById(R.id.mButton5);
mButton3.setOnClickListener(new View.OnClickListener()
{
public void onClick(View v)
{
c.setTimeInMillis(System.currentTimeMillis());
int mHour=c.get(Calendar.HOUR_OF_DAY);
int mMinute=c.get(Calendar.MINUTE);

new TimePickerDialog(MainActivity2.this,
new TimePickerDialog.OnTimeSetListener()
{
public void onTimeSet(TimePicker view,int hourOfDay,
int minute)
{
c.setTimeInMillis(System.currentTimeMillis());
c.set(Calendar.HOUR_OF_DAY,hourOfDay);
c.set(Calendar.MINUTE,minute);
c.set(Calendar.SECOND,0);
c.set(Calendar.MILLISECOND,0);

Intent intent = new Intent(MainActivity2.this, CallAlarm.class);
PendingIntent sender=PendingIntent.getBroadcast(
MainActivity2.this,1, intent, 0);
AlarmManager am;
am = (AlarmManager)getSystemService(ALARM_SERVICE);
am.set(AlarmManager.RTC_WAKEUP,
c.getTimeInMillis(),
sender
);
String tmpS=format(hourOfDay)+":"+format(minute);
setTime3.setText(tmpS);

//SharedPreferences保存数据,并提交
@SuppressLint("WrongConstant") SharedPreferences time2Share = getPreferences(1);
SharedPreferences.Editor editor = time2Share.edit();
editor.putString("TIME2", tmpS);
editor.commit();

Toast.makeText(MainActivity2.this,"设置闹钟时间为"+tmpS,
Toast.LENGTH_SHORT)
.show();
}
},mHour,mMinute,true).show();
}
});
}

public void InitButton4()
{
mButton4=(Button) findViewById(R.id.mButton6);
mButton4.setOnClickListener(new View.OnClickListener()
{
public void onClick(View v)
{
Intent intent = new Intent(MainActivity2.this, CallAlarm.class);
PendingIntent sender=PendingIntent.getBroadcast(
MainActivity2.this,0, intent, 0);
AlarmManager am;
am =(AlarmManager)getSystemService(ALARM_SERVICE);
am.cancel(sender);
Toast.makeText(MainActivity2.this,"闹钟时间删除",
Toast.LENGTH_SHORT).show();
setTime3.setText("目前无设置");

//SharedPreferences保存数据,并提交
@SuppressLint("WrongConstant") SharedPreferences time2Share = getPreferences(1);
SharedPreferences.Editor editor = time2Share.edit();
editor.putString("TIME2", "目前无设置");
editor.commit();
}
});
}

public void InitButton5()
{
setTime2=(TextView) findViewById(R.id.setTime2);
LayoutInflater factory = LayoutInflater.from(this);
final View setView = factory.inflate(R.layout.timeset,null);
final TimePicker tPicker=(TimePicker)setView
.findViewById(R.id.tPicker);
tPicker.setIs24HourView(true);

final AlertDialog di=new AlertDialog.Builder(MainActivity2.this)
.setIcon(R.drawable.clock)
.setTitle("设置")
.setView(setView)
.setPositiveButton("确定",
new DialogInterface.OnClickListener()
{
public void onClick(DialogInterface dialog, int which)
{
EditText ed=(EditText)setView.findViewById(R.id.mEdit);
int times=Integer.parseInt(ed.getText().toString())
*1000;
c.setTimeInMillis(System.currentTimeMillis());
c.set(Calendar.HOUR_OF_DAY,tPicker.getCurrentHour());
c.set(Calendar.MINUTE,tPicker.getCurrentMinute());
c.set(Calendar.SECOND,0);
c.set(Calendar.MILLISECOND,0);

Intent intent = new Intent(MainActivity2.this,
CallAlarm.class);
PendingIntent sender = PendingIntent.getBroadcast(
MainActivity2.this,1, intent, 0);
AlarmManager am;
am = (AlarmManager)getSystemService(ALARM_SERVICE);
am.setRepeating(AlarmManager.RTC_WAKEUP,
c.getTimeInMillis(),times,sender);
String tmpS=format(tPicker.getCurrentHour())+":"+
format(tPicker.getCurrentMinute());
String subStr = "设置闹钟时间为"+tmpS+
"开始,重复间隔为"+times/1000+"秒";
setTime2.setText("设置闹钟时间为"+tmpS+
"开始,重复间隔为"+times/1000+"秒");

//SharedPreferences保存数据,并提交
@SuppressLint("WrongConstant") SharedPreferences time3Share = getPreferences(2);
SharedPreferences.Editor editor = time3Share.edit();
editor.putString("TIME3", subStr);
editor.commit();

Toast.makeText(MainActivity2.this,"设置闹钟为"+tmpS+
"开始,重复间隔为"+times/1000+"秒",
Toast.LENGTH_SHORT).show();
}
})
.setNegativeButton("取消",
new DialogInterface.OnClickListener()
{
public void onClick(DialogInterface dialog, int which)
{
}
}).create();

mButton5=(Button) findViewById(R.id.mButton3);
mButton5.setOnClickListener(new View.OnClickListener()
{
public void onClick(View v)
{
c.setTimeInMillis(System.currentTimeMillis());
tPicker.setCurrentHour(c.get(Calendar.HOUR_OF_DAY));
tPicker.setCurrentMinute(c.get(Calendar.MINUTE));
di.show();
}
});
}

public void InitButton6()
{
mButton6=(Button) findViewById(R.id.mButton4);
mButton6.setOnClickListener(new View.OnClickListener()
{
public void onClick(View v)
{
Intent intent = new Intent(MainActivity2.this, CallAlarm.class);
PendingIntent sender = PendingIntent.getBroadcast(
MainActivity2.this,1, intent, 0);
AlarmManager am;
am = (AlarmManager)getSystemService(ALARM_SERVICE);
am.cancel(sender);
Toast.makeText(MainActivity2.this,"闹钟时间删除",
Toast.LENGTH_SHORT).show();
setTime2.setText("目前无设置");
//SharedPreferences保存数据,并提交
@SuppressLint("WrongConstant") SharedPreferences time3Share = getPreferences(2);
SharedPreferences.Editor editor = time3Share.edit();
editor.putString("TIME3", "目前无设置");
editor.commit();
}
});
}

@Override
public boolean onKeyUp(int keyCode, KeyEvent event) {

if(keyCode == KeyEvent.KEYCODE_BACK){
builder = new AlertDialog.Builder(MainActivity2.this)
.setIcon(R.drawable.clock)
.setTitle("温馨提示:")
.setMessage("您是否要退出闹钟程序!!!")
.setPositiveButton("确定",
new DialogInterface.OnClickListener() {
public void onClick(DialogInterface dialog,
int whichButton) {
MainActivity2.this.finish();
}
})
.setNegativeButton("取消",
new DialogInterface.OnClickListener() {
public void onClick(DialogInterface dialog,
int whichButton) {
builder.dismiss();
}
}).show();
}
return true;
}

private String format(int x)
{
String s=""+x;
if(s.length()==1) s="0"+s;
return s;
}
CallAlarm中的代码:
package com.example.myapplication2;

import android.content.Context;
import android.content.Intent;
import android.content.BroadcastReceiver;
import android.os.Bundle;

public class CallAlarm extends BroadcastReceiver
{
@Override
public void onReceive(Context context, Intent intent)
{
Intent i = new Intent(context, AlarmAlert.class);

Bundle bundleRet = new Bundle();
bundleRet.putString("STR_CALLER", "");
i.putExtras(bundleRet);
i.addFlags(Intent.FLAG_ACTIVITY_NEW_TASK);
context.startActivity(i);
}
}
AlarmAlert中的代码:
package com.example.myapplication2;

import android.app.Activity;
import android.app.AlertDialog;
import android.content.DialogInterface;
import android.os.Bundle;

public class AlarmAlert extends Activity
{
@Override
protected void onCreate(Bundle savedInstanceState)
{
super.onCreate(savedInstanceState);
new AlertDialog.Builder(AlarmAlert.this)
.setIcon(R.drawable.clock)
.setTitle("闹钟响了!!")
.setMessage("快完成你制定的计划吧!!!")
.setPositiveButton("关掉它",
new DialogInterface.OnClickListener()
{
public void onClick(DialogInterface dialog, int whichButton)
{
AlarmAlert.this.finish();
}
})
.show();
}
}
activity_main.xml布局文件的代码:
<?xml version="1.0" encoding="utf-8"?>
<AbsoluteLayout
xmlns:android="http://schemas.android.com/apk/res/android"
android:id="@+id/layout1"
android:layout_width="fill_parent"
android:layout_height="fill_parent"
android:background="@drawable/other"
>

<DigitalClock
android:id="@+id/dClock"
android:layout_width="wrap_content"
android:layout_height="wrap_content"
android:layout_x="148dp"
android:layout_y="62dp"
android:textColor="@drawable/blue"
android:textSize="40sp"></DigitalClock>

<TextView
android:id="@+id/text1"
android:layout_width="wrap_content"
android:layout_height="wrap_content"
android:layout_x="72dp"
android:layout_y="217dp"
android:text="@string/str_title3"
android:textColor="@drawable/black"
android:textSize="20sp"></TextView>

<Button
android:id="@+id/mButton1"
android:layout_width="wrap_content"
android:layout_height="wrap_content"
android:layout_x="275dp"
android:layout_y="202dp"
android:text="@string/str_button1"
android:textColor="@drawable/black"
android:textSize="18sp"></Button>

<TextView
android:id="@+id/setTime1"
android:layout_width="wrap_content"
android:layout_height="wrap_content"
android:layout_x="83dp"
android:layout_y="282dp"
android:text="@string/str_default"
android:textColor="@drawable/red"
android:textSize="16sp"></TextView>

<Button
android:id="@+id/mButton2"
android:layout_width="wrap_content"
android:layout_height="wrap_content"
android:layout_x="277dp"
android:layout_y="267dp"
android:text="@string/str_button2"
android:textColor="@drawable/black"
android:textSize="18sp"></Button>

<TextView
android:id="@+id/text5"
android:layout_width="wrap_content"
android:layout_height="wrap_content"
android:layout_x="70dp"
android:layout_y="337dp"
android:text="@string/str_title4"
android:textColor="@drawable/black"
android:textSize="20sp"></TextView>

<Button
android:id="@+id/mButton5"
android:layout_width="wrap_content"
android:layout_height="wrap_content"
android:layout_x="276dp"
android:layout_y="463dp"
android:text="@string/str_button1"
android:textColor="@drawable/black"
android:textSize="18sp"></Button>

<TextView
android:id="@+id/setTime5"
android:layout_width="wrap_content"
android:layout_height="wrap_content"
android:layout_x="84dp"
android:layout_y="414dp"
android:text="@string/str_default"
android:textColor="@drawable/red"
android:textSize="16sp"></TextView>

<Button
android:id="@+id/mButton6"
android:layout_width="wrap_content"
android:layout_height="wrap_content"
android:layout_x="277dp"
android:layout_y="533dp"
android:text="@string/str_button2"
android:textColor="@drawable/black"
android:textSize="18sp"></Button>

<TextView
android:id="@+id/text2"
android:layout_width="wrap_content"
android:layout_height="wrap_content"
android:layout_x="57dp"
android:layout_y="473dp"
android:text="@string/str_title2"
android:textColor="@drawable/black"
android:textSize="20sp"></TextView>

<Button
android:id="@+id/mButton3"
android:layout_width="wrap_content"
android:layout_height="wrap_content"
android:layout_x="277dp"
android:layout_y="329dp"
android:text="@string/str_button1"
android:textColor="@drawable/black"
android:textSize="18sp"></Button>

<TextView
android:id="@+id/setTime2"
android:layout_width="97dp"
android:layout_height="wrap_content"
android:layout_x="83dp"
android:layout_y="549dp"
android:text="@string/str_default"
android:textColor="@drawable/red"
android:textSize="16sp"></TextView>

<Button
android:id="@+id/mButton4"
android:layout_width="wrap_content"
android:layout_height="wrap_content"
android:layout_x="275dp"
android:layout_y="397dp"
android:text="@string/str_button2"
android:textColor="@drawable/black"
android:textSize="18sp"></Button>

</AbsoluteLayout>
timeset.xml布局文件中的代码:
</EditText>

<TextView

android:id="@+id/text3"

android:layout_width="57dp"

android:layout_height="48dp"

android:layout_x="107dp"

android:layout_y="48dp"

android:text="@string/str_text3"

android:textColor="@drawable/white"

android:textSize="16sp"

>

</TextView>

</AbsoluteLayout>
string.xml中的代码:
<?xml version="1.0" encoding="utf-8"?>
<resources>
<string name="hello">Hello World, EX06_10</string>
<string name="app_name">闹钟</string>
<string name="str_button1">设置闹钟</string>
<string name="str_button2">删除闹钟</string>
<string name="str_title2">重复响起的闹钟</string>
<string name="str_title3">闹钟一</string>
<string name="str_title4">闹钟二</string>
<string name="str_default">目前无设置</string>
<string name="str_text1">开始时间</string>
<string name="str_text2">重复响起的闹钟</string>
<string name="str_text3">秒</string>
</resources>
color.xml中的代码:
<?xml version="1.0" encoding="utf-8"?>
<resources>
<drawable name="white">#FFFFFFFF</drawable>
<drawable name="other">#FF00FFF0</drawable>
<drawable name="black">#000000</drawable>
<drawable name="blue">#0000FF</drawable>
<drawable name="red">#FF0000</drawable>
</resources>
AndroidManifest.xml中的代码:
<?xml version="1.0" encoding="utf-8"?>
<manifest xmlns:android="http://schemas.android.com/apk/res/android"
package="com.example.myapplication2"
android:versionCode="1"
android:versionName="1.0">
<uses-sdk android:minSdkVersion="8" />

<application android:icon="@drawable/icon" android:label="@string/app_name">
<!-- 註冊receiver CallAlarm -->
<receiver android:name=".CallAlarm" android:process=":remote" />
<activity android:name=".MainActivity2"
android:label="@string/app_name">
<intent-filter>
<action android:name="android.intent.action.MAIN" />
<category android:name="android.intent.category.LAUNCHER" />

1fff8
</intent-filter>
</activity>
<activity android:name=".AlarmAlert"
android:label="@string/app_name">
</activity>
</application>
</manifest>
其他用到的函数学习
android SharedPreferences的用法
SharedPreferences的本质是基于XML文件存储key-value键值对数据,通常用来存储一些简单的配置信息,用Sqlite数据库来存放并不划算,因为数据库连接跟操作等耗时大大影响了程序的效率。其存储位置在/data/data/<包名>/shared_prefs目录下。
另外SharedPreferences只能保存简单类型的数据,例如,String、int等。一般会将复杂类型的数据转换成Base64编码,然后将转换后的数据以字符串的形式保存在 XML文件中,再用SharedPreferences保存。
使用SharedPreferences保存key-value对的步骤如下:
(1)使用Activity类的getSharedPreferences方法获得SharedPreferences对象,其中存储key-value的文件的名称由getSharedPreferences方法的第一个参数指定,第二个参数指定访问应用程序私有文件的权限。
(2)使用SharedPreferences接口的edit获得SharedPreferences.Editor对象。
(3)通过SharedPreferences.Editor接口的putXxx方法保存key-value对。其中Xxx表示不同的数据类型。例如:字符串类型的value需要用putString方法。
(4)通过SharedPreferences.Editor接口的commit方法保存key-value对。commit方法相当于数据库事务中的提交(commit)操作。
存放数据信息,步骤如下:
a、打开Preferences,名称为setting,如果存在则打开它,否则创建新的Preferences
SharedPreferences userSettings = getSharedPreferences(“setting”, 0);
b、让setting处于编辑状态
SharedPreferences.Editor editor = userSettings.edit();
c、存放数据
editor.putString(“name”,“ATAAW”);
editor.putString(“URL”,“ATAAW.COM”);
d、完成提交
editor.commit();
读取数据信息,步骤如下:
a、获取Preferences
SharedPreferences userSettings= getSharedPreferences(“setting”, 0);
b、取出数据
String name = userSettings.getString(“name”,“默认值”);
String url = userSettings.getString(“URL”,“default”);
参考博文:https://www.geek-share.com/detail/2524902140.html
https://blog.csdn.net/coder_pig/article/details/49423531
https://www.geek-share.com/detail/2613970820.html
- 点赞
- 收藏
- 分享
- 文章举报
 芬达子
发布了1 篇原创文章 · 获赞 0 · 访问量 23
私信
关注
芬达子
发布了1 篇原创文章 · 获赞 0 · 访问量 23
私信
关注

- 学习笔记(Android Studio)2
- android system server and service manager
- 01 初识Android
- AndroidStudio+Cmake,NDK图文详解超简单
- Android图形基础(Android Studio版)
- Android设置无标题栏 、状态栏
- Android_tools_adb_monkey测试
- android 编译boot.img、dt.img、uboot.bin脚本
- Android studio Json数据的使用步骤
- Android studio创建数据库附加图片
- Android Spinner排序 ListView显示数据
- Android Activity和Intent机制学习笔记
- Android 最火的快速开发框架XUtils
- android asmack 注册 登陆 聊天 多人聊天室 文件传输
- 第一个androidAPP项目总结—ListView的上拉和下拉
- android SQLite使用SQLiteOpenHelper类对数据库进行操作
- android调用系统图片浏览器裁切后出现黑边
- Android Studio历史版本下载链接
- Android报错:Bomb CLEARTEXT communication to open-vip.bmob.cn not permitted by network security policy
- Android studio cmd命令行操作数据库文件导出,导入