Laravel + Elasticsearch 实现中文搜索的方法

Elasticsearch
Elasticsearch 是一个基于 Apache Lucene(TM) 的开源搜索引擎,无论在开源还是专有领域,Lucene可 以被认为是迄今为止最先进、性能最好的、功能最全的搜索引擎库。
但是,Lucene 只是一个库。想要发挥其强大的作用,你需使用 Java 并要将其集成到你的应用中。Lucene 非常复杂,你需要深入的了解检索相关知识来理解它是如何工作的。
Elasticsearch 也是使用 Java 编写并使用 Lucene 来建立索引并实现搜索功能,但是它的目的是通过简单连贯的 RESTful API 让全文搜索变得简单并隐藏 Lucene 的复杂性。
不过,Elasticsearch 不仅仅是 Lucene 和全文搜索引擎,它还提供:
- 分布式的实时文件存储,每个字段都被索引并可被搜索
- 实时分析的分布式搜索引擎
- 可以扩展到上百台服务器,处理PB级结构化或非结构化数据
而且,所有的这些功能被集成到一台服务器,你的应用可以通过简单的 RESTful API、各种语言的客户端甚至命令行与之交互。上手 Elasticsearch 非常简单,它提供了许多合理的缺省值,并对初学者隐藏了复杂的搜索引擎理论。它开箱即用(安装即可使用),只需很少的学习既可在生产环境中使用。
Elasticsearch 在 Apache 2 license 下许可使用,可以免费下载、使用和修改。
ElasticSearch 安装
在 Laradock 中已经集成了 ElasticSearch。我们可以直接使用:
docker-compose up -d elasticsearch
如果需要安装插件,执行命令:
docker-compose exec elasticsearch /usr/share/elasticsearch/bin/elasticsearch-plugin install {plugin-name}

// 重启容器
docker-compose restart elasticsearch
注:
The vm.max_map_count kernel setting must be set to at least 262144 for production use.由于我是 centos 7 环境,直接设置在系统设置:
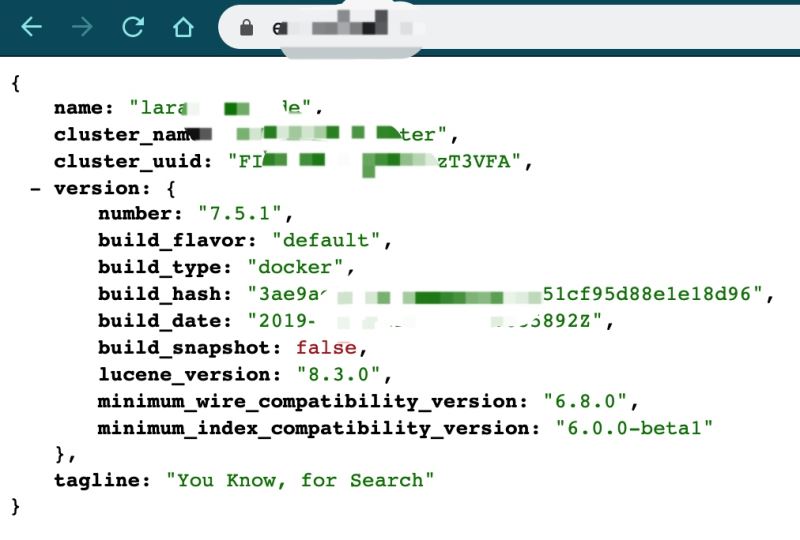
默认用户名和密码:「elastic」、「changeme」,端口号:9200
sysctl -w vm.max_map_count=262144
ElasticHQ
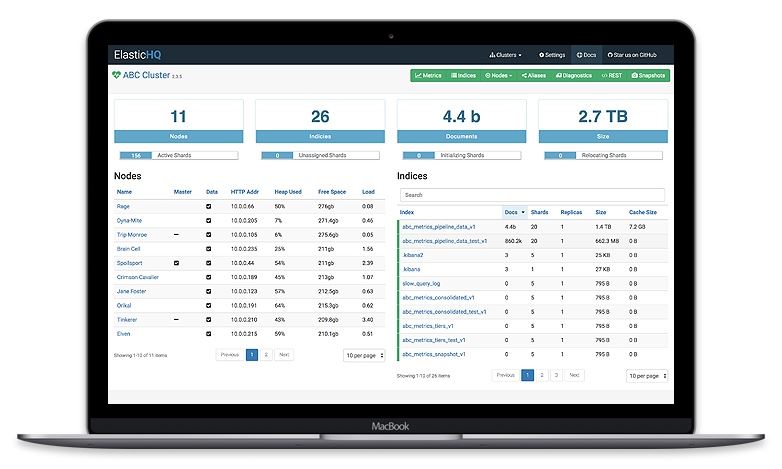
ElasticHQ is an open source application that offers a simplified interface for managing and monitoring Elasticsearch clusters.Management and Monitoring for Elasticsearch.
http://www.elastichq.org/
- Real-Time Monitoring
- Full Cluster Management
- Full Cluster Monitoring
- Elasticsearch Version Agnostic
- Easy Install - Always On
- Works with X-Pack
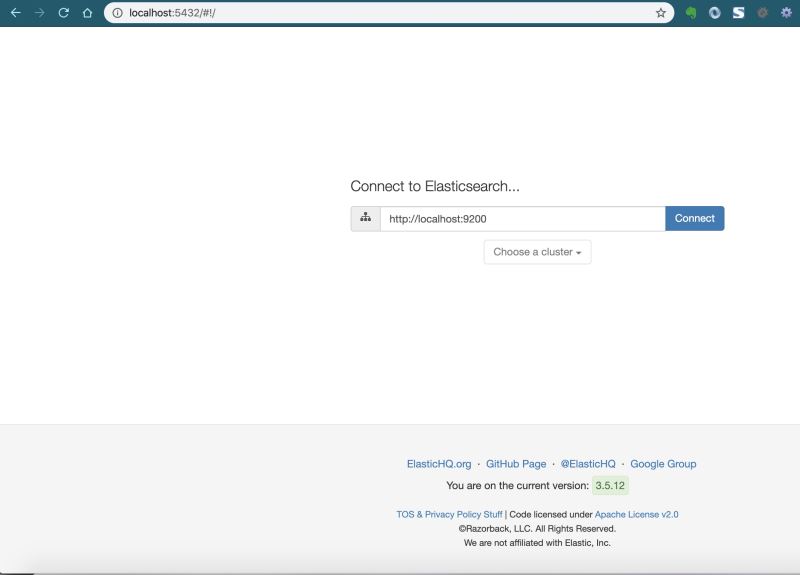
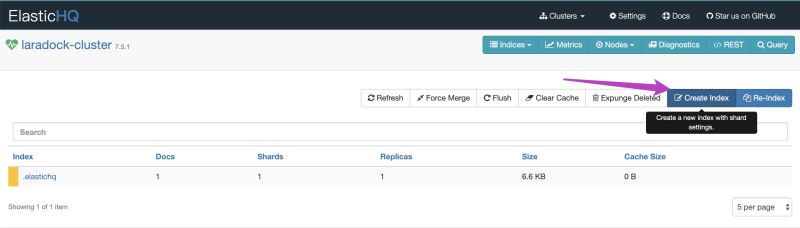
输入我们的 Elasticsearch Host,即可进入后台。
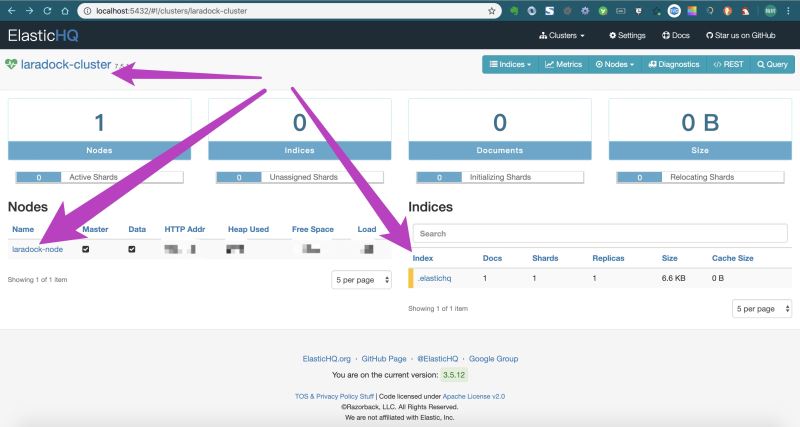
默认的创建了:
一个集群 cluster:laradock-cluster
一个节点 node:laradock-node
一个索引 index:.elastichq
IK 分词器安装
ElasticSearch 主要是用于自己 blog 或者公众号文章的搜索使用,所以需要选择一个中文分词器配合使用,这里刚开始推荐使用 IK 分词器,下面开始安装对应 ElasticSearch版本 (7.5.1) 一致的插件:
https://github.com/medcl/elasticsearch-analysis-ik/releases
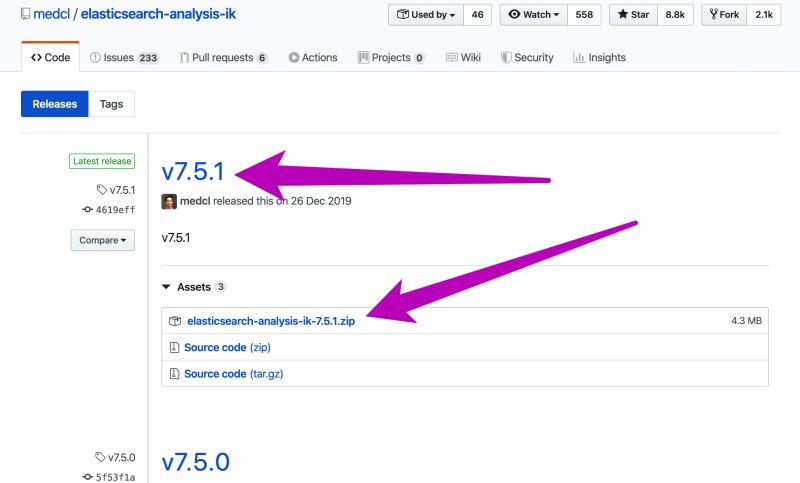
// 安装插件
docker-compose exec elasticsearch /usr/share/elasticsearch/bin/elasticsearch-plugin install https://github.com/medcl/elasticsearch-analysis-ik/releases/download/v7.5.1/elasticsearch-analysis-ik-7.5.1.zip
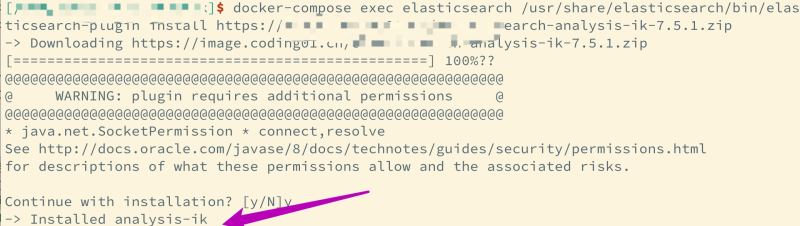
注:可以将 zip 文件先下载回来,然后再安装,速度会快些。
检验分词效果
根据 Elasticsearch API 测试,分词的效果达到了:
~ curl -X POST "http://your_host/_analyze?pretty" -H 'Content-Type: application/json' -d'
{
"analyzer": "ik_max_word",
"text":   "我是中国人"
}
'

{
"tokens" : [
{
"token" : "我",
"start_offset" : 0,
"end_offset" : 1,
"type" : "CN_CHAR",
"position" : 0
},
{
"token" : "是",
"start_offset" : 1,
"end_offset" : 2,
"type" : "CN_CHAR",
"position" : 1
},
{
"token" : "中国人",
"start_offset" : 2,
"end_offset" : 5,
"type" : "CN_WORD",
"position" : 2
},
{
"token" : "中国",
"start_offset" : 2,
"end_offset" : 4,
"type" : "CN_WORD",
"position" : 3
},
{
"token" : "国人",
"start_offset" : 3,
"end_offset" : 5,
"type" : "CN_WORD",
"position" : 4
}
]
}
结合 Laravel
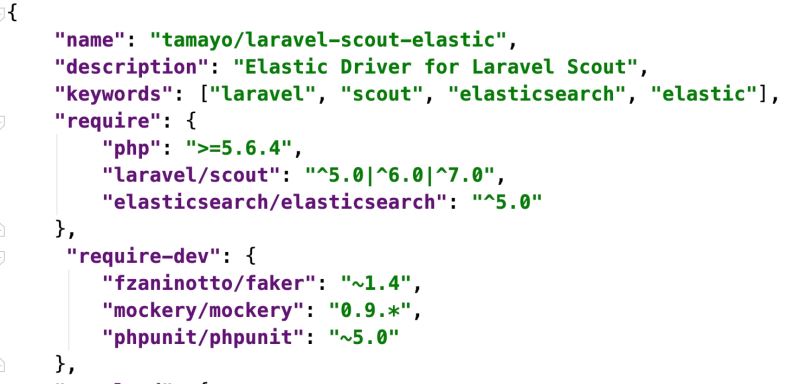
虽然 Elasticsearch 官方提供了对应的 PHP 版本的插件,但我们还是希望和 Laravel 结合的更紧密些,所以这里选择和 Scout 结合使用,具体用到了 tamayo/laravel-scout-elastic 插件。
composer require tamayo/laravel-scout-elastic

composer require laravel/scout

php artisan vendor:publish
选择:Laravel\Scout\ScoutServiceProvider

修改驱动为 elasticsearch:
'driver' => env('SCOUT_DRIVER', 'elasticsearch'),
创建索引
创建索引有几种方法,其中可以使用 Ela 可视化工具 ElasticHQ 直接创建。
接下来我们需要更新这个索引,补充 Mappings 这部分,可以用 Postman。
另一种方法是用 Laravel 自带的 Artisan 命令行功能。
这里我们推荐使用 Artisan 命令行。
php artisan make:command ESOpenCommand
根据官网提示,我们可以在 ESOpenCommand 上向 Elasticsearch 服务器发送 PUT 请求,这里借助 Elasticsearch 提供的 PHP 插件,在我们使用 tamayo/laravel-scout-elastic 插件时,已经安装了 Elasticsearch PHP 插件:
下面就可以借助插件,创建我们的 Index,直接看代码:
public function handle()
{
$host = config('scout.elasticsearch.hosts');
$index = config('scout.elasticsearch.index');
$client = ClientBuilder::create()->setHosts($host)->build();

if ($client->indices()->exists(['index' => $index])) {
$this->warn("Index {$index} exists, deleting...");
$client->indices()->delete(['index' => $index]);
}

$this->info("Creating index: {$index}");

return $client->indices()->create([
'index' => $index,
'body' => [
'settings' => [
'number_of_shards' => 1,
'number_of_replicas' => 0
],
'mappings' => [
'_source' => [
'enabled' => true
],
'properties' => [
'id' => [
'type' => 'long'
],
'title' => [
'type' => 'text',
'analyzer' => 'ik_max_word',
'search_analyzer' => 'ik_smart'
],
'subtitle' => [
'type' => 'text',
'analyzer' => 'ik_max_word',
'search_analyzer' => 'ik_smart'
],
'content' => [
'type' => 'text',
'analyzer' => 'ik_max_word',
'search_analyzer' => 'ik_smart'
]
],
]
]
]);
}

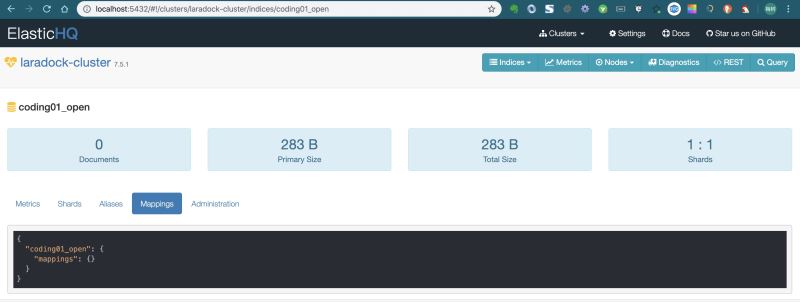
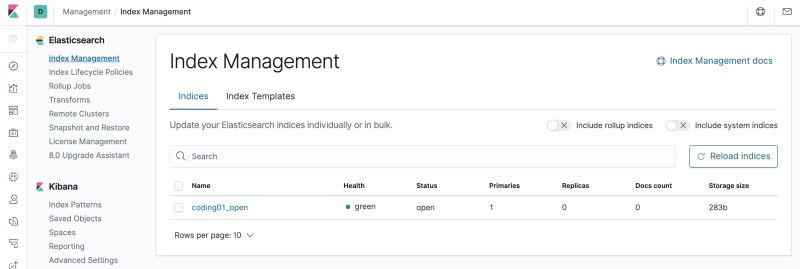
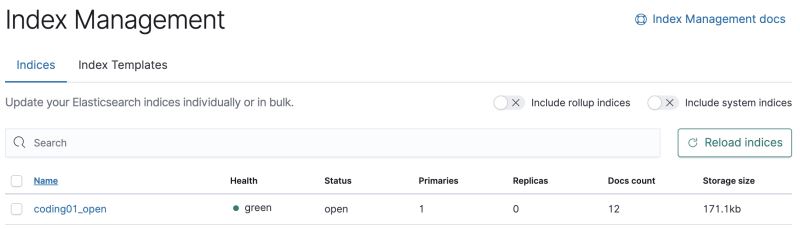
好了,我们执行 Kibana 看到我们已经创建好了 Index:
注 Kibana 本地 Docker 安装:后续会重点说明 Kibana 如何使用
docker run -d --name kibana -e ELASTICSEARCH_HOSTS=http://elasticsearch_host -p 5601:5601 -e SERVER_NAME=ki.test kibana:7.5.2
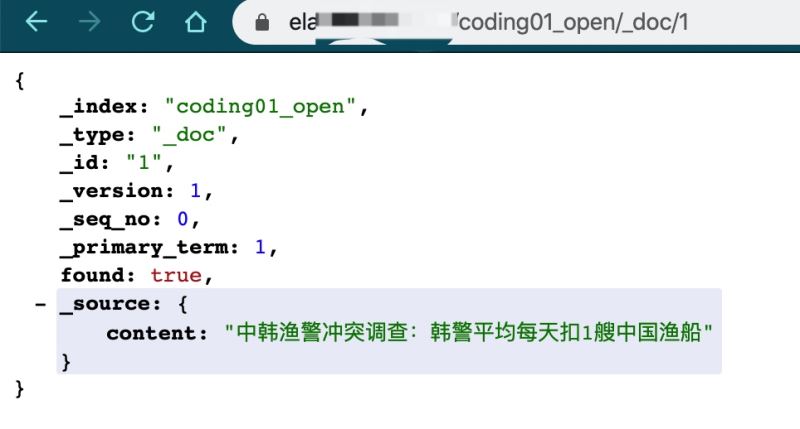
为了验证 Index 是否可用,可以插入一条数据看看:
curl -XPOST your_host/coding01_open/_create/1 -H 'Content-Type:application/json' -d'
{"content":"中韩渔警冲突调查:韩警平均每天扣1艘中国渔船"}

可以通过浏览器看看对应的数据:
有了 Index,下一步我们就可以结合 Laravel,导入、更新、查询等操作了。
Laravel Model 使用
Laravel 框架已经为我们推荐使用 Scout 全文搜索,我们只需要在 Article Model 加上官方所说的内容即可,很简单,推荐大家看 Scout 使用文档:https://learnku.com/docs/laravel/6.x/scout/5191,下面直接上代码:
<?php

namespace App;

use App\Tools\Markdowner;
use Illuminate\Database\Eloquent\Model;
use Illuminate\Database\Eloquent\SoftDeletes;
use Laravel\Scout\Searchable;

class Article extends Model
{
use Searchable;

protected $connection = 'blog';
protected $table = 'articles';
use SoftDeletes;

/**
* The attributes that should be mutated to dates.
*
* @var array
*/
protected $dates = ['published_at', 'created_at', 'deleted_at'];

/**
* The attributes that are mass assignable.
*
* @var array
*/
protected $fillable = [
'user_id',
'last_user_id',
'category_id',
'title',
'subtitle',
'slug',
'page_image',
'content',
'meta_description',
'is_draft',
'is_original',
'published_at',
'wechat_url',
];

protected $casts = [
'content' => 'array'
];

/**
* Set the content attribute.
*
* @param $value
*/
public function setContentAttribute($value)
{
$data = [
'raw' => $value,
'html' => (new Markdowner)->convertMarkdownToHtml($value)
];

$this->attributes['content'] = json_encode($data);
}

/**
* 获取模型的可搜索数据
*
* @return array
*/
public function toSearchableArray()
{
$data = [
'id' => $this->id,
'title' => $this->title,
'subtitle' => $this->subtitle,
'content' => $this->content['html']
];

return $data;
}

public function searchableAs()
{
return '_doc';
}
}
Scout 提供了 Artisan 命令 import 用来导入所有已存在的记录到搜索索引中。
php artisan scout:import "App\Article"

看看 Kibana,已存入 12 条数据,和数据库条数吻合。
有了数据,我们可以测试看看能不能查询到数据。
还是一样的,创建一个命令:
class ElasearchCommand extends Command
{
/**
* The name and signature of the console command.
*
* @var string
*/
protected $signature = 'command:search {query}';

/**
* The console command description.
*
* @var string
*/
protected $description = 'Command description';

/**
* Create a new command instance.
*
* @return void
*/
public function __construct()
{
parent::__construct();
}

/**
* Execute the console command.
*
* @return mixed
*/
public function handle()
{
$article = Article::search($this->argument('query'))->first();
$this->info($article->title);
}
}
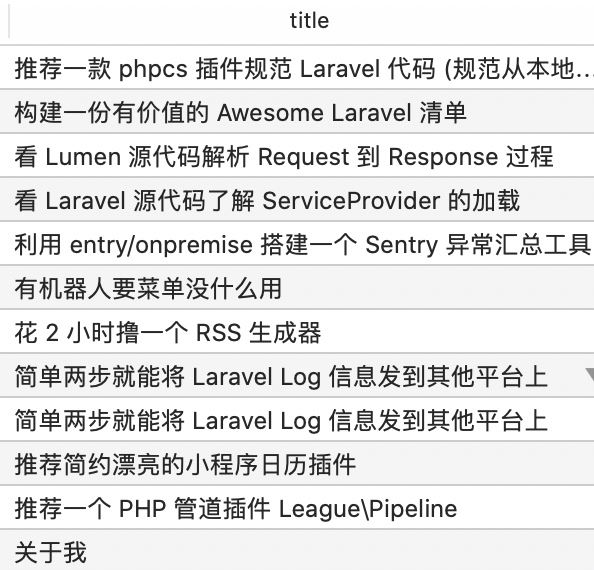
这是我的 titles,我随便输入一个关键字:「清单」,看是否能搜到。

总结
整体完成了:
- Elasticsearch 安装;
- Elasticsearch IK 分词器插件安装;
- Elasticsearch 可视化工具 ElasticHQ 和 Kibana 的安装和简单使用;
- Scout 的使用;
- Elasticsearch 和 Scout 结合使用。
接下来就要将更多的内容存入 Elasticsearch 中,为自己的 blog、公众号、自动化搜索等场景提供全文搜索。
参考
推荐一个命令行应用开发工具——Laravel Zero
Artisan 命令行 https://learnku.com/docs/laravel/6.x/artisan/5158
Scout 全文搜索 https://learnku.com/docs/laravel/6.x/scout/5191
How to integrate Elasticsearch in your Laravel App – 2019 edition https://madewithlove.be/how-to-integrate-elasticsearch-in-your-laravel-app-2019-edition/
Kibana Guide https://www.elastic.co/guide/en/kibana/index.html
以上就是本文的全部内容,希望对大家的学习有所帮助
您可能感兴趣的文章:
- Django项目之Elasticsearch搜索引擎的实例
- django使用haystack调用Elasticsearch实现索引搜索
- Python-ElasticSearch搜索查询的讲解
- Laravel使用scout集成elasticsearch做全文搜索的实现方法
- springboot2.0+elasticsearch5.5+rabbitmq搭建搜索服务的坑
- 使用ElasticSearch6.0快速实现全文搜索功能的示例代码
- Spring Boot与Kotlin 整合全文搜索引擎Elasticsearch的示例代码
- Spring Boot整合Elasticsearch实现全文搜索引擎案例解析
- Spring Boot集成ElasticSearch实现搜索引擎的示例
- 基于Lucene的Java搜索服务器Elasticsearch安装使用教程
- 安装ElasticSearch搜索工具并配置Python驱动的方法

- Laravel使用scout集成elasticsearch做全文搜索的实现方法
- Laravel使用scout集成elasticsearch做全文搜索的实现方法
- Elasticsearch 实现拼音,中文,首字母混合搜索
- php实现scws中文分词搜索的方法
- Elasticsearch5.6搭建及拼音中文混合搜索实现
- Elasticsearch1.x 基于lc-pinyin和ik分词实现 中文、拼音、同义词搜索
- php实现scws中文分词搜索的方法
- wml在文本框中输入中文关键字搜索时,服务端获取到的值总是乱码的解决方法。
- 分布式搜索elasticsearch java API 之(八)------使用More like this实现基于内容的推荐
- sps中的全文搜索和英文版sqlserver搜索中文的方法
- Sphinx+Mysql+中文分词安装-实现中文全文搜索
- spring mvc搜索字段中文乱码的解决方法
- android中文字中间有超链接的实现方法
- C#纯数学方法递归实现货币数字转换中文
- asp搜索两个以上的词的实现方法
- PHP实现中文字串截取无乱码的方法
- Lucene下引入ICTCLAS进行中文分词的实现方法
- 分布式搜索elasticsearch中文分词集成 .
- C#编程实现Excel文档中搜索文本内容的方法及思路
- Dedecms实现文章全文检索(搜索)的方法