nginx 系列1 linux下安装以及配置IIS分发
2018-10-14 11:55
741 查看
一. 安装
操作系统:centos 7 ,nginx版本1.12.2,windows server 2008 iis
1.1 确认nginx所依赖的工具
Zlib: nginx提供gzip模块,需要zlib库支持,Openssl: nginx提供ssl功能, Pcre: 支持地址重写rewrite功能。如果没有安装,在root下使用yum来安装。
下载了nginx-1.12.2.tar.gz包后,放在了linux系统目录/home/hsr/下。

最后查看nginx的运行状态
二. 配置IIS分发
2.1 编辑nginx.conf文件(可以先备份一下)
(1) 首先注释掉nobdy用户,添加 nginx用户用户组,如下脚本
在http模块里找到server 节点,里面的location节点,Location 是网站的根目录, 在location节点里,添加分发策略, 如下图(注意if与 大括号{之间要有空隔)
(3) 定义负载设备的ip(这里是IIS服务器上的50,51 ip),添加位置在http模块里的最后一行,后期根据自己的实际ip,进行更改,保存nginx.conf文件退出
操作系统:centos 7 ,nginx版本1.12.2,windows server 2008 iis
1.1 确认nginx所依赖的工具
Zlib: nginx提供gzip模块,需要zlib库支持,Openssl: nginx提供ssl功能, Pcre: 支持地址重写rewrite功能。如果没有安装,在root下使用yum来安装。
-- 检测是否安装依赖工具包
[root@xuegod64 hsr]# yum list | grep zlib
[root@xuegod64 hsr]# yum list | grep openssl
[root@xuegod64 hsr]# yum list | grep pcre
1.2 安装nginx
下载了nginx-1.12.2.tar.gz包后,放在了linux系统目录/home/hsr/下。
--解压
[root@xuegod64 hsr]# tar -xzvf  nginx-1.12.2.tar.gz
[root@xuegod64 hsr]# cd nginx-1.12.2
--编译
[root@xuegod64 nginx-1.12.2]# ./configure
--安装
[root@xuegod64 nginx-1.12.2]# make
[root@xuegod64 nginx-1.12.2]# make install
1.3 生成系统运行的nginx用户
/*
使用-u 来生成用户ID 8000,
-s 指定用户登入后所使用的shell,
nginx是指系统用户
*/
[root@xuegod64 ~]#  useradd –u 8000 –s  /usr/ sbin/nologin nginx
-- 查看nginx用户信息
[root@xuegod64 sbin]# cat /etc/passwd
nginx:x:8000:8000::/home/nginx:/sbin/nologin
1.4 启动nginx
[root@xuegod64 sbin]# pwd
/usr/local/nginx/sbin
[root@xuegod64 sbin]# ./nginx -c  /usr/local/nginx/conf/nginx.conf
上面nginx服务已经启动成功,后面可以把/usr/local/nginx/sbin目录添加到path 全局中,就不用在定位到/usr/local/nginx/sbin下。默认端口是80(确认防火墙已开通80端口)。
--查看nginx进程
[root@xuegod64 sbin]# ps -ef | grep nginx
最后查看nginx的运行状态
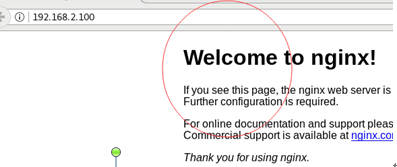
[root@xuegod64 sbin]# curl http://192.168.2.101:80如果没有出现welcome to nginx,需要查看nginx的日志 (/usr/local/nginx/logs),在要分发的客户端(iis服务)拼通 telnet 192.168.2.101 80。 也可以在浏览器里输入地址查看状态,如下:
二. 配置IIS分发
2.1 编辑nginx.conf文件(可以先备份一下)
(1) 首先注释掉nobdy用户,添加 nginx用户用户组,如下脚本
2 #user  nobody;
3 user nginx nginx;
4 worker_processes  1;
(2) 添加分发策略
在http模块里找到server 节点,里面的location节点,Location 是网站的根目录, 在location节点里,添加分发策略, 如下图(注意if与 大括号{之间要有空隔)
44         location / {
45             root   html;
46             index  index.html index.htm;
47         if ($request_uri ~* \.html$) {
48                 proxy_pass http://htmlservers;
49            }
50          if ($request_uri ~* \.aspx$){
51                proxy_pass http://aspxservers;
52            }
53            proxy_pass http://picservers;
54         }
注意上面的 uri 跟url一样,统一资源占位符例如如果进来是已.html结尾, 全部转到 http://htmlservers服务器上,还有aspxservers服务器,最后是picservers服务器。(名字自己启,相当一个服务器池)。 最后picservers相当于else。(3) 定义负载设备的ip(这里是IIS服务器上的50,51 ip),添加位置在http模块里的最后一行,后期根据自己的实际ip,进行更改,保存nginx.conf文件退出
126        upstream  htmlservers{
127           server 192.168.2.50:80;
128           server 192.168.2.51:80;
129       }
130       upstream  aspxservers{
131           server 192.168.2.50:80;
132           server 192.168.2.51:80;
133       }
134       upstream   picservers{
135           server 192.168.2.50:80;
136           server 192.168.2.51:80;
137       }
138
139 }
(4) 检查配置是否正确,在重新加载配置[root@xuegod64 sbin]# pwd /usr/local/nginx/sbin [root@xuegod64 sbin]# ./nginx -t nginx: the configuration file /usr/local/nginx/conf/nginx.conf syntax is ok nginx: configuration file /usr/local/nginx/conf/nginx.conf test is successful
[root@xuegod64 sbin]# ./nginx -s reload

相关文章推荐
- linux如何安装nginx以及配置多域名对多端口
- Linux下载安装Nginx并配置,以及启动/停止/重启命令
- Linux下安装配置Nginx以及安装PHP
- Nginx在Linux下的安装与配置,以及遇到问题的解决整理
- Linux系列 初识ngnix——ngnix安装及配置表内容详解、让nginx支持并显示国家及其城市
- Linux安装nginx以及配置反向代理
- NGINX的原理、安装、配置以及使用tomcat在linux上搭载集群环境
- Linux和WindowXP上安装Nginx,以及简单配置
- Linux下源码安装nginx服务器以及部分配置
- LINUX——关于nginx的安装配置以及如何简易的使用
- 【原】Boost下载安装编译配置使用指南(含Windows、Linux以及ARM Linux)
- Windows XP系统如何安装IIS5.1测试服务器 如何配置IIS以及安装中遇到的问题和解决办法
- linux系列--Vsftpd快速安装配置
- 海明作品 - Gentoo Linux安装和配置系列
- Linux 编译安装Nginx 配置 Python FastCGI Django (2) 安装python Django
- Linux 编译安装Nginx 配置 Python FastCGI Django (3) 配置nginx和django
- 详解linux系列之网络服务DHCP的安装及配置
- REP12_6在Linux上的安装配置(以及对象级的复制定义)
- nginx 0.6.3 安装与配置(linux,nginx,php-cgi)
- Linux 下 Trac SVN apache SSL 配置安装以及整合