Ubuntu 安装phpMyAdmin + 配置nginx
2018-09-19 20:55
393 查看
0x01 安装phpMyAdmin
``` sudo apt-get install phpmyadmin ```0x02 添加链接
``` sudo ln -s /usr/share/phpMyAdmin /usr/share/nginx/html ```0x03 配置nginx
添加server节点,监听端口8001server {
charset utf-8;
client_max_body_size 128M;
listen 8001; ## listen for ipv4
#listen [::]:80 default_server ipv6only=on; ## listen for ipv6
server_name phpmyadmin;
root /usr/share/phpmyadmin ;
index index.php;
location / {
# Redirect everything that isn't a real file to index.php
try_files $uri $uri/ /index.php$is_args$args;
}
# uncomment to avoid processing of calls to non-existing static files by Yii
#location ~ \.(js|css|png|jpg|gif|swf|ico|pdf|mov|fla|zip|rar)$ {
# try_files $uri =404;
#}
#error_page 404 /404.html;
# deny accessing php files for the /assets directory
location ~ ^/assets/.*\.php$ {
deny all;
}
location ~ \.php$ {
include fastcgi_params;
fastcgi_param SCRIPT_FILENAME $document_root$fastcgi_script_name;
fastcgi_pass 127.0.0.1:9000;
#fastcgi_pass unix:/var/run/php7.2-fpm.sock;
try_files $uri =404;
}
location ~* /\. {
deny all;
}
0x04 重启nginx
``` sudo service nginx restart ```0x05 测试
1.访问http://127.0.0.1:8001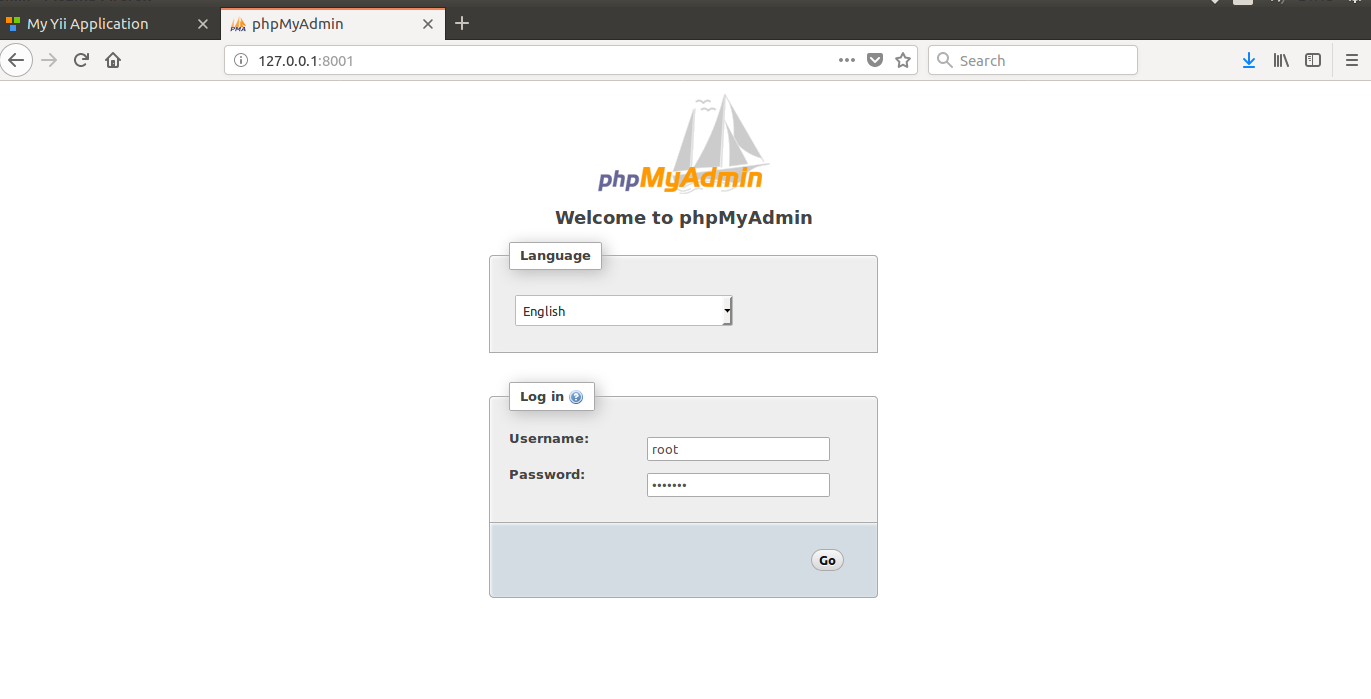
2.登陆 用户名:root 密码:abc123_
作 者:
Jackson0714
出 处:http://www.cnblogs.com/jackson0714/
关于作者:专注于微软平台的项目开发。如有问题或建议,请多多赐教!
版权声明:本文版权归作者和博客园共有,欢迎转载,但未经作者同意必须保留此段声明,且在文章页面明显位置给出原文链接。
特此声明:所有评论和私信都会在第一时间回复。也欢迎园子的大大们指正错误,共同进步。或者直接私信我
声援博主:如果您觉得文章对您有帮助,可以点击文章右下角【推荐】一下。您的鼓励是作者坚持原创和持续写作的最大动力!

相关文章推荐
- Ubuntu 安装配置 nginx
- Ubuntu中Nginx的安装与配置
- ubuntu14.04安装与配置nginx服务器
- Nginx安装配置+反向代理(ubuntu下)
- Ubuntu中Nginx的安装与配置
- ubuntu下nginx+php+mysql安装配置
- ubuntu安装配置 mysql+php+nginx
- ubuntu下安装配置nginx
- Ubuntu中Nginx的安装与配置
- Linux(Ubuntu)下Nginx安装配置及与Tomcat整合
- Ubuntu/CentOS 系统上安装与配置Nginx
- Ubuntu中Nginx的安装与配置
- Ubuntu 16.04 安装配置 Nginx 和 Geoip,实现不同城市页面跳转功能
- Ubuntu中Nginx的安装与配置
- Ubuntu中Nginx的安装与配置
- ubuntu_14.04.2安装配置laravel+nginx
- Debian/Ubuntu下Nginx的安装、反向代理和负载均衡的基本配置
- ubuntu下的nginx+php+mysql安装配置
- Ubuntu中Nginx的安装与配置全过程
- Ubuntu中Nginx的安装与配置