Android 动态添加View 并设置id
2018-03-22 16:55
633 查看
主页面布局(main_activity.xml)
LinearLayout 里面加一个Button,注意这里的LinearLayout要有orientation<?xml version="1.0" encoding="utf-8"?> <LinearLayout xmlns:android="http://schemas.android.com/apk/res/android" xmlns:tools="http://schemas.android.com/tools" android:id="@+id/linear_layout" android:layout_width="match_parent" android:layout_height="match_parent" android:orientation="vertical" android:padding="20dp" tools:context="com.yechaoa.addview.MainActivity"> <Button android:id="@+id/btn_add_view" android:layout_width="match_parent" android:layout_height 4000 ="wrap_content" android:padding="20dp" android:text="点击添加view" android:textSize="20sp"/> </LinearLayout>
子View布局(layout_item_view.xml)
<?xml version="1.0" encoding="utf-8"?>
<TextView
xmlns:android="http://schemas.android.com/apk/res/android"
android:id="@+id/text_view"
android:layout_width="match_parent"
android:layout_height="wrap_content"
android:gravity="center"
android:padding="20dp"
android:textSize="20sp"/>
点击动态添加View
先找到要添加的view ,然后添加到LinearLayout中TextView childView1 = (TextView) LayoutInflater.from(MainActivity.this) .inflate(R.layout.layout_item_view, mLinearLayout, false); mLinearLayout.addView(childView1);
动态设置id
这里需要先在values文件夹下创建一个ids.xml资源文件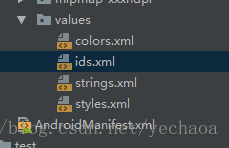
<?xml version="1.0" encoding="utf-8"?>
<resources>

<item name="text_view_1" type="id">text_view_1</item>
<item name="text_view_2" type="id">text_view_2</item>
<item name="text_view_3" type="id">text_view_3</item>
<item name="text_view_4" type="id">text_view_4</item>
<item name="text_view_5" type="id">text_view_5</item>

</resources>
然后通过setId()方法引用这个ids.xml资源文件中的id就行了
textView1.setId(R.id.text_view_1);
MainActivity.java
package com.yechaoa.addview;

import android.graphics.Color;
import android.os.Bundle;
import android.support.v7.app.AppCompatActivity;
import android.view.Gravity;
import android.view.LayoutInflater;
import android.view.View;
import android.view.animation.Animation;
import android.view.animation.TranslateAnimation;
import android.widget.Button;
import android.widget.LinearLayout;
import android.widget.TextView;

public class MainActivity extends AppCompatActivity implements View.OnClickListener {

private LinearLayout mLinearLayout;

@Override
protected void onCreate(Bundle savedInstanceState) {
super.onCreate(savedInstanceState);
setContentView(R.layout.activity_main);

initView();

}

private void initView() {
mLinearLayout = findViewById(R.id.linear_layout);
Button mBtnAddView = findViewById(R.id.btn_add_view);
mBtnAddView.setOnClickListener(this);
}

private int childCount = 0;

@Override
public void onClick(View view) {
switch (view.getId()) {
case R.id.btn_add_view:

childCount++;

TextView childView1 = (TextView) LayoutInflater.from(MainActivity.this).inflate(R.layout.layout_item_view, mLinearLayout, false);
mLinearLayout.addView(childView1);

TextView textView1 = childView1.findViewById(R.id.text_view);

switch (childCount) {
case 1:
textView1.setId(R.id.text_view_1);
textView1.setText(String.valueOf("第 " + childCount + " 个view"));
initAnimation(textView1, 1);
break;
case 2:
textView1.setId(R.id.text_view_2);
textView1.setText(String.valueOf("第 " + childCount + " 个view"));
initAnimation(textView1, 2);
break;
case 3:
textView1.setId(R.id.text_view_3);
textView1.setText(String.valueOf("第 " + childCount + " 个view"));
textView1.setTextColor(Color.RED);
break;
case 4:
textView1.setId(R.id.text_view_4);
textView1.setText(String.valueOf("第 " + childCount + " 个view"));
break;
case 5:
TextView textView = new TextView(MainActivity.this);
textView.setId(R.id.text_view_5);
textView.setTextSize(20);
textView.setGravity(Gravity.CENTER);
textView.setPadding(20, 20, 20, 20);
textView.setText(String.valueOf("第 " + childCount + " 个view"));
textView.setTextColor(Color.BLUE);
mLinearLayout.addView(textView);
break;
}

break;
}
}

private void initAnimation(TextView textView, int position) {
switch (position) {
case 1:
TranslateAnimation mLeftAnimation1 = new TranslateAnimation(Animation.RELATIVE_TO_SELF, -1.0f,
Animation.RELATIVE_TO_SELF, 0.0f, Animation.RELATIVE_TO_SELF,
0.0f, Animation.RELATIVE_TO_SELF, 0.0f);
mLeftAnimation1.setDuration(500);
textView.startAnimation(mLeftAnimation1);
textView.animate().alpha(1);
break;
case 2:
TranslateAnimation mLeftAnimation2 = new TranslateAnimation(Animation.RELATIVE_TO_SELF, 1.0f,
Animation.RELATIVE_TO_SELF, 0.0f, Animation.RELATIVE_TO_SELF,
0.0f, Animation.RELATIVE_TO_SELF, 0.0f);
mLeftAnimation2.setDuration(500);
textView.startAnimation(mLeftAnimation2);
textView.animate().alpha(1);
break;
}

}

}关于动画:Android Animation动画

相关文章推荐
- Android动态布局,并动态为TextView控件设置drawableLeft、drawableRight等属性添加图标
- Android动态布局,并动态为TextView控件设置drawableLeft、drawableRight等属性添加图标
- android 动态添加TextView 设置margin
- android 动态设置TextView值,例:金额添加
- android 动态添加ImageView 设置setPadding不起作用问
- Android-->View.setX()和.setY()的使用(移动布局,设置布局位置,动态添加View)
- Android 动态设置view的id,id设置为数字
- Android 动态添加View并设置padding
- Android 动态设置View的id——setId
- Android - 动态设置自定义View的id - setId
- Android动态给ViewPager添加Indicator导航
- Android动态设置View的位置和大小
- Android addView动态给Activity添加View组件
- Android艺术开发探索学习 之 测量view的宽高 以及 动态设置View的位置
- Android 动态添加view或item并获取数据
- Android 通过Java代码生成创建界面。动态生成View,动态设置View属性。addRules详解
- Android表格布局TableLayout简单实现(Java动态添加,设置边框,删除数据(单行,多行))
- Android 在TextView,EditText中添加表情,设置输入键盘消失
- Android 利用addView 动态给Activity添加View组件
- Android 利用addView 动态给Activity添加View组件