最基本的springMVC注解配置详解
2018-02-27 19:16
483 查看
Spring MVC是当前最优秀的MVC框架,自从Spring 2.5版本发布后,由于支持注解配置,易用性有了大幅度的提高。上一篇博文已经介绍了最简单的配置文件的详情,这里再介绍一下最简单的注解配置详情,毕竟springMVC是鼓励使用注解的。
1、导入jar包
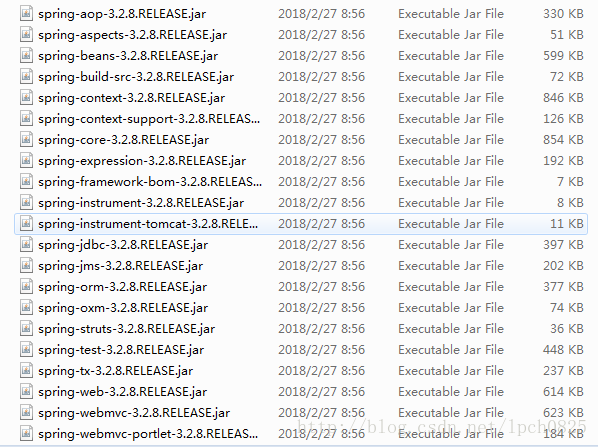
注解主要在spring-webmvc-3.2.8.RELEASE.jar中
2、web.xml配置文件
web.xml中主要配置springMVC的前端控制器(核心控制器)
注:这里采用xxx-servlet.xml默认命名方式,并且文件位于/WEB-INF目录下,所以在web.xml中不需要配置<init-param></init-param>
<?xml version="1.0" encoding="UTF-8"?>
<web-app xmlns:xsi="http://www.w3.org/2001/XMLSchema-instance" xmlns="http://java.sun.com/xml/ns/javaee" xsi:schemaLocation="http://java.sun.com/xml/ns/javaee http://java.sun.com/xml/ns/javaee/web-app_3_0.xsd" version="3.0">
<display-name>spring_mvc_annotation</display-name>
<!-- springMVC的前端控制器 -->
<servlet>
<servlet-name>springmvc</servlet-name>
<servlet-class>org.springframework.web.servlet.DispatcherServlet</servlet-class>
</servlet>
<servlet-mapping>
<servlet-name>springmvc</servlet-name>
<url-pattern>/</url-pattern>
</servlet-mapping>
</web-app>
3、springmvc-servlet.xml配置文件
注意:表头这里添加mvc声明,声明的地址在 spring-webmvc-3.2.8.RELEASE.jar 中的 META-INF/spring.schemas 中。这样以后<mvc:xxx>标签才会有效<?xml version="1.0" encoding="UTF-8"?>
<beans xmlns="http://www.springframework.org/schema/beans"
xmlns:xsi="http://www.w3.org/2001/XMLSchema-instance"
xmlns:mvc="http://www.springframework.org/schema/mvc" <!-- 注意添加mvc声明 -->
xmlns:aop="http://www.springframework.org/schema/aop"
xmlns:tx="http://www.springframework.org/schema/tx"
xmlns:context="http://www.springframework.org/schema/context"
xsi:schemaLocation="
http://www.springframework.org/schema/beans http://www.springframework.org/schema/beans/spring-beans-3.0.xsd http://www.springframework.org/schema/aop http://www.springframework.org/schema/aop/spring-aop-3.0.xsd http://www.springframework.org/schema/tx http://www.springframework.org/schema/tx/spring-tx-3.0.xsd http://www.springframework.org/schema/mvc <!-- 注意添加mvc声明 -->
http://www.springframework.org/schema/mvc/spring-mvc-3.0.xsd <!-- 注意添加mvc声明,注意版本,不写版本会有默认版本 -->
http://www.springframework.org/schema/context
http://www.springframework.org/schema/context/spring-context-3.0.xsd">
<mvc:annotation-driven/>
<context:component-scan base-package="com.hfxt.controller"></context:component-scan>
<!-- 配置视图解析器 如何把handler 方法返回值解析为实际的物理视图 根据控制器返回的字符串拼接成jsp路径:/WEB-INF/page/xx.jsp -->
<bean class="org.springframework.web.servlet.view.InternalResourceViewResolver">
<property name="prefix" value="/WEB-INF/page/"/><!-- 前缀 -->
<property name="suffix" value=".jsp"/><!-- 后缀 -->
</bean>
</beans>4、控制层(controller层)
注意:这里的login.jsp已经放入/WEB-INF/page目录下,为了方便视图解析器处理:是进入index.jsp页面还是返回login.jsp登录页面。这时初次进入login.jsp就需要利用toLogin()方法了。
package com.hfxt.controller;
import javax.servlet.http.HttpSession;
import org.springframework.stereotype.Controller;
import org.springframework.ui.Model;
import org.springframework.web.bind.annotation.RequestMapping;
import org.springframework.web.bind.annotation.RequestMethod;
@Controller //在类上面定义,表明该类为控制器,返回字符串与redirect:xxx
@RequestMapping(value="/") //在类或方法上面使用此注解,设置URL访问地址。它有两个属性,value指
a263
定访问路径,method指定指定请求方式,请求方式在RequestMethod这个类中,全部以常量形式定义,它默认使用GET请求。
public class LoginController {
@RequestMapping(value="/login",method=RequestMethod.GET) //访问.../login,方式为get时,该方法处理请求
public String toLogin(){
return "login";
}
@RequestMapping(value="/login",method=RequestMethod.POST)
public String doLogin(String username , String password , Model model , HttpSession session){ //访问.../login,方式为post时,该方法处理请求
if("admin".equals(username)&&"123".equals(password)){
session.setAttribute("username", username);
model.addAttribute("message", "登录成功!");
return "index";
}else{
model.addAttribute("message", "登录失败!");
return "login";
}
}
}
5、jsp页面
login.jsp页面代码<?xml version="1.0" encoding="UTF-8" ?>
<%@ page language="java" contentType="text/html; charset=UTF-8"
pageEncoding="UTF-8"%>
<!DOCTYPE html >
<html xmlns="http://www.w3.org/1999/xhtml">
<head>
<meta http-equiv="Content-Type" content="text/html; charset=UTF-8" />
<title>Insert title here</title>
</head>
<body>
<form action="/spring_mvc_annotation/login" method="post">
用户名:<input type="text" name="username" value=""/><br />
密码:<input type="password" name="password" value=""/><br />
<input type="submit" value="登录"/>
</form>
<div style="color: red">${message }</div>
</body>
</html>index.jsp页面代码<?xml version="1.0" encoding="UTF-8" ?>
<%@ page language="java" contentType="text/html; charset=UTF-8"
pageEncoding="UTF-8"%>
<!DOCTYPE html>
<html xmlns="http://www.w3.org/1999/xhtml">
<head>
<meta http-equiv="Content-Type" content="text/html; charset=UTF-8" />
<title>Insert title here</title>
</head>
<body>
<h1>${sessionScope.username },${message }</h1>
</body>
</html>
1、导入jar包
注解主要在spring-webmvc-3.2.8.RELEASE.jar中
2、web.xml配置文件
web.xml中主要配置springMVC的前端控制器(核心控制器)
注:这里采用xxx-servlet.xml默认命名方式,并且文件位于/WEB-INF目录下,所以在web.xml中不需要配置<init-param></init-param>
<?xml version="1.0" encoding="UTF-8"?>
<web-app xmlns:xsi="http://www.w3.org/2001/XMLSchema-instance" xmlns="http://java.sun.com/xml/ns/javaee" xsi:schemaLocation="http://java.sun.com/xml/ns/javaee http://java.sun.com/xml/ns/javaee/web-app_3_0.xsd" version="3.0">
<display-name>spring_mvc_annotation</display-name>
<!-- springMVC的前端控制器 -->
<servlet>
<servlet-name>springmvc</servlet-name>
<servlet-class>org.springframework.web.servlet.DispatcherServlet</servlet-class>
</servlet>
<servlet-mapping>
<servlet-name>springmvc</servlet-name>
<url-pattern>/</url-pattern>
</servlet-mapping>
</web-app>
3、springmvc-servlet.xml配置文件
注意:表头这里添加mvc声明,声明的地址在 spring-webmvc-3.2.8.RELEASE.jar 中的 META-INF/spring.schemas 中。这样以后<mvc:xxx>标签才会有效<?xml version="1.0" encoding="UTF-8"?>
<beans xmlns="http://www.springframework.org/schema/beans"
xmlns:xsi="http://www.w3.org/2001/XMLSchema-instance"
xmlns:mvc="http://www.springframework.org/schema/mvc" <!-- 注意添加mvc声明 -->
xmlns:aop="http://www.springframework.org/schema/aop"
xmlns:tx="http://www.springframework.org/schema/tx"
xmlns:context="http://www.springframework.org/schema/context"
xsi:schemaLocation="
http://www.springframework.org/schema/beans http://www.springframework.org/schema/beans/spring-beans-3.0.xsd http://www.springframework.org/schema/aop http://www.springframework.org/schema/aop/spring-aop-3.0.xsd http://www.springframework.org/schema/tx http://www.springframework.org/schema/tx/spring-tx-3.0.xsd http://www.springframework.org/schema/mvc <!-- 注意添加mvc声明 -->
http://www.springframework.org/schema/mvc/spring-mvc-3.0.xsd <!-- 注意添加mvc声明,注意版本,不写版本会有默认版本 -->
http://www.springframework.org/schema/context
http://www.springframework.org/schema/context/spring-context-3.0.xsd">
<mvc:annotation-driven/>
<context:component-scan base-package="com.hfxt.controller"></context:component-scan>
<!-- 配置视图解析器 如何把handler 方法返回值解析为实际的物理视图 根据控制器返回的字符串拼接成jsp路径:/WEB-INF/page/xx.jsp -->
<bean class="org.springframework.web.servlet.view.InternalResourceViewResolver">
<property name="prefix" value="/WEB-INF/page/"/><!-- 前缀 -->
<property name="suffix" value=".jsp"/><!-- 后缀 -->
</bean>
</beans>4、控制层(controller层)
注意:这里的login.jsp已经放入/WEB-INF/page目录下,为了方便视图解析器处理:是进入index.jsp页面还是返回login.jsp登录页面。这时初次进入login.jsp就需要利用toLogin()方法了。
package com.hfxt.controller;
import javax.servlet.http.HttpSession;
import org.springframework.stereotype.Controller;
import org.springframework.ui.Model;
import org.springframework.web.bind.annotation.RequestMapping;
import org.springframework.web.bind.annotation.RequestMethod;
@Controller //在类上面定义,表明该类为控制器,返回字符串与redirect:xxx
@RequestMapping(value="/") //在类或方法上面使用此注解,设置URL访问地址。它有两个属性,value指
a263
定访问路径,method指定指定请求方式,请求方式在RequestMethod这个类中,全部以常量形式定义,它默认使用GET请求。
public class LoginController {
@RequestMapping(value="/login",method=RequestMethod.GET) //访问.../login,方式为get时,该方法处理请求
public String toLogin(){
return "login";
}
@RequestMapping(value="/login",method=RequestMethod.POST)
public String doLogin(String username , String password , Model model , HttpSession session){ //访问.../login,方式为post时,该方法处理请求
if("admin".equals(username)&&"123".equals(password)){
session.setAttribute("username", username);
model.addAttribute("message", "登录成功!");
return "index";
}else{
model.addAttribute("message", "登录失败!");
return "login";
}
}
}
5、jsp页面
login.jsp页面代码<?xml version="1.0" encoding="UTF-8" ?>
<%@ page language="java" contentType="text/html; charset=UTF-8"
pageEncoding="UTF-8"%>
<!DOCTYPE html >
<html xmlns="http://www.w3.org/1999/xhtml">
<head>
<meta http-equiv="Content-Type" content="text/html; charset=UTF-8" />
<title>Insert title here</title>
</head>
<body>
<form action="/spring_mvc_annotation/login" method="post">
用户名:<input type="text" name="username" value=""/><br />
密码:<input type="password" name="password" value=""/><br />
<input type="submit" value="登录"/>
</form>
<div style="color: red">${message }</div>
</body>
</html>index.jsp页面代码<?xml version="1.0" encoding="UTF-8" ?>
<%@ page language="java" contentType="text/html; charset=UTF-8"
pageEncoding="UTF-8"%>
<!DOCTYPE html>
<html xmlns="http://www.w3.org/1999/xhtml">
<head>
<meta http-equiv="Content-Type" content="text/html; charset=UTF-8" />
<title>Insert title here</title>
</head>
<body>
<h1>${sessionScope.username },${message }</h1>
</body>
</html>

相关文章推荐
- springmvc注解配置详解及其demo代码下载
- 基于注解的SpringMVC配置的详解
- springMVC学习笔记---注解启用基本配置
- Java程序员从笨鸟到菜鸟之(七十二)细谈Spring(四)利用注解实现spring基本配置详解
- 基于注解的SpringMVC基本配置
- (推荐使用)SpringMVC注解,基本配置
- springmvc注解配置详解及其demo代码下载
- SpringMvc——进行注解开发的基本配置
- springMVC 注解及配置文件详解
- 利用注解实现spring基本配置详解
- SpringMvc——进行注解开发的基本配置
- springmvc基于注解事物配置详解
- spring mvc 第一天【注解实现springmvc的基本配置】
- 最基本的springMVC配置文件详解
- 利用注解实现spring基本配置详解
- Spring(三)利用注解实现spring基本配置详解
- Java程序员从笨鸟到菜鸟之(七十二)细谈Spring(四)利用注解实现spring基本配置详解
- Java程序员从笨鸟到菜鸟之(七十二)细谈Spring(四)利用注解实现spring基本配置详解
- 利用注解实现spring基本配置详解
- Spring自动注入,利用注解实现spring基本配置详解,Spring注解快速入门