Spring Boot核心配置
2018-02-22 06:17
609 查看
Spring Boot核心配置
一、基本配置1、入口类和@SpringBootApplication
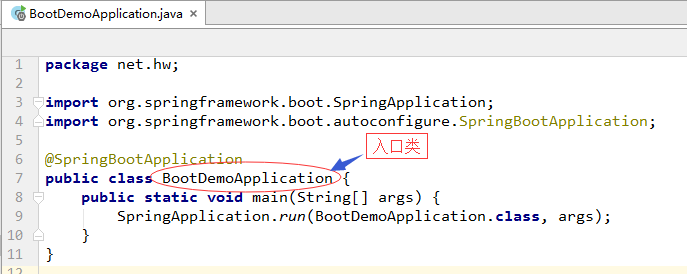
@SpringApplication是Spring Boot的核心注解,是一个组合注解。
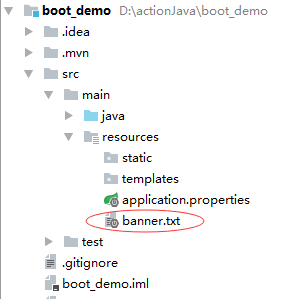
3、定制Banner(1)在resources目录下创建banner.txt文件
(2)通过http://patorjk.com/software/taag网站生成字符
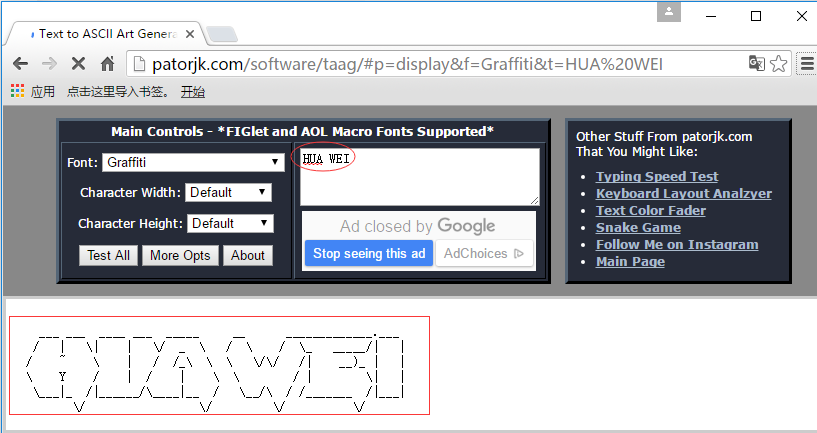
(3)将网站生成的字符复制到banner.txt文件里
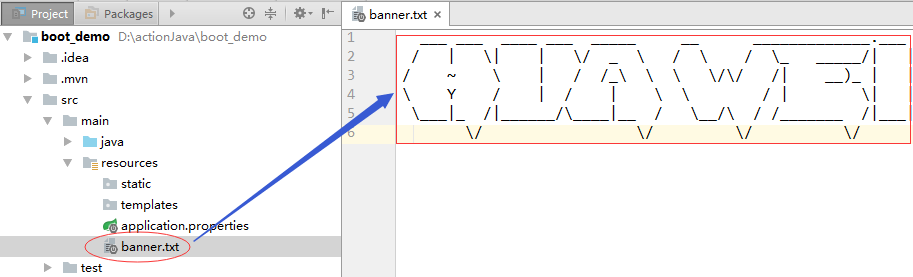
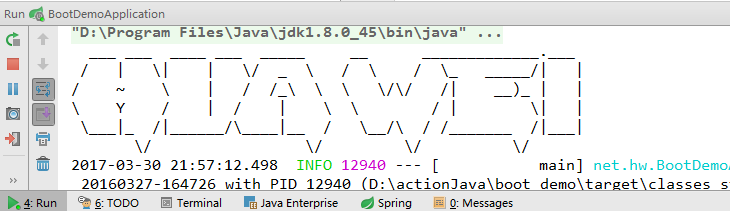
(4)启动应用程序,查看启动图案
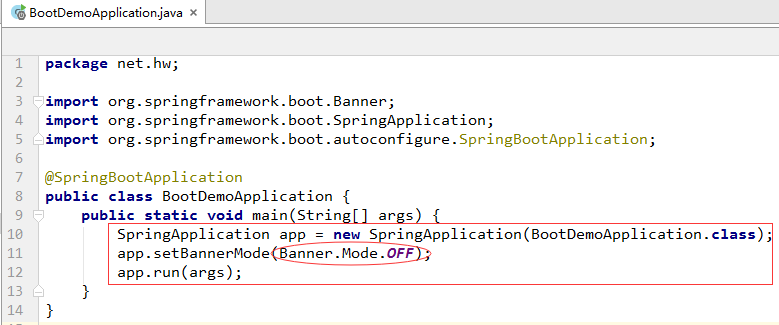
4、关闭Banner
5、Spring Boot配置文件application.properties(1)修改Tomcat的端口号

(2)修改入口类BootDemoApplication
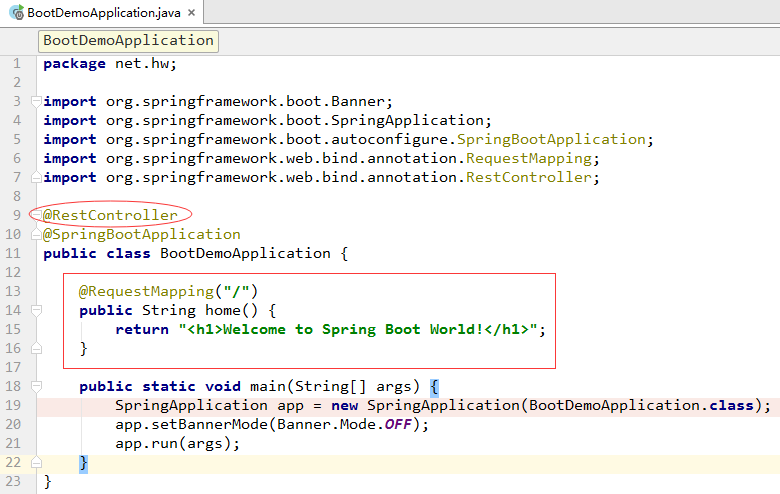
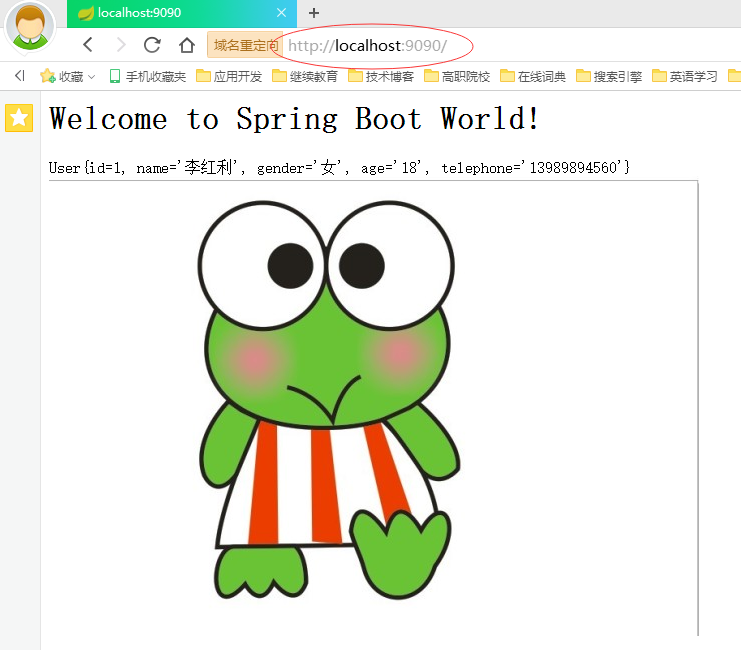
(3)启动程序,访问http://localhost:9090
在application.properties文件里注释掉修改服务器端口号的语句,于是服务器端口号恢复成默认的8080。
6、使用XML配置(1)创建User实体类
package net.hw.bean;
/**
* Created by howard on 2017/3/31.
*/
public class User {
private int id;
private String name;
private String gender;
private String age;
private String telephone;
public int getId() {
return id;
}
public void setId(int id) {
this.id = id;
}
public String getName() {
return name;
}
public void setName(String name) {
this.name = name;
}
public String getGender() {
return gender;
}
public void setGender(String gender) {
this.gender = gender;
}
public String getAge() {
return age;
}
public void setAge(String age) {
this.age = age;
}
public String getTelephone() {
return telephone;
}
public void setTelephone(String telephone) {
this.telephone = telephone;
}
@Override
public String toString() {
return "User{" +
"id=" + id +
", name='" + name + '\'' +
", gender='" + gender + '\'' +
", age='" + age + '\'' +
", telephone='" + telephone + '\'' +
'}';
}
}(2)创建Spring配置文件spring-config.xml
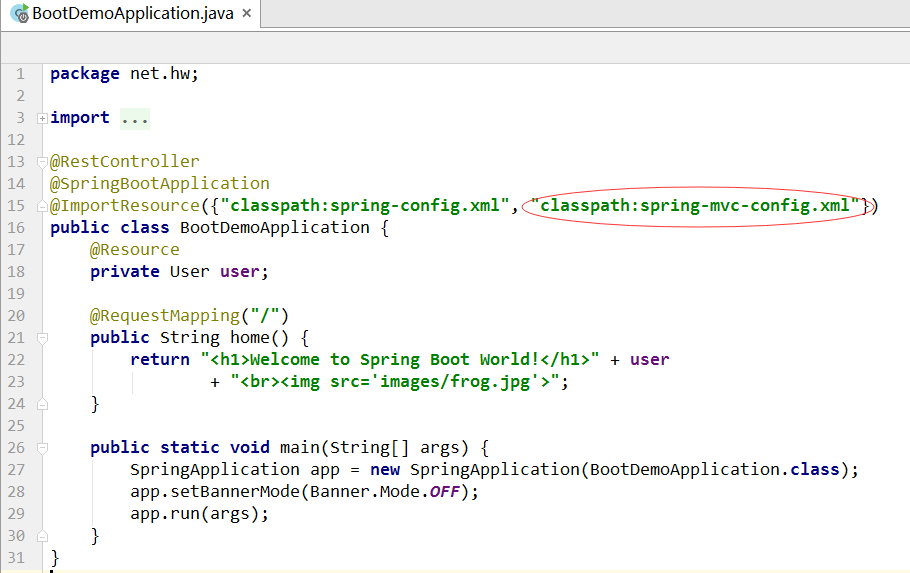
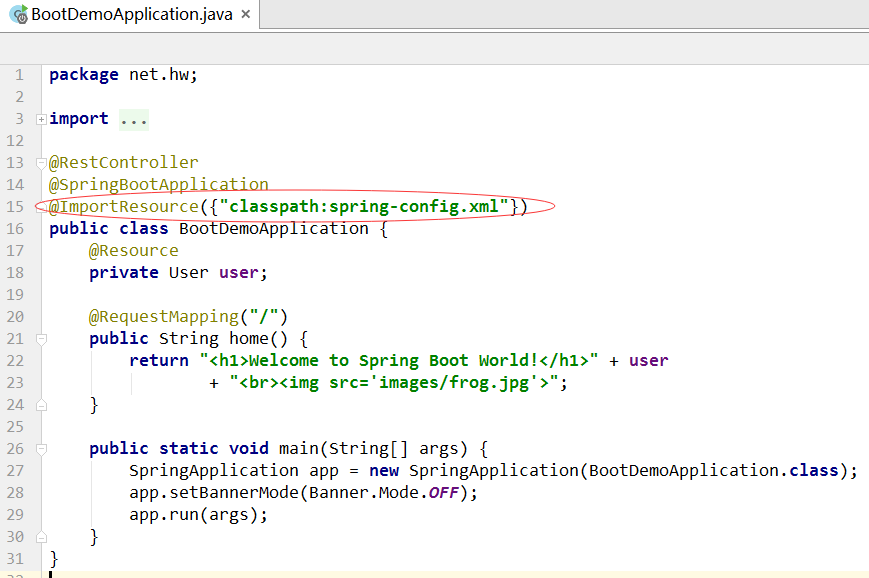
(3)修改入口类,导入spring-config.xml配置文件
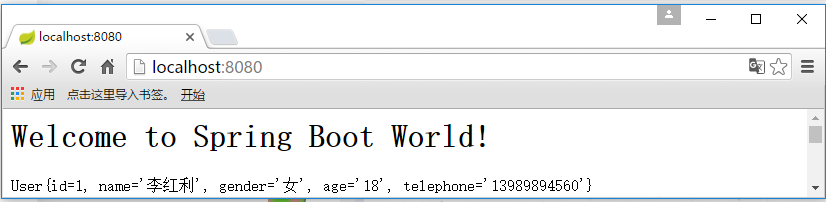
(4)启动程序,访问http://localhost:8080
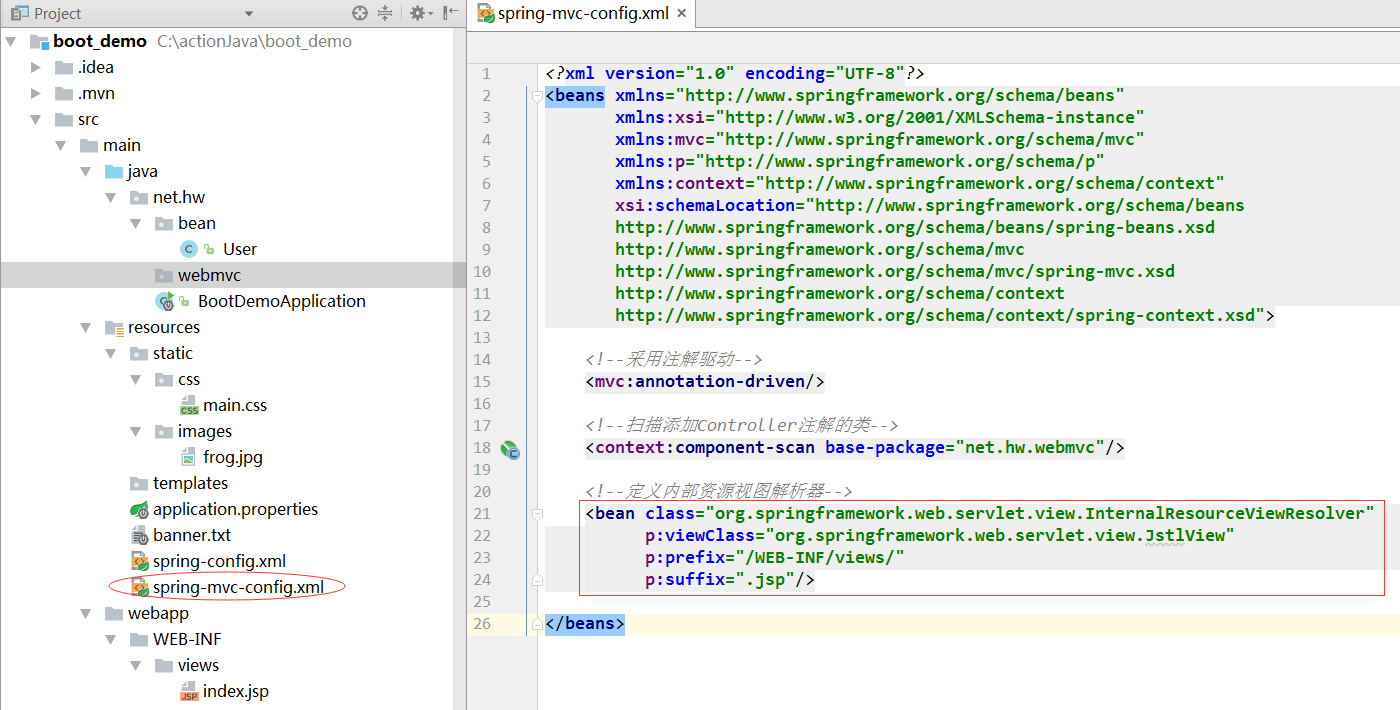
其实,也可以创建Spring MVC配置文件,在里面定义内部资源视图解析器。
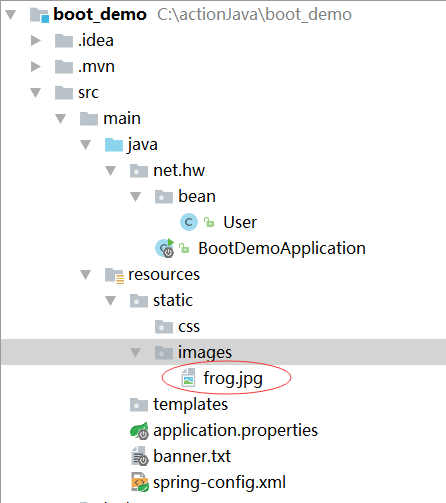
二、访问静态资源静态资源(css、images、scripts)都放在resources\static目录里。下面以访问图片为例说明静态资源的访问。1、在static里创建images目录,拷贝一张图片
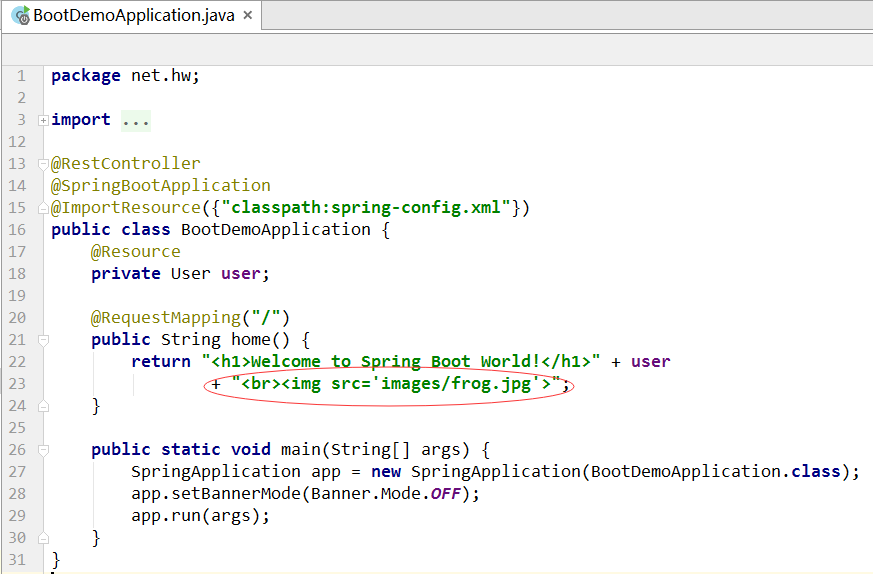
2、修改入口类BootDemoApplication
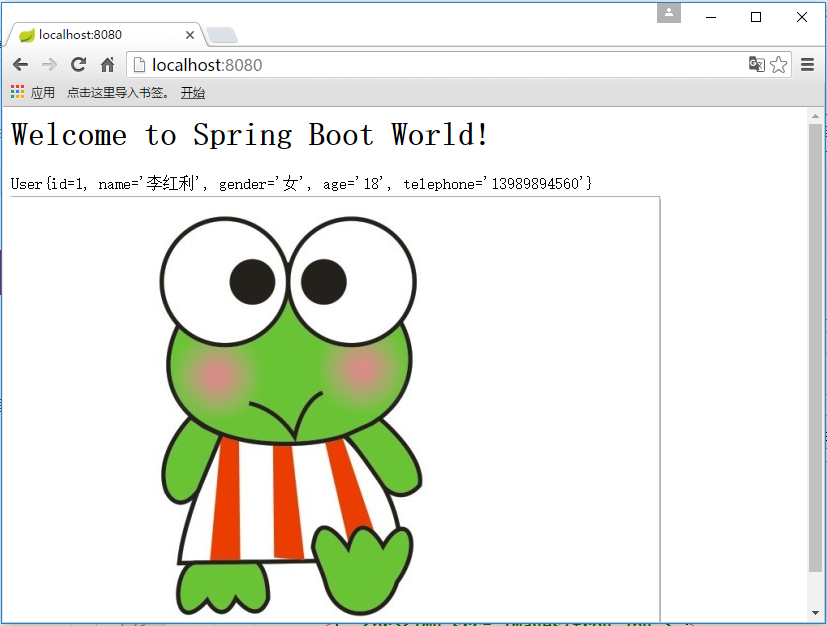
3、启动程序,访问http://localhost:8080
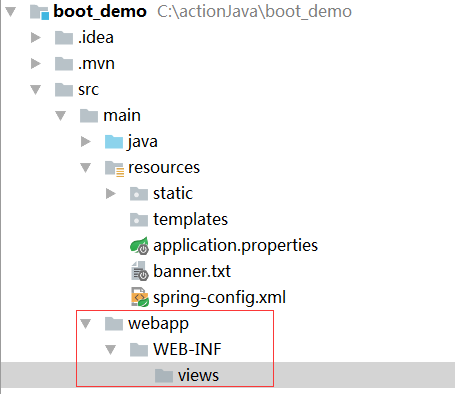
三、访问JSP资源Spring Boot建议采用的模板引擎包括Thymeleaf, Freemarker, Groovy, Velocity,官方不建议使用JSP页面,当然要使用也可以,但是必须将JSP页面放在跟resources同级的webapp目录里。1、创建webapp目录2、在webapp里创建WEB-INF目录3、在WEB-INF里创建views目录
4、在pom.xml文件里添加对jsp的支持
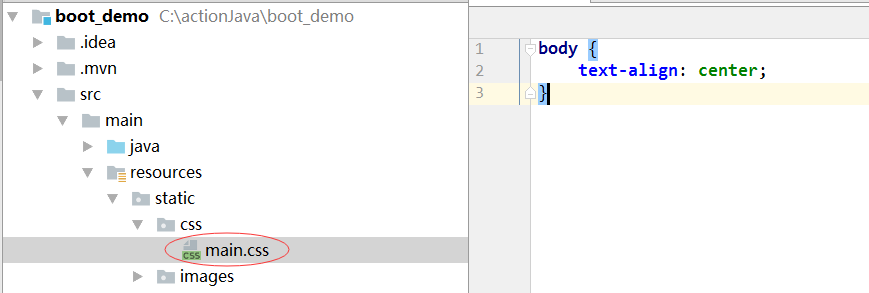
6、在static/css目录创建main.css样式表文件
7、在resources目录创建spring-mvc-config.xml文件
8、在入口类上通过注解加载spring-mvc-config.xml配置文件
9、在webmvc子包里创建HelloController
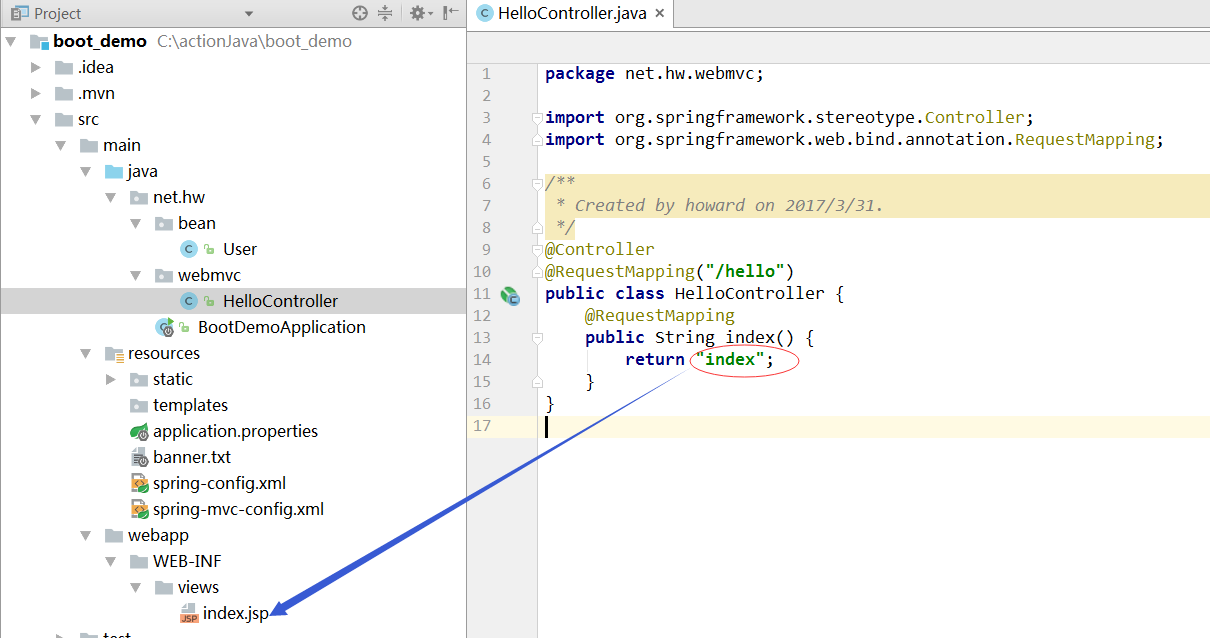
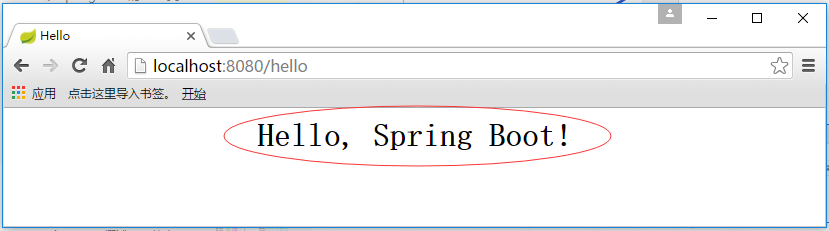
10、启动程序,访问http://localhost:8080/hello
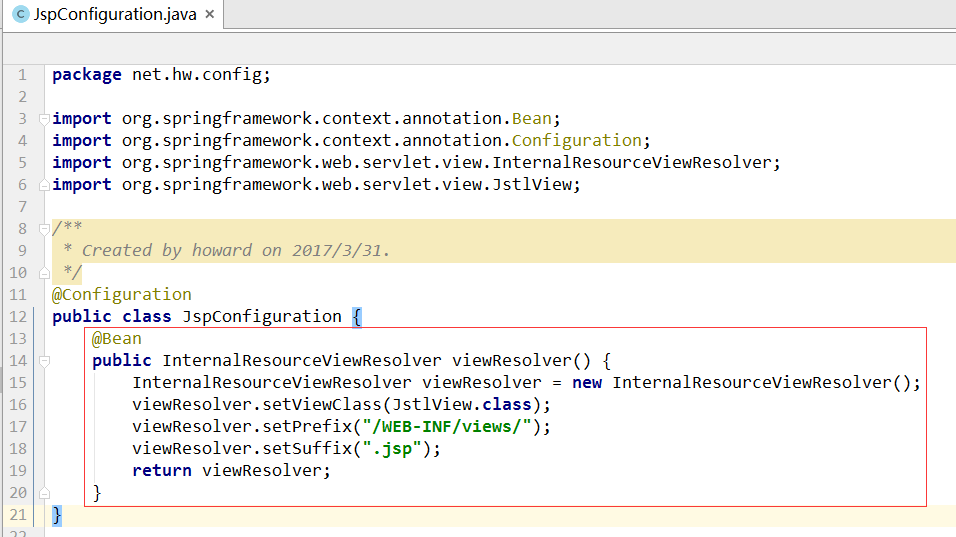
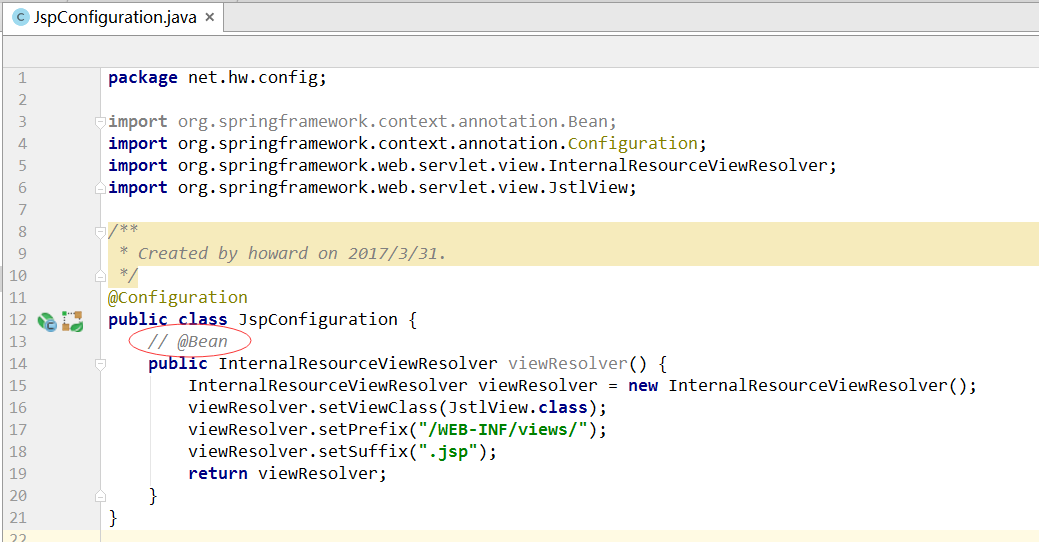
关于JSP页面的映射,还有另外两种方式可以实现。1、通过配置类来实现映射(1)在config子包里创建JspConfiguration配置类
(2)修改入口类,不用加载spring-mvc-config.xml配置文件
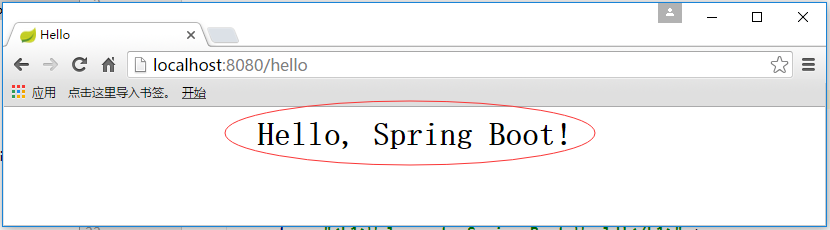
(3)启动程序,访问访问http://localhost:8080/hello

2、通过设置application.properties文件
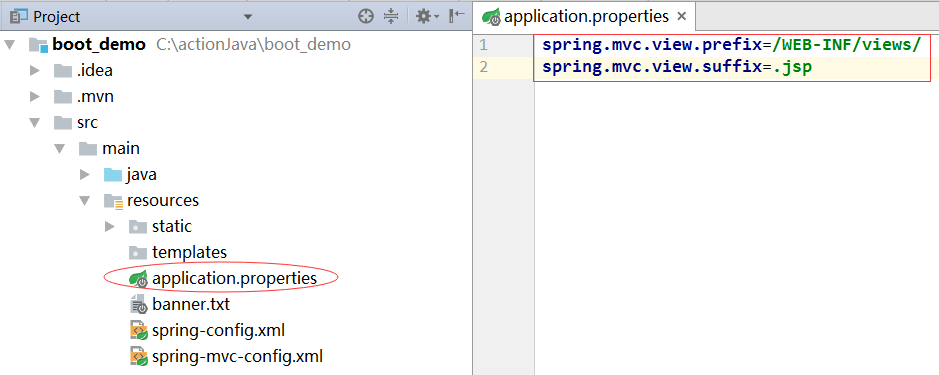
3、将JspConfiguration配置类里定义内部资源视图解析器给注释掉
4、启动程序,访问访问http://localhost:8080/hello
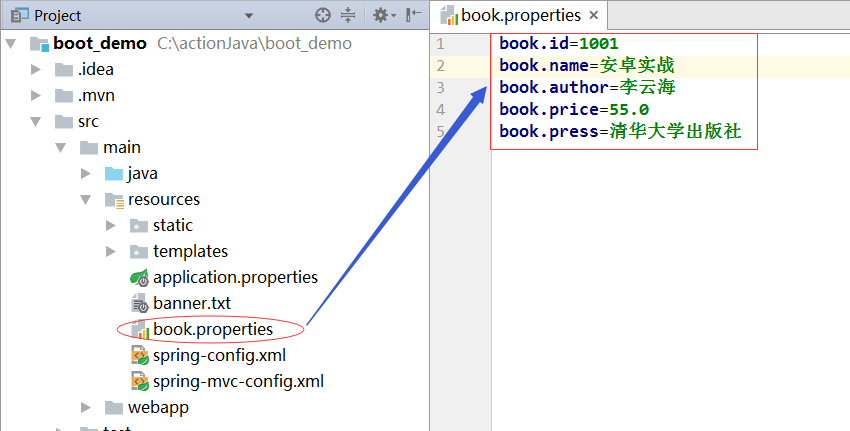
四、使用Freemarker模板引擎1、创建book.properties属性文件
2、在templates里创建模板文件showBook.ftl

<!DOCTYPE html>
<html>
<head>
<title>显示图书信息</title>
</head>
<body>
<table border="1" cellpadding="5" cellspacing="0">
<tr>
<td>编号</td>
<td>${bookId}</td>
</tr>
<tr>
<td>书名</td>
<td>${bookName}</td>
</tr>
<tr>
<td>作者</td>
<td>${bookAuthor}</td>
</tr>
<tr>
<td>单价</td>
<td>${bookPrice}</td>
</tr>
<tr>
<td>出版社</td>
<td>${bookPress}</td>
</tr>
</table>
</body>
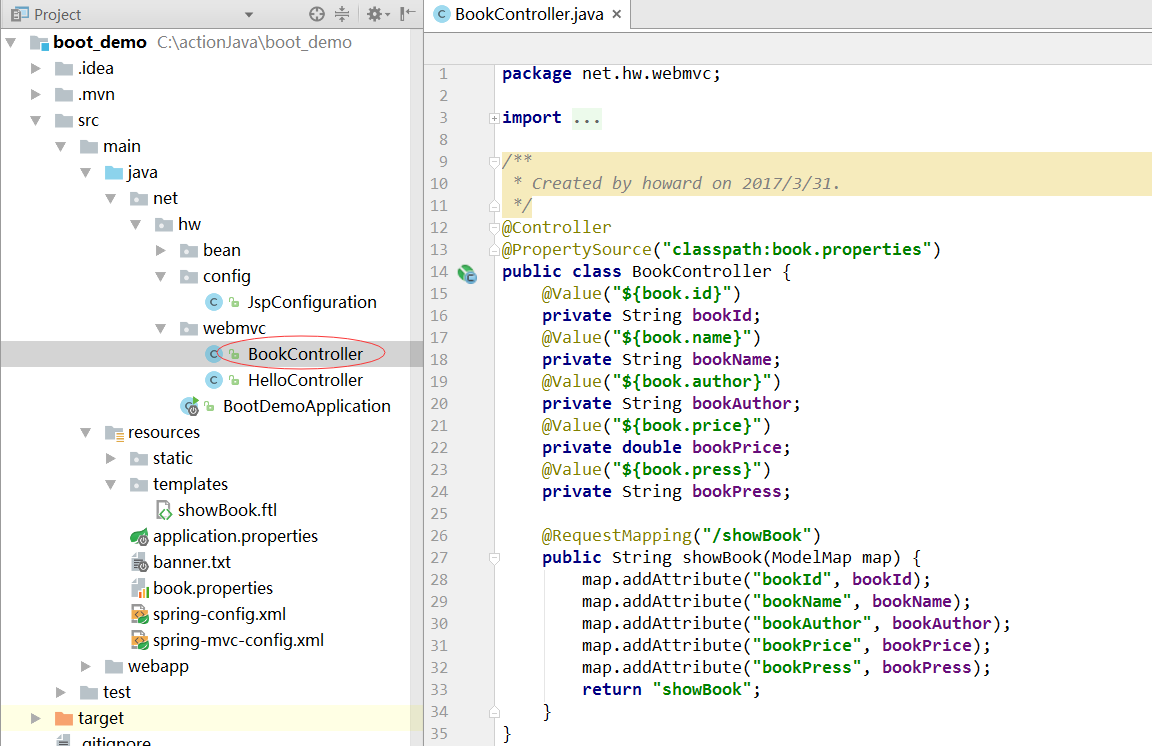
</html>3、在webmvc里创建BookController
package net.hw.webmvc;
import org.springframework.beans.factory.annotation.Value;
import org.springframework.context.annotation.PropertySource;
import org.springframework.stereotype.Controller;
import org.springframework.ui.ModelMap;
import org.springframework.web.bind.annotation.RequestMapping;
/**
* Created by howard on 2017/3/31.
*/
@Controller
@PropertySource("classpath:book.properties")
public class BookController {
@Value("${book.id}")
private String bookId;
@Value("${book.name}")
private String bookName;
@Value("${book.author}")
private String bookAuthor;
@Value("${book.price}")
private double bookPrice;
@Value("${book.press}")
private String bookPress;
@RequestMapping("/showBook")
public String showBook(ModelMap map) {
map.addAttribute("bookId", bookId);
map.addAttribute("bookName", bookName);
map.addAttribute("bookAuthor", bookAuthor);
map.addAttribute("bookPrice", bookPrice);
map.addAttribute("bookPress", bookPress);
return "showBook";
}
}4、在pom.xml文件增加jar包依赖
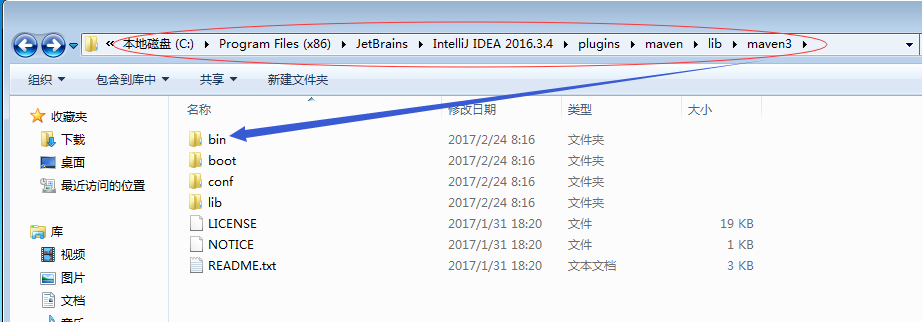
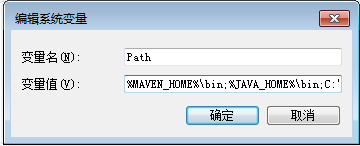
五、Spring Boot项目打包(jar形式)1、配置Maven的环境变量


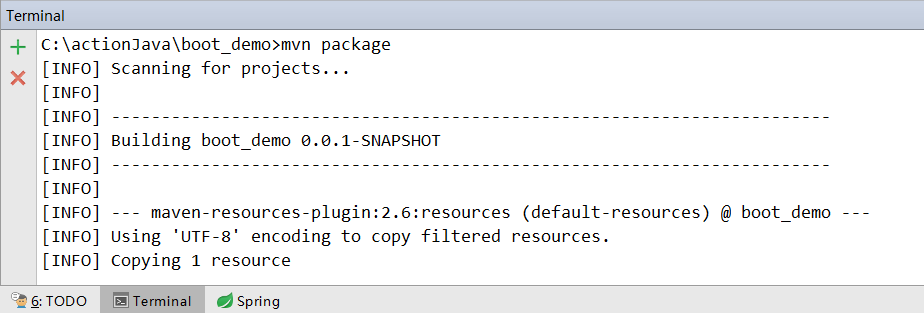
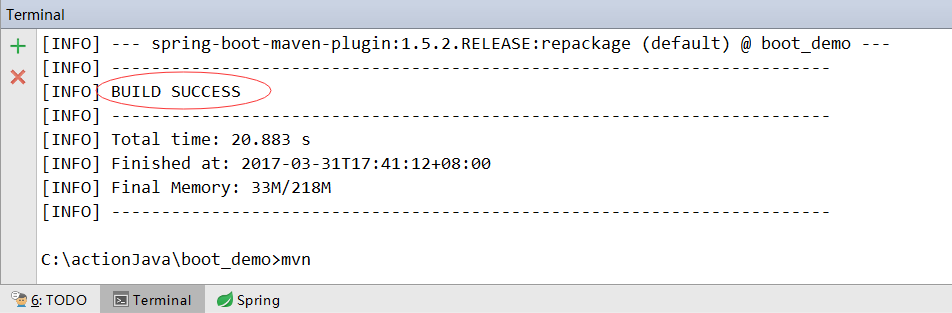
2、在Intellij里切换到Terminal发布 mvn package命令:
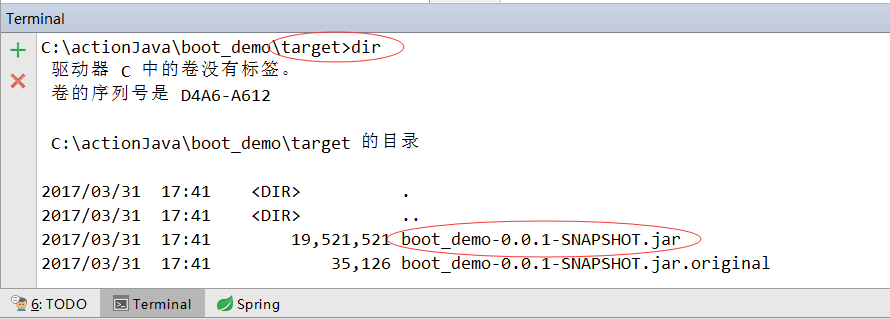
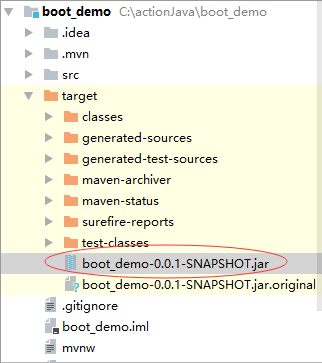
3、进入target子目录,发布dir命令
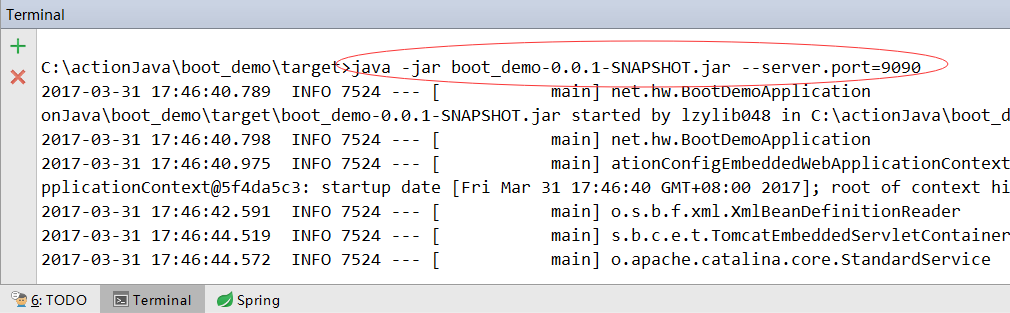
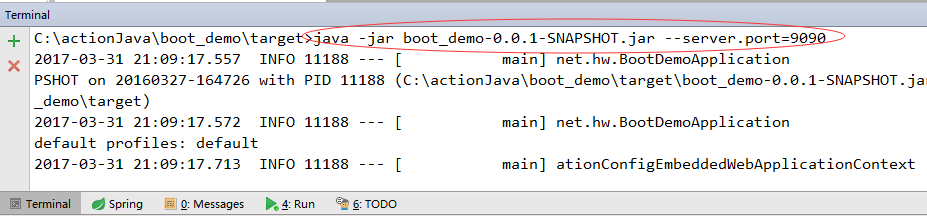
4、命令行方式运行程序
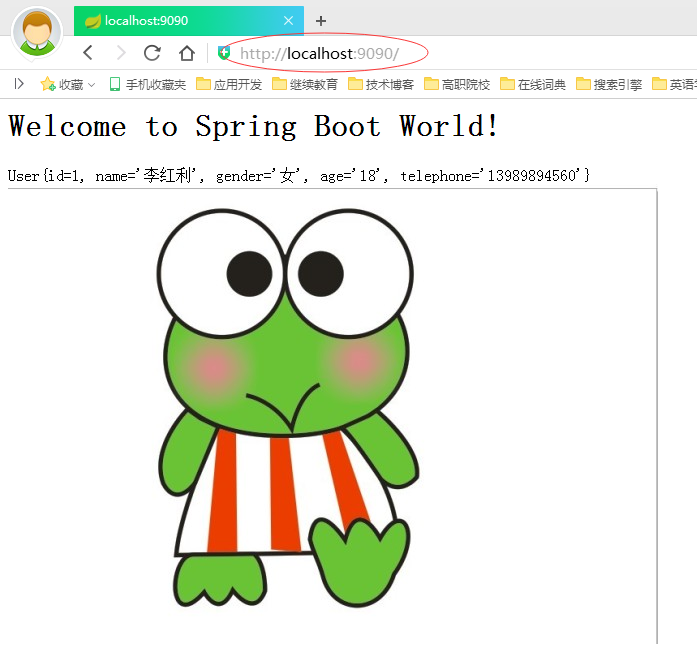
(1)访问http://localhost:9090
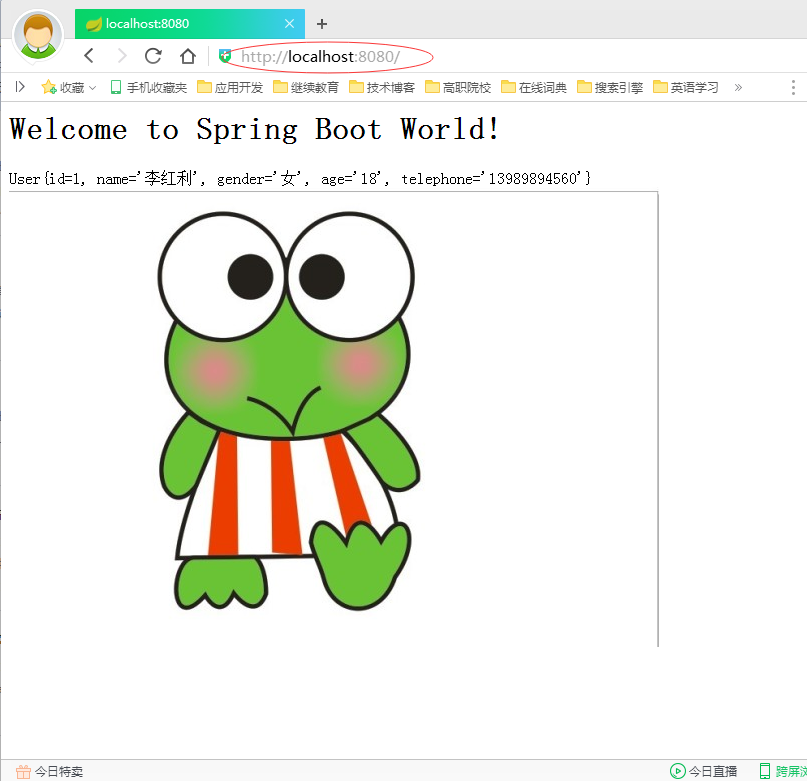
访问http://localhost:8080,也是同样结果:
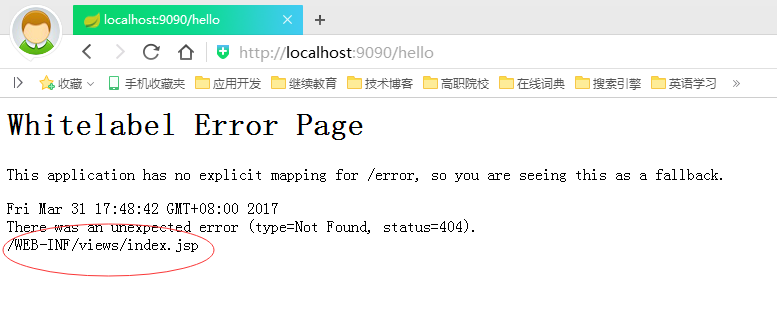
(2)访问http://localhost:9090/hello
但是访问http://localhost:8080/hello就没问题。

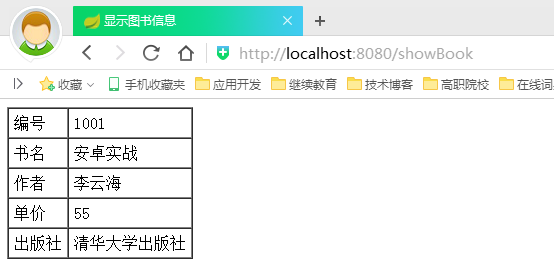
(3)访问http://localhost:9090/showBook
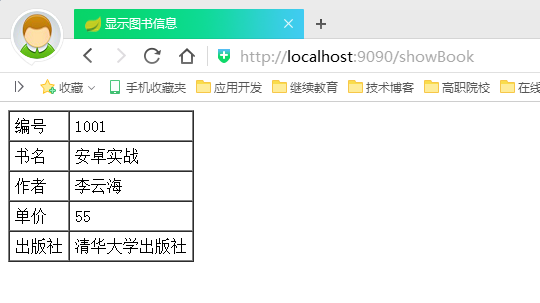
此时,访问http://localhost:8080/showBook,同样结果:
六、外部配置Spring Boot允许使用properties文件或者命令行参数作为外部配置1、命令行参数配置Spring Boot可以基于jar包运行。格式:java -jar xx.jar还可通过命令参数修改Tomcat端口号。java -jar xx.jar --server.port=9090
2、常规属性配置在Spring Boot里,在application.properties文件里定义属性,直接使用@Value注入即可。如果在其它属性文件里定义属性,就需要添加@PropertySource注解来指定属性文件的位置。
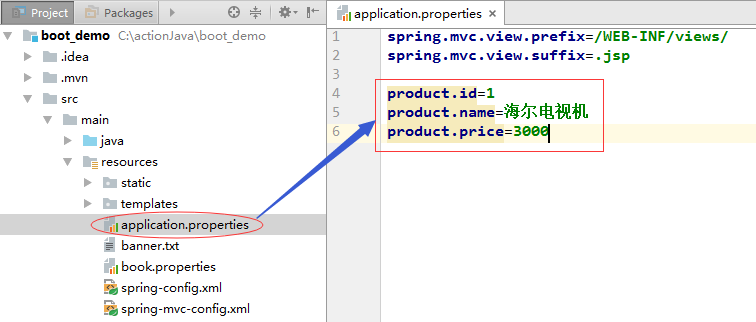
(1)在application.properties里定义属性
(2)在webmvc子包里创建ProductController

package net.hw.webmvc;
import org.springframework.beans.factory.annotation.Value;
import org.springframework.web.bind.annotation.RequestMapping;
import org.springframework.web.bind.annotation.RestController;
/**
* Created by howard on 2017/3/31.
*/
@RestController
public class ProductController {
@Value("${product.id}")
private int id;
@Value("${product.name}")
private String name;
@Value("${product.price}")
private double price;
@RequestMapping("/showProduct")
public String showProduct() {
return "产品编号:" + id
+ "<br>产品名称:" + name
+ "<br>产品单价:" + price;
}
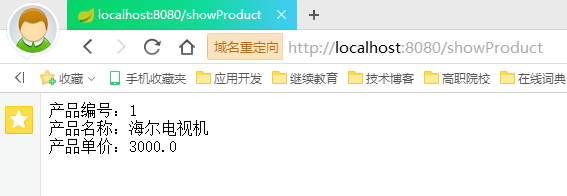
}(3)运行程序,访问http://localhost:8080/showProduct
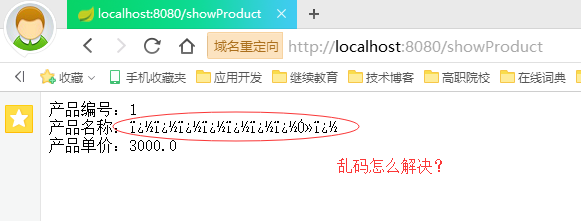
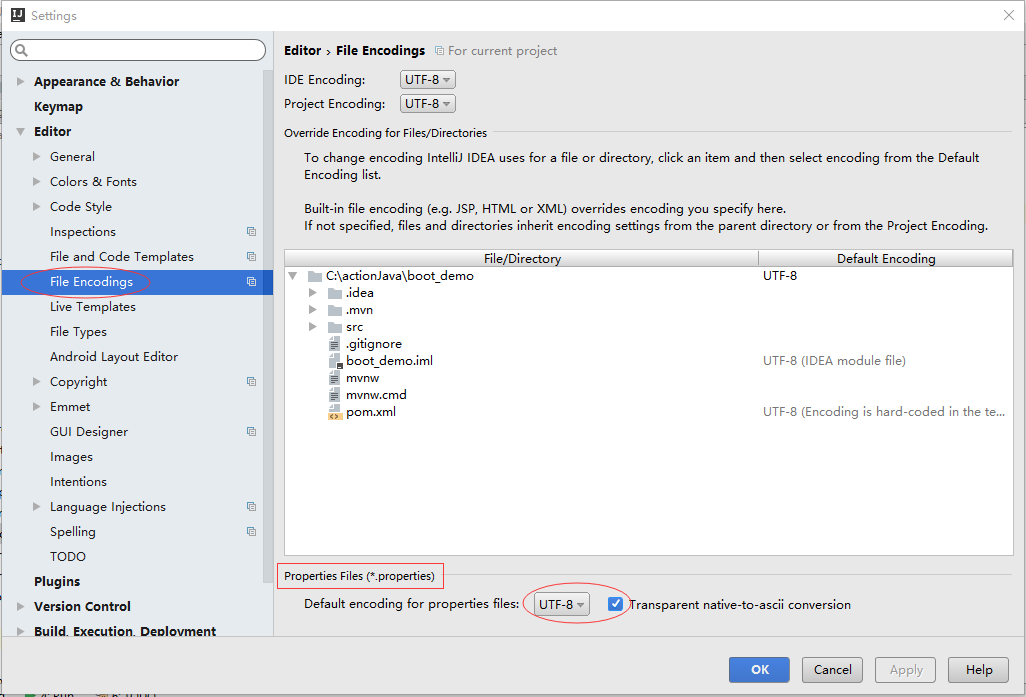
乱码一般是编码不一致导致的,我们在ProductController里通过@Value注解符读取application.properties文件里定义的属性,因此,我们去看看属性文件的编码形式。
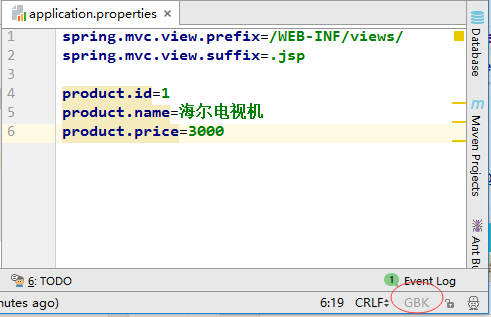
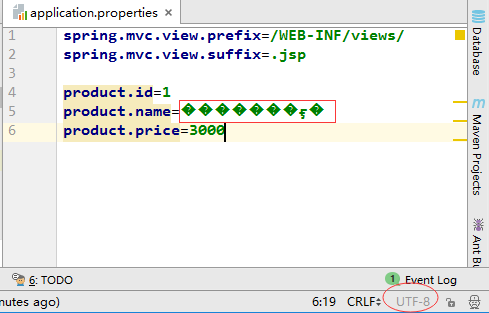
原来属性文件采用GBK编码,需要修改成UTF-8。

此时,application.properties里就会出现乱码:
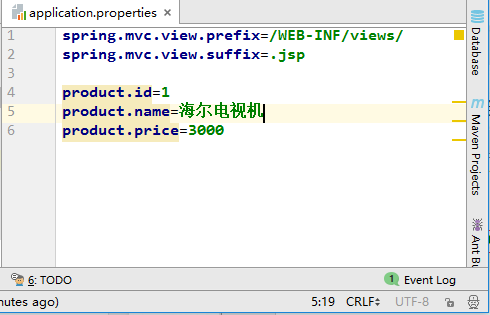
删掉乱码,重新输入产品名:
重新启动程序,访问http://localhost:8080/showProduct
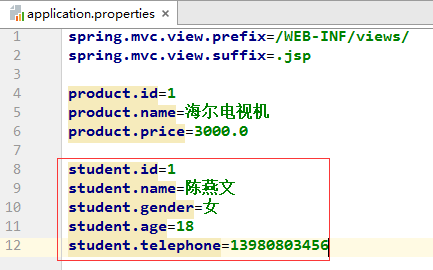
2、类型安全的配置(基于properties)Spring Boot提供了基于类型安全的配置方式,通过@ConfigurationProperties将properties属性和一个Bean及其属性关联,从而实现类型安全的配置。(1)在application.properties里定义属性
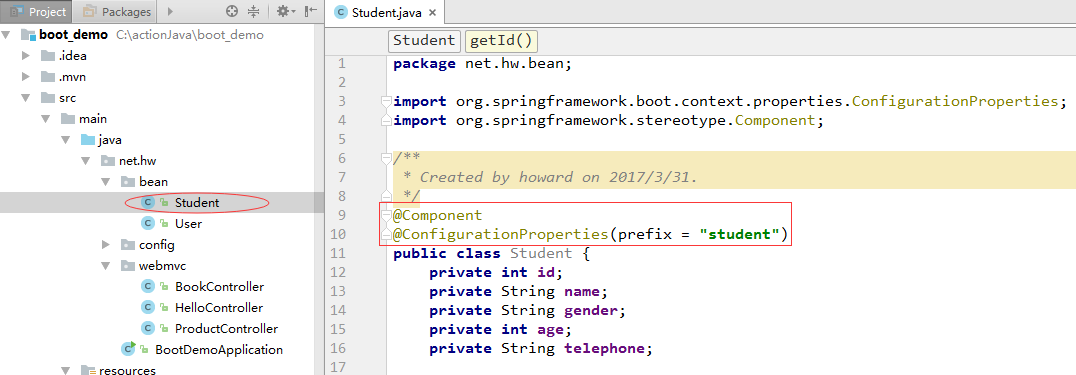
(2)在bean子包里创建Student(类型安全的Bean)
package net.hw.bean;
import org.springframework.boot.context.properties.ConfigurationProperties;
import org.springframework.stereotype.Component;
/**
* Created by howard on 2017/3/31.
*/
@Component
@ConfigurationProperties(prefix = "student")
public class Student {
private int id;
private String name;
private String gender;
private int age;
private String telephone;
public int getId() {
return id;
}
public void setId(int id) {
this.id = id;
}
public String getName() {
return name;
}
public void setName(String name) {
this.name = name;
}
public String getGender() {
return gender;
}
public void setGender(String gender) {
this.gender = gender;
}
public int getAge() {
return age;
}
public void setAge(int age) {
this.age = age;
}
public String getTelephone() {
return telephone;
}
public void setTelephone(String telephone) {
this.telephone = telephone;
}
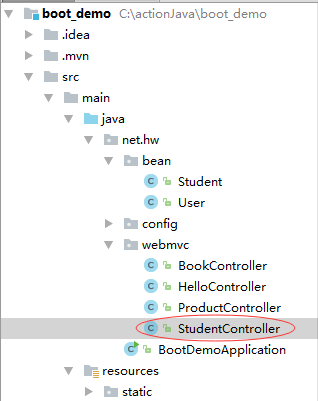
}(3)在webmvc子包里创建StudentController
package net.hw.webmvc;
import net.hw.bean.Student;
import org.springframework.beans.factory.annotation.Autowired;
import org.springframework.web.bind.annotation.RequestMapping;
import org.springframework.web.bind.annotation.RestController;
/**
* Created by howard on 2017/3/31.
*/
@RestController
public class StudentController {
@Autowired
private Student student;
@RequestMapping("/showStudent")
public String showStudent() {
return "学号:" + student.getId()
+ "<br>姓名:" + student.getName()
+ "<br>性别:" + student.getGender()
+ "<br>年龄:" + student.getAge()
+ "<br>电话:" + student.getTelephone();
}
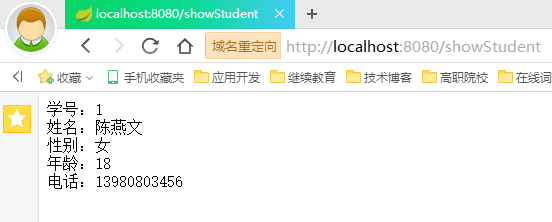
}(4)启动程序,访问http://localhost:8080/showStudent
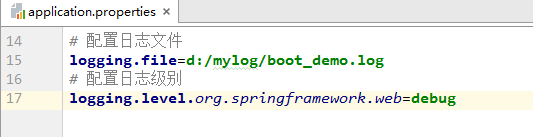
3、日志配置默认情况下,Spring Boot采用Logback作为日志框架。
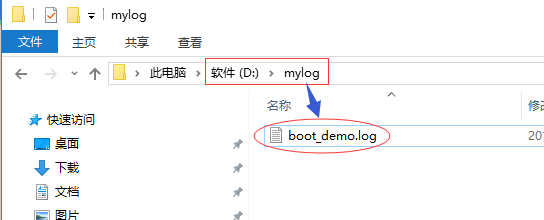
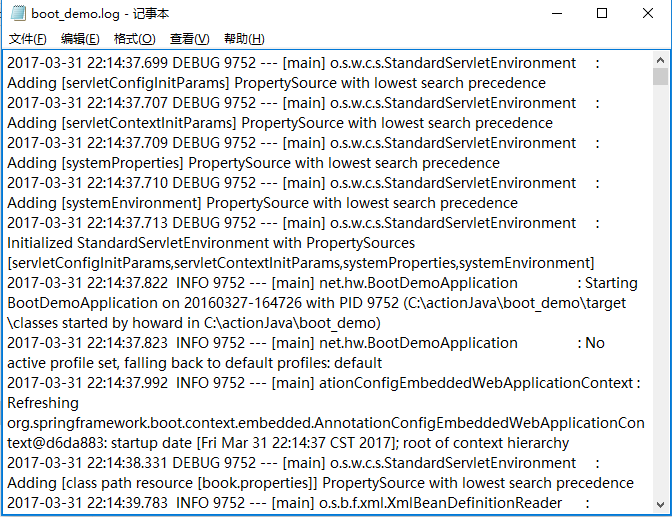
运行程序,查看日志文件:
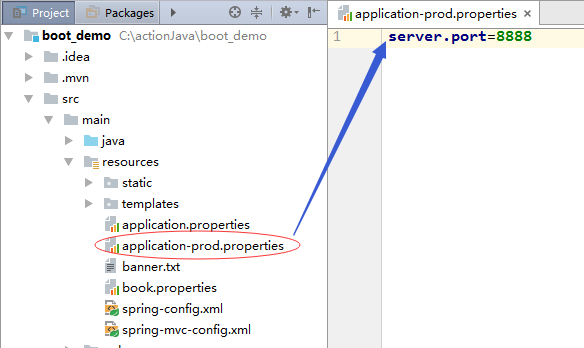
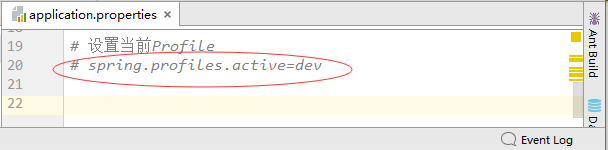
4、Profile配置Profile是Spring用来支持针对不同的环境提供不同的配置。全局Profile配置使用application-{profile}.properties。(1)创建生产环境下的配置文件application-prod.properties
(2)创建开发环境下的配置文件application-dev.properties
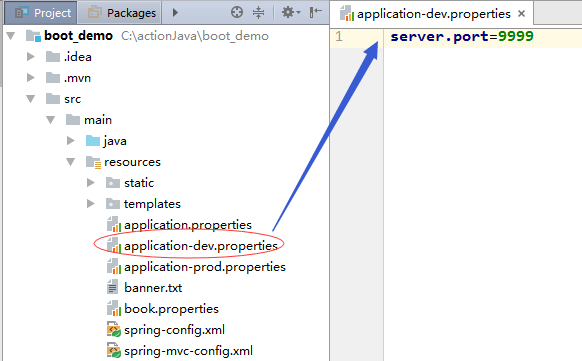
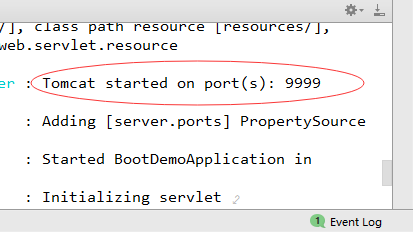
(3)在application.properties文件里设置当前环境配置
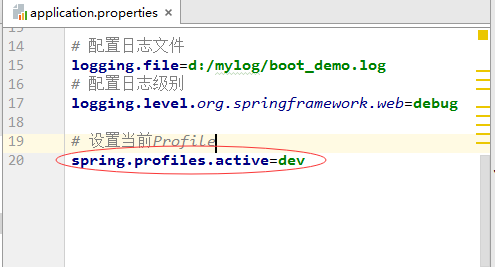
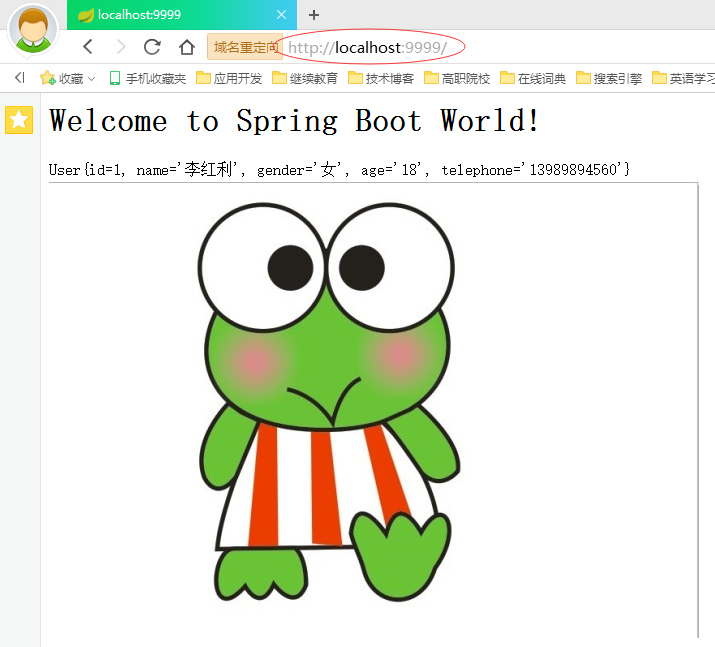
(4)运行程序,访问http://localhost:9999
七、Spring Boot运行原理Spring Boot关于自动配置的源码在spring-boot-autoconfigurer-1.5.2.RELEASE.jar内,主要包含了如下图所示的配置:

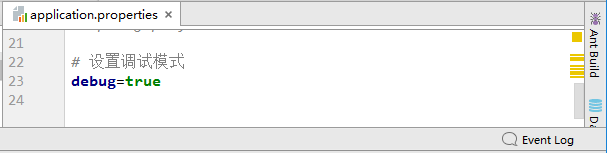
查看当前项目中已启用和未启用的自动配置的报告。(1)运行jar时增加--debug参数:(2)在application.properties中设置属性
启动程序,查看控制台。已启用的自动配置:

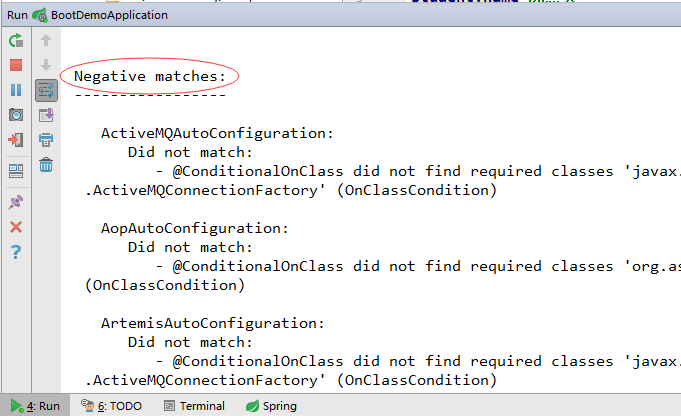
未启用的自动配置:
(一)运作原理@SpringBootApplication注解是一个组合注解,核心功能是由@EnableAutoConfiguration注解提供的。
其源码如下:
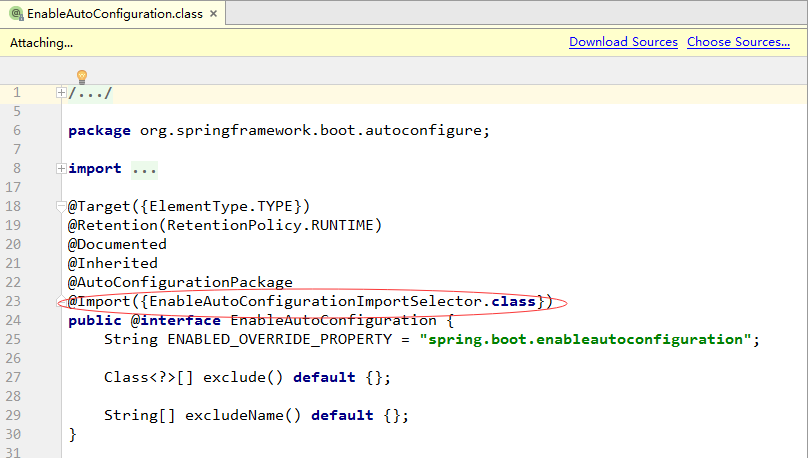
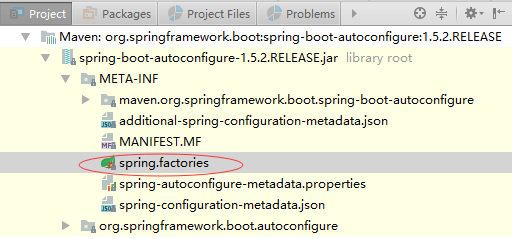
这里的关键功能是@Import注解导入的配置功能,EnableAutoConfigurationImportSelector使用SpringFactoriesLoader.loadFactoryNames方法扫描具有META-INF/spring.factories文件的jar包,而我们在spring-boot-autoconfigurer-1.5.2.RELEASE.jar里就有一个spring.factories文件,此文件中声明了有哪些自动配置:

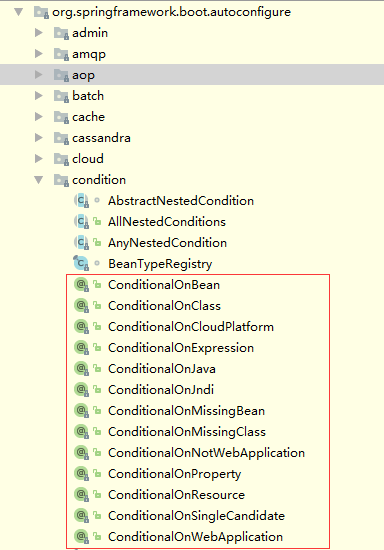
(二)核心注解打开上面任意一个AutoConfiguration文件,一般都有下面的条件注解。
我们不妨来看一看@ConditionalOnWebApplicaiton注解。
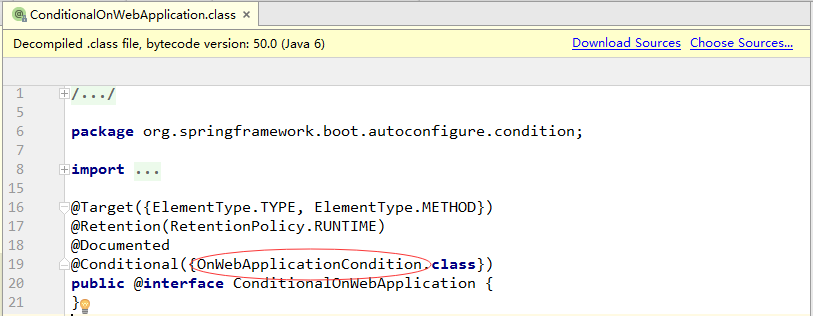
此注解使用的条件是OnWebApplicationCondition,分析其源码:
我们在常规Spring项目中配置http编码时是在web.xml文件里配置一个filter:
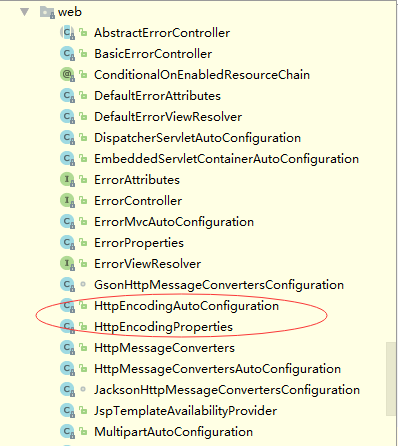
1、配置参数(通过HttpEncodingProperties)
package org.springframework.boot.autoconfigure.web;
import java.nio.charset.Charset;
import java.util.Locale;
import java.util.Map;
import org.springframework.boot.context.properties.ConfigurationProperties;
@ConfigurationProperties(
prefix = "spring.http.encoding"
)
public class HttpEncodingProperties {
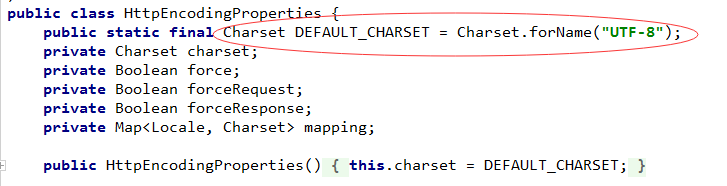
public static final Charset DEFAULT_CHARSET = Charset.forName("UTF-8");
private Charset charset;
private Boolean force;
private Boolean forceRequest;
private Boolean forceResponse;
private Map<Locale, Charset> mapping;
public HttpEncodingProperties() {
this.charset = DEFAULT_CHARSET;
}
public Charset getCharset() {
return this.charset;
}
public void setCharset(Charset charset) {
this.charset = charset;
}
public boolean isForce() {
return Boolean.TRUE.equals(this.force);
}
public void setForce(boolean force) {
this.force = Boolean.valueOf(force);
}
public boolean isForceRequest() {
return Boolean.TRUE.equals(this.forceRequest);
}
public void setForceRequest(boolean forceRequest) {
this.forceRequest = Boolean.valueOf(forceRequest);
}
public boolean isForceResponse() {
return Boolean.TRUE.equals(this.forceResponse);
}
public void setForceResponse(boolean forceResponse) {
this.forceResponse = Boolean.valueOf(forceResponse);
}
public Map<Locale, Charset> getMapping() {
return this.mapping;
}
public void setMapping(Map<Locale, Charset> mapping) {
this.mapping = mapping;
}
boolean shouldForce(HttpEncodingProperties.Type type) {
Boolean force = type == HttpEncodingProperties.Type.REQUEST?this.forceRequest:this.forceResponse;
if(force == null) {
force = this.force;
}
if(force == null) {
force = Boolean.valueOf(type == HttpEncodingProperties.Type.REQUEST);
}
return force.booleanValue();
}
static enum Type {
REQUEST,
RESPONSE;
private Type() {
}
}
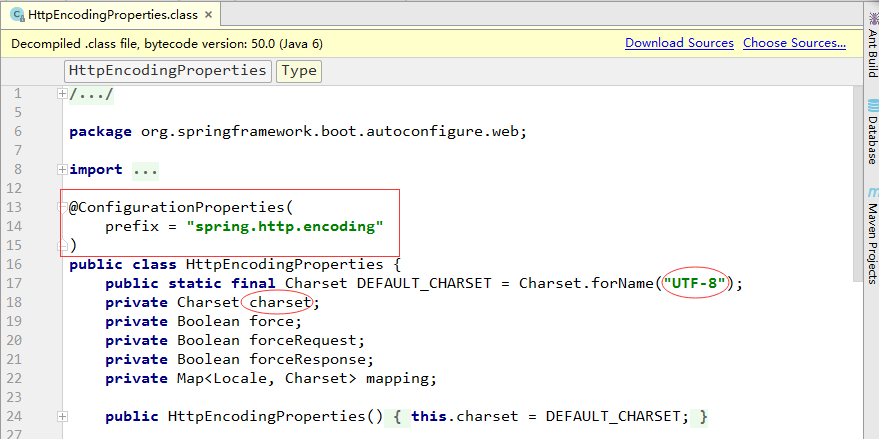
}代码解释:(1)在application.properties配置http编码时前缀是spring.http.encoding;

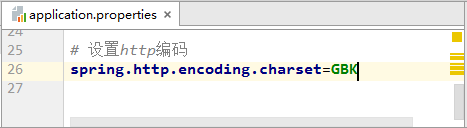
(2)默认编码方式为UTF-8,如果修改可使用spring.http.encoding.charset=编码;
2、配置Bean(通过HttpEncodingAutoConfiguration)
通过调用上述配置,并根据条件配置CharacterEncodingFilter的Bean,源码如下:
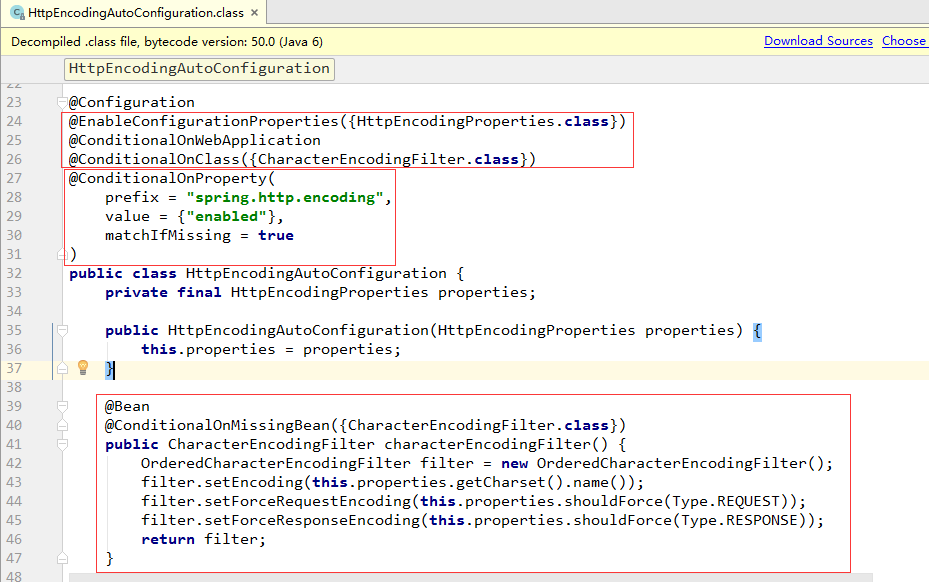
代码解释:(1)@EnableConfigurationProperties({HttpEncodingProperties.class}) 启用配置属性;(2)@ConditionalOnWebApplication 在项目是Web应用的条件下;(3)@ConditionalOnProperty( prefix = "spring.http.encoding", value = {"enabled"}, matchIfMissing = true) 当设置spring.http.encoding=enabled的情况下,如果没有设置则默认为true,即条件符合;(4)@ConditionalOnMissingBean({CharacterEncodingFilter.class}) 当容器中没有这个Bean的时候就新建Bean。
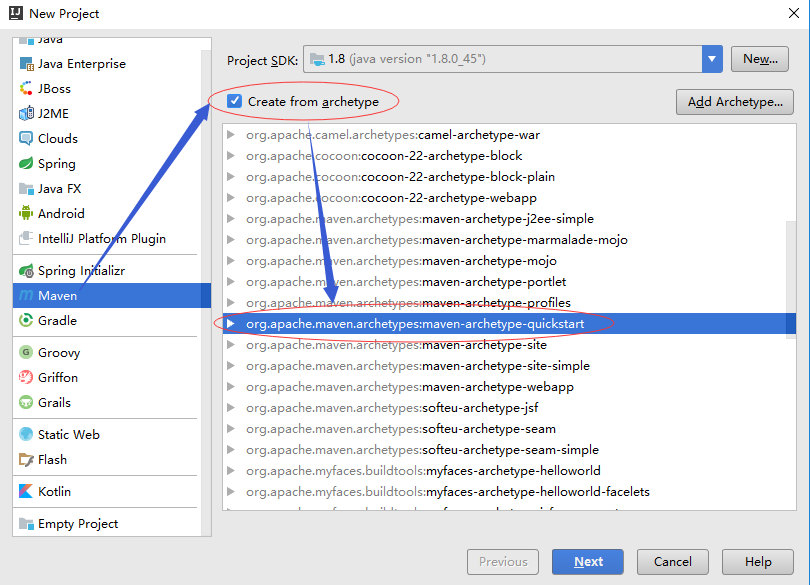
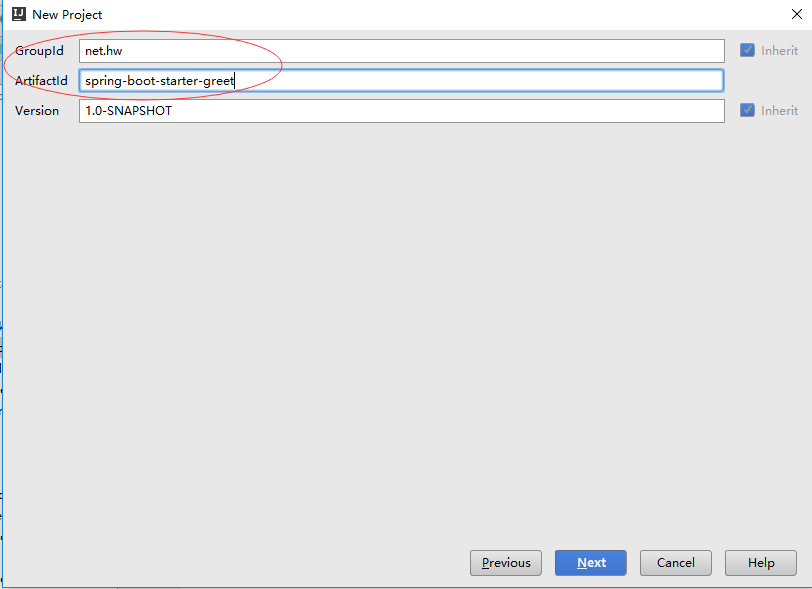
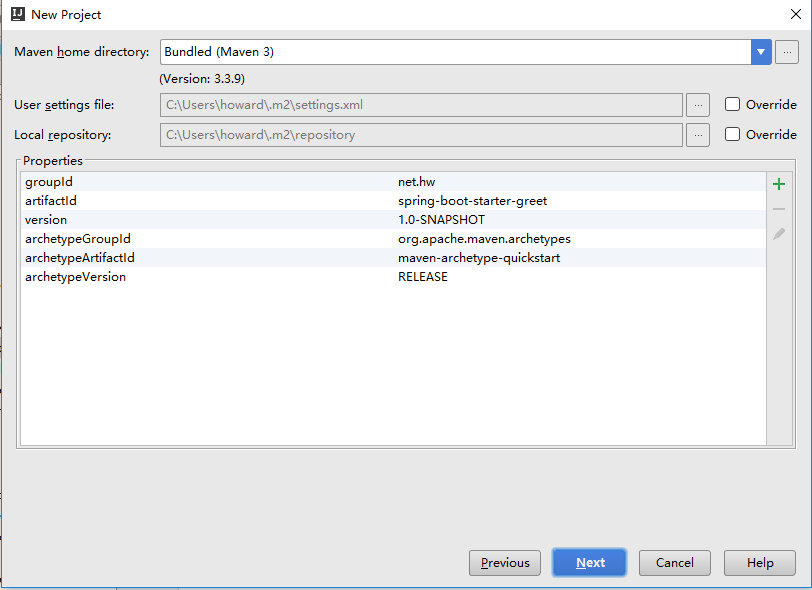
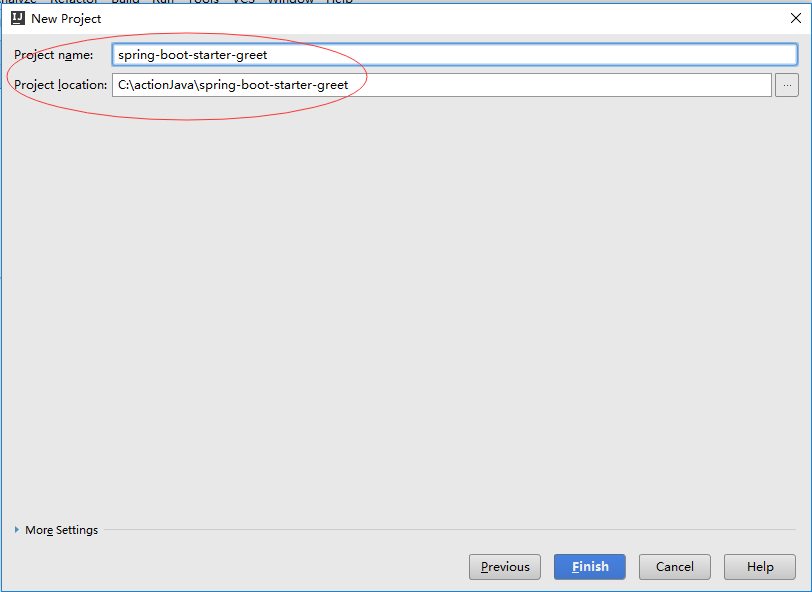
(四)实战练习编写一个starter pom,意味着我们不仅有自动配置的功能,而且具有更通用的耦合度更低的配置。(1)新建starter的Maven项目

(2)修改pom.xml文件
(4)创建包net.hw.config和net.hw.service
(5)在net.hw.config包里创建属性配置类
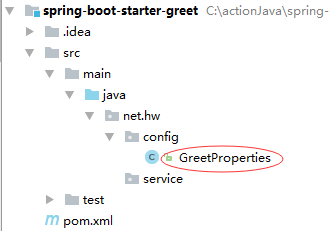
package net.hw.config;
import org.springframework.boot.context.properties.ConfigurationProperties;
/**
* Created by howard on 2017/4/2.
*/
@ConfigurationProperties(prefix = "greet")
public class GreetProperties {
private static String NAME = "World";
private String name = NAME;
public String getName() {
return name;
}
public void setName(String name) {
this.name = name;
}
}(6)在net.hw.service包里创建服务类
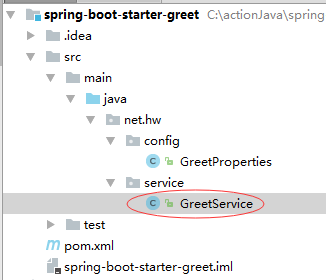
package net.hw.service;
/**
* Created by howard on 2017/4/2.
*/
public class GreetService {
private String name;
public String greet() {
return "Hello, " + name;
}
public String getName() {
return name;
}
public void setName(String name) {
this.name = name;
}
}(7)在net.hw包里创建自动配置类
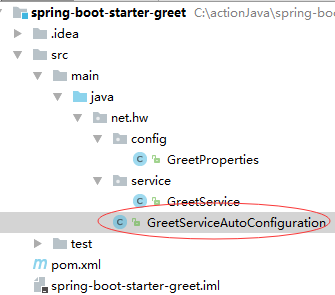
package net.hw;
import net.hw.config.GreetProperties;
import net.hw.service.GreetService;
import org.springframework.beans.factory.annotation.Autowired;
import org.springframework.boot.autoconfigure.condition.ConditionalOnClass;
import org.springframework.boot.autoconfigure.condition.ConditionalOnMissingBean;
import org.springframework.boot.autoconfigure.condition.ConditionalOnProperty;
import org.springframework.boot.context.properties.EnableConfigurationProperties;
import org.springframework.context.annotation.Bean;
import org.springframework.context.annotation.Configuration;
/**
* Created by howard on 2017/4/2.
*/
@Configuration
@EnableConfigurationProperties(GreetProperties.class)
@ConditionalOnClass(GreetService.class)
@ConditionalOnProperty(prefix = "greet", value = "enabled", matchIfMissing = true)
public class GreetServiceAutoConfiguration {
@Autowired
private GreetProperties greetProperties;
@Bean
@ConditionalOnMissingBean(GreetService.class)
public GreetService greetService() {
GreetService greetService = new GreetService();
greetService.setName(greetProperties.getName());
return greetService;
}
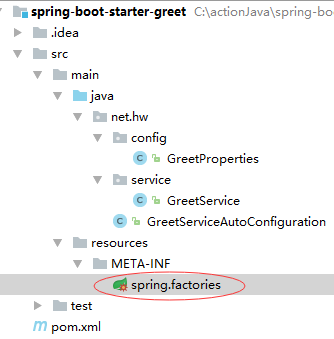
}(8)注册配置若想自动配置生效,需要注册自动配置类。在src/main里创建resources目录,在里面创建META-INF/spring.factories。

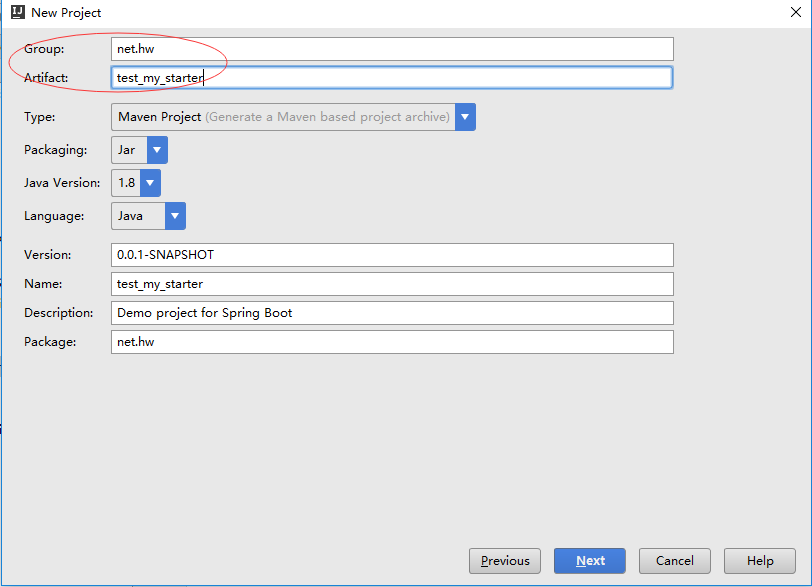
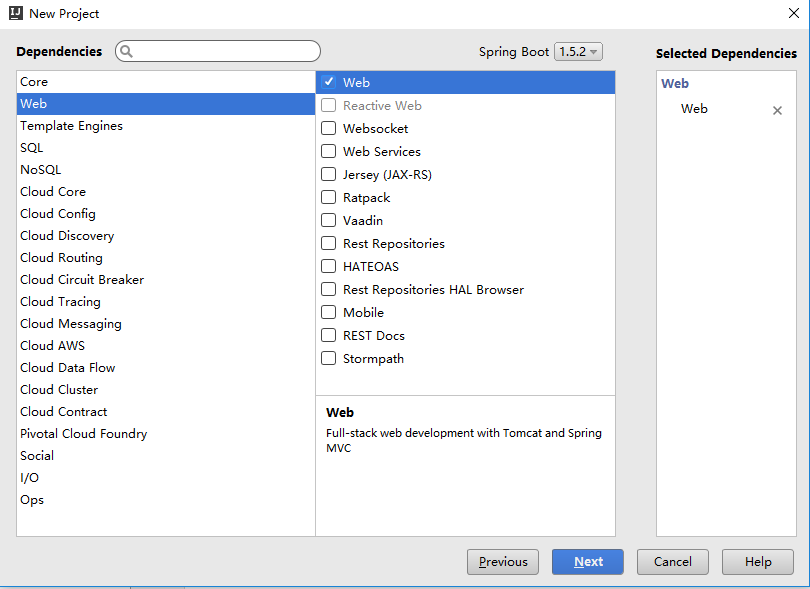
(9)新建Spring Boot项目

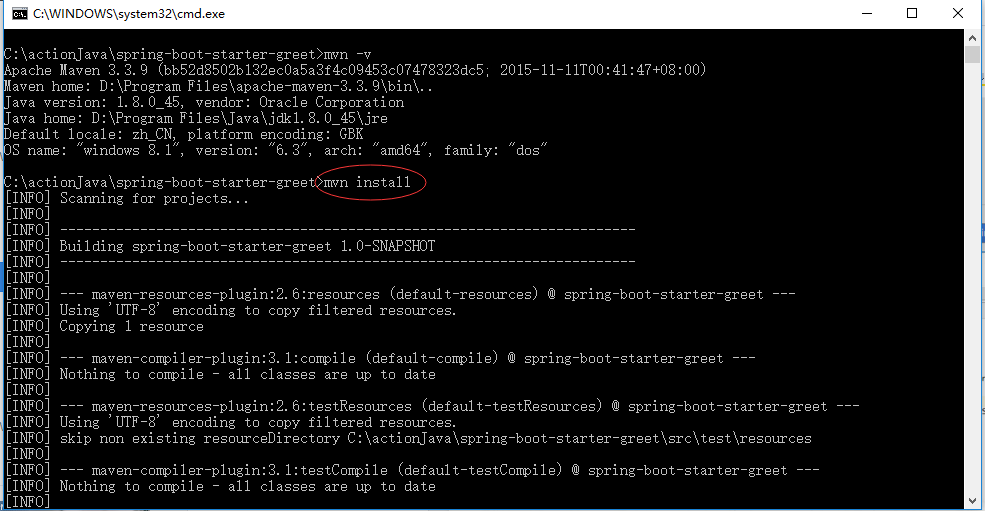
(10)通过 mvn install 将项目安装到本地库
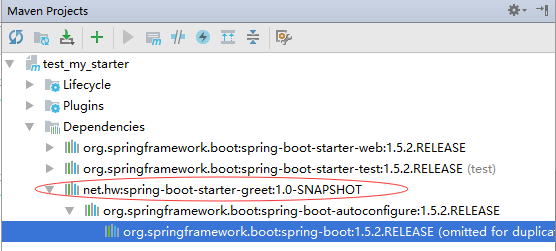
(11)在pom.xml中添加spring-boot-starter-greet的依赖
(12)修改入口类TestMyStarterApplication
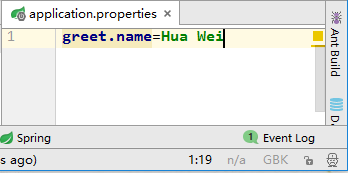
(14)在applicaion.properties里添加属性
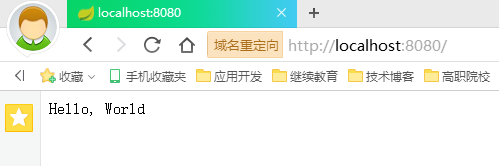
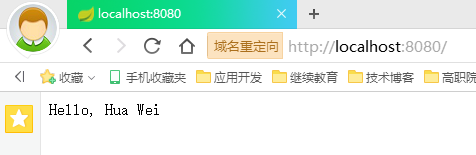
(15)启动程序,访问http://localhost:8080
一、基本配置1、入口类和@SpringBootApplication
@SpringApplication是Spring Boot的核心注解,是一个组合注解。
@Target({ElementType.TYPE})
@Retention(RetentionPolicy.RUNTIME)
@Documented
@Inherited
@SpringBootConfiguration
@EnableAutoConfiguration
@ComponentScan(
excludeFilters = {@Filter(
type = FilterType.CUSTOM,
classes = {TypeExcludeFilter.class}
), @Filter(
type = FilterType.CUSTOM,
classes = {AutoConfigurationExcludeFilter.class}
)}
)
public @interface SpringBootApplication {
@AliasFor(
annotation = EnableAutoConfiguration.class,
attribute = "exclude"
)
Class<?>[] exclude() default {};

@AliasFor(
annotation = EnableAutoConfiguration.class,
attribute = "excludeName"
)
String[] excludeName() default {};

@AliasFor(
annotation = ComponentScan.class,
attribute = "basePackages"
)
String[] scanBasePackages() default {};

@AliasFor(
annotation = ComponentScan.class,
attribute = "basePackageClasses"
)
Class<?>[] scanBasePackageClasses() default {};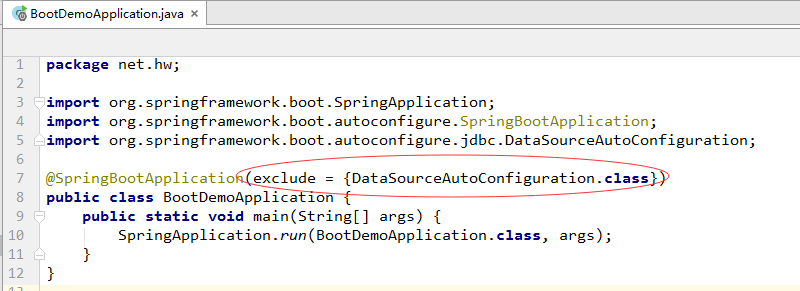
}2、设置exclude属性值,关闭特定的自动配置3、定制Banner(1)在resources目录下创建banner.txt文件
(2)通过http://patorjk.com/software/taag网站生成字符
(3)将网站生成的字符复制到banner.txt文件里
(4)启动应用程序,查看启动图案
4、关闭Banner
5、Spring Boot配置文件application.properties(1)修改Tomcat的端口号
(2)修改入口类BootDemoApplication
(3)启动程序,访问http://localhost:9090
在application.properties文件里注释掉修改服务器端口号的语句,于是服务器端口号恢复成默认的8080。
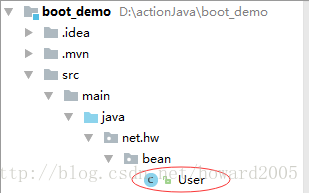
6、使用XML配置(1)创建User实体类
package net.hw.bean;
/**
* Created by howard on 2017/3/31.
*/
public class User {
private int id;
private String name;
private String gender;
private String age;
private String telephone;
public int getId() {
return id;
}
public void setId(int id) {
this.id = id;
}
public String getName() {
return name;
}
public void setName(String name) {
this.name = name;
}
public String getGender() {
return gender;
}
public void setGender(String gender) {
this.gender = gender;
}
public String getAge() {
return age;
}
public void setAge(String age) {
this.age = age;
}
public String getTelephone() {
return telephone;
}
public void setTelephone(String telephone) {
this.telephone = telephone;
}
@Override
public String toString() {
return "User{" +
"id=" + id +
", name='" + name + '\'' +
", gender='" + gender + '\'' +
", age='" + age + '\'' +
", telephone='" + telephone + '\'' +
'}';
}
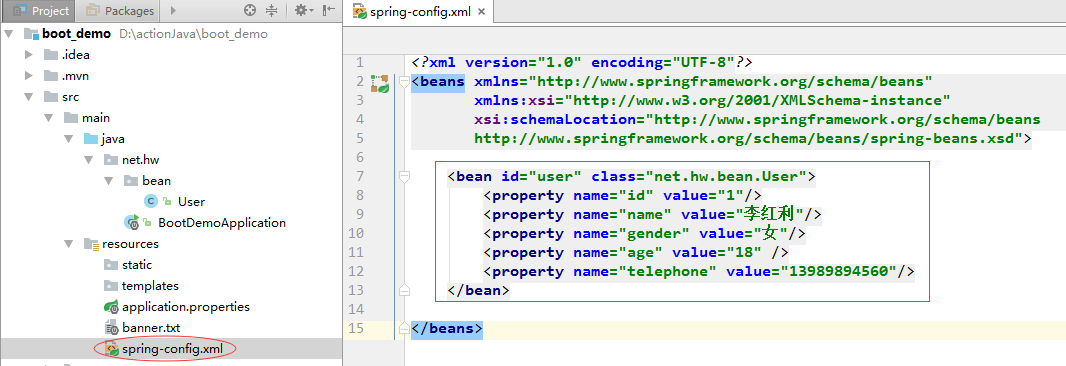
}(2)创建Spring配置文件spring-config.xml
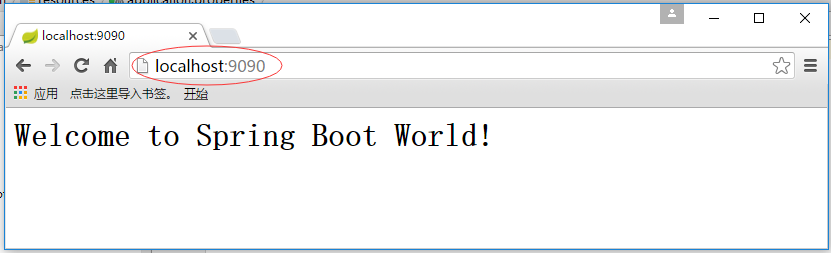
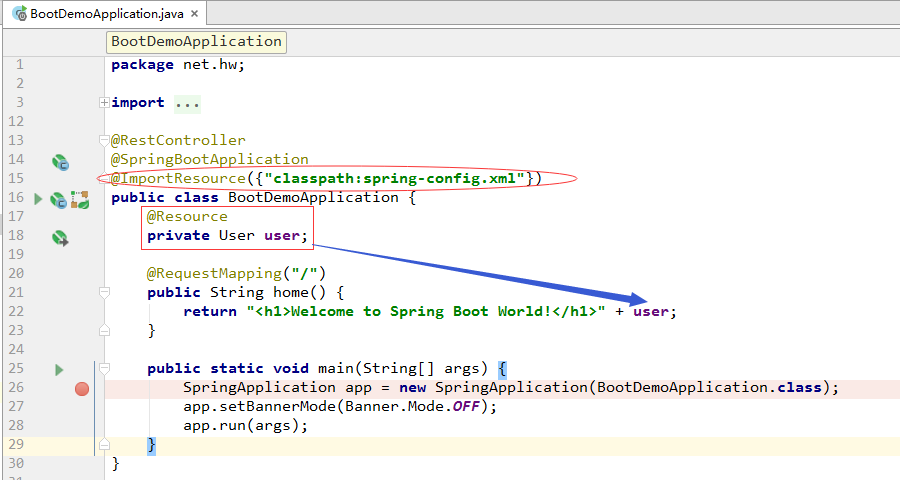
(3)修改入口类,导入spring-config.xml配置文件
(4)启动程序,访问http://localhost:8080
其实,也可以创建Spring MVC配置文件,在里面定义内部资源视图解析器。
二、访问静态资源静态资源(css、images、scripts)都放在resources\static目录里。下面以访问图片为例说明静态资源的访问。1、在static里创建images目录,拷贝一张图片
2、修改入口类BootDemoApplication
3、启动程序,访问http://localhost:8080
三、访问JSP资源Spring Boot建议采用的模板引擎包括Thymeleaf, Freemarker, Groovy, Velocity,官方不建议使用JSP页面,当然要使用也可以,但是必须将JSP页面放在跟resources同级的webapp目录里。1、创建webapp目录2、在webapp里创建WEB-INF目录3、在WEB-INF里创建views目录
4、在pom.xml文件里添加对jsp的支持
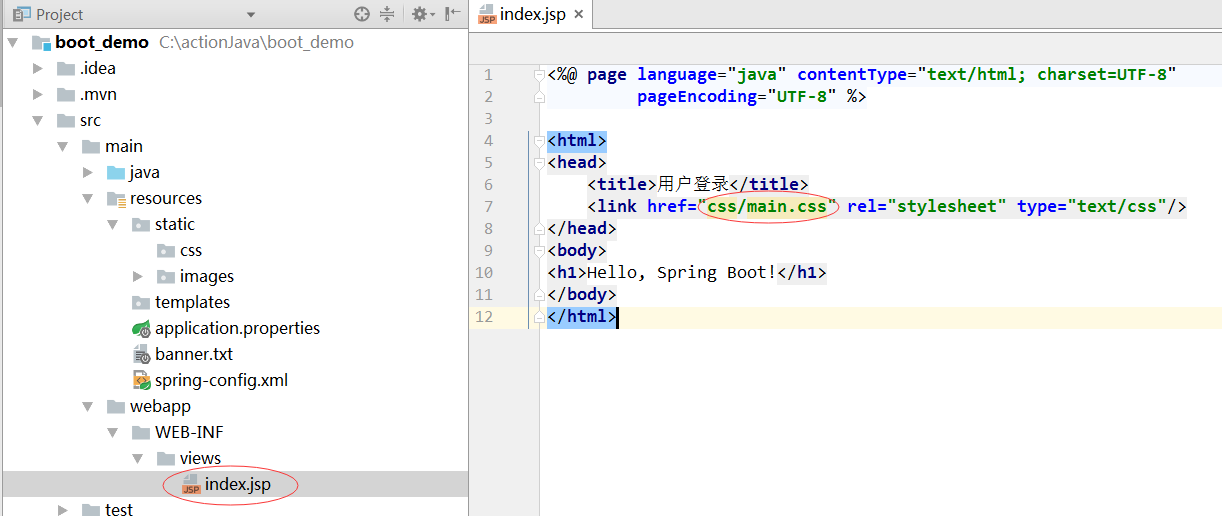
<dependency>
<groupId>org.apache.tomcat.embed</groupId>
<artifactId>tomcat-embed-jasper</artifactId>
</dependency>
<dependency>
<groupId>javax.servlet</groupId>
<artifactId>jstl</artifactId>
</dependency>
5、在views目录里创建起始页面index.jsp
6、在static/css目录创建main.css样式表文件
7、在resources目录创建spring-mvc-config.xml文件
8、在入口类上通过注解加载spring-mvc-config.xml配置文件
9、在webmvc子包里创建HelloController
10、启动程序,访问http://localhost:8080/hello
关于JSP页面的映射,还有另外两种方式可以实现。1、通过配置类来实现映射(1)在config子包里创建JspConfiguration配置类
(2)修改入口类,不用加载spring-mvc-config.xml配置文件
(3)启动程序,访问访问http://localhost:8080/hello
2、通过设置application.properties文件
3、将JspConfiguration配置类里定义内部资源视图解析器给注释掉
4、启动程序,访问访问http://localhost:8080/hello
四、使用Freemarker模板引擎1、创建book.properties属性文件
2、在templates里创建模板文件showBook.ftl
<!DOCTYPE html>
<html>
<head>
<title>显示图书信息</title>
</head>
<body>
<table border="1" cellpadding="5" cellspacing="0">
<tr>
<td>编号</td>
<td>${bookId}</td>
</tr>
<tr>
<td>书名</td>
<td>${bookName}</td>
</tr>
<tr>
<td>作者</td>
<td>${bookAuthor}</td>
</tr>
<tr>
<td>单价</td>
<td>${bookPrice}</td>
</tr>
<tr>
<td>出版社</td>
<td>${bookPress}</td>
</tr>
</table>
</body>
</html>3、在webmvc里创建BookController
package net.hw.webmvc;
import org.springframework.beans.factory.annotation.Value;
import org.springframework.context.annotation.PropertySource;
import org.springframework.stereotype.Controller;
import org.springframework.ui.ModelMap;
import org.springframework.web.bind.annotation.RequestMapping;
/**
* Created by howard on 2017/3/31.
*/
@Controller
@PropertySource("classpath:book.properties")
public class BookController {
@Value("${book.id}")
private String bookId;
@Value("${book.name}")
private String bookName;
@Value("${book.author}")
private String bookAuthor;
@Value("${book.price}")
private double bookPrice;
@Value("${book.press}")
private String bookPress;
@RequestMapping("/showBook")
public String showBook(ModelMap map) {
map.addAttribute("bookId", bookId);
map.addAttribute("bookName", bookName);
map.addAttribute("bookAuthor", bookAuthor);
map.addAttribute("bookPrice", bookPrice);
map.addAttribute("bookPress", bookPress);
return "showBook";
}
}4、在pom.xml文件增加jar包依赖
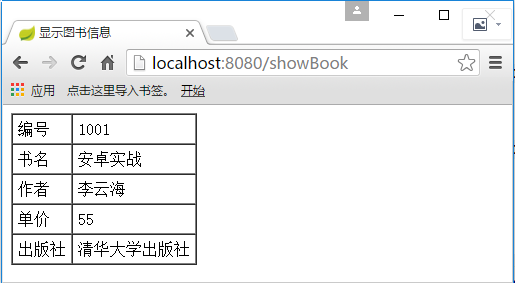
<dependency> <groupId>org.springframework.boot</groupId> <artifactId>spring-boot-starter-freemarker</artifactId> <version>1.5.2.RELEASE</version> </dependency>5、启动程序,访问http://localhost:8080/showBook
五、Spring Boot项目打包(jar形式)1、配置Maven的环境变量
2、在Intellij里切换到Terminal发布 mvn package命令:
3、进入target子目录,发布dir命令
4、命令行方式运行程序
(1)访问http://localhost:9090
访问http://localhost:8080,也是同样结果:
(2)访问http://localhost:9090/hello
但是访问http://localhost:8080/hello就没问题。
(3)访问http://localhost:9090/showBook
此时,访问http://localhost:8080/showBook,同样结果:
六、外部配置Spring Boot允许使用properties文件或者命令行参数作为外部配置1、命令行参数配置Spring Boot可以基于jar包运行。格式:java -jar xx.jar还可通过命令参数修改Tomcat端口号。java -jar xx.jar --server.port=9090
2、常规属性配置在Spring Boot里,在application.properties文件里定义属性,直接使用@Value注入即可。如果在其它属性文件里定义属性,就需要添加@PropertySource注解来指定属性文件的位置。
(1)在application.properties里定义属性
(2)在webmvc子包里创建ProductController
package net.hw.webmvc;
import org.springframework.beans.factory.annotation.Value;
import org.springframework.web.bind.annotation.RequestMapping;
import org.springframework.web.bind.annotation.RestController;
/**
* Created by howard on 2017/3/31.
*/
@RestController
public class ProductController {
@Value("${product.id}")
private int id;
@Value("${product.name}")
private String name;
@Value("${product.price}")
private double price;
@RequestMapping("/showProduct")
public String showProduct() {
return "产品编号:" + id
+ "<br>产品名称:" + name
+ "<br>产品单价:" + price;
}
}(3)运行程序,访问http://localhost:8080/showProduct
乱码一般是编码不一致导致的,我们在ProductController里通过@Value注解符读取application.properties文件里定义的属性,因此,我们去看看属性文件的编码形式。
原来属性文件采用GBK编码,需要修改成UTF-8。
此时,application.properties里就会出现乱码:
删掉乱码,重新输入产品名:
重新启动程序,访问http://localhost:8080/showProduct
2、类型安全的配置(基于properties)Spring Boot提供了基于类型安全的配置方式,通过@ConfigurationProperties将properties属性和一个Bean及其属性关联,从而实现类型安全的配置。(1)在application.properties里定义属性
(2)在bean子包里创建Student(类型安全的Bean)
package net.hw.bean;
import org.springframework.boot.context.properties.ConfigurationProperties;
import org.springframework.stereotype.Component;
/**
* Created by howard on 2017/3/31.
*/
@Component
@ConfigurationProperties(prefix = "student")
public class Student {
private int id;
private String name;
private String gender;
private int age;
private String telephone;
public int getId() {
return id;
}
public void setId(int id) {
this.id = id;
}
public String getName() {
return name;
}
public void setName(String name) {
this.name = name;
}
public String getGender() {
return gender;
}
public void setGender(String gender) {
this.gender = gender;
}
public int getAge() {
return age;
}
public void setAge(int age) {
this.age = age;
}
public String getTelephone() {
return telephone;
}
public void setTelephone(String telephone) {
this.telephone = telephone;
}
}(3)在webmvc子包里创建StudentController
package net.hw.webmvc;
import net.hw.bean.Student;
import org.springframework.beans.factory.annotation.Autowired;
import org.springframework.web.bind.annotation.RequestMapping;
import org.springframework.web.bind.annotation.RestController;
/**
* Created by howard on 2017/3/31.
*/
@RestController
public class StudentController {
@Autowired
private Student student;
@RequestMapping("/showStudent")
public String showStudent() {
return "学号:" + student.getId()
+ "<br>姓名:" + student.getName()
+ "<br>性别:" + student.getGender()
+ "<br>年龄:" + student.getAge()
+ "<br>电话:" + student.getTelephone();
}
}(4)启动程序,访问http://localhost:8080/showStudent
3、日志配置默认情况下,Spring Boot采用Logback作为日志框架。
运行程序,查看日志文件:
4、Profile配置Profile是Spring用来支持针对不同的环境提供不同的配置。全局Profile配置使用application-{profile}.properties。(1)创建生产环境下的配置文件application-prod.properties
(2)创建开发环境下的配置文件application-dev.properties
(3)在application.properties文件里设置当前环境配置
(4)运行程序,访问http://localhost:9999
七、Spring Boot运行原理Spring Boot关于自动配置的源码在spring-boot-autoconfigurer-1.5.2.RELEASE.jar内,主要包含了如下图所示的配置:
查看当前项目中已启用和未启用的自动配置的报告。(1)运行jar时增加--debug参数:(2)在application.properties中设置属性
启动程序,查看控制台。已启用的自动配置:
未启用的自动配置:
(一)运作原理@SpringBootApplication注解是一个组合注解,核心功能是由@EnableAutoConfiguration注解提供的。
其源码如下:
这里的关键功能是@Import注解导入的配置功能,EnableAutoConfigurationImportSelector使用SpringFactoriesLoader.loadFactoryNames方法扫描具有META-INF/spring.factories文件的jar包,而我们在spring-boot-autoconfigurer-1.5.2.RELEASE.jar里就有一个spring.factories文件,此文件中声明了有哪些自动配置:
(二)核心注解打开上面任意一个AutoConfiguration文件,一般都有下面的条件注解。
我们不妨来看一看@ConditionalOnWebApplicaiton注解。
此注解使用的条件是OnWebApplicationCondition,分析其源码:
package org.springframework.boot.autoconfigure.condition;

import org.springframework.boot.autoconfigure.condition.ConditionMessage;
import org.springframework.boot.autoconfigure.condition.ConditionOutcome;
import org.springframework.boot.autoconfigure.condition.ConditionalOnWebApplication;
import org.springframework.boot.autoconfigure.condition.SpringBootCondition;
import org.springframework.boot.autoconfigure.condition.ConditionMessage.Builder;
import org.springframework.context.annotation.ConditionContext;
import org.springframework.core.annotation.Order;
import org.springframework.core.type.AnnotatedTypeMetadata;
import org.springframework.util.ClassUtils;
import org.springframework.util.ObjectUtils;
import org.springframework.web.context.WebApplicationContext;
import org.springframework.web.context.support.StandardServletEnvironment;

@Order(-2147483628)
class OnWebApplicationCondition extends SpringBootCondition {
private static final String WEB_CONTEXT_CLASS = "org.springframework.web.context.support.GenericWebApplicationContext";

OnWebApplicationCondition() {
}

public ConditionOutcome getMatchOutcome(ConditionContext context, AnnotatedTypeMetadata metadata) {
boolean required = metadata.isAnnotated(ConditionalOnWebApplication.class.getName());
ConditionOutcome outcome = this.isWebApplication(context, metadata, required);
return required && !outcome.isMatch()?ConditionOutcome.noMatch(outcome.getConditionMessage()):(!required && outcome.isMatch()?ConditionOutcome.noMatch(outcome.getConditionMessage()):ConditionOutcome.match(outcome.getConditionMessage()));
}

private ConditionOutcome isWebApplication(ConditionContext context, AnnotatedTypeMetadata metadata, boolean required) {
Builder message = ConditionMessage.forCondition(ConditionalOnWebApplication.class, new Object[]{required?"(required)":""});
if(!ClassUtils.isPresent("org.springframework.web.context.support.GenericWebApplicationContext", context.getClassLoader())) {
return ConditionOutcome.noMatch(message.didNotFind("web application classes").atAll());
} else {
if(context.getBeanFactory() != null) {
String[] scopes = context.getBeanFactory().getRegisteredScopeNames();
if(ObjectUtils.containsElement(scopes, "session")) {
return ConditionOutcome.match(message.foundExactly("\'session\' scope"));
}
}

return context.getEnvironment() instanceof StandardServletEnvironment?ConditionOutcome.match(message.foundExactly("StandardServletEnvironment")):(context.getResourceLoader() instanceof WebApplicationContext?ConditionOutcome.match(message.foundExactly("WebApplicationContext")):ConditionOutcome.noMatch(message.because("not a web application")));
}
}
}(三)实例分析了解了Spring Boot的运作原理和主要的条件注解后,现在来分析一个简单的Spring Boot内置的自动配置功能:http的编码配置。我们在常规Spring项目中配置http编码时是在web.xml文件里配置一个filter:
<filter>
<filter-name>Character Encoding</filter-name>
<filter-class>org.springframework.web.filter.CharacterEncodingFilter</filter-class>
<init-param>
<param-name>encoding</param-name>
<param-value>UTF-8</param-value>
</init-param>
<init-param>
<param-name>forceEncoding</param-name>
<param-value>true</param-value>
</init-param>
</filter>
自动配置要满足两个条件:(1)能配置CharacterEncodingFilter这个Bean;(2)能配置encoding和forceEncoding这两个参数。
1、配置参数(通过HttpEncodingProperties)
package org.springframework.boot.autoconfigure.web;
import java.nio.charset.Charset;
import java.util.Locale;
import java.util.Map;
import org.springframework.boot.context.properties.ConfigurationProperties;
@ConfigurationProperties(
prefix = "spring.http.encoding"
)
public class HttpEncodingProperties {
public static final Charset DEFAULT_CHARSET = Charset.forName("UTF-8");
private Charset charset;
private Boolean force;
private Boolean forceRequest;
private Boolean forceResponse;
private Map<Locale, Charset> mapping;
public HttpEncodingProperties() {
this.charset = DEFAULT_CHARSET;
}
public Charset getCharset() {
return this.charset;
}
public void setCharset(Charset charset) {
this.charset = charset;
}
public boolean isForce() {
return Boolean.TRUE.equals(this.force);
}
public void setForce(boolean force) {
this.force = Boolean.valueOf(force);
}
public boolean isForceRequest() {
return Boolean.TRUE.equals(this.forceRequest);
}
public void setForceRequest(boolean forceRequest) {
this.forceRequest = Boolean.valueOf(forceRequest);
}
public boolean isForceResponse() {
return Boolean.TRUE.equals(this.forceResponse);
}
public void setForceResponse(boolean forceResponse) {
this.forceResponse = Boolean.valueOf(forceResponse);
}
public Map<Locale, Charset> getMapping() {
return this.mapping;
}
public void setMapping(Map<Locale, Charset> mapping) {
this.mapping = mapping;
}
boolean shouldForce(HttpEncodingProperties.Type type) {
Boolean force = type == HttpEncodingProperties.Type.REQUEST?this.forceRequest:this.forceResponse;
if(force == null) {
force = this.force;
}
if(force == null) {
force = Boolean.valueOf(type == HttpEncodingProperties.Type.REQUEST);
}
return force.booleanValue();
}
static enum Type {
REQUEST,
RESPONSE;
private Type() {
}
}
}代码解释:(1)在application.properties配置http编码时前缀是spring.http.encoding;
(2)默认编码方式为UTF-8,如果修改可使用spring.http.encoding.charset=编码;
2、配置Bean(通过HttpEncodingAutoConfiguration)
通过调用上述配置,并根据条件配置CharacterEncodingFilter的Bean,源码如下:
代码解释:(1)@EnableConfigurationProperties({HttpEncodingProperties.class}) 启用配置属性;(2)@ConditionalOnWebApplication 在项目是Web应用的条件下;(3)@ConditionalOnProperty( prefix = "spring.http.encoding", value = {"enabled"}, matchIfMissing = true) 当设置spring.http.encoding=enabled的情况下,如果没有设置则默认为true,即条件符合;(4)@ConditionalOnMissingBean({CharacterEncodingFilter.class}) 当容器中没有这个Bean的时候就新建Bean。
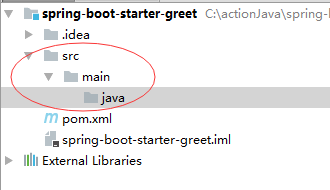
(四)实战练习编写一个starter pom,意味着我们不仅有自动配置的功能,而且具有更通用的耦合度更低的配置。(1)新建starter的Maven项目
(2)修改pom.xml文件
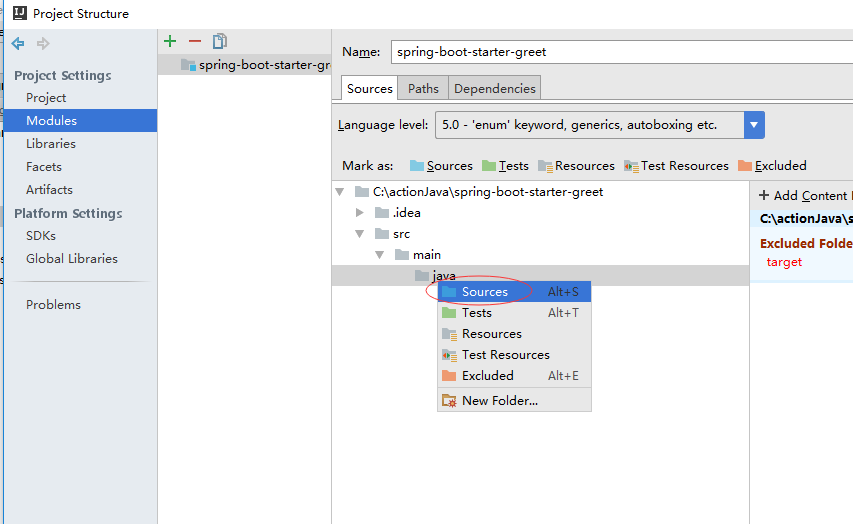
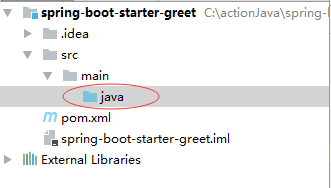
<?xml version="1.0" encoding="UTF-8"?>
<project xmlns="http://maven.apache.org/POM/4.0.0"
xmlns:xsi="http://www.w3.org/2001/XMLSchema-instance"
xsi:schemaLocation="http://maven.apache.org/POM/4.0.0 http://maven.apache.org/xsd/maven-4.0.0.xsd"> <modelVersion>4.0.0</modelVersion>

<groupId>net.hw</groupId>
<artifactId>spring-boot-starter-greet</artifactId>
<version>1.0-SNAPSHOT</version>
<packaging>jar</packaging>

<name>spring-boot-starter-greet</name>
<url>http://maven.apache.org</url>

<properties>
<project.build.sourceEncoding>UTF-8</project.build.sourceEncoding>
</properties>

<dependencies>
<dependency>
<groupId>org.springframework.boot</groupId>
<artifactId>spring-boot-autoconfigure</artifactId>
<version>1.5.2.RELEASE</version>
</dependency>
<dependency>
<groupId>junit</groupId>
<artifactId>junit</artifactId>
<version>3.8.1</version>
<scope>test</scope>
</dependency>
</dependencies>

</project>
(3)创建src/main/java目录
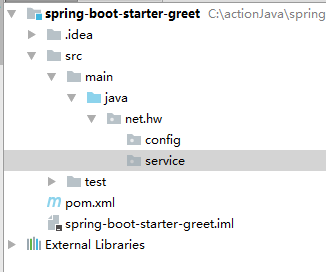
(4)创建包net.hw.config和net.hw.service
(5)在net.hw.config包里创建属性配置类
package net.hw.config;
import org.springframework.boot.context.properties.ConfigurationProperties;
/**
* Created by howard on 2017/4/2.
*/
@ConfigurationProperties(prefix = "greet")
public class GreetProperties {
private static String NAME = "World";
private String name = NAME;
public String getName() {
return name;
}
public void setName(String name) {
this.name = name;
}
}(6)在net.hw.service包里创建服务类
package net.hw.service;
/**
* Created by howard on 2017/4/2.
*/
public class GreetService {
private String name;
public String greet() {
return "Hello, " + name;
}
public String getName() {
return name;
}
public void setName(String name) {
this.name = name;
}
}(7)在net.hw包里创建自动配置类
package net.hw;
import net.hw.config.GreetProperties;
import net.hw.service.GreetService;
import org.springframework.beans.factory.annotation.Autowired;
import org.springframework.boot.autoconfigure.condition.ConditionalOnClass;
import org.springframework.boot.autoconfigure.condition.ConditionalOnMissingBean;
import org.springframework.boot.autoconfigure.condition.ConditionalOnProperty;
import org.springframework.boot.context.properties.EnableConfigurationProperties;
import org.springframework.context.annotation.Bean;
import org.springframework.context.annotation.Configuration;
/**
* Created by howard on 2017/4/2.
*/
@Configuration
@EnableConfigurationProperties(GreetProperties.class)
@ConditionalOnClass(GreetService.class)
@ConditionalOnProperty(prefix = "greet", value = "enabled", matchIfMissing = true)
public class GreetServiceAutoConfiguration {
@Autowired
private GreetProperties greetProperties;
@Bean
@ConditionalOnMissingBean(GreetService.class)
public GreetService greetService() {
GreetService greetService = new GreetService();
greetService.setName(greetProperties.getName());
return greetService;
}
}(8)注册配置若想自动配置生效,需要注册自动配置类。在src/main里创建resources目录,在里面创建META-INF/spring.factories。
(9)新建Spring Boot项目
(10)通过 mvn install 将项目安装到本地库
(11)在pom.xml中添加spring-boot-starter-greet的依赖
<dependency>
<groupId>net.hw</groupId>
<artifactId>spring-boot-starter-greet</artifactId>
<version>1.0-SNAPSHOT</version>
</dependency>
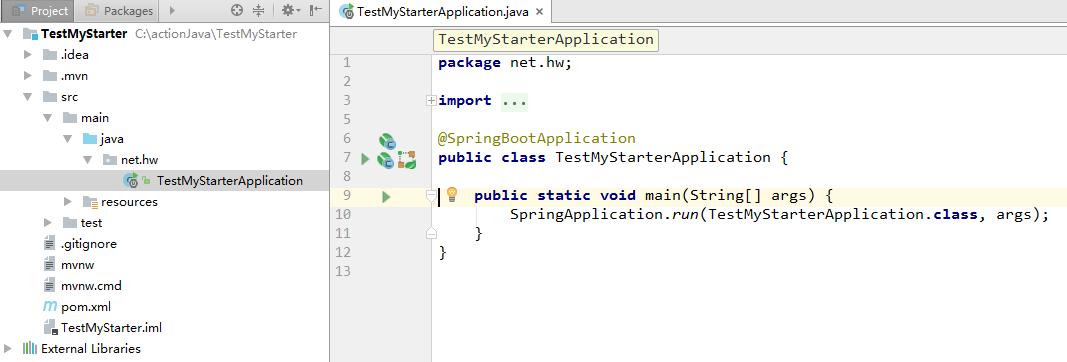
(12)修改入口类TestMyStarterApplication
package net.hw;

import net.hw.service.GreetService;
import org.springframework.beans.factory.annotation.Autowired;
import org.springframework.boot.SpringApplication;
import org.springframework.boot.autoconfigure.SpringBootApplication;
import org.springframework.web.bind.annotation.RequestMapping;
import org.springframework.web.bind.annotation.RestController;

@RestController
@SpringBootApplication
public class TestMyStarterApplication {
@Autowired
private GreetService greetService;

@RequestMapping("/")
public String home() {
return greetService.greet();
}

public static void main(String[] args) {
SpringApplication.run(TestMyStarterApplication.class, args);
}
}(13)启动程序,访问http://localhost:8080(14)在applicaion.properties里添加属性
(15)启动程序,访问http://localhost:8080

相关文章推荐
- Spring Boot 核心-外部配置
- 21-SpringBoot——核心-Web配置
- SpringBoot核心原理:自动化配置2
- Spring Boot核心原理-自动配置
- 22-SpringBoot——核心-Tomcat配置
- Spring Boot核心--基本配置
- Springboot的核心及相关配置
- 【SpringBoot】SpringBoot核心-基本配置
- Spring Boot核心-核心注解、自动配置、自定义banner
- Spring Boot核心原理-自动配置
- 【SpringBoot】核心依赖和自动配置
- SpringBoot14-springboot核心-外部配置,日志配置,Profile配置
- 【SpringBoot】SpringBoot核心-外部配置
- Spring-boot中读取核心配置文件application和自定义properties配置文件的方式
- Spring Boot核心原理-自动配置
- 19-SpringBoot——核心-Profile配置
- Spring Boot核心配置
- Spring Boot 核心注解与配置文件
- Spring Boot核心原理-自动配置 以及@ConfigurationProperties 注解
- SpringBoot13-springboot核心-基本配置