识别简单验证码, Java 实现
2018-01-15 00:00
399 查看
之前写过一个 Python PIL 识别验证码, 由于最近需求, 需要在 Android 中识别类似验证码,于是就用 Java 实现了一遍. 大概实现方法: 1, 获取图片, 分析验证码中每个数字的位置, 得到各个验证码块的 x, y, width, height. 2, 采集一定量的样本切割, 打上标签, 编码后生成字典. 3, 将要识别的验证码转换为灰度图, 降噪, 切片, 编码. 4 对比字典中各个值, 获取相似度, 返回每个切片与字典值相似度最高的值的下标.
验证码样本

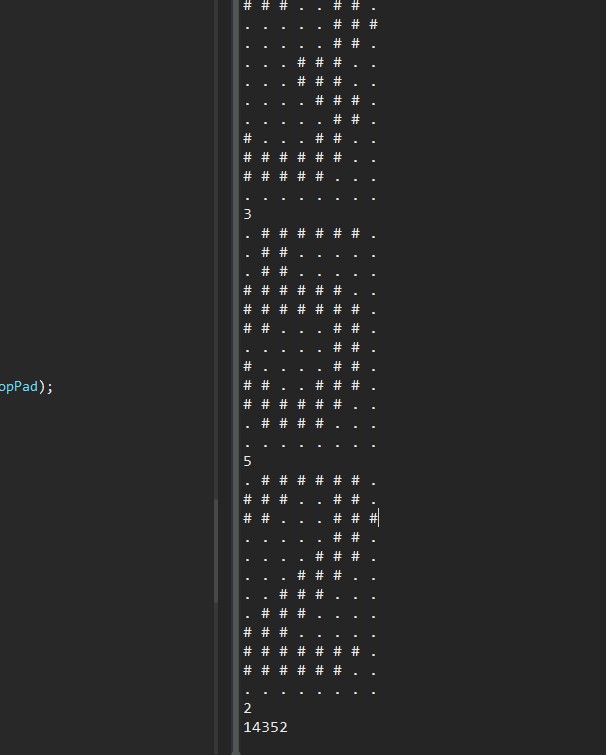
识别过程
(完)
首发于我的博客 denua 的博客
验证码样本
识别过程
package captcha;

import java.awt.Rectangle;
import java.awt.color.ColorSpace;
import java.awt.image.BufferedImage;
import java.awt.image.ColorConvertOp;
import java.io.BufferedReader;
import java.io.File;
import java.io.FileInputStream;
import java.io.FileOutputStream;
import java.io.FileReader;
import java.io.IOException;
import java.io.InputStream;
import java.io.OutputStream;
import java.io.Reader;

import javax.imageio.ImageIO;
import javax.swing.ImageIcon;
import javax.swing.JFrame;
import javax.swing.JLabel;

public class Scan {

// 切割开始位置 x 轴坐标
private final int cropStartX = 7;
// 切割开始位置 y 轴坐标
private final int cropStartY = 7;
private final int cropWidth = 8;
private final int cropHeight = 12;
// 切割数字间隔填充
private final int cropPad = 1;
// 过滤噪音阈值 ARGB 值小于这个的都为背影噪音, 大于这个的都为数字
private final int threshold = 0xff777777;

private String[] dict;
// 验证码默认大小
private int height = 22;
private int width = 63;

private BufferedImage bufferedImage;

public Scan(InputStream input){

try {
this.bufferedImage = ImageIO.read(input);

} catch (IOException e) {
e.printStackTrace();
}
}
/**
* 给图片降噪, 再此之前必须先将图片转换为 灰度图 BYTE_GRAY 模式 \n
* 将图片 低于阈值的像素点灰度变为 0 高于阈值的像素点灰度变为 255 \n
* 这样图片就只有黑白两种颜色了
*
*/
public void denoise(){

BufferedImage res = new BufferedImage(width, height, BufferedImage.TYPE_BYTE_GRAY);

int[] rgb = new int[width * height];
this.bufferedImage.getRGB(0, 0, width, height, rgb, 0, width);

for(int index=0; index<rgb.length; index++){
int pixel = rgb[index];
// 小于阈值则变白否则变黑
if(pixel < this.threshold)
rgb[index] = 0xff000000;
else
rgb[index] = 0xffffffff;
}

res.setRGB(0, 0, width, height, rgb, 0, width);
this.bufferedImage = res;
}
/**
* 将传入的灰度图转换为一个 0, 1 二值数组.
* 灰度图需已经降噪
*
* @param img 需要二值化的灰度图
*
* @return 灰度值对应的二值数组
*/
public byte[] getBin(BufferedImage img){

int w = img.getWidth();
int h = img.getHeight();
byte[] bin = new byte[w*h];

for(int x=0; x<h; x++){
for(int y=0; y<w; y++){
// 获取像素
int pixel = img.getRGB(y, x);
// 纯黑则为1
if(pixel == 0xffffffff)
bin[x*w + y] = 1;
else
bin[x*w + y] = 0;
}
}

return bin;
}
/**
* 将图片转换为灰度图
*
*/
public void convertGrayMode(){

ColorSpace cs = ColorSpace.getInstance(ColorSpace.CS_GRAY);
ColorConvertOp op = new ColorConvertOp(cs, null);

this.bufferedImage = op.filter(bufferedImage, null);
}
/**
* 将验证码图片切割为五部分
* 将数字部分切割
*
* @param x1 第一个数字的右上角 x 坐标
* @param y1 第一个数字的右上角 y 坐标
* @param h 各部分的高度
* @param w 各部分的宽度
* @param pad 各部分间隔
*
* @return 验证码的五个数字部分
*/
private BufferedImage[] getPart(int x1, int y1, int w, int h, int pad){

// 用于保存和返回切割的四部分
BufferedImage[] imagePart = new BufferedImage[5];

// 五个部分的位置,
3fe8
各个部分的  x 等于 x1 + n * pad, n=位置
Rectangle[] part = new Rectangle[5];

part[0] = new Rectangle(x1 + 0 * pad + w * 0, y1, h, w);
part[1] = new Rectangle(x1 + 1 * pad + w * 1, y1, h, w);
part[2] = new Rectangle(x1 + 2 * pad + w * 2, y1, h, w);
part[3] = new Rectangle(x1 + 3 * pad + w * 3, y1, h, w);
part[4] = new Rectangle(x1 + 4 * pad + w * 4, y1, h, w);

// 用于存放 rgb 值
int[] rgbTamp = new int[w*h];

for(int index=0; index < 5; index++){

int x = part[index].x;
int y = part[index].y;

// 将每个部分存放到临时数组中
this.bufferedImage.getRGB(x, y, w, h, rgbTamp, 0, w);
// 新建图像
imagePart[index] = new BufferedImage(w, h, BufferedImage.TYPE_BYTE_GRAY);
// 将数 rgb 组数据填入 新图像
imagePart[index].setRGB(0, 0, w, h, rgbTamp, 0, w);
}

return imagePart;
}
/**
* 从文件中读取已保存的验证码特征值
*
*
* @param path
*/
public void setDict(File dict){

try {
Reader in = new FileReader(dict);
BufferedReader reader = new BufferedReader(in);

String str = "";
String temp;
while((temp = reader.readLine()) != null){
str += temp;
}
this.dict = str.split("#");//Arrays.copyOfRange(str.split("#"), 0, 10);
in.close();

} catch (IOException e) {
e.printStackTrace();
}
}
/**
* 获取所选数字的所有字典值
*
* @param number 要获得字典的数字
*
* @return byte[10][imagePixelCount] 字典
*/
public byte[][] getDict(int number){

byte[][] dictx = new byte[10][cropHeight * cropWidth];

String str = this.dict[number];
String[] each = str.split(",\\|");

for(int i=0; i<10; i++){
String[] part = each[i].split(",");
byte[] data = new byte[cropHeight * cropWidth];

for(int index=0; index<data.length; index++)
data[index] = Byte.valueOf(part[index]);
dictx[i] = data;
}

return dictx;
}
/**
* 获取验证码切片的结果
* 验证码切片先转换为 二值 数组, 再与字典中的每个值对比
* 得出每个数字的像素点相似率, 相似率最大的就为结果
*
* @param img 验证码切片对应二值数组
*
* @return 验证码切片识别的数字
*/
public int getResult(byte[] binImg){

// 十个数字的相似度
double[] same = new double[10];
// 结果
int res = -1;

// 对比每个数字
for(int n=0; n<10; n++){
// 获取当前数字的字典值
byte[][] dictx = getDict(n);
// 用于统计值一致的像素点数量
double sm = 0;
// 与每组值对比
for(int r=0; r<10; r++){
// 当前组的值
byte[] now = dictx[r];
// 与当前组每个像素点对比
for(int index=0; index < (cropWidth*cropHeight); index++){
// 如果相似则统计加一
if(now[index] == binImg[index]){
sm += 1;
};
}
}
// 与当前数字的相似度 12*8*10=960 => 1000
same
= sm/1000;// (cropWidth*cropHeight*10);
}

double max = 0;
// 获取最大值的下标
for(int i=0; i<10; i++){
if(same[i]>max){
res = i;
max = same[i];
}
}

return res;
}
/**
* 从已打好标签的图片中生成字典
* 目录中包含数字 0-9 命名的文件夹, 每个文件夹里是对应的验证码中数字的切片
*
* @param LabeledDir 标记图片的目录
* @param saveFile 字典储存文件
* @throws IOException
*/
public void generaterDict(File LabeledDir, File saveFile) throws IOException{

String s = "";
// 枚举每个文件夹
for(File n:LabeledDir.listFiles()){

File[] imgs = n.listFiles();
int size = 0;

// 枚举每个数字
for(File im:imgs){
// 只生成 10 个值
if(size++>9) break;

BufferedImage bim = ImageIO.read(im);
// 获取对应的二值数组
byte[] bin = getBin(bim);
// 转换并添加分隔符
for(byte b:bin) s += String.valueOf(b) + ",";
// 每组值的分隔符
s += "|";
}
// 每个数字的分隔符
s += "\n#";
}
OutputStream out = new FileOutputStream(saveFile);

out.write(s.getBytes());
out.close();
}
/**
* 开始识别验证码内容
* 1, 转换为灰度图
* 2, 降噪
* 3, 识别每个切片
*
* @return 结果
*/
private String scan(){

String result = "";
convertGrayMode();
denoise();

BufferedImage[] parts = getPart(cropStartX, cropStartY, cropWidth, cropHeight, cropPad);
for(BufferedImage part : parts){
byte[] binImg = getBin(part);
printBin(binImg);
p(getResult(binImg));
}

return result;
}

public static void main(String[] args) throws IOException {

File f = new File("H:\\temp\\0.gif");
InputStream in = new FileInputStream(f);

Scan scan = new Scan(in);
scan.setDict(new File("H:\\Desktop\\Python\\school_data_spider\\sc.dict"));
scan.scan();

in.close();
}
/**
* 打印二值验证码切片
*
* @param bin 二值验证码切片
*/
public void printBin(byte[] bin){

for(int x=0; x<cropHeight; x++){
for(int y=0; y<cropWidth; y++){
if(bin[x*8 + y] == 1)
System.out.print(". ");
else
System.out.print("# ");
}
System.out.println("");
}
}
public void show(BufferedImage im){

JFrame frame = new JFrame("IMAGE");

JLabel l = new JLabel(new ImageIcon(im));
frame.add(l);

frame.setBounds(600, 300, 200, 100);
frame.setDefaultCloseOperation(JFrame.EXIT_ON_CLOSE);
frame.setVisible(true);
}

public void p(Object obj){

System.out.println(obj);
}
}
(完)
首发于我的博客 denua 的博客

相关文章推荐
- java识别验证码-用tess4j实现超简单调用tessreact-orc来破解验证码
- Cage 是一个 Java 实现的验证码图片生成库,快速、小型和简单。
- Java简单验证码的识别
- 【KNN近邻算法】实现识别简单数字验证码(算法原理+代码笔记)
- 图片验证码自动识别,使用tess4j进行验证码自动识别(java实现)
- Java简单验证码的识别
- Java日记——识别简单的验证码
- Ocrking图片识别之Java实现本地验证码的识别
- java实现一个简单的验证码生成器
- java实现简单的登录验证码 4000
- 简单验证码图片识别BMP,C,C++,C#,JAVA,脚本-网络攻防大赛笔记(1)
- java 实现简单文本验证码思路源码
- 简单实现Java验证码功能
- 简单验证码的识别(matlab实现)
- java awt 实现简单的验证码图片的生成
- Python2.7+pytesser实现简单验证码的识别方法
- Java实现验证码简单示例
- Java 实现随机验证码功能简单实例
- java 简单验证码实现
- 简单的谈一下怎么Java的验证码的实现