Spring Boot入门小案例
2018-01-04 10:14
375 查看
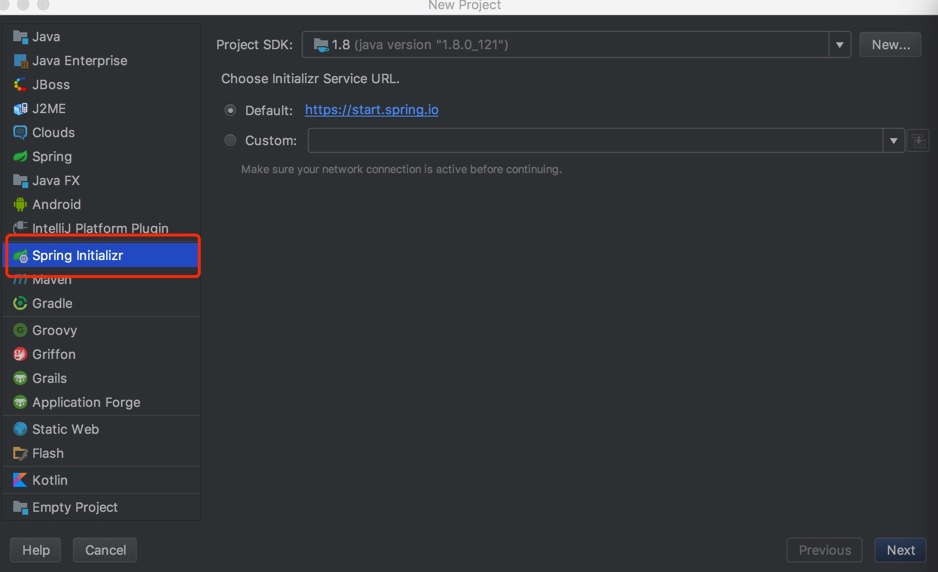
1.打开IDEA,创建新项目,选择Spring Initializr
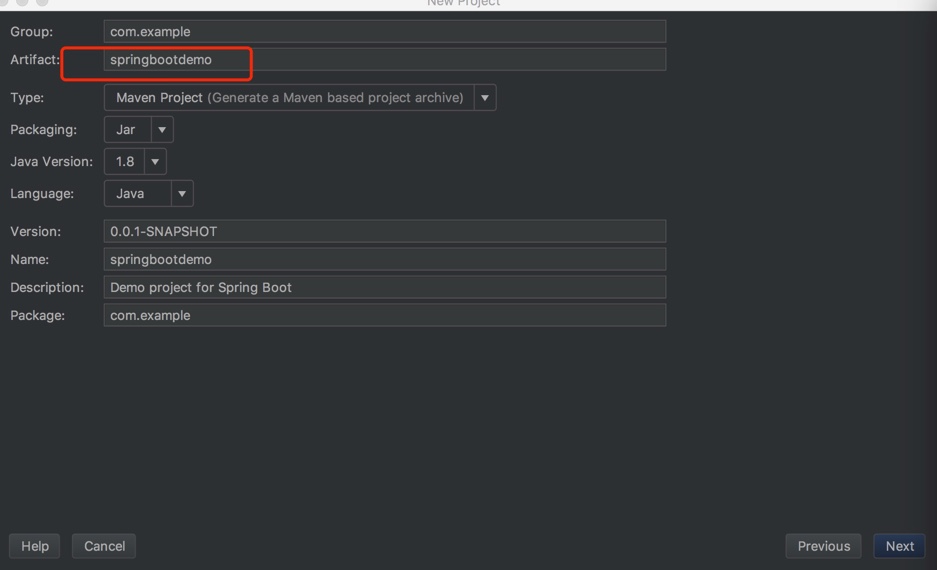
2.输入Artifact
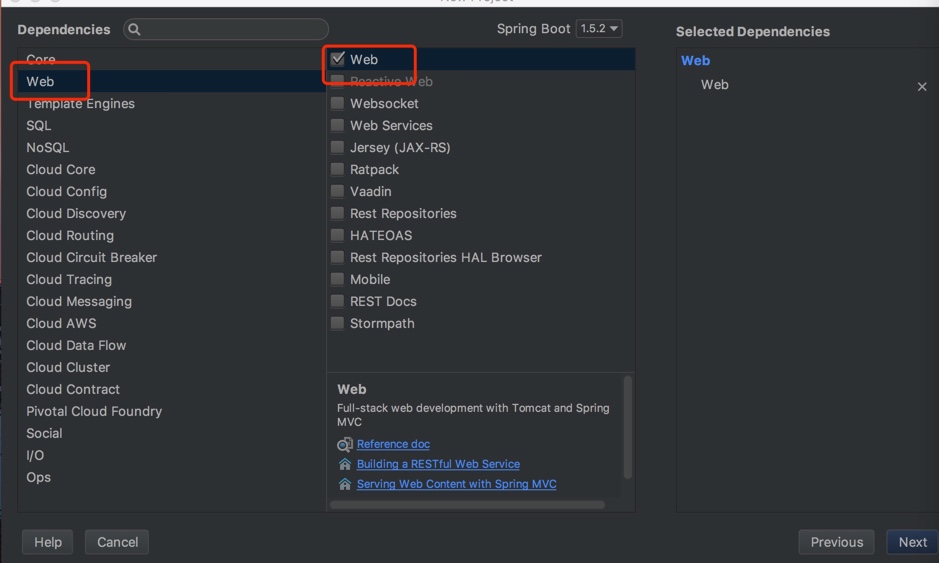
3.勾选Web
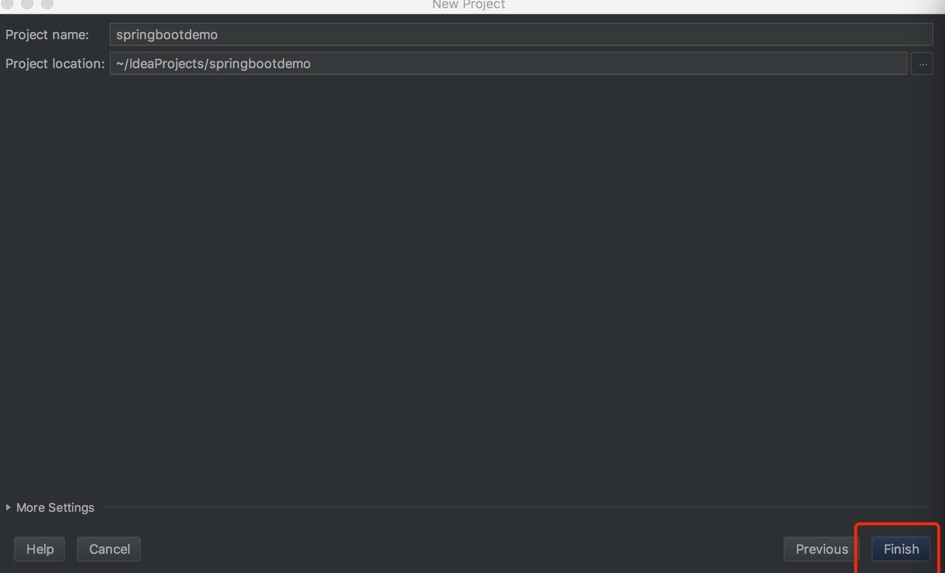
4.点击finish完成(是不是很简单!!)
5.配置文件介绍
pom.xml文件:
[html] view
plain copy
<?xml version="1.0" encoding="UTF-8"?>
<project xmlns="http://maven.apache.org/POM/4.0.0" xmlns:xsi="http://www.w3.org/2001/XMLSchema-instance"
xsi:schemaLocation="http://maven.apache.org/POM/4.0.0 http://maven.apache.org/xsd/maven-4.0.0.xsd">
<modelVersion>4.0.0</modelVersion>
<groupId>com.example</groupId>
<artifactId>springbootdemo</artifactId>
<version>0.0.1-SNAPSHOT</version>
<packaging>jar</packaging>
<name>springbootdemo</name>
<description>Demo project for Spring Boot</description>
<!--起步依赖--
18cfc
>
<parent>
<groupId>org.springframework.boot</groupId>
<artifactId>spring-boot-starter-parent</artifactId>
<version>1.5.2.RELEASE</version>
<relativePath/> <!-- lookup parent from repository -->
</parent>
<properties>
<project.build.sourceEncoding>UTF-8</project.build.sourceEncoding>
<project.reporting.outputEncoding>UTF-8</project.reporting.outputEncoding>
<java.version>1.8</java.version>
</properties>
<dependencies>
<!--开发web项目相关依赖-->
<dependency>
<groupId>org.springframework.boot</groupId>
<artifactId>spring-boot-starter-web</artifactId>
</dependency>
<!--springboot单元测试-->
<dependency>
<groupId>org.springframework.boot</groupId>
<artifactId>spring-boot-starter-test</artifactId>
<scope>test</scope>
</dependency>
</dependencies>
<!--maven构建-->
<build>
<plugins>
<plugin>
<groupId>org.springframework.boot</groupId>
<artifactId>spring-boot-maven-plugin</artifactId>
</plugin>
</plugins>
</build>
</project>
application.yml文件:
springboot可以通过yml文件进行一些属性配置来代替properties文件。设置数据库连接,工程根目录
2
3
4
5
6
7
8
9
6.创建一个HelloController
[java] view
plain copy
package com.example;
import org.springframework.web.bind.annotation.RequestMapping;
import org.springframework.web.bind.annotation.RestController;
@RestController
public class HelloController {
@RequestMapping("/hello")
public String hello() {
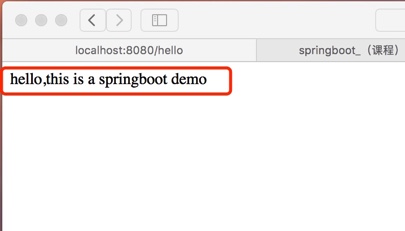
return "hello,this is a springboot demo";
}
}
7.程序自动生成的SpringbootdemoApplication,会有一个@SpringBootApplication的注解,这个注解用来标明这个类是程序的入口。
@SpringBootApplication开启了Spring的组件扫描和springboot的自动配置功能,相当于将以下三个注解组合在了一起
(1)@Configuration:表名该类使用基于Java的配置,将此类作为配置类
(2)@ComponentScan:启用注解扫描
(3)@EnableAutoConfiguration:开启springboot的自动配置功能
[java] view
plain copy
package com.example;
import org.springframework.boot.SpringApplication;
import org.springframework.boot.autoconfigure.SpringBootApplication;
//入口
@SpringBootApplication
public class SpringbootdemoApplication {
public static void main(String[] args) {
SpringApplication.run(SpringbootdemoApplication.class, args);
}
}
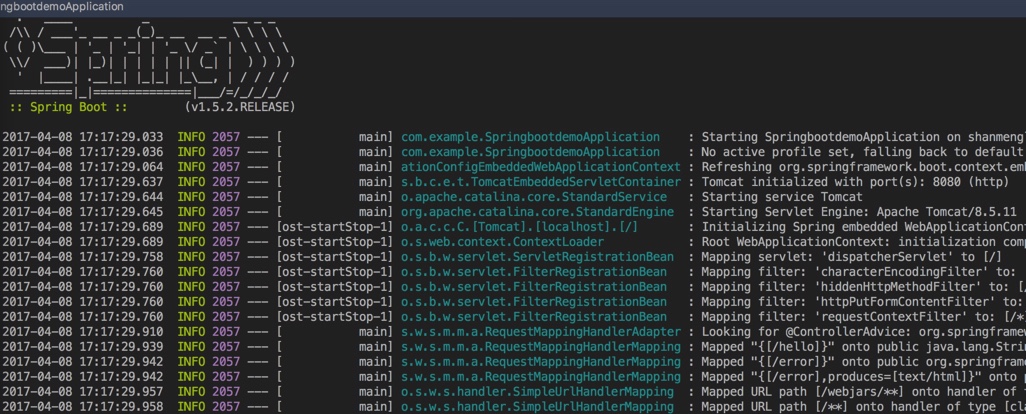
8.运行SpringbootdemoApplication类
测试:
在地址栏中输入http://localhost:8080/hello

2.输入Artifact

3.勾选Web

4.点击finish完成(是不是很简单!!)

5.配置文件介绍
pom.xml文件:
[html] view
plain copy
<?xml version="1.0" encoding="UTF-8"?>
<project xmlns="http://maven.apache.org/POM/4.0.0" xmlns:xsi="http://www.w3.org/2001/XMLSchema-instance"
xsi:schemaLocation="http://maven.apache.org/POM/4.0.0 http://maven.apache.org/xsd/maven-4.0.0.xsd">
<modelVersion>4.0.0</modelVersion>
<groupId>com.example</groupId>
<artifactId>springbootdemo</artifactId>
<version>0.0.1-SNAPSHOT</version>
<packaging>jar</packaging>
<name>springbootdemo</name>
<description>Demo project for Spring Boot</description>
<!--起步依赖--
18cfc
>
<parent>
<groupId>org.springframework.boot</groupId>
<artifactId>spring-boot-starter-parent</artifactId>
<version>1.5.2.RELEASE</version>
<relativePath/> <!-- lookup parent from repository -->
</parent>
<properties>
<project.build.sourceEncoding>UTF-8</project.build.sourceEncoding>
<project.reporting.outputEncoding>UTF-8</project.reporting.outputEncoding>
<java.version>1.8</java.version>
</properties>
<dependencies>
<!--开发web项目相关依赖-->
<dependency>
<groupId>org.springframework.boot</groupId>
<artifactId>spring-boot-starter-web</artifactId>
</dependency>
<!--springboot单元测试-->
<dependency>
<groupId>org.springframework.boot</groupId>
<artifactId>spring-boot-starter-test</artifactId>
<scope>test</scope>
</dependency>
</dependencies>
<!--maven构建-->
<build>
<plugins>
<plugin>
<groupId>org.springframework.boot</groupId>
<artifactId>spring-boot-maven-plugin</artifactId>
</plugin>
</plugins>
</build>
</project>
application.yml文件:
springboot可以通过yml文件进行一些属性配置来代替properties文件。设置数据库连接,工程根目录
spring:
datasource:
driver-class-name: com.mysql.jdbc.Driver
username: root
password: 123456
url: jdbc:mysql://localhost:3306/springboot_test?characterEncoding=utf-8&useSSL=false

server:
context-path: /userCentre
1
2
3
4
5
6
7
8
9
6.创建一个HelloController
[java] view
plain copy
package com.example;
import org.springframework.web.bind.annotation.RequestMapping;
import org.springframework.web.bind.annotation.RestController;
@RestController
public class HelloController {
@RequestMapping("/hello")
public String hello() {
return "hello,this is a springboot demo";
}
}
7.程序自动生成的SpringbootdemoApplication,会有一个@SpringBootApplication的注解,这个注解用来标明这个类是程序的入口。
@SpringBootApplication开启了Spring的组件扫描和springboot的自动配置功能,相当于将以下三个注解组合在了一起
(1)@Configuration:表名该类使用基于Java的配置,将此类作为配置类
(2)@ComponentScan:启用注解扫描
(3)@EnableAutoConfiguration:开启springboot的自动配置功能
[java] view
plain copy
package com.example;
import org.springframework.boot.SpringApplication;
import org.springframework.boot.autoconfigure.SpringBootApplication;
//入口
@SpringBootApplication
public class SpringbootdemoApplication {
public static void main(String[] args) {
SpringApplication.run(SpringbootdemoApplication.class, args);
}
}
8.运行SpringbootdemoApplication类

测试:
在地址栏中输入http://localhost:8080/hello

相关文章推荐
- Spring Boot 入门案例与配置说明
- dubbo整合springboot入门案例
- Springboot案例入门
- SpringBoot 整合 SpringData 入门案例(一)
- 入门整合案例(SpringBoot+Spring-data-elasticsearch) ---- (指定分词器)
- 5.1 入门整合案例(SpringBoot+Spring-data-elasticsearch) ---- good
- SpringBoot入门案例
- Spring boot入门,整合mybatis开发案例
- 5.1 入门整合案例(SpringBoot+Spring-data-elasticsearch) ---- good
- IntelliJ IDEA 中开发springboot之入门案例(HelloWorld)
- day2-180315-springboot经典入门案例
- Spring_boot 入门学习00
- Spring boot 多模块入门
- spring boot 原理及快速入门一(springboot)
- <springBoot>(三)(入门篇)Eclipse中yml文件格式化显示
- Spring Boot 2.0 的快速入门(图文教程)
- 微服务开发的入门级框架Spring Boot详解(五)
- spring-boot入门
- SpringBoot入门系列:第三篇 日志输出
- spring boot 入门学习
