Unity3D - 详解Quaternion类
2017-12-21 16:10
281 查看
一、简介
Quaternion又称四元数,由x,y,z和w这四个分量组成,是由爱尔兰数学家威廉·卢云·哈密顿在1843年发现的数学概念。四元数的乘法不符合交换律。从明确地角度而言,四元数是复数的不可交换延伸。如把四元数的集合考虑成多维实数空间的话,四元数就代表着一个四维空间,相对于复数为二维空间。
四元数
关于四元数的性质、与旋转的关系、球型线性插值的介绍,请阅读3D游戏与计算机图形学中的数学方法-四元数,在此不多做介绍。下面主要介绍的是Unity中的四元数-Quaternion。
在Unity中,用Quaternion来存储和表示对象的旋转角度。Quaternion的变换比较复杂,对于GameObject一般的旋转及移动,可以用Transform中的相关方法实现。
二、Quaternion类属性
eulerAngles-欧拉角
定义public Vector3 eulerAngles{get;set;}如何改变一个游戏对象旋的转状态,我们可以通过改变其Transform进行欧拉角的变换次序,例如假设p(x,y,z)是游戏对象上的一个点,绕x轴旋转a角,绕y轴旋转b角,绕z轴旋转c角,这样就可以得到旋转之后的状态p'(x',y',z')。Unity的实现过程是很简单的,一句代码就可以搞定。但是具体的实现过程确实很复杂的,详情请阅读3D游戏与计算机图形学中的数学方法-变换。
下面给出一个例子,演示一下如何使用欧拉角。
using UnityEngine;
using System.Collections;

public class EulerAngler_ts : MonoBehaviour {
public Transform A, B;
Quaternion rotations = Quaternion.identity;
Vector3 eulerAngle = Vector3.zero;
float speed = 10.0f;
float tSpeed = 0.0f;
// Use this for initialization
void Start () {

}

// Update is called once per frame
void Update () {
tSpeed += speed * Time.deltaTime;
//第一种方式:将Quaternion实例对象赋值给transform的rotation
rotations.eulerAngles = new Vector3(0.0f, tSpeed, 0.0f);
A.rotation = rotations;
//第二种方式:将三位向量代表的欧拉角直接赋值给transform的eulerAngle
B.eulerAngles = new Vector3(0.0f, tSpeed, 0.0f);
}
}
三、Quaternion类实例方法
1、SetFromToRotation方法-创建rotation实例
1.1 函数原型
public void SetFromToRotion(Vector3 fromDirection,Vector3 toDirection);
可以创建一个从formDirection到toDirection的Quaternion实例。
Quaternion q = Quaternion.identity;
q.SetFromToRotation(v1,v2);
transform.rotation = q;
可以将GameObject对象进行如下变换:首先将GameObject对象自身坐标系的x,y,z轴方向和世界坐标系的x,y,z轴方向一致,然后将GameObject对象自身坐标系中向量V1指向的方向旋转到V2方向。
1.2 PS:不可以直接使用transform.rotation.SetFromToRotation(v1,v2)方式进行设置,只能将实例化的Quaternion复制给transform.rotation。
1.3 实例演示
using UnityEngine;
using System.Collections;

public class SetFromToDirection_ts : MonoBehaviour {
public Transform A, B, C;
Quaternion q = Quaternion.identity;
// Use this for initialization
void Start () {

}

// Update is called once per frame
void Update () {

q.SetFromToRotation(A.position, B.position);
C.rotation = q;
Debug.DrawLine(Vector3.zero, A.position, Color.red);
Debug.DrawLine(Vector3.zero, B.position, Color.green);
Debug.DrawLine(C.position, C.position + new Vector3(0.0f, 1.0f, 0.0f), Color.black);
Debug.DrawLine(C.position, C.TransformPoint(Vector3.up * 1.5f), Color.yellow);
}
}
运行结果如下图所示:

2、SetLookRotation方法-设置Quaternion实例的朝向
2.1 函数原型
public void SetLookRotation(Vector3 view);
public void SetLookRotation(Vector3 view,Vector3 up);
例如:
Quaternion q = Quaternion.identity;
q.SetLookRotation(v1,v2);
transform.rotation = q;
transform.forward方向与V1方向相同。
transform.right垂直于由Vector3.zer0、V1和V2这3点构成的平面。
V2决定了transform.up的朝向,因为当transform.forward和transform.right方向确定后,transform.up的方向总会与V2的方向的夹角小于或等于90度。
当V1为Vector3.zero时,方法失效。
2.2 PS:同上,不要直接使用transform.rotation.SetLookRotation(v1,v2)的方式来实例化Quaternion对象。
2.3 实例演示
using UnityEngine;
using System.Collections;

public class SetLookRotation_ts : MonoBehaviour {

public Transform A, B, C;
Quaternion q = Quaternion.identity;
// Use this for initialization
void Start()
{

}

// Update is called once per frame
void Update()
{

q.SetLookRotation(A.position, B.position);
C.rotation = q;
Debug.DrawLine(Vector3.zero, A.position, Color.red);
Debug.DrawLine(Vector3.zero, B.position, Color.green);
Debug.DrawLine(C.position, C.TransformPoint(Vector3.right * 1.5f), Color.black);
Debug.DrawLine(C.position, C.TransformPoint(Vector3.forward * 1.5f), Color.yellow);

Debug.Log("C.right与A的夹角: " + Vector3.Angle(C.right, A.position));
Debug.Log("C.right与B的夹角: " + Vector3.Angle(C.right, B.position));
Debug.Log("C.up与B的夹角: " + Vector3.Angle(C.up, B.position));
}
}
运行结果


3、ToAngleAxis方法
3.1 函数原型
public void ToAngleAxis(out float angle,out Vector3 axis);
参数angle为旋转角,参数axis为轴向量。
该函数可以实现将GameObject对象的rotation从Quaternion.identity状态变换到当前状态,只需要将GameObject对象绕着axis轴(世界坐标系)旋转angle角度即可。
3.2 实例演示
using UnityEngine;
using System.Collections;
public class ToAngleAxis_ts : MonoBehaviour {
public Transform A, B;
float angle;
Vector3 axis = Vector3.zero;
float xSpeed = 0.0f, ySpeed = 0.0f, zSpeed = 0.0f;
// Use this for initialization
void Start () {
}
// Update is called once per frame
void Update () {
xSpeed += 0.5f * Time.deltaTime;
ySpeed += 1.0f * Time.deltaTime;
zSpeed += 2.5f * Time.deltaTime;
A.eulerAngles = new Vector3(xSpeed, ySpeed, zSpeed);
//获取A的rotation的旋转轴和角度
A.rotation.ToAngleAxis(out angle, out axis);
//设置B的rotation,使得B的rotation和A相同
B.rotation = Quaternion.AngleAxis(angle, axis);
}
}四、Quaternion类静态方法
Quaternion中的静态方法有9个即:Angle方法、Dot方法、Euler方法、FromToRotation方法、Inverse方法、Lerp方法、LookRotation方法、RotateToWards方法和Slerp方法。关于静态的方法的使用就是直接用类名调用其静态方法,例如Quaternion.Angle(q1,q2);下面对这些静态方法做下分析。1、Angle方法
1.1 函数原型
public static float Angle(Quaternion a,Quaternion b);
该方法可以计算两个旋转状态a达到b时需要旋转的最小夹角。1.2 实例演示
using UnityEngine;
using System.Collections;
public class Angle_ts : MonoBehaviour {
// Use this for initialization
void Start () {
Quaternion q1 = Quaternion.identity;
Quaternion q2 = Quaternion.identity;
q1.eulerAngles = new Vector3(30.0f, 40.0f, 50.0f);
float a1 = Quaternion.Angle(q1, q2);
float a2 = 0.0f;
Vector3 v = Vector3.zero;
q1.ToAngleAxis(out a2,out v);
Debug.Log("a1: " + a1);
Debug.Log("a2: " + a2);
Debug.Log("q1的欧拉角: " + q1.eulerAngles + " q1的rotation: " + q1);
Debug.Log("q2的欧拉角: " + q2.eulerAngles + " q2的rotation: " + q2);
}
// Update is called once per frame
void Update () {
}
}
运行结果

从输出结果可以看出a1和a2的值相等,即Angle的返回值是两个Quaternion实例转换的最小夹角。2、Dot方法-点乘
2.1 函数原型
public static float Dot(Quaternion a,Quaternion b);
该方法可以根据点乘的结果,判断a和b对应欧拉角的关系。例如有两个Quaternion实例q1(x1,y1,z1,w1)和q2(x2,y2,z2,w2),则float f = Quaternion.Dot(q1,q2);即f = x1*x2+y1*y2+z1*z2+w1*w2,结果值f的范围为[-1,1]。当f=+(-)1时,q1和q2对应的欧拉角是相等的,即旋转状态是一致的。特别地,当f = -1时,说明其中一个rotation比另外一个rotation多旋转了360°。2.2 实例演示
using UnityEngine;
using System.Collections;
public class Dot_ts : MonoBehaviour {
public Transform A, B;
Quaternion q1 = Quaternion.identity;
Quaternion q2 = Quaternion.identity;
// Use this for initialization
void Start () {
A.eulerAngles = new Vector3(0.0f, 40.0f, 0.0f);
B.eulerAngles = new Vector3(0.0f, 360.0f + 40.0f, 0.0f);
q1 = A.rotation;
q2 = B.rotation;
float f = Quaternion.Dot(q1, q2);
Debug.Log("q1的欧拉角: " + q1.eulerAngles + " q1的rotation: " + q1);
Debug.Log("q2的欧拉角: " + q2.eulerAngles + " q2的rotation: " + q2);
Debug.Log("Dot(q1,q2): " + f);
}
// Update is called once per frame
void Update () {
}
}
运行输出

从输出结果可以证明q1和q2的欧拉角相等,但是rotation值却是相反的,也说明当Dot的返回值为-1时,两个参数的角度相差360°。3、Euler方法
3.1 函数原型
public static Quaternion Euler(Vector3 euler);
public static Quaternion Euler(float x,float y,float z);
该方法用于返回欧拉角Vector3(ex,ey,ez)对应的四元数Quaternion q(qx,qy,qz,qw)。其对应关系如下:已知PIover180 = 3.141592/180 = 0.0174532925f是计算机图形学中的一个常亮,其变换过程如下:
ex = ex * PIover180 / 2.0f;
ey = ey * PIover180 / 2.0f;
ez = ez * PIover180 / 2.0f;
qx = Mathf.Sin(ex) * Mathf.Cos(ey) * Mathf.Cos(ez) + Mathf.Cos(ex) * Mathf.Sin(ey) * Mathf.Sin(ez);
qy = Mathf.Cos(ex) * Mathf.Sin(ey) * Mathf.Cos(ez) - Mathf.Sin(ex) * Mathf.Cos(ey) * Mathf.Sin(ez);
qz = Mathf.Cos(ex) * Mathf.Cos(ey) * Mathf.Sin(ez) - Mathf.Sin(ex) * Mathf.Sin(ey) * Mathf.Cos(ez);
qw = Mathf.Cos(ex) * Mathf.Cos(ey) * Mathf.Cos(ez) + Mathf.Sin(ex) * Mathf.Sin(ey) * Mathf.Sin(ez);
3.2 验证变换过程
using UnityEngine;
using System.Collections;
public class Euler_ts : MonoBehaviour {
public float ex, ey, ez;
float qx, qy, qz,qw;
float PIover180 = 0.0174532925f;
Quaternion q = Quaternion.identity;
Vector3 euler;
void OnGUI()
{
if(GUI.Button(new Rect(10.0f,10.0f,100.0f,45.0f),"计算"))
{
euler = new Vector3(ex,ey,ez);
Debug.Log("欧拉角Euler(ex,ey,ez): " + euler);
q = Quaternion.Euler(ex, ey, ez);
Debug.Log("对应的四元数为: " + q);
Debug.Log("q.x: " + q.x + " q.y: " + q.y + " q.z: " + q.z + " q.w: " + q.w);
//验证算法
ex = ex * PIover180 / 2.0f;
ey = ey * PIover180 / 2.0f;
ez = ez * PIover180 / 2.0f;
qx = Mathf.Sin(ex) * Mathf.Cos(ey) * Mathf.Cos(ez) + Mathf.Cos(ex) * Mathf.Sin(ey) * Mathf.Sin(ez);
qy = Mathf.Cos(ex) * Mathf.Sin(ey) * Mathf.Cos(ez) - Mathf.Sin(ex) * Mathf.Cos(ey) * Mathf.Sin(ez);
qz = Mathf.Cos(ex) * Mathf.Cos(ey) * Mathf.Sin(ez) - Mathf.Sin(ex) * Mathf.Sin(ey) * Mathf.Cos(ez);
qw = Mathf.Cos(ex) * Mathf.Cos(ey) * Mathf.Cos(ez) + Mathf.Sin(ex) * Mathf.Sin(ey) * Mathf.Sin(ez);
Debug.Log("qx: " + qx + " qy: " + qy + " qz: " + qz + " qw: " + qw);
}
}
}
运行结果

从输出结果可以证明该公式是正确,另外转换后的四元数直接输出的话,如下:q = Quaternion.Euler(ex, ey, ez);
Debug.Log("对应的四元数为: " + q);输出值是做了四舍五入处理的。4、FromToRotation方法
函数原型public static Quaternion FromToRotation(Vector3 fromDirection,Vector3 ToDirection);
在前面介绍了SetFromToRotation实例方法,它们的功能都是一样的只不过用法稍有不同。使用FromToRotation类静态方法,需要直接使用类名进行调用,如Quaternion.FromToRotation(v1,v2);在此就不做演示了!5、Inverse方法
5.1 函数原型
public static Quaternion Inverse(Quaternion rotation);
该方法可以返回参数rotation的逆向Quaternion值。例如rotation(x,y,z,w),那么Quaternion.Inverse(rotation) = (-x,-y,-z,w)。假设rotation的欧拉角为(a,b,c),则transform.rotation = Quaternion.Inverse(rotation)相当于transform依次绕自身坐标系的z轴、x轴和y轴分别旋转-c°、-a°和-z°。由于是在局部坐标系内的变换,最后transform的欧拉角的各个分量值并不一定等于-a、-b或-c。5.2 实例演示
using UnityEngine;
using System.Collections;
public class Invers_ts : MonoBehaviour {
public Transform A, B;
// Use this for initialization
void Start () {
Quaternion q1 = Quaternion.identity;
Quaternion q2 = Quaternion.identity;
q1.eulerAngles = new Vector3(30.0f,40.0f,50.0f);
q2 = Quaternion.Inverse(q1);
A.rotation = q1;
B.rotation = q2;
Debug.Log("q1的欧拉角: " + q1.eulerAngles + "q1的rotation: " + q1);
Debug.Log("q2的欧拉角: " + q2.eulerAngles + "q2的rotation: " + q2);
}
// Update is called once per frame
void Update () {
}
}
运行截图

6、Lerp和Slerp方法
6.1 函数原型
public static Quaternion Lerp(Quaternion form, Quaternion to,float t);
public static Quaternion Slerp(Quaternion form, Quaternion to,float t);
两种方法的作用都是返回从form到to的插值。当参数t<=0时返回值为from,当参数t>=1时返回值为to。其中Lerp是线性差值,而Slerp是球面插值。6.2 实例演示
using UnityEngine;
using System.Collections;
public class LerpAndSlerp_ts : MonoBehaviour
{
public Transform A, B, C,D;
float speed = 0.2f;
float total = 0.0f;
// Use this for initialization
void Start () {
}
// Update is called once per frame
void Update () {
total += Time.deltaTime * speed;
if(total >= 1.0f)
total = 1.0f;
C.rotation = Quaternion.Lerp(A.rotation, B.rotation, total);
D.rotation = Quaternion.Lerp(A.rotation, B.rotation, total);
//C.rotation = Quaternion.Lerp(A.rotation, B.rotation, Time.deltaTime * speed);
//D.rotation = Quaternion.Lerp(A.rotation, B.rotation, Time.deltaTime * speed);
}
}
7、RotateTowards方法
7.1 函数原型
public static Quaternion RotateTowards(Quaternion from, Quaternion to, float maxDegreesDelta);
该方法也是一个插值方法,即从返回参数from到to的插值,且返回值的最大角度不超过maxDegreesDelta。maxDegreesDelta是角度值,不是插值系数,当maxDegreesDelta < 0时,将进行逆向插值即从to到from的方向进行插值计算。7.2 实例演示
using UnityEngine;
using System.Collections;
public class RotateToWards_ts : MonoBehaviour {
public Transform A, B, C;
float speed = 10.0f;
float total = 0.0f;
// Use this for initialization
void Start()
{
}
// Update is called once per frame
void Update()
{
total += Time.deltaTime * speed;
if (total >= 1.0f)
total = 1.0f;
C.rotation = Quaternion.RotateTowards(A.rotation, B.rotation, Time.time * speed - 40.0f);
Debug.Log("C与A的欧拉角的插值: " + (C.eulerAngles - A.eulerAngles) + "maxDegreesDelta: " + (Time.time * speed - 40.0f));
}
}
运行截图

8、LookRotation方法
函数原型public static Quaternion LookRotation(Vector3 forward);
public static Quaternion LookRotation(Vector3 forward,Vector3 upwards);
参数forward为返回Quaternion实例的forward朝向。该方法和前面讲到的SetLookRotation实例方法的功能是一样的,故不多做阐述了。五、Quaternion类运算符
Quaternion类涉及到两个Quaternion对象相乘和Quaternion对象与Vector3对象相乘,那么就必须重载"*"运算符。1、函数原型
public static Quaternion operator *(Quaternion lhs, Quaternion rhs);
public static Vector3 operator *(Quaternion rotation, Vector3 point);
2、两个Quaternion对象相乘
对于两个Quaternion对象相乘主要用于自身旋转变换,例如:B.rotation *= A.rotation;
B会绕着B的局部坐标系的z、x、y轴按照先绕z轴再绕x轴最后绕y轴的旋转次序,分别旋转A.eulerAngles.z度、A.eulerAngles.x度、和A.eulerAngles.y度。由于是绕着局部坐标系进行旋转,所以当绕着其中一个轴进行旋转时,可能会影响其余两个坐标轴方向的欧拉角(除非其余两轴的欧拉角都为0才不会受到影响)。
假如A的欧拉角为aEuler(ax,ay,az),则沿着B的初始局部坐标系的aEuler方向向下看B在绕着aEuler顺时针旋转。B的旋转状况还受到其初始状态的影响。
2.1 实例演示
using UnityEngine;
using System.Collections;
public class Multiply1_ts : MonoBehaviour {
public Transform A, B;
// Use this for initialization
void Start () {
A.eulerAngles = new Vector3(1.0f, 1.5f, 2.0f);
}
// Update is called once per frame
void Update () {
B.rotation *= A.rotation;
Debug.Log(B.eulerAngles);
}
}
运行截图

2.2 分析
B绕着其自身坐标系的Vector3(1.0f,1.5f,2.0f)方向旋转。虽然每次都绕着这个轴向旋转的角度相同,但角度的旋转在3个坐标轴的值都不为零,三个轴的旋转会相互影响,所以B的欧拉角的各个分量的每次递增是不固定的。3、Quaternion对象与Vector3对象
对于Quaternion对象与Vector3对象相乘主要用于自身移动变换,例如transform.position += tansform.rotation * A;
其中A为Vector3的对象。transform对应的对象会沿着自身坐标系中向量A的方向移动A的模长的距离。transform.rotation与A相乘可以确定移动的方向和距离。3.1 实例演示
using UnityEngine;
using System.Collections;
public class Multiply2_ts : MonoBehaviour {
public Transform A;
float speed = 0.1f;
// Use this for initialization
void Start () {
A.position = Vector3.zero;
A.eulerAngles = new Vector3(0.0f, 45.0f, 0.0f);
}
// Update is called once per frame
void Update () {
A.position += A.rotation * (Vector3.forward * speed);
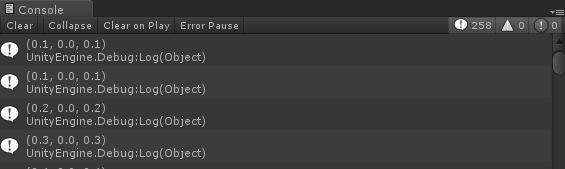
Debug.Log(A.position);
}
}
运行截图
4、两个Quaternion对象相乘与Quaternion对象与Vector3对象相乘的异同
设A为两个两个Quaternion对象相乘的结果。B为Quaternion对象与Vector3对象相乘的结果。其中A为Quaternion类型,B为Vector3类型。
A与B的相同之处是它们都通过自身坐标系的“相乘”方式来实现在世界坐标系中的变换。
A主要用来实现transform绕自身坐标系的某个轴旋转,B主要用来实现transform沿着自身坐标系的某个方向移动。
必须遵守Quaternion对象*Vector3对象的形式,不可以颠倒顺序。
由于它们都是相对于自身坐标系进行的旋转或移动,所以当自身坐标系的轴向和世界坐标系的轴向不一致时,它们绕着自身坐标系中的某个轴向的变动都会影响到物体在世界坐标系中各个坐标轴的变动。 四元数quaternion的变换比较复杂,但是在unity中已经给我们写好了相应的函数实现对transform的操作。 在最近的一个项目中,遇到了一个单手指滑动手机屏幕实现对模型的一个旋转操作,在尝试了各种unity中的旋转函数之后都没能够达到想要的效果之后,我选择了用Quaternion.AngleAxis的函数来实现旋转的操作效果。 首先我们来分析一下Quaternion.AngleAxis(angle,axis),参数angle和axis代表了物体的旋转角度和旋转轴心。如下图:红色箭头方向代表物体所围绕的旋转轴,旋转角度可以是自定义的。

接下来,我们就要做两件事情,确定axis和计算angle。在这个项目中,我们是根据单个手指在手机屏幕上滑动,我们通过记录滑动的距离,X方向的增量,以及Y轴方向的增量来为后面计算axis和angle打下基础。unity的Input函数有GetTouch这个函数,我们只需要调用这个函数的相关方法就可以实现需求。 现在,我们在unity中新建一个场景,在场景中新建一个立方块。

注意立方块的世界坐标轴,Z轴的朝向应该是朝着摄像机的。根据之前对四元数脚本的分析,立方体的旋转脚本为: Gesture.cs:
1 using UnityEngine;
2 using System.Collections;
3
4 public class gesture : MonoBehaviour {
5 public Transform Cube;
6 private float radius = 1080;
7 private Vector3 originalDir = new Vector3(0f,0f,1080f);
8 private Vector3 CenterPos = new Vector3(0, 0, 0);
9 private Vector2 startPos;
10 private Vector2 tempPos;
11 private Vector3 tempVec;
12 private Vector3 normalAxis;
13 private float angle;
14 // Use this for initialization
15 void Start () {
16 Cube = GameObject.Find("Cube").transform;
17 }
18
19 // Update is called once per frame
20 void Update () {
21 if (Input.touchCount == 1)
22 {
23 //Vector2 startPos = Input.compositionCursorPos;
24 if (Input.GetTouch(0).phase == TouchPhase.Began)
25 {
26 startPos = Input.GetTouch(0).position;
27 //tempPos = startPos;
28 }
29 //if (Input.GetTouch(0).phase == TouchPhase.Ended)
30 //{
31 // tempPos = startPos;
32 //}
33 if (Input.GetTouch(0).phase == TouchPhase.Moved)
34 {
35 tempPos = Event.current.mousePosition;
36
37 float tempX = tempPos.x - startPos.x;
38
39 float tempY = tempPos.y - startPos.y;
40
41 //tempPos = Input.GetTouch(0).deltaPosition;
42 //float tempX = tempPos.x;
43
44 //float tempY = tempPos.y;
45
46 float tempZ = Mathf.Sqrt(radius * radius - tempX * tempX - tempY * tempY);
47
48 tempVec = new Vector3(tempX, tempY, tempZ);
49
50 angle = Mathf.Acos(Vector3.Dot(originalDir.normalized, tempVec.normalized)) * Mathf.Rad2Deg;
51
52 normalAxis = getNormal(CenterPos, originalDir, tempVec);
53
54 Cube.rotation = Quaternion.AngleAxis(2 *angle, normalAxis);
55
56 }
57 }
58 }
59
60 void OnGUI()
61 {
62 GUILayout.Label("StartPos 的坐标值为: "+startPos);
63 GUILayout.Label("tempPos 的坐标值为: " + tempPos);
64 GUILayout.Label("tempVec 的坐标值为: " + tempVec);
65 GUILayout.Label("normalAxis 的坐标值为: " + normalAxis);
66 GUILayout.Label("旋转角度的值为: " + 2*angle);
67 GUILayout.Label("Cube的四元数角度: " + Cube.rotation);
68 GUILayout.Label("Cube de rotation.x: " + Cube.rotation.eulerAngles.x);
69 GUILayout.Label("Cube de rotation.y: " + Cube.rotation.eulerAngles.y);
70 GUILayout.Label("Cube de rotation.z: " + Cube.rotation.eulerAngles.z);
71 }
72
73 private Vector3 getNormal(Vector3 p1,Vector3 p2,Vector3 p3)
74 {
75 float a = ((p2.y - p1.y) * (p3.z - p1.z) - (p2.z - p1.z) * (p3.y - p1.y));
76
77 float b = ((p2.z - p1.z) * (p3.x - p1.x) - (p2.x - p1.x) * (p3.z - p1.z));
78
79 float c = ((p2.x - p1.x) * (p3.y - p1.y) - (p2.y - p1.y) * (p3.x - p1.x));
80 //a对应的屏幕的垂直方向,b对应的屏幕的水平方向。
81 return new Vector3(a, -b, c);
82 }
83 }
如果我们将这个在新机上运行,会发现在第一次手指滑动旋转是正常的,但是第二次就会有个跳动的过程。在这里我们需要注意一个问题,四元数函数Quaternion.AngleAxis是将立方体以初始的旋转角度来进行围绕着轴Axis旋转Angle角度,不是在上一个状态下的增量。如果需要延续上一次的旋转状态,就需要将这个物体的rotation恢复到初始的状态。按照这个思路,我在Cube添加了一个父对象,我们在操作的时候对这个父对象进行操作,然后手指在离开屏幕的时候,将Cube脱离父对象,然后将父对象的rotation进行还原,再将Cube绑定为父物体的子对象,在一下次手指旋转之后就会接着上一次的旋转状态进行旋转,实现了旋转的延续。

实现的代码为:
1 using UnityEngine;
2 using System.Collections;
3
4 public class gesture : MonoBehaviour {
5 public Transform Cube;
6 public Transform RotObj;
7 private float radius = 1080;
8 private Vector3 originalDir = new Vector3(0f,0f,1080f);
9 private Vector3 CenterPos = new Vector3(0, 0, 0);
10 private Vector2 startPos;
11 private Vector2 tempPos;
12 private Vector3 tempVec;
13 private Vector3 normalAxis;
14 private float angle;
15 // Use this for initialization
16 void Start () {
17 Cube = GameObject.Find("Cube").transform;
18 }
19
20 // Update is called once per frame
21 void Update () {
22 if (Input.touchCount == 1)
23 {
24 //Vector2 startPos = Input.compositionCursorPos;
25 if (Input.GetTouch(0).phase == TouchPhase.Began)
26 {
27 startPos = Input.GetTouch(0).position;
28 }
29 if (Input.GetTouch(0).phase == TouchPhase.Moved)
30 {
31 tempPos = Event.current.mousePosition;
32
33 float tempX = tempPos.x - startPos.x;
34
35 float tempY = tempPos.y - startPos.y;
36
37 float tempZ = Mathf.Sqrt(radius * radius - tempX * tempX - tempY * tempY);
38
39 tempVec = new Vector3(tempX, tempY, tempZ);
40
41 angle = Mathf.Acos(Vector3.Dot(originalDir.normalized, tempVec.normalized)) * Mathf.Rad2Deg;
42
43 normalAxis = getNormal(CenterPos, originalDir, tempVec);
44
45 RotObj.rotation = Quaternion.AngleAxis(2 *angle, normalAxis);
46
47 }
48 if (Input.GetTouch(0).phase == TouchPhase.Ended)
49 {
50 Cube.transform.parent = null;
51 RotObj.rotation = Quaternion.identity;
52 Cube.parent = RotObj;
53 }
54 }
55 }
56
57 void OnGUI()
58 {
59 GUILayout.Label("StartPos 的坐标值为: "+startPos);
60 GUILayout.Label("tempPos 的坐标值为: " + tempPos);
61 GUILayout.Label("tempVec 的坐标值为: " + tempVec);
62 GUILayout.Label("normalAxis 的坐标值为: " + normalAxis);
63 GUILayout.Label("旋转角度的值为: " + 2*angle);
64 GUILayout.Label("Cube的四元数角度: " + Cube.rotation);
65 GUILayout.Label("Cube de rotation.x: " + Cube.rotation.eulerAngles.x);
66 GUILayout.Label("Cube de rotation.y: " + Cube.rotation.eulerAngles.y);
67 GUILayout.Label("Cube de rotation.z: " + Cube.rotation.eulerAngles.z);
68 }
69
70 private Vector3 getNormal(Vector3 p1,Vector3 p2,Vector3 p3)
71 {
72 float a = ((p2.y - p1.y) * (p3.z - p1.z) - (p2.z - p1.z) * (p3.y - p1.y));
73
74 float b = ((p2.z - p1.z) * (p3.x - p1.x) - (p2.x - p1.x) * (p3.z - p1.z));
75
76 float c = ((p2.x - p1.x) * (p3.y - p1.y) - (p2.y - p1.y) * (p3.x - p1.x));
77 //a对应的屏幕的垂直方向,b对应的屏幕的水平方向。
78 return new Vector3(a, -b, c);
79 }
80 }
现在对应着手指的滑动距离,然后调整参数radius,就可以实现比较顺滑的旋转效果,真机实现的效果就不展示了。

相关文章推荐
- unity3d开发实战《啪啪三国》技术详解
- 【转载】Unity3D之LOD技术详解
- Unity3d粒子系统详解
- Unity3D中的Coroutine详解
- [Unity3D]Script 脚本所有编译器属性详解
- Unity3D技术之名称与血条绘制详解
- Unity3D 游戏引擎之游戏对象的访问绘制线与绘制面详解
- Unity3D:Script 脚本所有编译器属性详解
- Unity3D-常用小功能详解,例子(得分变动效果、倒计时)
- Unity3D技术之遮挡剔除(仅限专业版)详解
- Unity3d 绘制并获取通过任意点的曲线实现详解
- unity3d中Transform组件 Rotate()和rotation变量详解
- [Unity3D]Script 脚本所有编译器属性详解
- Unity3D技术之实现声波支付时的波纹详解
- Unity3D的Time类(UnityEngine.Time)详解
- Unity3d Preferences参数详解
- Unity3D 脚本所有编译器属性详解
- Unity3D Built-in Shader详解一
- Unity3D核心技术详解
- [Unity3D]Script 脚本所有编译器属性详解