微信JS-SDK上传照片到本地服务器 解析与实例
2017-12-20 11:20
771 查看
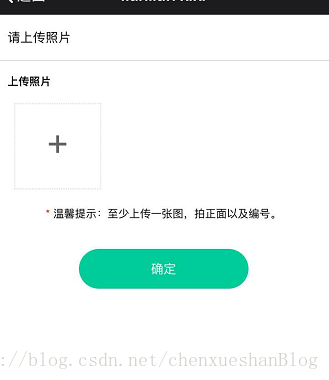
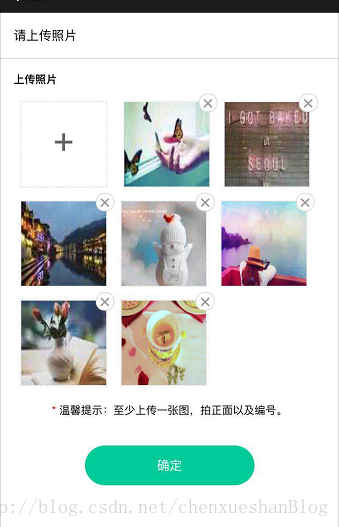
先附两张效果图

实现此实例的思路:
需要调用微信的JSSDK,所以首先要进行微信验证(验证需要的appid、生成签名的随机串、签名等信息需要后台提供)
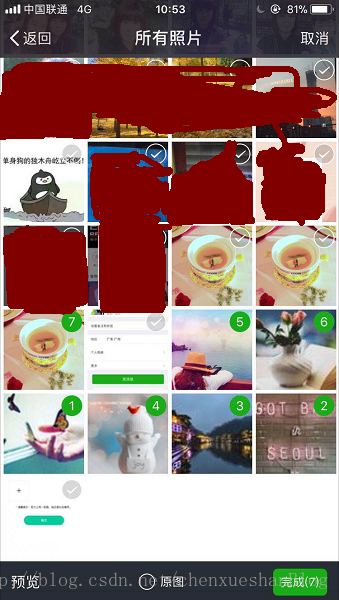
这里要的功能是可以多选,上传多张照片。而上传照片接口是需要一张一张上传到微信服务器的,所以这里用递归做了一个处理。
最后得到的serverIds图片地址列表是本地图片上传后在微信服务器上的地址列表。如果想要保存到本地服务器,可以把它传给后台,由后台去和微信交互来得到并保存图片。
完整实现代码
<!DOCTYPE html>
<html lang="en">
<head>
<meta charset="UTF-8">
<meta content="yes" name="apple-mobile-web-app-capable">
<meta content="yes" name="apple-touch-fullscreen">
<meta content="telephone=no,email=no" name="format-detection">
<meta name="viewport" content="initial-scale=1, maximum-scale=1 minimum-scale=1, user-scalable=no">
<title>lianlian xixi</title>

<script src="http://g.tbcdn.cn/mtb/lib-flexible/0.3.4/??flexible_css.js,flexible.js"></script>
<style>
.red { color: red; }
.box > p { font-size: 14px; border-bottom: 1px solid #ddd; padding: 0.4rem; }
.box > .uploadImgBox { padding: 0.266667rem 0.4rem; }
.box > .uploadImgBox > h1 { border: none; font-weight: bold; padding: 0.1rem 0 0.2rem; }
.box > .uploadImgBox > p { text-align: center; margin-top: 0.3rem; }
.box > .uploadImgBox .imgBoxOne,
.box > .uploadImgBox .imgBox { display: inline-block; width: 2.5rem; height: 2.5rem; line-height: 2.2rem; border: 1px dotted #ddd; margin: 0.2rem; text-align: center; vertical-align: middle; position: relative; }
.box > .uploadImgBox .imgBoxOne { font-size: 1rem; color: #666; }
.box > .uploadImgBox .imgBox > img { width: 2.5rem; height: 2.5rem; }
.box > .uploadImgBox .imgBox > .del { background: #fff; position: absolute; top: -0.25rem; right: -0.25rem; width: 0.5rem; height: 0.5rem; color: #9a9a9a; font-size: 20px; line-height: 0.45rem; border: 1px solid #ddd; border-radius: 0.25rem; }
.box > .trueInstall { width: 50vw; margin: 0.533333rem auto 0.533333rem 25vw; color: #fff; background: #00CC99; border: none; border-radius: 0.8rem; padding: 0.32rem 1.6rem; font-size: 14px; }
</style>
</head>

<body>
<div class="box">
<p>请上传照片</p>
<div class="uploadImgBox">
<h1>上传照片</h1>
<div class="imgList" id="imgBox">
<div class="imgBoxOne" id="addImg">+</div>
<!--<div class="imgBox"><img src="img/error.png" alt=""><span class="del">×</span></div>-->
</div>
<p><span class="red">* </span>温馨提示:至少上传一张图,拍正面以及编号。</p>
</div>
<button type="button" class="trueInstall" id="trueInstall">确定</button>
</div>

<script src="http://libs.baidu.com/jquery/2.1.1/jquery.min.js"></script>
<script src="http://res.wx.qq.com/open/js/jweixin-1.2.0.js"></script>
<script>
var serverIds = [];     //用于存储要上传到本地服务器的照片 在微信服务器上的地址列表
function delImg(dom){    //选择图片显示后 点击删除按钮删除图片(DOM 和 上面的图片列表)
serverIds.splice($(dom).parent().prevAll().length-1,1);
$(dom).parent().remove();
}

$(function(){
$.ajax({        //请求获取微信验证需要的数据
url:  "/wprovider/wechat/get_signature",
type: "post",
dataType: "json",
data: { "url" : window.location.href },
success: function (data) {
wx.config({        //微信验证
//debug: true, // 开启调试模式,调用的所有api的返回值会在客户端alert出来,若要查看传入的参数,可以在pc端打开,参数信息会通过log打出,仅在pc端时才会打印。
appId: data.data.appId, // 必填,企业号的唯一标识,此处填写企业号corpid
timestamp: data.data.timestamp, // 必填,生成签名的时间戳
nonceStr: data.data.nonceStr, // 必填,生成签名的随机串
signature: data.data.signature,// 必填,签名,见附录1
jsApiList: ['chooseImage','uploadImage']  // 必填,需要使用的JS接口列表,所有JS接口列表见附录2
});
}
});
$("#addImg").on("click",function(){
wx.chooseImage({
//count: 1, // 默认9
//sizeType: ['original', 'compressed'], // 可以指定是原图还是压缩图,默认二者都有
//sourceType: ['album', 'camera'], // 可以指定来源是相册还是相机,默认二者都有
success: function(res) {
//返回选定照片的本地ID列表
var localIds = res.localIds;  //返回选定照片的本地ID列表,localId可以作为img标签的src属性显示图片
var i = 0, length = localIds.length;
function upload() {
wx.uploadImage({
localId: localIds[i],   //需要上传的图片的本地ID,由chooseImage接口获得
//isShowProgressTips: 1, // 默认为1,显示进度提示
success: function(res) {
//var serverId = res.serverId; // 返回图片的服务器端ID
(i==0) && ($("#imgBox").append($('<div class="imgBox"><img src="'+localIds[0]+'" alt=""><span class="del" onclick="delImg(this)">×</span></div>')));
i++;
serverIds.push(res.serverId);
if (i < length) {
$("#imgBox").append($('<div class="imgBox"><img src="'+localIds[i]+'" alt=""><span class="del" onclick="delImg(this)">×</span></div>'));
upload();   //用递归实现上传多张照片
}
},
fail: function(res) { /* alert(JSON.stringify(res)); */ }
});
}
upload();
}
});
});

$("#trueInstall").on("click",function(){
//ajax将serverIds传递给后台
alert(serverIds.length);
});
});
</script>
</body>
</html>

相关文章推荐
- thinkphp微信开发之jssdk图片上传并下载到本地服务器
- 微信JS-SDK选取手机照片上传并下载保存至自己的服务器
- ThinkPHP微信实例——JSSDK图像接口多张图片上传下载并将图片流写入本地
- ThinkPHP微信开发实例——JSSDK图像接口上传下载并将图片流写入本地
- thinkphp微信开发之jssdk图片上传并下载到本地服务器
- 【原创】.Net 微信 JS-SDK图片、语音上传接口的实现(MVC)-(二 、上传图片服务器操作)
- 微信公众号开发《四》使用微信JS-SDK实现手机图片上传,支持压缩、预览。并下载图片到自身服务器
- 微信服务号开发之jssdk-照片上传、下载 总结
- 微信js-sdk,选择图片,上传,下载到本地,php服务端
- PHP实现微信JS-SDK接口选择相册及拍照并上传的方法 lieren_chengshi 2016-12-05 8463 查看 0评论 公开 原文 举报 取精 添加收藏 本文实例讲述了
- 使用微信的 JS SDK 选取手机照片并进行上传,Iphone无法显示缩略图
- 微信js-sdk,选择图片,上传,下载到本地,php服务端
- 微信JS-SDK选取手机照片上传功能
- PHP调用微信JS-SDK接口上传头像保存到服务器
- 微信JS-SDK接口 + FLASK实现图片上传
- 微信JS-SDK选择相册或拍照并上传PHP实现
- 微信小程序教程之本地图片上传(leancloud)实例详解
- 微信JS SDK demo 实例
- iOS视频压缩存储至本地并上传至服务器实例代码
- 微信js-sdk 地理位置接口实例