Java Web Service using Eclipse (Eclipse提供的自动生成webservice接口,endpoint的功能,以及自动测试webservice的功能)
2017-12-14 17:22
1231 查看
转自: https://javapapers.com/web-service/java-web-service-using-eclipse/
This tutorial is to create a java web service and client using Eclipse IDE. We will go by lazy way and use Eclipse wizard to generate the web service and client. Previously I wrote a tutorial to create a
java web service using NetBeans and based on popular request I am writing this tutorial.
There are two ways to develop a web service namely top-down approach and bottom-up approach. To know about these approaches and in general about web service refer my
introduction to web service tutorial posted earlier. We will be using bottom-up development approach in this tutorial.
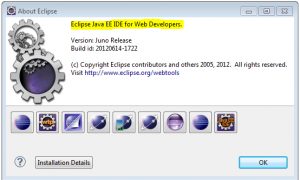
Eclipse has many different versions and remember to use the Java EE IDE. It comes bundled with necessary plugins.
Just for your information, Eclipse by default uses Apache Axis to implement the web service and it provides option to use our choice of web service engine. I decided to go with the default bundled
Apache Axis.
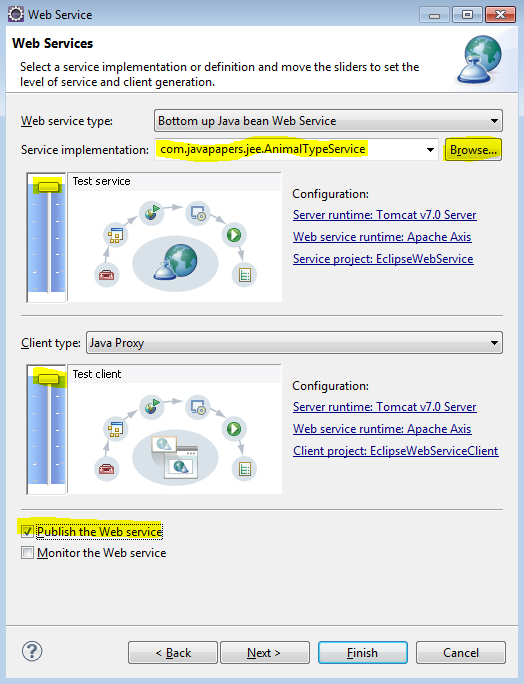
I have used the above for my service. This is a simple service which will return type of animal based on argument passed.
With this step everything is over. If you have Eclipse it will take care of all the remaining work like creating web service, generating wsdl, skeleton, service client, stub and etc etc. Imagine how it would be if we have an Eclipse to help us in living
our daily life. Eclipse for bathing, eating, … just sit and click eating is done. Crazy isn’t it? That is how the remainder of web service creation is going to be, just click click. IDE is helping us to do our job better but sometimes I think it makes us lazy.
If you are a beginner, you must know what is happening behind the screens for every click in the Eclipse wizard.
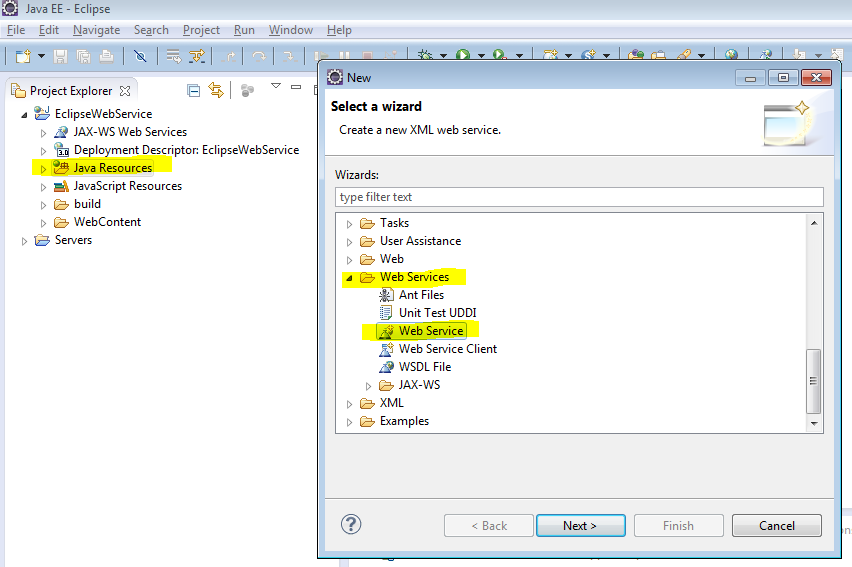
Right click on ‘Java Resources’ -> New and select ‘Web Service’ under ‘Web Services’ folder from the wizard. Click Next button.

Then, drag the slider bar to upper most in both service and client part.
Then, enable the Publish the Web service check box.
project and write a client to access the web service.

There is one more way, Eclipse provides a Web Service Explorer. It is a nice client that will help us test a web service client.
Then click Next to reach ‘Test Web Service’ wizard and then click Launch button.

Do not stop with this. Open the EclipseWebServiceClient application and go through the code and generated Stub, Proxy and all the files. It will really help to understand more.
Download Eclipse based Web Service Source Code
Download Eclipse based Web Service Client Source Code
This Web Service tutorial was added on 05/11/2012.
This tutorial is to create a java web service and client using Eclipse IDE. We will go by lazy way and use Eclipse wizard to generate the web service and client. Previously I wrote a tutorial to create a
java web service using NetBeans and based on popular request I am writing this tutorial.
There are two ways to develop a web service namely top-down approach and bottom-up approach. To know about these approaches and in general about web service refer my
introduction to web service tutorial posted earlier. We will be using bottom-up development approach in this tutorial.
Eclipse has many different versions and remember to use the Java EE IDE. It comes bundled with necessary plugins.
Just for your information, Eclipse by default uses Apache Axis to implement the web service and it provides option to use our choice of web service engine. I decided to go with the default bundled
Apache Axis.
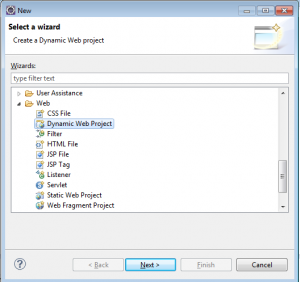
1. Create a Dynamic Web Project
Use the new project from menu and open project wizard. Select ‘Dynamic Web Project’ and click next. Then give a project name and select a target runtime (I have Apache Tomcat v7.0) and leave all other default values and click next to finish.Create a New Runtime
If the run time is not already defined, then click New Runtime and select the version of Tomcat you have installed (already) then click next. Now browse the path of Tomcat home directory and click finish.2. Create Web Service Provider Java Class
Create a new package under ‘Java Resources – src’ named com.javapapers.jee Then, create a new java class under that package. This is the web service’s service provider class.package com.javapapers.jee;
public class AnimalTypeService {
public String animalType(String animal) {
String animalType = "";
if ("Lion".equals(animal)) {
animalType = "Wild";
} else if ("Dog".equals(animal)) {
animalType = "Domestic";
} else {
animalType = "I don't know!";
}
return animalType;
}
}I have used the above for my service. This is a simple service which will return type of animal based on argument passed.
With this step everything is over. If you have Eclipse it will take care of all the remaining work like creating web service, generating wsdl, skeleton, service client, stub and etc etc. Imagine how it would be if we have an Eclipse to help us in living
our daily life. Eclipse for bathing, eating, … just sit and click eating is done. Crazy isn’t it? That is how the remainder of web service creation is going to be, just click click. IDE is helping us to do our job better but sometimes I think it makes us lazy.
If you are a beginner, you must know what is happening behind the screens for every click in the Eclipse wizard.
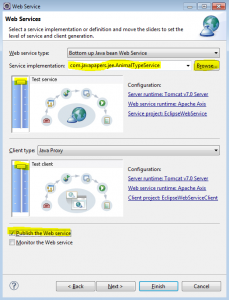
3. Create a Web Service
Now the service class is ready and we need to create a web service using this java class.Right click on ‘Java Resources’ -> New and select ‘Web Service’ under ‘Web Services’ folder from the wizard. Click Next button.
Select Service Implementation
In this Web Service wizard, use the browse button and select the java class written earlier. Which is our service implementation java class.Then, drag the slider bar to upper most in both service and client part.
Then, enable the Publish the Web service check box.
Web Service Client Creation
Added to configuring the service implementation, we are instructing Eclipse to generate a web service client also. This will create a dynamic web java project and create a web service client for the web service created. Instead we can also create a javaproject and write a client to access the web service.
Deploy Web Service and Client
Click Next till the Server Starup wizard and then click Start Server. This step will start the associated runtime Tomcat.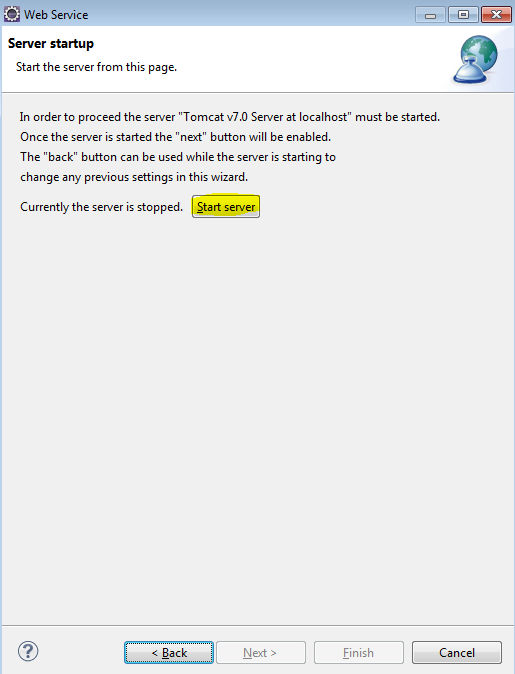
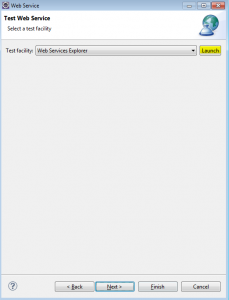
4. Test Web Service
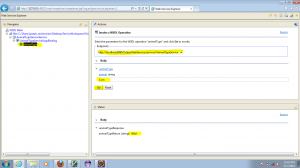
We can test the web service using a web service client. For this we need to create web service client application. In our previous configuration we moved the slider above in service configuration wizard which will create a web service client application.Eclipse Web Service Explorer
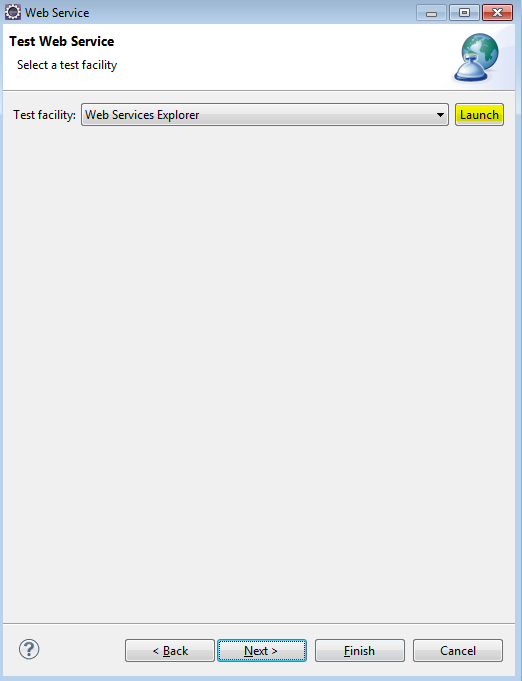
There is one more way, Eclipse provides a Web Service Explorer. It is a nice client that will help us test a web service client.
Then click Next to reach ‘Test Web Service’ wizard and then click Launch button.

Web Service Client Application
Then click next next and we will see the web service client application generated. See in the image below, EclipseWebServiceClient is a web application generated by Eclipse.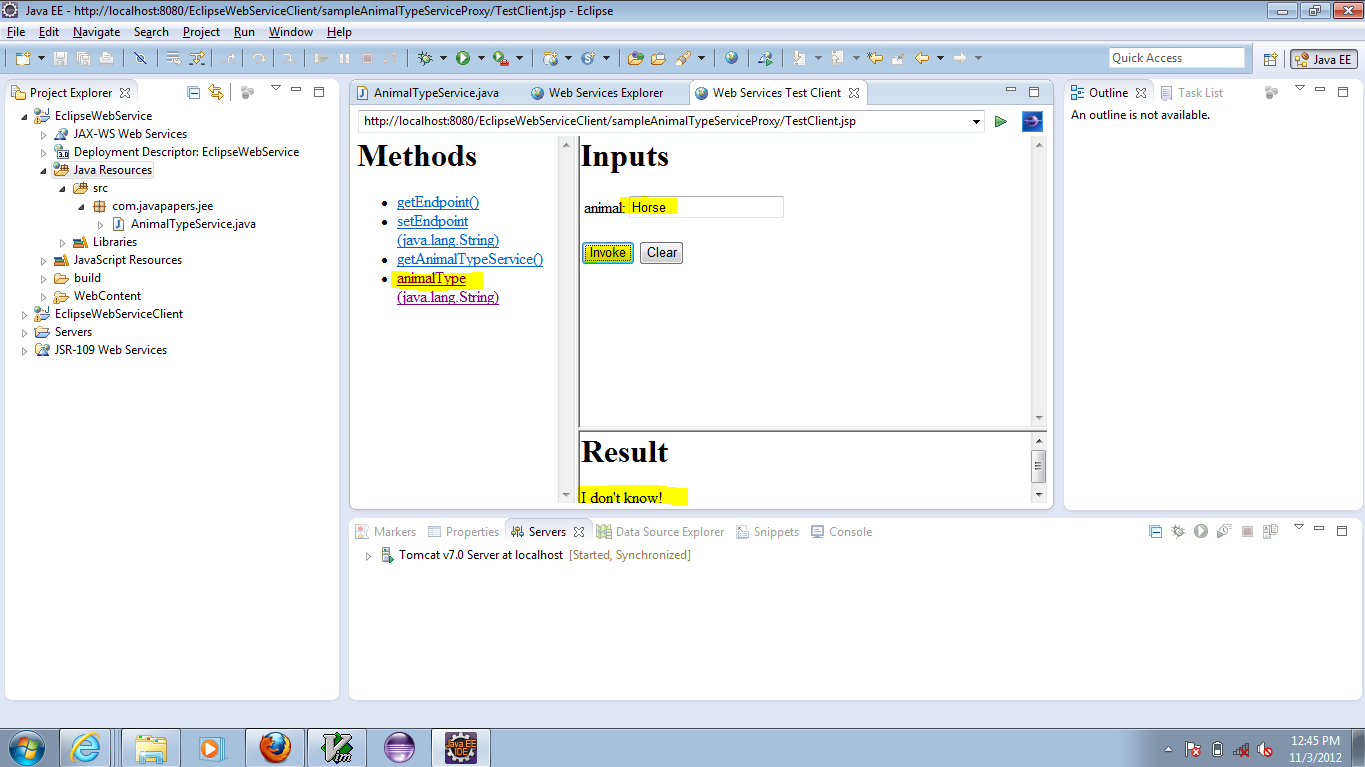
Do not stop with this. Open the EclipseWebServiceClient application and go through the code and generated Stub, Proxy and all the files. It will really help to understand more.
Download Eclipse based Web Service Source Code
Download Eclipse based Web Service Client Source Code
This Web Service tutorial was added on 05/11/2012.

相关文章推荐
- Eclipse根据wsdl文件自动生成webservice client图解,以及调用示例,附测试项目
- weiapi2.2 HelpPage自动生成接口说明文档和接口测试功能
- wsdl自动生成web service的client和server,Java类详解,以及webservice访问
- JavaWeb项目中WEB-INF目录下class文件自动生成以及显示
- SAP&Java WebService(二) ----ABAP调用SAP生成的WebService
- 关于 wsdl2Java 自动生成客户端调取webservice接口
- 【Javaweb】Eclipse for JavaEE新建的Web工程自动生成web.xml
- java_Eclipse自动生成作者、日期注释等功能设置_导入 xml方式
- [图解教程]Eclipse不可不知的用法之二:自动生成接口和JUnit测试类
- 用代码实现在eclipse中自动生成package_这个功能很有用_java版
- weiapi2.2 HelpPage自动生成接口说明文档和接口测试功能
- eclipse中设置java、xml文件的字体大小以及代码自动提示功能
- Java WebService 接口的简单生成和调用
- 利用wsdl文件生成webservice接口的java客户端测试代码
- JAVA学习7_Eclipse操作_生成方法、接口、Junit测试类_定制视图、New选项_Tomcat服务器_Jar包
- Java WebService 简单实例、调用第三方提供的webService服务
- java自带webservice功能实现Javax.jws.WebService--JAX-WS
- Eclipse生成Swing应用程序以及用Java Web Start发布
- WebService学习——利用Eclipse生成JAX-WS WebService客户端
- weiapi2.2 HelpPage自动生成接口说明文档和接口测试功能