富文本编辑器三种不同图片上传功能
2017-12-12 17:27
351 查看
最近在集成富文本和fastDFS文服做图片上传,找了写相关资料,感觉官网的比较全也比较杂。刚好看到一片好的文章,然后我就转载并对不太详细的地方进行了一定的修改并新添加了一种前后端分离的方法。各位小伙伴就将就看吧。一学就会。
下面是转载的小伙伴正文;修改地方我会用红色标注出来。
最近项目需要新增一个发布文章的模块,用的是百度的Ueditor富文本编辑器。
公司用的是阿里云的图片服务器,需要直接把文章中图片上传到服务器上,但是这个编辑器的上传图片是直接上传到Tomcat的根目录。
不能满足要求,尝试改造了一下上传图片的功能。
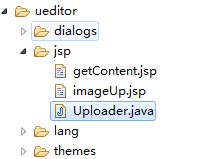
下载下来的编辑器直接导入项目webapp目录下

因为用的是Spring框架,基本已经包含了ueditor需要的几个jar包,所以不需要导入了。

需要注意的是,这个ueditor-1.1.1.jar的这个jar包,其实不需要导入,因为这个包里面就只有一个文件Uploader.java
而在ueditor的jsp目录下已经有了Uploader.java文件,所以直接把这个文件copy到工作区中,访问这个文件就可以了。
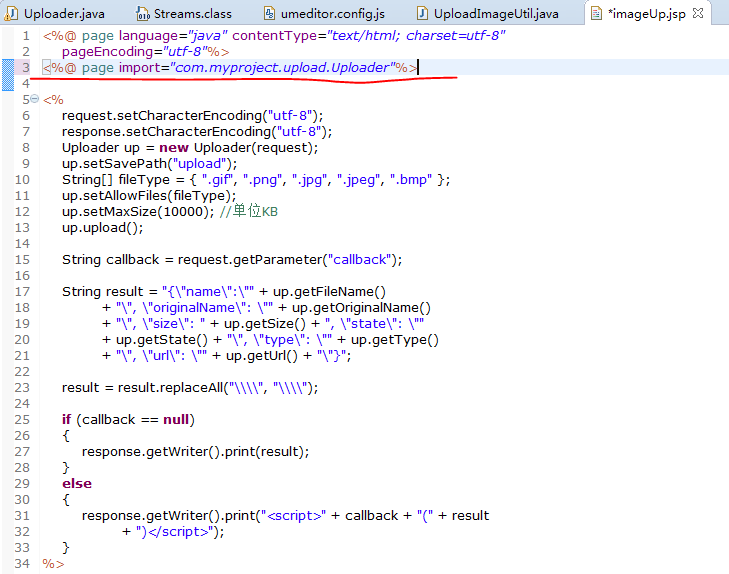
在调用的地方改一下目录
把
改成
如下图:
然后关键就是要改造一下Uploader.java这个类。
原有上传代码如下:
一、第一种上传服务器根目录
改造后如下:
二、第二种通过后台读取流上传到文服
用到了Spring的这两个文件
import org.springframework.web.multipart.commons.CommonsMultipartFile;
import org.springframework.web.multipart.commons.CommonsMultipartResolver;
然后编辑器页面上显示的时候,img的src目录需要改一下(插件目录下的
dialogs/image/image.js)
三、前端后分离直接通过http请求读取上传文件(修改image.js)
上传成功!

下面是转载的小伙伴正文;修改地方我会用红色标注出来。
最近项目需要新增一个发布文章的模块,用的是百度的Ueditor富文本编辑器。
公司用的是阿里云的图片服务器,需要直接把文章中图片上传到服务器上,但是这个编辑器的上传图片是直接上传到Tomcat的根目录。
不能满足要求,尝试改造了一下上传图片的功能。
下载下来的编辑器直接导入项目webapp目录下
因为用的是Spring框架,基本已经包含了ueditor需要的几个jar包,所以不需要导入了。
需要注意的是,这个ueditor-1.1.1.jar的这个jar包,其实不需要导入,因为这个包里面就只有一个文件Uploader.java
而在ueditor的jsp目录下已经有了Uploader.java文件,所以直接把这个文件copy到工作区中,访问这个文件就可以了。
在调用的地方改一下目录
把
<%@ page import="com.baidu.ueditor.um.Uploader" %>
改成
<%@ page import="com.myproject.upload.Uploader"%>
如下图:
然后关键就是要改造一下Uploader.java这个类。
原有上传代码如下:
一、第一种上传服务器根目录
public void uploads() throws Exception {
boolean isMultipart = ServletFileUpload.isMultipartContent(this.request);
if (!isMultipart) {
this.state = this.errorInfo.get("NOFILE");
return;
}
DiskFileItemFactory dff = new DiskFileItemFactory();
String savePath = this.getFolder(this.savePath);
dff.setRepository(new File(savePath));
try {
ServletFileUpload sfu = new ServletFileUpload(dff);
sfu.setSizeMax(this.maxSize * 1024);
sfu.setHeaderEncoding("utf-8");
FileItemIterator fii = sfu.getItemIterator(this.request);
while (fii.hasNext()) {
FileItemStream fis = fii.next();
if (!fis.isFormField()) {
this.originalName = fis.getName().substring(fis.getName().lastIndexOf(System.getProperty("file.separator")) + 1);
if (!this.checkFileType(this.originalName)) {
this.state = this.errorInfo.get("TYPE");
continue;
}
this.fileName = this.getName(this.originalName);
this.type = this.getFileExt(this.fileName);
this.url = savePath + "/" + this.fileName;
BufferedInputStream in = new BufferedInputStream(fis.openStream());
File file = new File(this.getPhysicalPath(this.url));
FileOutputStream out = new FileOutputStream( file );
BufferedOutputStream output = new BufferedOutputStream(out);
Streams.copy(in, output, true);
this.state=this.errorInfo.get("SUCCESS");
this.size = file.length();
//UE中只会处理单张上传,完成后即退出
break;
} else {
String fname = fis.getFieldName();
//只处理title,其余表单请自行处理
if(!fname.equals("pictitle")){
continue;
}
BufferedInputStream in = new BufferedInputStream(fis.openStream());
BufferedReader reader = new BufferedReader(new InputStreamReader(in));
StringBuffer result = new StringBuffer();
while (reader.ready()) {
result.append((char)reader.read());
}
this.title = new String(result.toString().getBytes(),"utf-8");
reader.close();

}
}
} catch (SizeLimitExceededException e) {
this.state = this.errorInfo.get("SIZE");
} catch (InvalidContentTypeException e) {
this.state = this.errorInfo.get("ENTYPE");
} catch (FileUploadException e) {
this.state = this.errorInfo.get("REQUEST");
} catch (Exception e) {
this.state = this.errorInfo.get("UNKNOWN");
}
}
改造后如下:
二、第二种通过后台读取流上传到文服
// 改造后的代码,百度原有代码注释了
public void upload() throws Exception
{
boolean isMultipart = ServletFileUpload.isMultipartContent(this.request);
if (!isMultipart)
{
this.state = this.errorInfo.get("NOFILE");
return;
}
try
{
MultipartResolver resolver = new CommonsMultipartResolver(this.request.getSession().getServletContext());
MultipartHttpServletRequest multipartRequest = resolver.resolveMultipart(request);
CommonsMultipartFile orginalFile = (CommonsMultipartFile) multipartRequest.getFile("upfile");

this.originalName = orginalFile.getOriginalFilename();
if (!this.checkFileType(this.originalName))
{
this.state = this.errorInfo.get("TYPE");
return;
}
this.type = this.getFileExt(this.originalName);
this.size = orginalFile.getSize();

DiskFileItem fileItem = (DiskFileItem) orginalFile.getFileItem();
InputStream inputStream = fileItem.getInputStream();

//读取图片流上传到文服返回储存路径
String key = FastDFSClient.uploadFiless(inputStream, orginalFile.getOriginalFilename());

// 这里是公司内部上传到阿里云服务器的工具类
//            String key = uploadImage( multipartRequest.getFile("upfile").getBytes());

this.fileName = key;
this.url = key;
this.url = "http://xxxxxxx/" + key;
this.state = this.errorInfo.get("SUCCESS");
}
catch (Exception e)
{
this.state = this.errorInfo.get("UNKNOWN");
}
}
用到了Spring的这两个文件
import org.springframework.web.multipart.commons.CommonsMultipartFile;
import org.springframework.web.multipart.commons.CommonsMultipartResolver;
然后编辑器页面上显示的时候,img的src目录需要改一下(插件目录下的
dialogs/image/image.js)
callback: function (editor, $w, url, state) {

if (state == "SUCCESS") {
//显示图片计数+1
Upload.showCount++;
//                var $img = $("<img src='" + editor.options.imagePath + url + "' class='edui-image-pic' />"),
var $img = $("<img src='" + url + "' class='edui-image-pic' />"),
$item = $("<div class='edui-image-item edui-image-upload-item'><div class='edui-image-close'></div></div>").append($img);

if ($(".edui-image-upload2", $w).length < 1) {
$(".edui-image-content", $w).append($item);

Upload.render(".edui-image-content", 2)
.config(".edui-image-upload2");
} else {
$(".edui-image-upload2", $w).before($item).show();
}

$img.on("load", function () {
Base.scale(this, 120);
Base.close($(this));
$(".edui-image-content", $w).focus();
});

} else {
currentDialog.showTip( state );
window.setTimeout( function () {

currentDialog.hideTip();

}, 3000 );
}

Upload.toggleMask();

}
};
三、前端后分离直接通过http请求读取上传文件(修改image.js)
     //$(this).parent()[0].submit();
     //Upload.updateInput( input );
     //me.toggleMask("Loading....");
     //callback && callback();

var formData = new FormData($(this).parent()[0]);
$.ajax({
url : "http://aqqas.rifeng.com.cn/upload",
//	     url : "/upload",
type : "POST",
data : formData,
cache: false,
processData: false,
contentType: false,
success : function(data) {
var returnJson =  eval("(" + data + ")");
if (!/\.(gif|jpg|jpeg|png|GIF|JPG|PNG)$/.test(returnJson[0].fileURL)) {
///	nui.alert("图片类型必须是.gif,jpeg,jpg,png中的一种","系统提示");
} else {
newUrl = returnJson[0].fileURL;
newFileName = returnJson[0].name;
//显示图片计数+1
Upload.showCount++;
var $img = $("<img src='" + newUrl + "' class='edui-image-pic' />"),
$item = $("<div class='edui-image-item edui-image-upload-item'><div class='edui-image-close'></div></div>").append($img);

if ($(".edui-image-upload2", $('#edui-dialog-image')).length < 1) {
$(".edui-image-content", $('#edui-dialog-image')).append($item);

Upload.render(".edui-image-content", 2)
.config(".edui-image-upload2");
} else {
$(".edui-image-upload2", $('#edui-dialog-image')).before($item).show();
}

$img.on("load", function () {
Base.scale(this, 120);
Base.close($(this));
$(".edui-image-content", $('#edui-dialog-image')).focus();
});
Upload.toggleMask();
}

},
error : function(data) {

currentDialog.showTip( state );
window.setTimeout( function () {

currentDialog.hideTip();

}, 3000 );

}
});
上传成功!

相关文章推荐
- 三步在mvc中使用KindEditor开发富文本编辑器上传图片功能
- 改造百度UMeditor(UEditor-min)富文本编辑器的图片上传功能
- EXTJS中整合tinymce的富文本编辑器,添加上传图片功能
- 在使用富文本编辑器kindeditor时,使用图片上传的功能报不允许访问路径***的HTTP谓词POST
- wysiwyg 富文本编辑器(附带图片上传功能)
- 改造百度UMeditor(UEditor-min)富文本编辑器的图片上传功能
- react 中 使用 没有启用图片上传功能的simditor 富文本编辑器
- 图片上传及登录跳转不同页面功能实现简述
- JS实现上传图片的三种方法并实现预览图片功能
- 启用ckeditor自带的图片上传功能
- JFileChooser+FileNameExtensionFilter 文件选择器+过滤器------上传图片功能 表格内部操作
- thinkPHP5框架整合plupload实现图片批量上传功能的方法
- 通过input上传图片,判断不同浏览器及图片类型和大小的js代码
- FCKeditor编辑器添加图片上传功能及图片路径问题解决方法
- 上传图片 带图片预览功能
- 在jsp页面中添加富文本编译器(ueditor)+ 图片上传功能
- ckeditor ckfinder 集成 ,添加本地上传图片功能
- 如何实现无刷新安全图片上传功能
- kindeditor编辑器,图片上传功能齐全