idear maven springmvc 注解开发2(开发中真正使用)
2017-12-03 02:59
751 查看
1.修改springmvc.xml
springmv.xml
刚开始:

需要 alt+enter键 导入命名空间即可。
-----------------------------------------------------
2.访问结果:
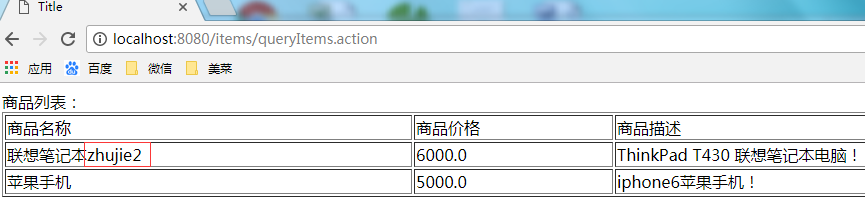
<?xml version="1.0" encoding="UTF-8"?>
<beans xmlns="http://www.springframework.org/schema/beans"
xmlns:xsi="http://www.w3.org/2001/XMLSchema-instance"
xmlns:contex="http://www.springframework.org/schema/context"
xmlns:mvc="http://www.springframework.org/schema/mvc"
xsi:schemaLocation="http://www.springframework.org/schema/beans http://www.springframework.org/schema/beans/spring-beans.xsd http://www.springframework.org/schema/context http://www.springframework.org/schema/context/spring-context.xsd http://www.springframework.org/schema/mvc http://www.springframework.org/schema/mvc/spring-mvc.xsd">
<!-- 对于注解的Handler可以单个配置
实际开发中建议使用组件扫描
-->
<!-- 可以扫描controller、service、...
这里让扫描controller,指定controller的包
-->
<contex:component-scan base-package="com.meicai.Controller"/>

<!-- 使用 mvc:annotation-driven代替上边注解映射器和注解适配器配置
mvc:annotation-driven默认加载很多的参数绑定方法,
比如json转换解析器就默认加载了,如果使用mvc:annotation-driven不用配置上边的RequestMappingHandlerMapping和RequestMappingHandlerAdapter
实际开发时使用mvc:annotation-driven
-->
<mvc:annotation-driven></mvc:annotation-driven>

<!-- 视图解析器
解析jsp解析,默认使用jstl标签,classpath下的得有jstl的包
-->
<bean class="org.springframework.web.servlet.view.InternalResourceViewResolver">
<!-- 配置jsp路径的前缀 -->
<property name="prefix" value="/"/>
<!-- 配置jsp路径的后缀 -->
<property name="suffix" value=".jsp"/>
</bean>
</beans>
springmv.xml
刚开始:
需要 alt+enter键 导入命名空间即可。
-----------------------------------------------------
2.访问结果:

相关文章推荐
- idear maven springmvc 非注解开发1
- idear maven springmvc 注解开发1
- idear maven springmvc 非注解开发2
- SpringMVC学习笔记(二)使用IntelliJ IDEA开发Spring MVC HelloWorld(基于Maven)
- 通过注解的方式集成Spring 4 MVC+Hibernate 4+MySQL+Maven,开发项目样例
- 使用IntelliJ IDEA开发Maven SpringMVC网站
- 基于Spring MVC+Spring JPA技术使用Spring全注解实战开发大型商业ERP项目
- 使用Maven+Hibernate+Spring+Spring MVC开发新闻发布系统
- 使用maven+springboot+springmvc+mybaits-spring+mybatis-generator开发
- SpringMVC学习笔记(三)使用IntelliJ IDEA开发Spring MVC HelloWorld(注解配置SpringMVC)
- 基于Spring MVC+Spring JPA技术使用Spring全注解实战开发大型商业ERP项目
- 【springMVC】使用maven时,已经添加了spring-web和spring-webmvc依赖,却没有注解,还有其他报错
- Spring MVC + MyBatis+Maven 零基础搭建Web开发框架(注解模式哦)
- spring-mvc入门(五):使用注解(下)
- (菜鸟来动手)SpringMVC+Spring+Mybatis整合(第二天) 使用maven来构建项目
- SpringMVC+Spring+Mybatis整合,使用druid连接池,声明式事务,maven配置
- 如果是作为客户端的HTTP+JSON接口工程,没有JSP等view视图的情况下,使用Jersery框架开发绝对是第一选择。而在基于Spring3 MVC的架构下,对HTTP+JSON的返回类型也有很好
- spring3.1.1 mvc使用注解搭建hello world
- Spring之使用Annotation注解开发项目
- spring3 mvc使用注解方式时,不能扫描jar包里面的类