ActiveMQ 5.15.x Release安装和配置--Linux篇
2017-11-26 00:00
253 查看
阅读目录:
1. 关闭防火墙和Selinux
2. 下载并安装ActiveMQ 5.15.x Release版本
3. 启动并验证
4.配置ActiveMQ 5.15.x Release自启动
5.注意事项以及说明
1. 关闭防火墙和Selinux
Linux的防火墙是咱们新手的噩梦,很多情况会出现能ping通,但是访问不了Web页面。所以开始就干掉它!1.1 关闭防火墙
[root@localhost ~]# /etc/init.d/iptables stop
iptables: Setting chains to policy ACCEPT: filter          [  OK  ]
iptables: Flushing firewall rules:                         [  OK  ]
iptables: Unloading modules:                               [  OK  ]
1.2 开机自动关闭防火墙
[root@localhost ~]# chkconfig iptables off
1.3 查看Selinux状态
[root@localhost ~]# sestatus
SELinux status: enabled
SELinuxfs mount: /sys/fs/selinux
SELinux root directory: /etc/selinux
Loaded policy name: targeted
Current mode: enforcing
Mode from config file: enforcing
Policy MLS status: enabled
Policy deny_unknown status: allowed
Max kernel policy version: 28
1.4 关闭selinux
[root@localhost ~]# vi /etc/selinux/config
修改 SELINUX=disabled ,重启机器。
注:永久开启->改成:SELINUX=enforcing
2. 下载并安装ActiveMQ 5.15.x Release版本
注:为了方便管理,创建一个文件夹专门放所需软件[root@localhost /]# mkdir developer [root@localhost /]# cd developer
2.1 下载ActiveMQ 5.15.x Release
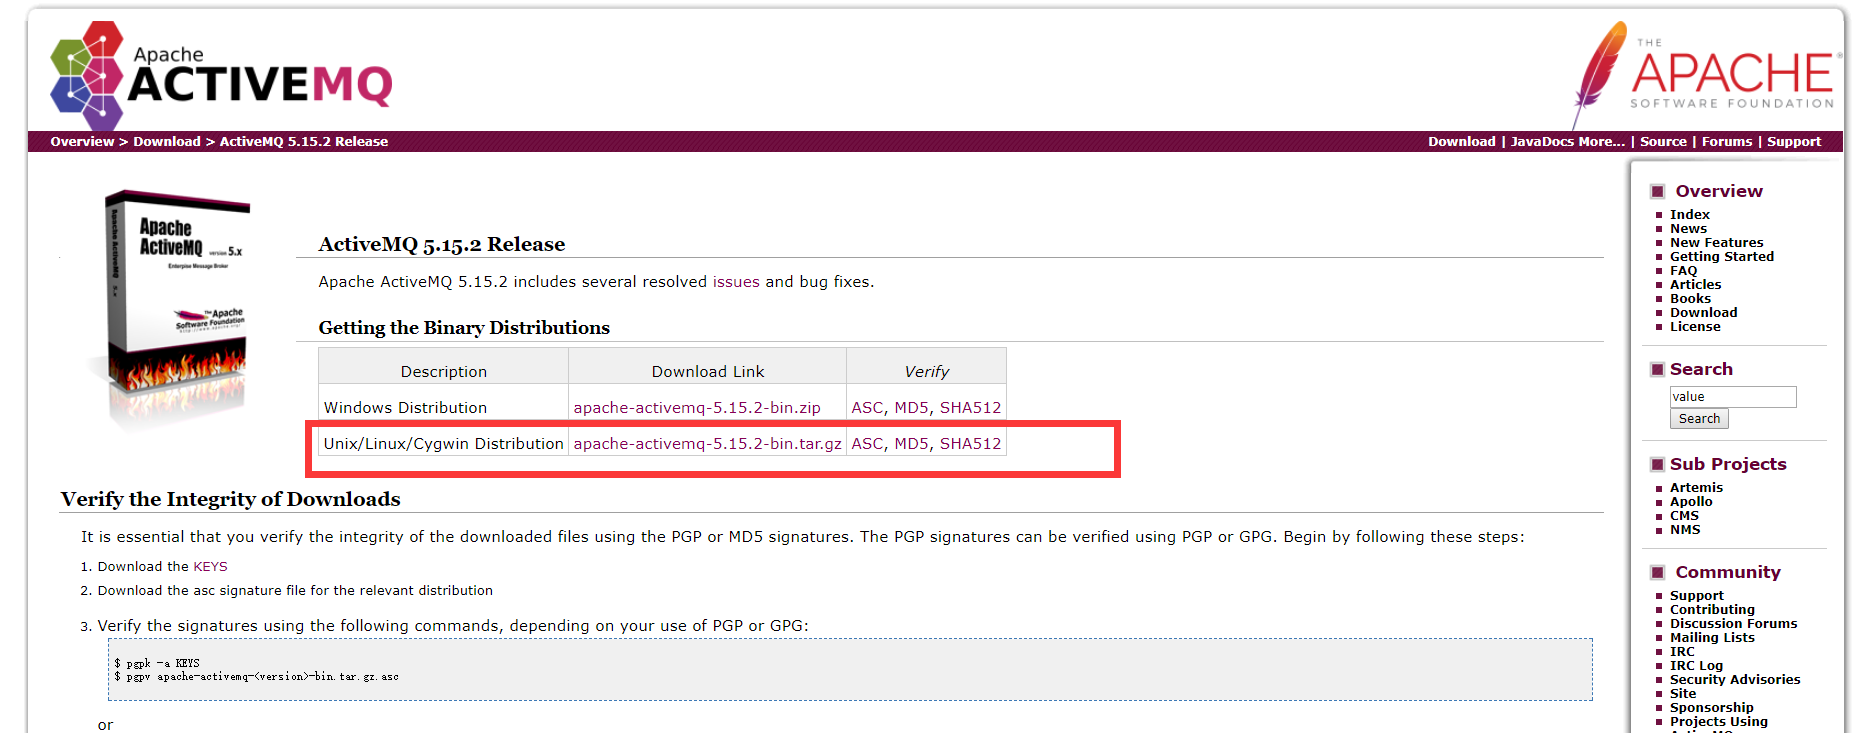
[root@localhost developer]# wget http://www.apache.org/dyn/closer.cgi?filename=/activemq/5.15.2/apache-activemq-5.15.2-bin.tar.gz&action=download[/code] 注:ActiveMQ 5.15.x Release 官网url如下:
http://activemq.apache.org/activemq-5152-release.html
2.2 解压ActiveMQ 5.15.x Release[root@localhost developer]# tar -zxvf apache-activemq-5.15.2-bin.tar.gz3. 启动并验证
3.1 进入ActiveMQ文件夹[root@localhost developer]# cd apache-activemq-5.15.2
3.2 启动ActiveMQ[root@localhost apache-activemq-5.15.2]# ./bin/activemq start
3.3 验证ActiveMQ是否启动
方式1:打开浏览器,输入ip:8161/admin/index.jsp,比如:192.168.163.129:8161/admin/index.jsp
账号:admin,密码:admin
方式2:检查端口号,或者进程,再者检查状态
检查端口号[root@localhost apache-activemq-5.15.2]# netstat -an | grep 61616
检查进程[root@localhost apache-activemq-5.15.2]# ps -ef | grep activemq
检查状态[root@localhost apache-activemq-5.15.2]# ./bin/activemq status4. 配置ActiveMQ 自启动
4.1 复制ActiveMQ解压文件夹(为了自启动方便)[root@localhost apache-activemq-5.15.2]# cd .. [root@localhost developer]# cp -r /developer/apache-activemq-5.15.2/ /usr/local/active
4.2 复制ActiveMQ启动文件[root@localhost developer]# cp /usr/local/activemq/bin/activemq /etc/init.d
4.3 编辑ActiveMQ启动文件[root@localhost developer]# vim /etc/init.d/activemq
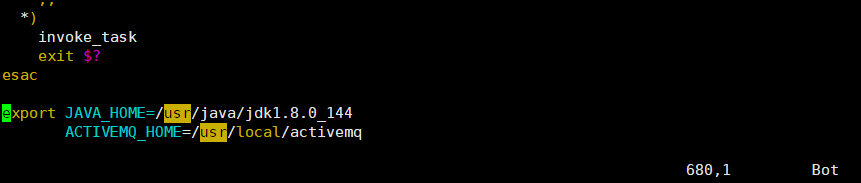
在最后一行添加如下代码
export JAVA_HOME=/usr/java/jdk1.8.0_144
ACTIVEMQ_HOME=/usr/local/activemq
4.4 赋予ActiveMQ启动文件的权限[root@localhost developer]# cd /etc/init.d [root@localhost developer]# chmod +x /etc/init.d/activemq
4.5 添加到系统启动文件中[root@localhost developer]# chkconfig --add activemq
4.6 检验查看列表[root@localhost developer]# chkconfig --list|grep activemq activemq 0:off 1:off 2:off 3:on 4:off 5:on 6:off5. 注意事项以及说明
注意事项:
ActiveMQ 5.15.x Release 有对应的JDK版本最低为1.8,检查jdk版本是否匹配,不则启动ActiveMQ就会报错
检查jdk:[root@localhost apache-activemq-5.15.2]# java -version java version "1.8.0_144" Java(TM) SE Runtime Environment (build 1.8.0_144-b01) Java HotSpot(TM) 64-Bit Server VM (build 25.144-b01, mixed mode)
说明:本次使用
操作系统:CentOS 6.8 64位
ActiveMQ版本:5.15.2Release
JDK版本:1.8.0_144


相关文章推荐
- 分布式架构高可用架构篇_02_activemq高可用集群(zookeeper+leveldb)安装、配置、高可用测试
- ActiveMQ安装配置 和 使用简例
- ActiveMQ — 集群 — 安装与配置
- MySQL 5.1.x 安装和配置--Linux篇
- activemq下载安装配置
- Activemq 安装与集群配置
- ActiveMQ安装与配置
- ActiveMQ安装配置及使用
- 2016.2.16 ActiveMQ集群负载均衡、安装、配置
- ActiveMQ的安装和配置
- ActiveMQ安装与配置
- ActiveMQ安装与配置
- JMS之——ActiveMQ的安装与配置(单机版)
- Maven 3.5.x 安装和配置--Linux篇
- JMS之——ActiveMQ高可用集群安装、配置(基于ZooKeeper + LevelDB的伪集群)
- linux上ActiveMQ 集群安装、配置和高可用测试
- Centos6.5 下的 ActiveMQ 5.14.2 的安装与配置
- activemq安装及配置
- Linux中安装ActiveMQ 配置开机自启动教程
- linux apache activemq的安装配置