Centos7+nginx+tomcat 集群部署实战
2017-11-16 15:27
369 查看
1:安装centos7(链接:http://pan.baidu.com/s/1o80x36a 密码:xuwb),安装步骤自己百度,并克隆4个虚拟机
我的ip为(192.168.72.129 192.168.72.130 192.168.72.131 192.168.72.132)
2:下载xshell,连接上这四台linux
3:在192.168.72.129安装nginx(链接:http://pan.baidu.com/s/1skAQ3X7 密码:lwrz)
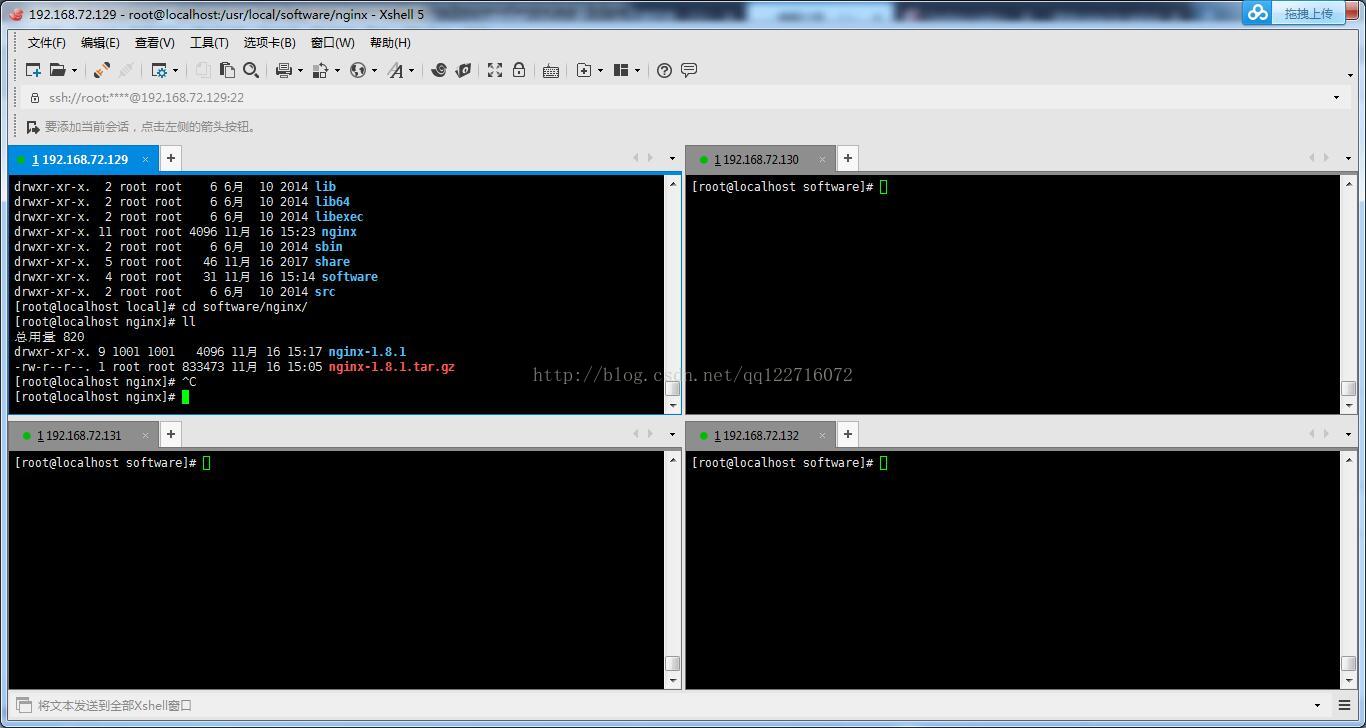
安装步骤:先在192.168.72.129创建文件夹
------------------------nginx开始安装---------------------------
cd /usr/local
mkdir software/nginx
cd /usr/local/software/nginx
rz 这里把下载好的nginx复制到/usr/local/software/nginx目录下,
tar -xzvf nginx-1.8.1.tar.gz
cd /usr/local/software/nginx/nginx-1.8.1
./configure
这里会报错,一些包找不到
安装缺失的包
yum -y install pcre-devel
yum -y install openssl-devel
安装完成后执行
./configure
make
make install
测试nginx
cd /usr/local/nginx/sbin
./nginx -t
启动nginx
./nginx
访问nginx 192.168.72.129:80
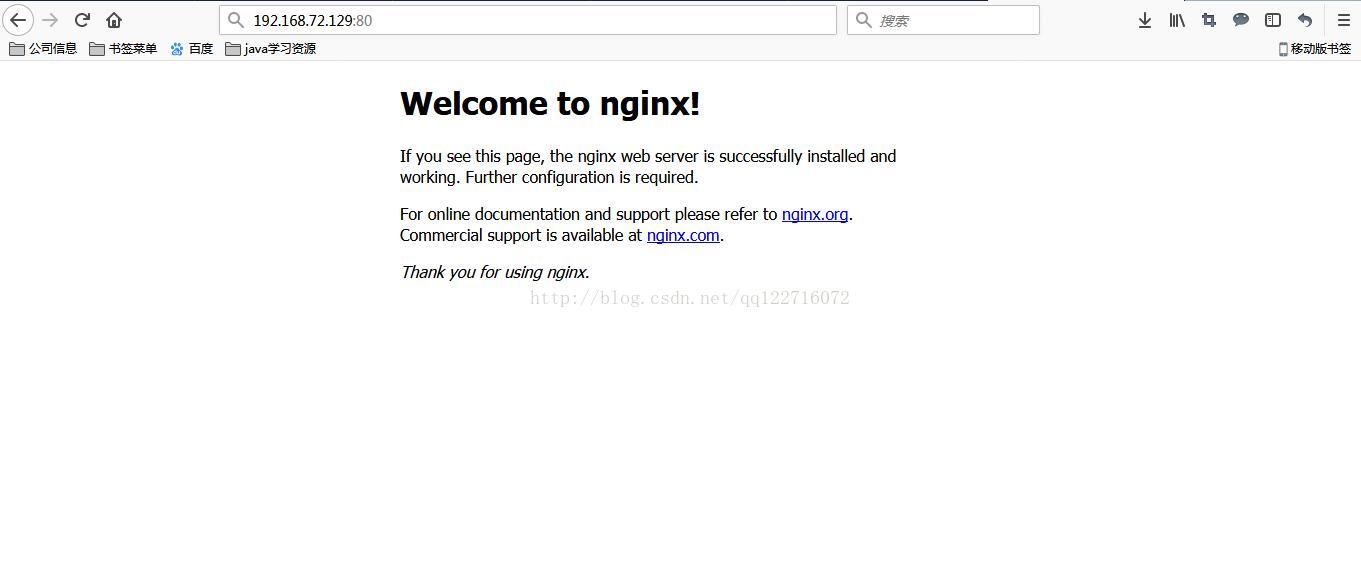
--------------------nginx安装完成-----------------------
4:4个机器上安装tomcat,并分别部署测试项目(链接:http://pan.baidu.com/s/1i4VzLtF 密码:qnxv)
安装步骤略
5:修改nginx配置文件
#user nobody;
#启动进程,通常设置成和cpu的数量相等
worker_processes 1;
#全局错误日志及PID文件
#error_log logs/error.log;
#error_log logs/error.log notice;
#error_log logs/error.log info;
#pid logs/nginx.pid;
events {
#epoll是多路复用IO(I/O Multiplexing)中的一种方式,但是仅用于linux2.6以上内核,可以大大提高nginx的性能
use epoll;
#单个后台worker process进程的最大并发链接数
worker_connections 1024;
}
#设定http服务器,利用它的反向代理功能提供负载均衡支持
http {
#设定mime类型,类型由mime.type文件定义
include mime.types;
default_type application/octet-stream;
#设定日志格式
#设定负载均衡的服务器列表
upstream tomcat {
#weigth参数表示权值,权值越高被分配到的几率越大
server 192.168.72.129:8080 weight=1 max_fails=1 fail_timeout=30s;
server 192.168.72.130:8080 weight=1 max_fails=2 fail_timeout=30s;
server 192.168.72.131:8080 weight=1 max_fails=2 fail_timeout=30s;
server 192.168.72.132:8080 weight=1 max_fails=2 fail_timeout=30s;
}
#log_format main '$remote_addr - $remote_user [$time_local] "$request" '
# '$status $body_bytes_sent "$http_referer" '
# '"$http_user_agent" "$http_x_forwarded_for"';
#access_log logs/access.log main;
sendfile on;
#tcp_nopush on;
#keepalive_timeout 0;
keepalive_timeout 65;
#gzip on;
server {
#侦听8888端口
listen 8888;
# server_name 192.168.72.129;
# 定义使用 www.GeekPlusA.com 访问
server_name www.GeekPlusA.com;
#设定本虚拟主机的访问日志
# access_log logs/www.GeekPlusA.com.access.log main;
#charset koi8-r;
#access_log logs/host.access.log main;
location / {
#定义服务器的默认网站根目录位置
root html;
#定义首页索引文件的名称
index index.jsp index.html index.htm;
proxy_connect_timeout 3;
proxy_send_timeout 30;
proxy_read_timeout 30;
#请求转向 tomcat 定义的服务器列表
proxy_pass http://tomcat;
#以下是一些反向代理的配置可删除.
}
#error_page 404 /404.html;
# redirect server error pages to the static page /50x.html
#
error_page 500 502 503 504 /50x.html;
location = /50x.html {
root html;
}
# proxy the PHP scripts to Apache listening on 127.0.0.1:80
#
#location ~ \.php$ {
# proxy_pass http://127.0.0.1;
#}
# pass the PHP scripts to FastCGI server listening on 127.0.0.1:9000
#
#location ~ \.php$ {
# root html;
# fastcgi_pass 127.0.0.1:9000;
# fastcgi_index index.php;
# fastcgi_param SCRIPT_FILENAME /scripts$fastcgi_script_name;
# include fastcgi_params;
#}
# deny access to .htaccess files, if Apache's document root
# concurs with nginx's one
#
#location ~ /\.ht {
# deny all;
#}
}
# another virtual host using mix of IP-, name-, and port-based configuration
#
#server {
# listen 8000;
# listen somename:8080;
# server_name somename alias another.alias;
# location / {
# root html;
# index index.html index.htm;
# }
#}
# HTTPS server
#
#server {
# listen 443 ssl;
# server_name localhost;
# ssl_certificate cert.pem;
# ssl_certificate_key cert.key;
# ssl_session_cache shared:SSL:1m;
# ssl_session_timeout 5m;
# ssl_ciphers HIGH:!aNULL:!MD5;
# ssl_prefer_server_ciphers on;
# location / {
# root html;
# index index.html i
4000
ndex.htm;
# }
#}
}
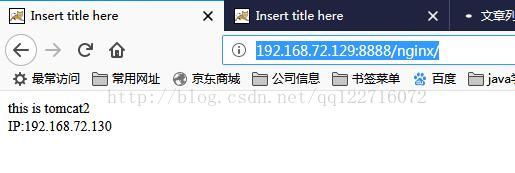
6:启动tomcat,启动tomcat,观看效果
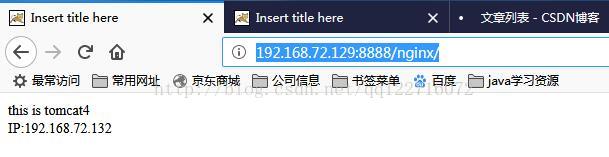
浏览器输入(http://192.168.72.129:8888/nginx/),刷新看效果
每刷新一次,就切换一下

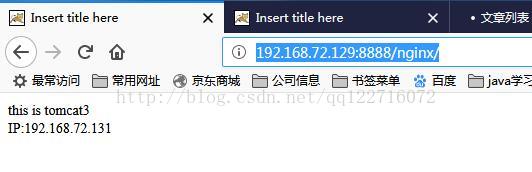
7:停止某个tomcat,观看效果.再启动观看效果
如有疑问,随时加Q交流:1428424253
我的ip为(192.168.72.129 192.168.72.130 192.168.72.131 192.168.72.132)
2:下载xshell,连接上这四台linux
3:在192.168.72.129安装nginx(链接:http://pan.baidu.com/s/1skAQ3X7 密码:lwrz)
安装步骤:先在192.168.72.129创建文件夹
------------------------nginx开始安装---------------------------
cd /usr/local
mkdir software/nginx
cd /usr/local/software/nginx
rz 这里把下载好的nginx复制到/usr/local/software/nginx目录下,
tar -xzvf nginx-1.8.1.tar.gz
cd /usr/local/software/nginx/nginx-1.8.1
./configure
这里会报错,一些包找不到
安装缺失的包
yum -y install pcre-devel
yum -y install openssl-devel
安装完成后执行
./configure
make
make install
测试nginx
cd /usr/local/nginx/sbin
./nginx -t
启动nginx
./nginx
访问nginx 192.168.72.129:80
--------------------nginx安装完成-----------------------
4:4个机器上安装tomcat,并分别部署测试项目(链接:http://pan.baidu.com/s/1i4VzLtF 密码:qnxv)
安装步骤略
5:修改nginx配置文件
#user nobody;
#启动进程,通常设置成和cpu的数量相等
worker_processes 1;
#全局错误日志及PID文件
#error_log logs/error.log;
#error_log logs/error.log notice;
#error_log logs/error.log info;
#pid logs/nginx.pid;
events {
#epoll是多路复用IO(I/O Multiplexing)中的一种方式,但是仅用于linux2.6以上内核,可以大大提高nginx的性能
use epoll;
#单个后台worker process进程的最大并发链接数
worker_connections 1024;
}
#设定http服务器,利用它的反向代理功能提供负载均衡支持
http {
#设定mime类型,类型由mime.type文件定义
include mime.types;
default_type application/octet-stream;
#设定日志格式
#设定负载均衡的服务器列表
upstream tomcat {
#weigth参数表示权值,权值越高被分配到的几率越大
server 192.168.72.129:8080 weight=1 max_fails=1 fail_timeout=30s;
server 192.168.72.130:8080 weight=1 max_fails=2 fail_timeout=30s;
server 192.168.72.131:8080 weight=1 max_fails=2 fail_timeout=30s;
server 192.168.72.132:8080 weight=1 max_fails=2 fail_timeout=30s;
}
#log_format main '$remote_addr - $remote_user [$time_local] "$request" '
# '$status $body_bytes_sent "$http_referer" '
# '"$http_user_agent" "$http_x_forwarded_for"';
#access_log logs/access.log main;
sendfile on;
#tcp_nopush on;
#keepalive_timeout 0;
keepalive_timeout 65;
#gzip on;
server {
#侦听8888端口
listen 8888;
# server_name 192.168.72.129;
# 定义使用 www.GeekPlusA.com 访问
server_name www.GeekPlusA.com;
#设定本虚拟主机的访问日志
# access_log logs/www.GeekPlusA.com.access.log main;
#charset koi8-r;
#access_log logs/host.access.log main;
location / {
#定义服务器的默认网站根目录位置
root html;
#定义首页索引文件的名称
index index.jsp index.html index.htm;
proxy_connect_timeout 3;
proxy_send_timeout 30;
proxy_read_timeout 30;
#请求转向 tomcat 定义的服务器列表
proxy_pass http://tomcat;
#以下是一些反向代理的配置可删除.
}
#error_page 404 /404.html;
# redirect server error pages to the static page /50x.html
#
error_page 500 502 503 504 /50x.html;
location = /50x.html {
root html;
}
# proxy the PHP scripts to Apache listening on 127.0.0.1:80
#
#location ~ \.php$ {
# proxy_pass http://127.0.0.1;
#}
# pass the PHP scripts to FastCGI server listening on 127.0.0.1:9000
#
#location ~ \.php$ {
# root html;
# fastcgi_pass 127.0.0.1:9000;
# fastcgi_index index.php;
# fastcgi_param SCRIPT_FILENAME /scripts$fastcgi_script_name;
# include fastcgi_params;
#}
# deny access to .htaccess files, if Apache's document root
# concurs with nginx's one
#
#location ~ /\.ht {
# deny all;
#}
}
# another virtual host using mix of IP-, name-, and port-based configuration
#
#server {
# listen 8000;
# listen somename:8080;
# server_name somename alias another.alias;
# location / {
# root html;
# index index.html index.htm;
# }
#}
# HTTPS server
#
#server {
# listen 443 ssl;
# server_name localhost;
# ssl_certificate cert.pem;
# ssl_certificate_key cert.key;
# ssl_session_cache shared:SSL:1m;
# ssl_session_timeout 5m;
# ssl_ciphers HIGH:!aNULL:!MD5;
# ssl_prefer_server_ciphers on;
# location / {
# root html;
# index index.html i
4000
ndex.htm;
# }
#}
}
6:启动tomcat,启动tomcat,观看效果
浏览器输入(http://192.168.72.129:8888/nginx/),刷新看效果
每刷新一次,就切换一下
7:停止某个tomcat,观看效果.再启动观看效果
如有疑问,随时加Q交流:1428424253

相关文章推荐
- 生产环境实战spark (11)分布式集群 5台设备 Zookeeper集群、Kafka集群安装部署
- codis集群部署实战 - 入门篇
- 自己学Docker:15.Docker使用实战--zookeeper集群部署
- docker 实战---部署tomcat\weblogic集群 (二)
- 实战CentOS系统部署Hadoop集群服务
- codis集群部署实战
- Elasticsearch单机双节点集群部署实战
- codis集群部署实战
- 实战Centos系统部署Codis集群服务
- [实战] 用数人云,部署弹性 ELK 集群就五步
- 开源Nosql数据库Cassandra3.0实战-集群部署与插件使用
- Spark核心源码分析与开发实战(1)-----------SSH hadoop spark集群部署
- 实战Centos系统部署Codis集群服务
- J2EE集群开发部署实战
- 企业级DNS服务集群架构设计及BIND部署配置实战 推荐
- 实战部署weblogic集群及发布应用(1)
- codis集群部署实战
- Ceph实战入门系列(一)——三节点Ceph集群的安装与部署
- 实战部署weblogic集群及发布应用(2)
- codis集群部署实战