vue2 + typescript2 项目开发(环境配置)
2017-11-10 09:23
417 查看
Vue 引入 TypeScript
vue init airyland/vux2 projectName
增加开发包的依赖
npm install typescript ts-loader --save-dev
增加运行依赖包(
安装vue的官方插件)
npm i vue-class-component vue-property-decorator --save
说明:
vue-class-component:强化 Vue 组件,使用 TypeScript/装饰器 增强 Vue 组件
vue-property-decorator:在 vue-class-component 上增强更多的结合 Vue 特性的装饰器
ts-loader:TypeScript 为 Webpack 提供了 ts-loader,其实就是为了让webpack识别 .ts .tsx文件
配置 webpack
首先找到./build/webpack.base.conf.js
1.找到entry.app 将main.js 改成 main.ts, 顺便把项目文件中的main.js也改成main.ts, 里面内容保持不变
如下所示
entry: {
app: './src/main.ts'
}
2.找到resolve.extensions 里面加上.ts 后缀 (是为了之后引入.ts的时候不写后缀)
如下所示
resolve: {
extensions: ['.js', '.vue', '.json', '.ts'],
alias: {
'@': resolve('src')
}
}
3.找到module.rules 添加webpack对.ts的解析
module: {
rules: [
{
test: /\.(js|vue)$/,
loader: 'eslint-loader',
enforce: 'pre',
include: [resolve('src'), resolve('test')],
options: {
formatter: require('eslint-friendly-formatter')
}
},
// 从这里复制下面的代码就可以了
{
test: /\.tsx?$/,
loader: 'ts-loader',
exclude: /node_modules/,
options: {
appendTsSuffixTo: [/\.vue$/],
}
},
// 复制以上的
}
}ts-loader会检索当前目录下的
tsconfig.json文件,根据里面定义的规则来解析
.ts文件(就跟
.babelrc的作用一样)
添加 tsconfig.json
接下来在根路径下创建tsconfig.json文件
这里有一份参考的
tsconfig.json配置
{
// 编译选项
"compilerOptions": {
// 输出目录
"outDir": "./output",
// 是否包含可以用于 debug 的 sourceMap
"sourceMap": true,
// 以严格模式解析
"strict": true,
// 采用的模块系统
"module": "esnext",
// 如何处理模块
"moduleResolution": "node",
// 编译输出目标 ES 版本
"target": "es5",
// 允许从没有设置默认导出的模块中默认导入
"allowSyntheticDefaultImports": true,
// 将每个文件作为单独的模块
"isolatedModules": false,
// 启用装饰器
"experimentalDecorators": true,
// 启用设计类型元数据(用于反射)
"emitDecoratorMetadata": true,
// 在表达式和声明上有隐含的any类型时报错
"noImplicitAny": false,
// 不是函数的所有返回路径都有返回值时报错。
"noImplicitReturns": true,
// 从 tslib 导入外部帮助库: 比如__extends,__rest等
"importHelpers": true,
// 编译过程中打印文件名
"listFiles": true,
// 移除注释
"removeComments": true,
"suppressImplicitAnyIndexErrors": true,
// 允许编译javascript文件
"allowJs": true,
// 解析非相对模块名的基准目录
"baseUrl": "./",
// 指定特殊模块的路径
"paths": {
"jquery": [
"node_modules/jquery/dist/jquery"
]
},
// 编译过程中需要引入的库文件的列表
"lib": [
"dom",
"es2015",
"es2015.promise"
]
}
}
顺便贴一份自己的配置
{
"include": [
"src/**/*"
],
"exclude": [
"node_modules"
],
"compilerOptions": {
"allowSyntheticDefaultImports": true,
"experimentalDecorators": true,
"allowJs": true,
"module": "esnext",
"target": "es5",
"moduleResolution": "node",
"isolatedModules": true,
"lib": [
"dom",
"es5",
"es2015.promise"
],
"sourceMap": true,
"pretty": true
}
}
让 ts 识别 .vue
由于TypeScript默认并不支持
*.vue后缀的文件,所以在
vue项目中引入的时候需要创建一个
vue-shim.d.ts文件,放在项目项目对应使用目录下,例如
src/vue-shim.d.ts
declare module "*.vue" {
import Vue from "vue";
export default Vue;
}
意思是告诉
TypeScript
*.vue后缀的文件可以交给
vue模块来处理。
而在代码中导入
*.vue文件的时候,需要写上
.vue后缀。原因还是因为
TypeScript默认只识别
*.ts文件,不识别
*.vue文件:
import Component from 'components/component.vue'
改造 .vue
文件
在这之前先让我们了解一下所需要的插件(下面的内容需要掌握es7的装饰器, 就是下面使用的@符号)
vue-class-component
vue-class-component 对Vue组件进行了一层封装,让
Vue组件语法在结合了
TypeScript语法之后更加扁平化:
<template>
<div>
<input v-model="msg">
<p>msg: {{ msg }}</p>
<p>computed msg: {{ computedMsg }}</p>
<button @click="greet">Greet</button>
</div>
</template>

<script lang="ts">
import Vue from 'vue'
import Component from 'vue-class-component'

@Component
export default class App extends Vue {
// 初始化数据
msg = 123

// 声明周期钩子
mounted () {
this.greet()
}

// 计算属性
get computedMsg () {
return 'computed ' + this.msg
}

// 方法
greet () {
alert('greeting: ' + this.msg)
}
}
</script>
上面的代码跟下面的代码作用是一样的
export default {
data () {
return {
msg: 123
}
}

// 声明周期钩子
mounted () {
this.greet()
}

// 计算属性
computed: {
computedMsg () {
return 'computed ' + this.msg
}
}

// 方法
methods: {
greet () {
alert('greeting: ' + this.msg)
}
}
}
vue-property-decorator
vue-property-decorator 是在vue-class-component上增强了更多的结合
Vue特性的装饰器,新增了这 7 个装饰器:
@Emit
@Inject
@Model
@Prop
@Provide
@Watch
@Component(从
vue-class-component继承)
在这里列举几个常用的
@Prop/@Watch/@Component, 更多信息,详见官方文档
import { Component, Emit, Inject, Model, Prop, Provide, Vue, Watch } from 'vue-property-decorator'

const s = Symbol('baz')

@Component
export class MyComponent extends Vue {

@Emit()
addToCount(n: number){ this.count += n }

@Emit('reset')
resetCount(){ this.count = 0 }

@Inject() foo: string
@Inject('bar') bar: string
@Inject(s) baz: string

@Model('change') checked: boolean

@Prop()
propA: number

@Prop({ default: 'default value' })
propB: string

@Prop([String, Boolean])
propC: string | boolean

@Provide() foo = 'foo'
@Provide('bar') baz = 'bar'

@Watch('child')
onChildChanged(val: string, oldVal: string) { }

@Watch('person', { immediate: true, deep: true })
onPersonChanged(val: Person, oldVal: Person) { }
}
上面的代码相当于:
const s = Symbol('baz')

export const MyComponent = Vue.extend({
name: 'MyComponent',
inject: {
foo: 'foo',
bar: 'bar',
[s]: s
},
model: {
prop: 'checked',
event: 'change'
},
props: {
checked: Boolean,
propA: Number,
propB: {
type: String,
default: 'default value'
},
propC: [String, Boolean],
},
data () {
return {
foo: 'foo',
baz: 'bar'
}
},
provide () {
return {
foo: this.foo,
bar: this.baz
}
},
methods: {
addToCount(n){
this.count += n
this.$emit("add-to-count", n)
},
resetCount(){
this.count = 0
this.$emit("reset")
},
onChildChanged(val, oldVal) { },
onPersonChanged(val, oldVal) { }
},
watch: {
'child': {
handler: 'onChildChanged',
immediate: false,
deep: false
},
'person': {
handler: 'onPersonChanged',
immediate: true,
deep: true
}
}
})开始修改App.vue
文件
在script标签上加上
lang="ts", 意思是让
webpack将这段代码识别为
typescript而非
javascript
修改vue组件的构造方式( 跟
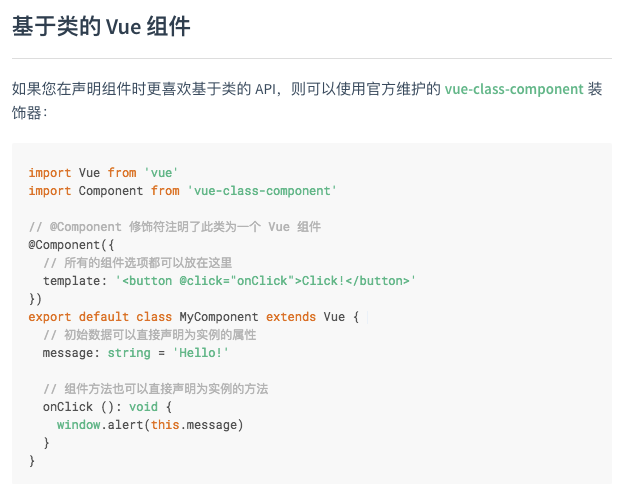
react组件写法有点类似, 详见官方 ), 如下图
用
vue-property-decorator语法改造之前代码
当然也可以直接复制下面的代码替换就可以了
<template>
<div id="app">
<img src="./assets/logo.png">
<router-view/>
</div>
</template>

<script lang="ts">
import Vue from 'vue'
import Component from 'vue-class-component'

@Component({})
export default class App extends Vue {
}
</script>

<style>
#app {
font-family: 'Avenir', Helvetica, Arial, sans-serif;
-webkit-font-smoothing: antialiased;
-moz-osx-font-smoothing: grayscale;
text-align: center;
color: #2c3e50;
margin-top: 60px;
}

</style>
接下来用相同的方式修改HelloWorld.vue即可
npm run dev
这个时候运行项目就应该能正常跑起来了到这里我们的配置就已经结束了

相关文章推荐
- 详解使用Typescript开发node.js项目(简单的环境配置)
- 使用Typescript开发node.js项目——简单的环境配置
- Windows 下 PHP 开发环境配置系列三 - eclipse PDT + Zend Debugger 调试web 项目
- MacBook Pro 下vue项目开发环境搭建,安装和配置apache
- 配置React Native的开发环境及项目创建
- 电商项目(四)开发环境安装与配置讲解(tomcat)
- Linux中Java的web项目开发环境配置(JDK1.7+Tomcat7+Mysql5.5+eclipse)
- MAC下配置android开发环境以及运行cocos2dx项目
- Maven项目之Spring.profile.开发.测试.生产环境的配置和切换之一键部署
- IDEA开发工具配置nw.js项目开发环境
- PHP开发环境搭建 (XAMPP+Xdebug+netbeans,配置调试),创建第一个php项目
- 使用websphere开发J2EE项目时,在服务器配置文件->“环境”->“类路径”中添加的ORACLE的JDBC文件classes12.zip文件是否有效呢?
- 2 配置Ionic开发环境以及创建新的项目
- mac上配置android开发环境并把cocos2dx项目编译到android
- centos中安装并配置Java EE开发环境(可以开发java项目和web项目的环境)
- PhpStorm10和Apache24配置多项目开发环境
- 安装配置PhoneGap开发环境(二)——使用Cordova代替PhoneGap创建项目
- JBOSS安装与配置搭建本地项目环境(方便前端开发调式)
- 电商项目(六)开发环境安装与配置(vsftpd)
- Mac上配置Android开发环境并把Cocos2d-x项目编译到Andro