【ServletFileUpLoad】上传本地文件到服务器
2017-10-31 16:16
465 查看
【ServletFileUpLoad】上传本地文件到服务器
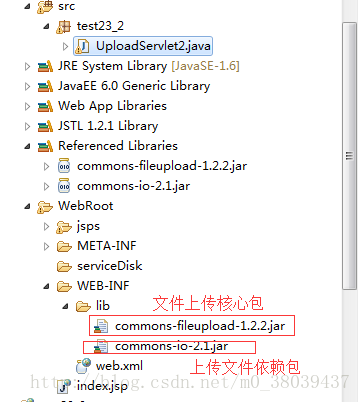
一、项目需要的jar包
二、上传实例
三、前端选择上传文件实例
四、前端显示上传文件结果信息的实例
五、上传流程介绍
通过前端上传页面,用户可以选择文件上传,上传核心类接收到请求后,处理请求。上传成功后,将图片信息转发到显示图片信息的前端页面展示。
一、项目需要的jar包
二、上传实例
package test23_2;

import java.io.File;
import java.io.IOException;
import java.io.PrintWriter;
import java.util.List;
import java.util.UUID;

import javax.servlet.ServletException;
import javax.servlet.http.HttpServlet;
import javax.servlet.http.HttpServletRequest;
import javax.servlet.http.HttpServletResponse;

import org.apache.commons.fileupload.FileItem;
import org.apache.commons.fileupload.FileUploadException;
import org.apache.commons.fileupload.disk.DiskFileItemFactory;
import org.apache.commons.fileupload.servlet.ServletFileUpload;
import org.apache.commons.io.FileUtils;
/*
* 实现基本上传并对文件进行UUID重命名
*/
public class UploadServlet2 extends HttpServlet {

public void doPost(HttpServletRequest request, HttpServletResponse response)
throws ServletException, IOException {
request.setCharacterEncoding("UTF-8");
response.setContentType("text/html;charset=utf-8");
PrintWriter out = response.getWriter();

//1、设置临时上传的路径
DiskFileItemFactory disk =
new DiskFileItemFactory(10240,new File("e:disk"));
//2、设置文件上传的目标路径
String servePath = getServletContext().getRealPath("/serviceDisk");
System.out.println(servePath+"-------------------------");

//3、申明upload
ServletFileUpload up = new ServletFileUpload(disk);
//4、解析request
try {
List<FileItem> list = up.parseRequest(request);
for(FileItem file:list){
if(!file.isFormField()){
//获取上传文件的名字
String fileName = file.getName();
fileName = fileName.substring(fileName.lastIndexOf("\\")+1);
//获取上传文件的后缀
String extName = fileName.substring(fileName.lastIndexOf("."));
//申明UUID
String uuid = UUID.randomUUID().toString().replace("-", "");
//组成新的名称
String newName = uuid+extName;
//上传文件
FileUtils.copyInputStreamToFile(file.getInputStream(),
new File(servePath+"/"+newName));
//封装
request.setAttribute("newName", newName);
request.setAttribute("oldName", fileName);
}
}
//转发
request.getRequestDispatcher("jsps/show2.jsp").forward(request, response);
} catch (FileUploadException e) {
// TODO Auto-generated catch block
new RuntimeException();
}
}

}
三、前端选择上传文件实例
<%@ page language="java" import="java.util.*" pageEncoding="UTF-8"%>
<%
String path = request.getContextPath();
String basePath = request.getScheme()+"://"+request.getServerName()+":"+request.getServerPort()+path+"/";
%>

<!DOCTYPE HTML PUBLIC "-//W3C//DTD HTML 4.01 Transitional//EN">
<html>
<head>
<base href="<%=basePath%>">

<title>My JSP 'upload2.jsp' starting page</title>

<meta http-equiv="pragma" content="no-cache">
<meta http-equiv="cache-control" content="no-cache">
<meta http-equiv="expires" content="0">
<meta http-equiv="keywords" content="keyword1,keyword2,keyword3">
<meta http-equiv="description" content="This is my page">
<!--
<link rel="stylesheet" type="text/css" href="styles.css">
-->

</head>

<body>
<p>上传文件,重命名<p/> <br>
<form action="UploadServlet2" method="post" enctype="multipart/form-data">
上传图片<input type="file" name="imgs"/></br>
图片说明<input type="text" name="node"/></br>
<input type="submit" value="上传"/></br>

</form>
</body>
</html>
四、前端显示上传文件结果信息的实例
<%@ page language="java" import="java.util.*" pageEncoding="UTF-8"%>
<%@ taglib uri="http://java.sun.com/jsp/jstl/core" prefix="c" %>>
<%
String path = request.getContextPath();
String basePath = request.getScheme()+"://"+request.getServerName()+":"+request.getServerPort()+path+"/";
%>

<!DOCTYPE HTML PUBLIC "-//W3C//DTD HTML 4.01 Transitional//EN">
<html>
<head>
<base href="<%=basePath%>">

<title
ce5e
>My JSP 'show2.jsp' starting page</title>

<meta http-equiv="pragma" content="no-cache">
<meta http-equiv="cache-control" content="no-cache">
<meta http-equiv="expires" content="0">
<meta http-equiv="keywords" content="keyword1,keyword2,keyword3">
<meta http-equiv="description" content="This is my page">
<!--
<link rel="stylesheet" type="text/css" href="styles.css">
-->

</head>

<body>
上传文件重命名UUID <br>
文件新名称 ${newName}</br>
文件上传名称 ${oldName}</br>
<img src="<c:url value='/serviceDisk/${newName}'/>"/>
</body>
</html>
五、上传流程介绍
通过前端上传页面,用户可以选择文件上传,上传核心类接收到请求后,处理请求。上传成功后,将图片信息转发到显示图片信息的前端页面展示。

相关文章推荐
- 文件上传下载:commons-fileupload + Servlet 2.5
- 遇到问题-----uploadify上传文件ServletFileUpload.isMultipartContent(request)为false
- Servlet利用Commons FileUpload实现文件上传
- Servlet中配合common-fileupload.jar和common-io.jar进行文件上传
- MultipartHttpServletRequest,ajaxFileUpload上传文件,读取文件乱码问题
- Jsp上传文件(FileUpload+Servlet)
- Spring Boot使用ServletFileUpload上传文件失败
- 文件上传和下载-ServletFileUpload and DiskFileItemFactory
- 文件上传和下载-ServletFileUpload
- servlet文件上传(工具类apache.commons.fileupload)
- Spring Boot使用ServletFileUpload上传文件失败
- 文件上传和下载-ServletFileUpload
- 手把手教Jsp上传文件(FileUpload+Servlet)
- Java-上传文件Spring MultipartResolver 或者 ServletFileUpload
- kindeditor上传文件在SpringMVC中servletFileUpload.parseRequest(request)解析为空获取不到数据问题 .
- struts2 文件上传 和 ServletFileUpload的矛盾
- Commons Fileupload+Servlet+JQuery实现文件上传进度条
- 文件上传和下载-ServletFileUpload
- Spring中servletFileUpload完成上传文件以及文本的处理
- ServletFileUpload上传文件带进度条