更简单的上传你的代码到jcenter
2017-10-25 10:12
369 查看
首先看看有这几个文件:
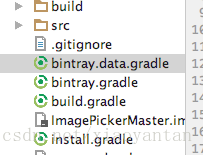
bintray.data.gradle(写你自己的配置)
bintray.gradle(配置bintray,一些task)
install.gradle(关于install的)
接下来在下面的文件中加入相对的内容:
在自己的library的build.gradle中加入:
在root build.gradle中加入
在local.properties中加入自己在jcenter上的用户名和apikey
接下来是上传了
在终端Terminal中输入 ./gradlew install 如果没有问题,再输入 ./gradlew bintrayUpload上传到jcenter就行了。
关于jcenter帐号的注册和maven 仓库的创建我就不再赘述了。
bintray.data.gradle(写你自己的配置)
ext {
bintrayRepo = 'maven' //jcenter上的仓库名,习惯用maven
bintrayName = 'imagepickermaster' //发布到JCenter上的项目名字
bintrayUserOrg = 'supertxy' //jcenter 上的用户名
publishedGroupId = 'com.github.SuperTxy' //groupId
libraryName = 'imagepickermaster' //name
artifact = 'imagepickermaster'

libraryDescription = "image picker with video"

siteUrl = 'https://github.com/SuperTxy/imagerpickermaster'
gitUrl = 'https://github.com/SuperTxy/imagerpickermaster.git'

libraryVersion = 'v1.6.5'

developerId = 'SuperTxy'
developerName = 'xxx'
developerEmail = 'xxxx@gmail.com'

licenseName = 'The Apache Software License, Version 2.0'
licenseUrl = 'http://www.apache.org/licenses/LICENSE-2.0.txt'
allLicenses = ["Apache-2.0"]
}
bintray.gradle(配置bintray,一些task)
apply plugin: 'com.jfrog.bintray'
apply from: './bintray.data.gradle'

version = libraryVersion

if (project.hasProperty("android")) { // Android libraries
task sourcesJar(type: Jar) {
classifier = 'sources'
from android.sourceSets.main.java.srcDirs
}

task javadoc(type: Javadoc) {
options.addBooleanOption('Xdoclint:none', true)
source = android.sourceSets.main.java.srcDirs
classpath += project.files(android.getBootClasspath().join(File.pathSeparator))
failOnError false
}
} else { // Java libraries
task sourcesJar(type: Jar, dependsOn: classes) {
classifier = 'sources'
from sourceSets.main.allSource
}
}

task javadocJar(type: Jar, dependsOn: javadoc) {
classifier = 'javadoc'
from javadoc.destinationDir
}

artifacts {
archives javadocJar
archives sourcesJar
}
Properties properties = new Properties();
properties.load(project.rootProject.file('local.properties').newDataInputStream())
bintray {
user = properties.getProperty("bintray.user")
key = properties.getProperty("bintray.apikey")

configurations = ['archives']
pkg {
repo = bintrayRepo
name = bintrayName
desc = libraryDescription
websiteUrl = siteUrl
vcsUrl = gitUrl
licenses = allLicenses
publish = true
publicDownloadNumbers = true
}
}
install.gradle(关于install的)
apply plugin: 'com.github.dcendents.android-maven'
apply from: './bintray.data.gradle'

group = publishedGroupId

install {
repositories.mavenInstaller {
pom {
project {
packaging 'aar'
groupId publishedGroupId
artifactId artifact

name libraryName
description libraryDescription
url siteUrl

licenses {
license {
name licenseName
url licenseUrl
}
}
developers {
developer {
id developerId
name developerName
email developerEmail
}
}
scm {
connection gitUrl
developerConnection gitUrl
url siteUrl

}
}
}
}
}
接下来在下面的文件中加入相对的内容:
在自己的library的build.gradle中加入:
apply from: './install.gradle'
apply from: './bintray.gradle'
在root build.gradle中加入
buildscript {
repositories {
jcenter()
}
dependencies {
classpath 'com.android.tools.build:gradle:2.3.3'
classpath'com.github.dcendents:android-maven-gradle-plugin:1.5'
classpath 'com.jfrog.bintray.gradle:gradle-bintray-plugin:1.7.3'
}
}
在local.properties中加入自己在jcenter上的用户名和apikey
bintray.user=YOUR_BINTRAY_USERNAME
bintray.apikey=YOUR_BINTRAY_API_KEY
接下来是上传了
在终端Terminal中输入 ./gradlew install 如果没有问题,再输入 ./gradlew bintrayUpload上传到jcenter就行了。
关于jcenter帐号的注册和maven 仓库的创建我就不再赘述了。

相关文章推荐
- C# 客服端上传文件与服务器器端接收 (简单代码)
- 简单的PHP多图上传小程序代码
- 简单的PHP文件上传代码
- JavaWeb 文件的上传和下载功能简单实现代码
- JS简单实现文件上传实例代码(无需插件)
- c# net 简单 上传和下载文件代码
- 上传Android代码到Jcenter(解决了字符映射的问题)
- 简单asp.net上传文件代码,留个标识方便查翻
- github上传代码(sourceTree是一个界面化的上传工具,简单易懂,可以初学者去看看)
- Asp.net图片上传实现预览效果的简单代码
- vue的简单程序,第一次上传代码
- 简单使用git上传代码
- 用简单的代码来实现文件上传
- php 文件上传 简单代码
- 简单多图片上传 jquery+java 代码
- git上传本地代码到github(最简单方法,不用配置ssh)
- Python上传package到Pypi(代码简单)
- Android将Library上传到jcenter超简单完整图文步骤以及遇到的各种坑