eclipse_win7_hadoop1.2.1开发环境搭建2
2017-10-16 20:45
615 查看
转自:http://www.cnblogs.com/xia520pi/archive/2012/05/20/2510723.html
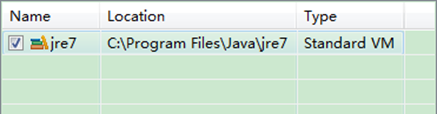
下面是没有添加之前的设置如下:
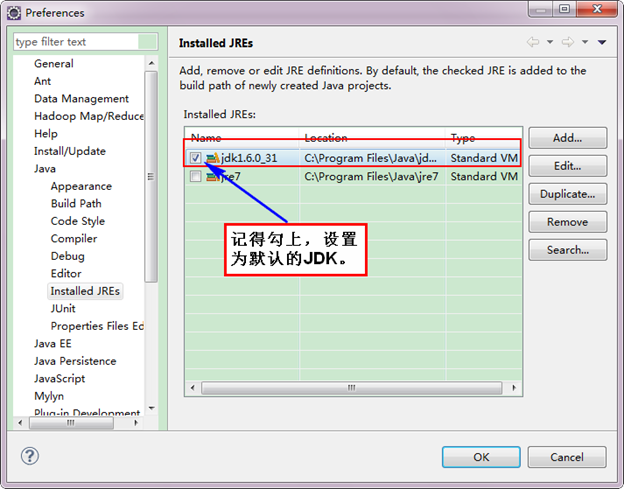
下面是添加完JDK6.0之后结果如下:
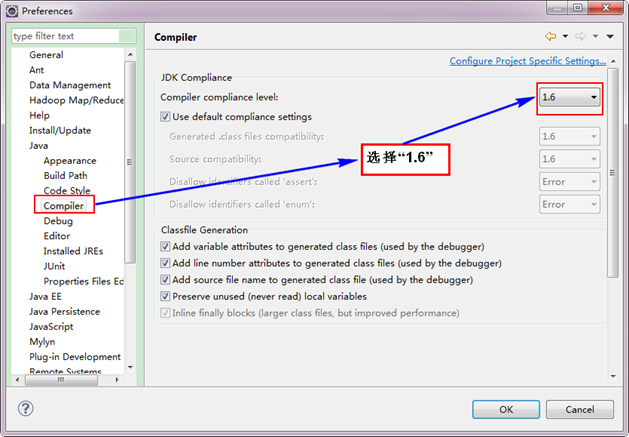
接着设置Complier。
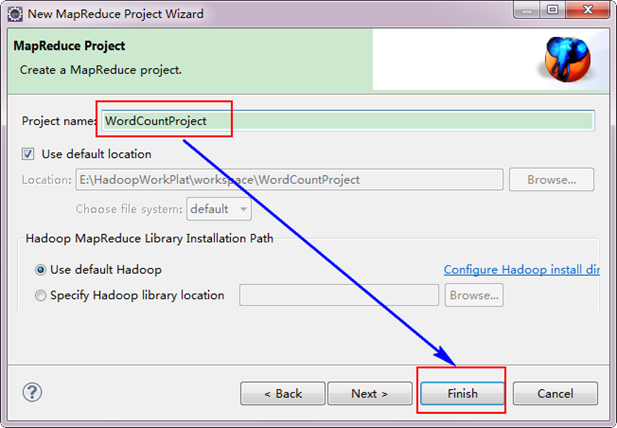
接着,填写MapReduce工程的名字为"WordCountProject",点击"finish"完成。
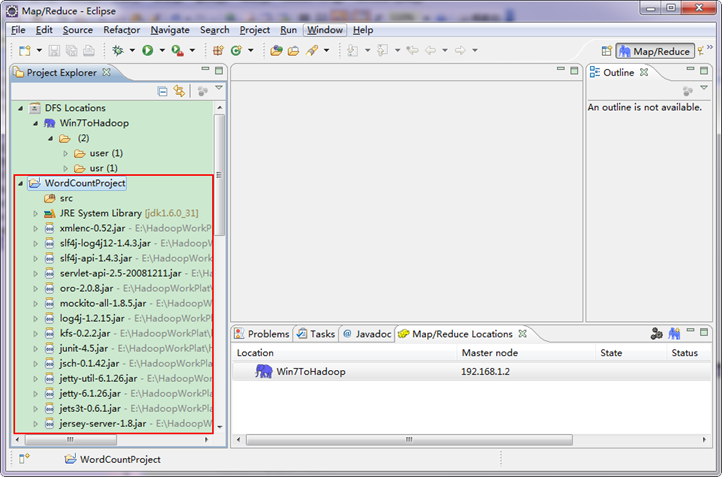
目前为止我们已经成功创建了MapReduce项目,我们发现在Eclipse软件的左侧多了我们的刚才建立的项目。
因为我们直接用Hadoop1.0.0自带的WordCount程序,所以报名需要和代码中的一致为"org.apache.hadoop.examples",类名也必须一致为"WordCount"。这个代码放在如下的结构中。 hadoop-1.0.0|---src|---examples|---org|---apache|---hadoop|---examples 从上面目录中找见"WordCount.java"文件,用记事本打开,然后把代码复制到刚才建立的java文件中。当然源码有些变动,变动的红色已经标记出。
备注:如果不加"conf.set("mapred.job.tracker","192.168.1.2:9001");",将提示你的权限不够,其实照成这样的原因是刚才设置的"Map/Reduce Location"其中的配置不是完全起作用,而是在本地的磁盘上建立了文件,并尝试运行,显然是不行的。我们要让Eclipse提交作业到Hadoop集群上,所以我们这里手动添加Job运行地址。详细参考"常见问题FAQ_3"。

运行结果如下:
从上图中我们得知我们的程序已经运行成功了。
3、Eclipse运行WordCount程序
3.1 配置Eclipse的JDK
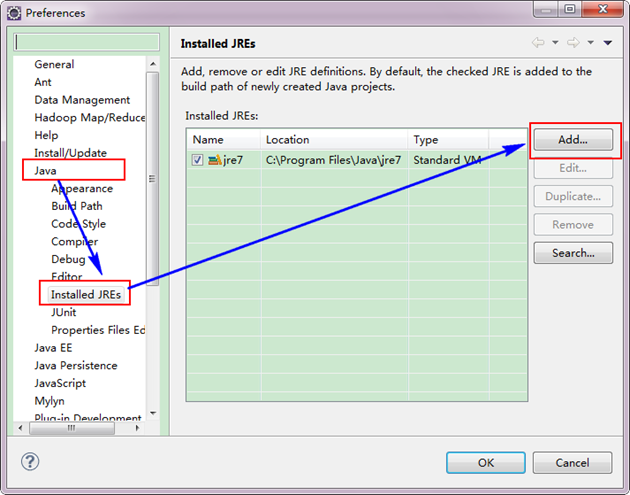
如果电脑上不仅仅安装的JDK6.0,那么要确定一下Eclipse的平台的默认JDK是否6.0。从"Window"菜单下选择"Preference",弹出一个窗体,从窗体的左侧找见"Java",选择"Installed JREs",然后添加JDK6.0。下面是我的默认选择JRE。下面是没有添加之前的设置如下:
下面是添加完JDK6.0之后结果如下:
接着设置Complier。
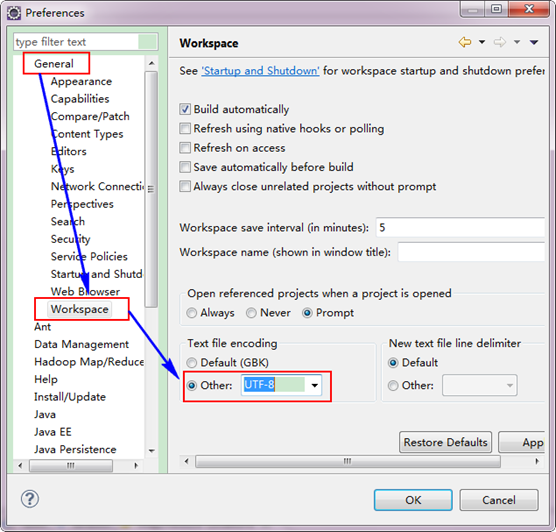
3.2 设置Eclipse的编码为UTF-8
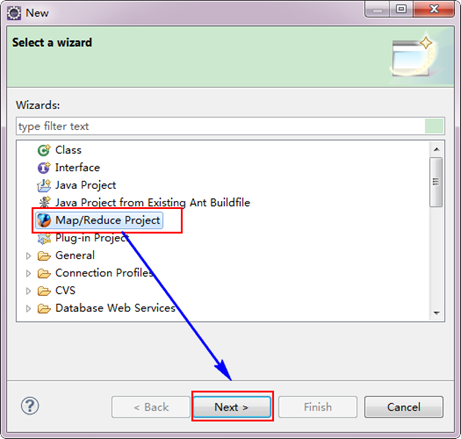
3.3 创建MapReduce项目
从"File"菜单,选择"Other",找到"Map/Reduce Project",然后选择它。接着,填写MapReduce工程的名字为"WordCountProject",点击"finish"完成。
目前为止我们已经成功创建了MapReduce项目,我们发现在Eclipse软件的左侧多了我们的刚才建立的项目。
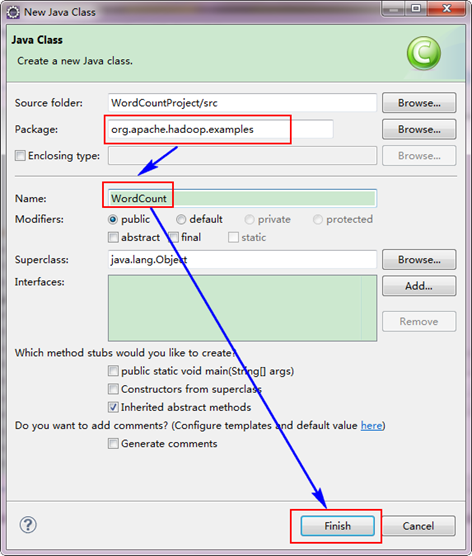
3.4 创建WordCount类
选择"WordCountProject"工程,右击弹出菜单,然后选择"New",接着选择"Class",然后填写如下信息:因为我们直接用Hadoop1.0.0自带的WordCount程序,所以报名需要和代码中的一致为"org.apache.hadoop.examples",类名也必须一致为"WordCount"。这个代码放在如下的结构中。 hadoop-1.0.0|---src|---examples|---org|---apache|---hadoop|---examples 从上面目录中找见"WordCount.java"文件,用记事本打开,然后把代码复制到刚才建立的java文件中。当然源码有些变动,变动的红色已经标记出。
| 12345678910111213141516171819202122232425262728293031323334353637383940414243444546474849505152535455565758596061626364656667686970 | package org.apache.hadoop.examples; import java.io.IOException; import java.util.StringTokenizer; import org.apache.hadoop.conf.Configuration; import org.apache.hadoop.fs.Path; import org.apache.hadoop.io.IntWritable; import org.apache.hadoop.io.Text; import org.apache.hadoop.mapreduce.Job; import org.apache.hadoop.mapreduce.Mapper; import org.apache.hadoop.mapreduce.Reducer; import org.apache.hadoop.mapreduce.lib.input.FileInputFormat; import org.apache.hadoop.mapreduce.lib.output.FileOutputFormat; import org.apache.hadoop.util.GenericOptionsParser; public class WordCount { public static class TokenizerMapper extends Mapper<Object,Text,Text,IntWritable>{ private final static IntWritable one = new IntWritable( 1 ); private Text word = new Text(); public void map(Object key,Text value,Context context ) throws IOException,InterruptedException {StringTokenizer itr = new StringTokenizer(value.toString()); while (itr.hasMoreTokens()){word.set(itr.nextToken()); context.write(word,one);} } } public static class IntSumReducer extends Reducer<Text,IntWritable,Text,IntWritable> {private IntWritable result = new IntWritable(); public void reduce(Text key,Iterable values, Context context ) throws IOException,InterruptedException {int sum = 0 ; for (IntWritable val :values){sum += val.get(); } result.set(sum); context.write(key,result); } } public static void main(String[] args) throws Exception {Configuration conf = new Configuration(); conf.set( "mapred.job.tracker" , "192.168.1.2:9001" ); String[] ars= new String[]{"input" , "newout" }; String[] otherArgs = new GenericOptionsParser(conf,ars).getRemainingArgs(); if (otherArgs.length != 2 ){System.err.println( "Usage:wordcount" ); System.exit( 2 ); } Job job = new Job(conf, "word count" ); job.setJarByClass(WordCount. class ); job.setMapperClass(TokenizerMapper. class ); job.setCombinerClass(IntSumReducer. class ); job.setReducerClass(IntSumReducer. class ); job.setOutputKeyClass(Text. class ); job.setOutputValueClass(IntWritable. class ); FileInputFormat.addInputPath(job, new Path(otherArgs[ 0 ])); FileOutputFormat.setOutputPath(job, new Path(otherArgs[ 1 ])); System.exit(job.waitForCompletion( true )? 0 : 1 ); } } |
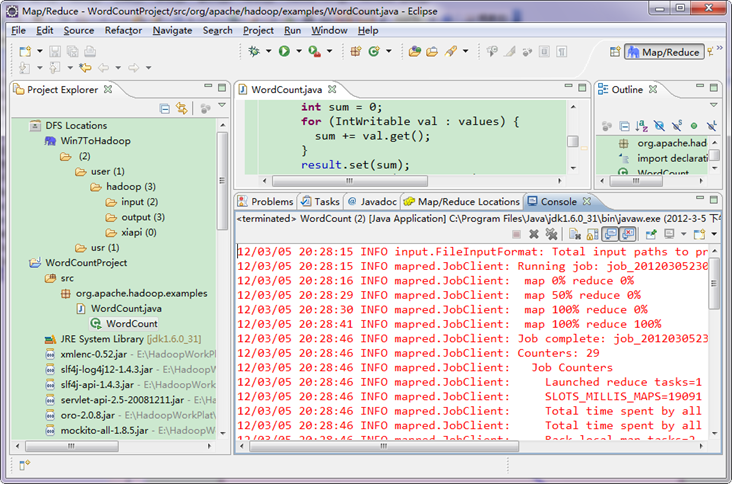
3.5 运行WordCount程序
选择"Wordcount.java"程序,右击一次按照"Run ASàRun on Hadoop"运行。然后会弹出如下图,按照下图进行操作。运行结果如下:
从上图中我们得知我们的程序已经运行成功了。

相关文章推荐
- eclipse_win7_hadoop1.2.1开发环境搭建1
- eclipse_win7_hadoop1.2.1开发环境搭建3
- eclipse_win7_hadoop1.2.1开发环境搭建1
- eclipse_win7_hadoop1.2.1开发环境搭建2
- eclipse_win7_hadoop1.2.1开发环境搭建3
- win7(64位)平台下Cygwin+Eclipse搭建Hadoop单机开发环境 (二) Hadoop的安装
- win7搭建hadoop开发环境之编译hadoop-eclipse-xxx.jar插件
- win7(64位)平台下Cygwin+Eclipse搭建Hadoop单机开发环境 (三) 在Eclipse中配置Hadoop
- win7下Eclipse开发Hadoop应用程序环境搭建
- win7(64位)平台下Cygwin+Eclipse搭建Hadoop单机开发环境 (四) 导入Hadoop源码+wordcount程序+运行
- win7 eclipse连接hadoop2.x开发环境搭建
- win7(64位)平台下Cygwin+Eclipse搭建Hadoop单机开发环境 (一) Cygwin(64位)的安装 + ssh的配置
- win7 eclipse连接hadoop2.x开发环境搭建
- Win7(64)+Eclipse+Hadoop2.6.4开发环境搭建--转载记录一下,虽然还没有配置成功
- hadoop2.2.0 单机伪分布式(含64位hadoop编译) 及 eclipse hadoop开发环境搭建
- Windows下Cygwin+Eclipse搭建Hadoop开发环境
- Eclipse上Hadoop开发环境搭建
- win7 下面如何搭建Scala ——Eclipse开发环境
- 【Hadoop】Win7上搭建Hadoop开发环境,方法一
- win7下Cygwin搭建Hadoop开发环境(由于win7环境不同导致本文章并不一定适合所有的win7用户)