可以拖动的div
2017-10-09 13:46
232 查看
<html lang="en">
<head>
<meta charset="UTF-8">
<title>Document</title>
<style type="text/css">
#div_wrapper{
width: 500px;
height:500px;
position: absolute;
top: 50%;
left: 50%;
margin-left: -250px;
margin-top: -250px;
border: 1px solid silver;
}
#div_01{
position: absolute;
width: 10px;
height: 100%;
/*background-color: red;*/
top:0px;
right: 0px;
}
#div_01:hover{
cursor: e-resize;
}
#div_02{
position: absolute;
width: 100%;
height: 10px;
/*background-color: red;*/
bottom: 0px;
left: 0px;
}
#div_02:hover{
cursor: n-resize;
}
#div_03{
position: absolute;
width: 10px;
height: 10px;
/*background-color:black;*/
right: 0px;
bottom: 0px;
}
#div_03:hover{
cursor: nw-resize;
}
#div_0 {
text-align: center;
height: 30px;
width: 100%;
background-color: silver;
margin: 0px;
}
#div_0 p{
margin: 0px;
line-height: 30px;
font: bold 17px 微软雅黑,arial;
}
</style>
<script type="text/javascript" >
var offsetLeft,offsetTop,timer,mouse_x,mouse_y,margin_left,margin_top;
var to_x,to_y;
function drag(id,type){
var item=document.getElementById(id);
document.onmousemove=function(e){
var e=e||window.event;
mouse_x=e.pageX;
mouse_y=e.pageY;
};
item.onmousedown=function(){
// offsetTop以及offsetTop必须要放在mousedown里面,每次都要计算
offsetLeft=item.offsetLeft;
offsetTop=item.offsetTop;
margin_top=mouse_y-offsetTop;
margin_left=mouse_x-offsetLeft;
timer=setInterval(function(){
if(timer){
var max_with=800,max_height=600;
to_x=mouse_x-margin_left;
to_y=mouse_y-margin_top;
to_x=Math.min(to_x,max_with);
to_y=Math.min(to_y,max_height);
// 一定要记得加“px"
if(type=="x"){
item.style.left=to_x+"px";
document.getElementById("div_wrapper").style.width=to_x+10+"px";
document.getElementById("div_03").style.left=to_x+"px";
}
else if(type=="y"){
item.style.top=to_y+"px";
document.getElementById("div_03").style.top=to_y+"px";
document.getElementById("div_wrapper").style.height=to_y+10+"px";
}
//默认为上下左右移动
else {
item.style.left=to_x+"px";
item.style.top=to_y+"px";
// Style刷新
document.getElementById("div_01").style.left=to_x+"px";
document.getElementById("div_02").style.top=to_y+"px";
document.getElementById("div_wrapper").style.width=to_x+10+"px";
document.getElementById("div_wrapper").style.height=to_y+10+"px";
}
}
},5);
};
document.onmouseup=function(){
clearInterval(timer);
timer=0;
}
}
window.onload=function(){
drag("div_01","x");
drag("div_02","y");
drag("div_03");
// drag("div_wrapper");
}
</script>
</head>
<body>
<div id="div_wrapper">
<div id="div_0">
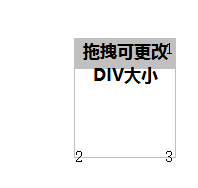
<p>拖拽可更改DIV大小</p>
</div>
<div id="div_01">1</div>
<div id="div_02">2</div>
<div id="div_03">3</div>
</div>
</body>
</html>效果如下:
这是别的大神写好发我的忘了那个大神了,在此感谢大神。

相关文章推荐
- 源代码:用层DIV模拟的类似C/S模式下的小窗口(可以拖动,展开关闭)
- js实现一个可以兼容PC端和移动端的div拖动效果
- jQuery 可以拖动的div实现代码 脚本之家修正版
- 可以用鼠标拖动的DIV实现思路及代码
- javascript 可以拖动的DIV(二)
- 可以拖动的旋转div
- (html/javascript)可以用鼠标自由拖动的div(收藏)
- 源代码:用层DIV模拟的类似C/S模式下的小窗口(可以拖动,展开关闭)
- js实现一个可以兼容PC端和移动端的div拖动效果实例
- jQuery 可以拖动的div实现代码 脚本之家修正版
- 可以用鼠标拖动的DIV实现思路及代码
- 自定义div 拖动。键盘上下左右键移动,ctrl+Q控制是否可以移动,ctrl+回车,返回初始状态
- 可以拖动的div
- DIV+CSS+JS实现的可以随意拖动的网页布局
- 可以拖动的div 实现代码第1/2页
- 可以随意拖动的div对象操作sample
- js实现一个可以兼容PC端和移动端的div拖动效果实例
- javascript 可以拖动的DIV(二)
- 在禁止了页面的触摸拖动事件之后如何允许某div可以拖动
- js实现一个可以兼容PC端和移动端的div拖动效果