RabbitMQ+Spring Quartz 实现消息的定时发送和接收
2017-10-06 16:13
836 查看
因公司需要使用RabbitMQ作为中间件实现消息的发送和接收。同时加入Spring Quartz 实现消息的定时发送。所以做了个Dome.只是做个演示。
主要有4个项目。
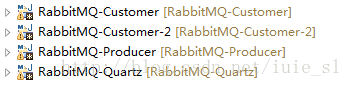
两个消费者一个生产者,一个调度者。
界面截图

调度者的RabbitMQ配置文件
界面截图
消费者的rabbitMQ配置文件
界面截图
代码资源文件中有sql文件,你只需把修改数据源,修改rabbitMQ的url为自己的地址,把4个项目放到Tomcat中在浏览器中输入
http://localhost:8081/RabbitMQ-Producer/index
http://localhost:8081/RabbitMQ-Quartz/index
http://localhost:8081/RabbitMQ-Customer/index
http://localhost:8081/RabbitMQ-Customer-2/index
主要有4个项目。
两个消费者一个生产者,一个调度者。
生产者
生产者比较简单,只是把要发送的消息保存到数据库。在界面上显示所有的消息。点击全部发送并没有发送消息只是修改消息的状态为NOT_SEND.界面截图
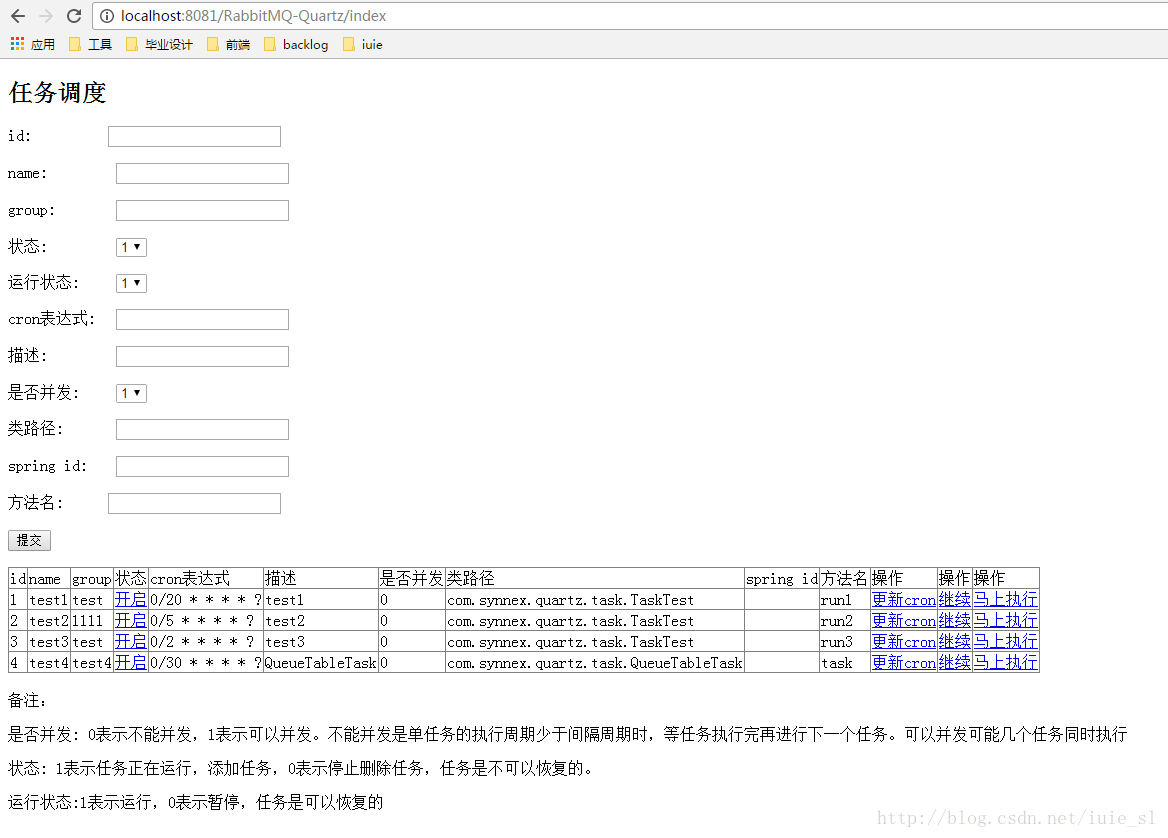
调度者
调度者定时重数据库查询出消息然后发送。封装了一个ScheduleJob实现任务的添加,删除,更新,启动,停止的管理界面。在状态中修改这个状态为开启的,那么发送消息的任务将执行。调度者的RabbitMQ配置文件
<?xml version="1.0" encoding="UTF-8"?>
<beans xmlns="http://www.springframework.org/schema/beans"
xmlns:xsi="http://www.w3.org/2001/XMLSchema-instance" xmlns:context="http://www.springframework.org/schema/context"
xmlns:rabbit="http://www.springframework.org/schema/rabbit"
xsi:schemaLocation=" http://www.springframework.org/schema/beans http://www.springframework.org/schema/beans/spring-beans.xsd http://www.springframework.org/schema/context http://www.springframework.org/schema/context/spring-context.xsd http://www.springframework.org/schema/rabbit http://www.springframework.org/schema/rabbit/spring-rabbit-1.4.xsd">

<!-- 配置读取外部配置文件 -->
<context:property-placeholder location="classpath:application.properties" />

<!-- 创建连接工厂 -->
<rabbit:connection-factory id="rabbitConnectionFactory"
host="${mq.host}" port="${mq.port}" username="${mq.username}"
password="${mq.password}" />

<!--通过指定下面的admin信息,当前producer中的exchange和queue会在rabbitmq服务器上自动生成 -->
<rabbit:admin connection-factory="rabbitConnectionFactory" />

<!-- RabbitMQ Template -->
<rabbit:template id="rabbitAmqpTemplate"
connection-factory="rabbitConnectionFactory" exchange="${mq.queue}_exchange"
routing-key="30000" />

</beans>
界面截图
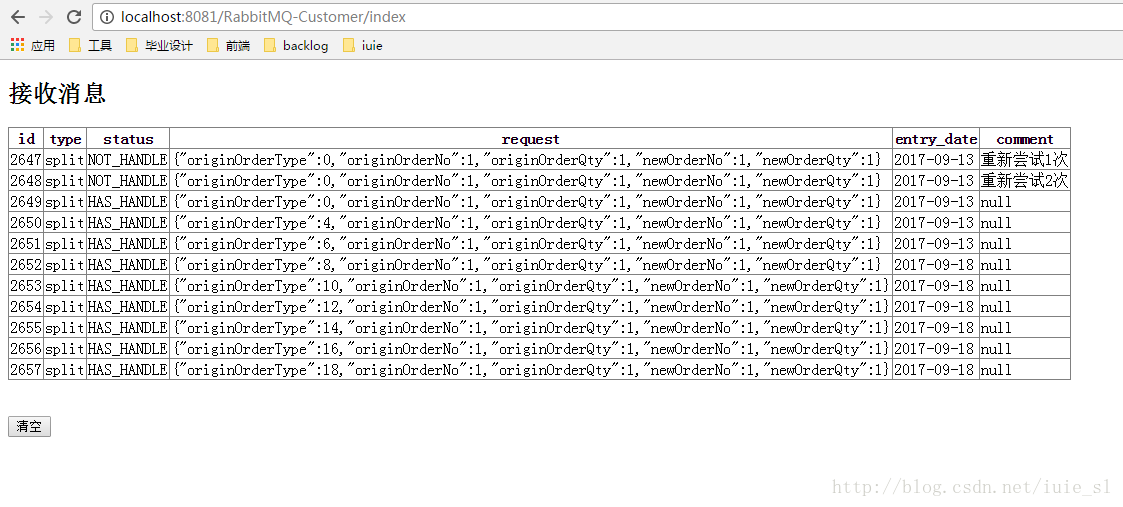
消费者
负责监听消息处理消息,修改消息的状态。消费者的界面通过js定时器不停的请求服务器,展示所有已经接受到的消息。消费者的rabbitMQ配置文件
<?xml version="1.0" encoding="UTF-8"?>
<beans xmlns="http://www.springframework.org/schema/beans"
xmlns:xsi="http://www.w3.org/2001/XMLSchema-instance" xmlns:context="http://www.springframework.org/schema/context"
xmlns:rabbit="http://www.springframework.org/schema/rabbit"
xsi:schemaLocation=" http://www.springframework.org/schema/beans http://www.springframework.org/schema/beans/spring-beans.xsd http://www.springframework.org/schema/context http://www.springframework.org/schema/context/spring-context.xsd http://www.springframework.org/schema/rabbit http://www.springframework.org/schema/rabbit/spring-rabbit-1.4.xsd">

<!-- 配置读取外部配置文件 -->
<context:property-placeholder location="classpath:application.properties" />

<!-- 创建连接工厂 -->
<rabbit:connection-factory id="rabbitConnectionFactory"
host="${mq.host}" port="${mq.port}" username="${mq.username}"
password="${mq.password}" />

<!--通过指定下面的admin信息,当前producer中的exchange和queue会在rabbitmq服务器上自动生成 -->
<rabbit:admin connection-factory="rabbitConnectionFactory" />

<rabbit:topic-exchange name="${mq.queue}_exchange"
durable="true" auto-delete="false">
<rabbit:bindings>
<rabbit:binding queue="test_queue" pattern="${mq.queue}_patt" />
</rabbit:bindings>
</rabbit:topic-exchange>

<!-- 生产者队列 durable:是否持久化 ,
exclusive:仅创建者可以使用的私有队列,
auto-delete:当所有消费端连接断开后,是否自动删除队列 -->
<rabbit:queue id="test_queue" name="${mq.queue}_testQueue_1" durable="true" auto-delete="false" exclusive="false">
<rabbit:queue-arguments>
<entry key="x-message-ttl">   <!-- 设置消息的默认保存时间 -->
<value type="java.lang.Long">60000</value>
</entry>
</rabbit:queue-arguments>
</rabbit:queue>

<!-- 消费者 -->
<bean name="rabbitCumstomerListener" class="com.synnex.jms.listener.RabbitCumstomerListener"/>

<!-- 配置监听 -->
<rabbit:listener-container
connection-factory="rabbitConnectionFactory" acknowledge="manual">
<!-- queues 监听队列,多个用逗号分隔 ref 监听器 -->
<rabbit:listener queues="test_queue" ref="rabbitCumstomerListener" />
</rabbit:listener-container>

</beans>
界面截图
代码资源文件中有sql文件,你只需把修改数据源,修改rabbitMQ的url为自己的地址,把4个项目放到Tomcat中在浏览器中输入
http://localhost:8081/RabbitMQ-Producer/index
http://localhost:8081/RabbitMQ-Quartz/index
http://localhost:8081/RabbitMQ-Customer/index
http://localhost:8081/RabbitMQ-Customer-2/index
源码下载,点击这里

相关文章推荐
- 使用spring-rabbit测试RabbitMQ消息确认(发送确认,接收确认)
- SPring中quartz的配置(可以用实现邮件定时发送,任务定时执行,网站定时更新等)
- spring boot整合spring-kafka实现发送接收消息实例代码
- Spring 4.3.6 整合 Quartz 2.2.3 与 Java Mail1.4.0实现定时邮件发送
- Spring Boot RabbitMQ 延迟消息实现完整版示例
- jms+spring+activemq配置(发送和接收消息)
- spring与Quartz整合实现定时邮件发送
- 集群与负载均衡系列(6)——消息队列之rabbitMQ+spring-boot+spring amqp发送可靠的消息
- Quartz 框架和cron表达式任务调度的例子(spring下实现定时发送邮件)
- Spring + ActiveMQ实现jms发送消息
- Spring+quartz实现定时发送邮件功能实例
- Spring + ActiveMQ实现jms发送消息
- spring boot Rabbitmq集成,延时消息队列实现
- spring activeMQ 整合(一): 一个简单的demo,测试消息的发送与接收
- spring整合javamail跟quartz实现定时发送邮件
- [置顶] 【MQ】ActiveMQ(三)——spring管理ActiveMQ,实现发送和接收效果
- SpringBoot webSocket实现发送广播、点对点消息和Android接收
- Spring + ActiveMQ实现jms发送消息
- Spring+JMS实现消息的发送与接收
- Spring Boot + RabbitMQ 实现消息队列场景