Android学习笔记(2)——底部导航栏、菜单的使用
2017-09-15 08:39
316 查看
前言:现在大多数App都会用到底部导航栏,比如常见的聊天工具QQ、微信,购物App等等,有了底部导航栏,用户可以随时切换界面,查看不同的内容。它的实现方式也很多,我采用的是tabhost来构造底部导航栏,和菜单。
工程目录:首先来看一下工程目录。
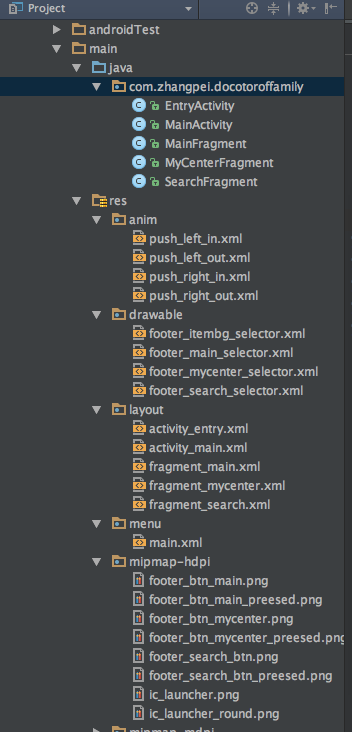
主要文件:
1.activity_main.xml
ps:本人小白一枚,习惯工程起源于主界面的搭建。>_<<?xml version="1.0" encoding="utf-8"?> <TabHost xmlns:android="http://schemas.android.com/apk/res/android" xmlns:app="http://schemas.android.com/apk/res-auto" xmlns:tools="http://schemas.android.com/tools" android:id="@android:id/tabhost" android:layout_width="fill_parent" android:layout_height="fill_parent" tools:context="com.zhangpei.docotoroffamily.MainActivity"> <LinearLayout android:layout_width="fill_parent" android:layout_height="fill_parent" android:background="#FFFFFFFF" android:orientation="vertical"> <FrameLayout android:layout_width="fill_parent" android:layout_height="fill_parent" android:layout_weight="1"> <FrameLayout android:id="@android:id/tabcontent" android:layout_width="match_parent" android:layout_height="fill_parent"> <fragment android:layout_width="fill_parent" android:layout_height="fill_parent" android:id="@+id/fragment_main" android:name="com.zhangpei.docotoroffamily.MainFragment" /> <fragment android:layout_width="fill_parent" android:layout_height="fill_parent" android:id="@+id/fragment_mycenter" android:name="com.zhangpei.docotoroffamily.MyCenterFragment" /> <fragment android:layout_width="fill_parent" android:layout_height="fill_parent" android:id="@+id/fragment_search" android:name="com.zhangpei.docotoroffamily.SearchFragment" /> </FrameLayout> </FrameLayout> <TabWidget android:id="@android:id/tabs" android:layout_width="fill_parent" android:layout_height="wrap_content" android:layout_weight="0.0" android:visibility="gone" ></TabWidget> <LinearLayout android:layout_width="fill_parent" android:layout_height="3dp" android:background="@drawable/fbutton_color_emerald"> </LinearLayout> <RadioGroup android:id="@+id/radiogroup" android:layout_width="fill_parent" android:layout_height="wrap_content" android:layout_gravity="bottom" android:background="@drawable/fbutton_color_turquoise" android:gravity="center_vertical" android:orientation="horizontal"> <RadioButton android:id="@+id/radio_main" style="@style/main_tab_bottom" android:layout_weight="1" android:background="@drawable/footer_itembg_selector" android:button="@null" android:checked="true" android:drawableTop="@drawable/footer_main_selector" android:text="首 页" /> <RadioButton android:id="@+id/radio_search" style="@style/main_tab_bottom" android:layout_weight="1" android:background="@drawable/footer_itembg_selector" android:drawableTop="@drawable/footer_search_selector" android:text="查 询" /> <RadioButton android:id="@+id/radio_mycenter" style="@style/main_tab_bottom" android:layout_weight="1" android:background="@drawable/footer_itembg_selector" android:drawableTop="@drawable/footer_mycenter_selector" android:text="个人中心" /> </RadioGroup> </LinearLayout> </TabHost>
主界面文件相应的布局一目了然,三个fragmen,三个底部按钮,通过TabHost实现转换。注意红色部分,不要太相信编译器呦!!!
2.MainActivity.java
public class MainActivity extends ActionBarActivity {
// tab用参数
private TabHost tabHost;
private RadioGroup radiogroup;
private int menuid;
@Override
protected void onCreate(Bundle savedInstanceState) {
super.onCreate(savedInstanceState);
setContentView(R.layout.activity_main);
radiogroup = (RadioGroup) findViewById(R.id.radiogroup);
tabHost = (TabHost) findViewById(android.R.id.tabhost);
tabHost.setup();
tabHost.addTab(tabHost.newTabSpec("main").setIndicator("main")
.setContent(R.id.fragment_main));
tabHost.addTab(tabHost.newTabSpec("mycenter").setIndicator("mycenter")
.setContent(R.id.fragment_mycenter));
tabHost.addTab(tabHost.newTabSpec("search").setIndicator("search")
.setContent(R.id.fragment_search));
radiogroup.setOnCheckedChangeListener(new RadioGroup.OnCheckedChangeListener() {
@Override
public void onCheckedChanged(RadioGroup radioGroup, @IdRes int checkedId) {
menuid = checkedId;
//int currentTab = tabHost.getCurrentTab();
switch (checkedId) {
case R.id.radio_main:
tabHost.setCurrentTabByTag("main");
//如果需要动画效果就使用
//setCurrentTabWithAnim(currentTab, 0, "main");
//getSupportActionBar().setTitle("首页");
break;
case R.id.radio_mycenter:
tabHost.setCurrentTabByTag("mycenter");
//setCurrentTabWithAnim(currentTab, 1, "mycenter");
//getSupportActionBar().setTitle("个人中心");
break;
case R.id.radio_search:
//setCurrentTabWithAnim(currentTab, 1, "search");
tabHost.setCurrentTabByTag("search");
//getSupportActionBar().setTitle("搜索");
}
// 刷新actionbar的menu
getWindow().invalidatePanelMenu(Window.FEATURE_OPTIONS_PANEL);
}
});
}
@Override
public boolean onCreateOptionsMenu(Menu menu) {
switch (menuid) {
case R.id.radio_main:
getMenuInflater().inflate(R.menu.main, menu);
break;
case R.id.radio_mycenter:
menu.clear();
break;
case R.id.radio_search:
menu.clear();
break;
}
return true;
}
@Override
public boolean onOption
4000
sItemSelected(MenuItem item) {
int id = item.getItemId();
if (id == R.id.action_settings) {
return true;
}
return super.onOptionsItemSelected(item);
}
// 判断动画滑动的方向
private void setCurrentTabWithAnim(int now, int next, String tag) {
if (now > next) {
tabHost.getCurrentView().startAnimation(AnimationUtils.loadAnimation(this, R.anim.push_right_out));
tabHost.setCurrentTabByTag(tag);
tabHost.getCurrentView().startAnimation(AnimationUtils.loadAnimation(this, R.anim.push_right_in));
} else {
tabHost.getCurrentView().startAnimation(AnimationUtils.loadAnimation(this, R.anim.push_left_out));
tabHost.setCurrentTabByTag(tag);
tabHost.getCurrentView().startAnimation(AnimationUtils.loadAnimation(this, R.anim.push_left_in));
}
}
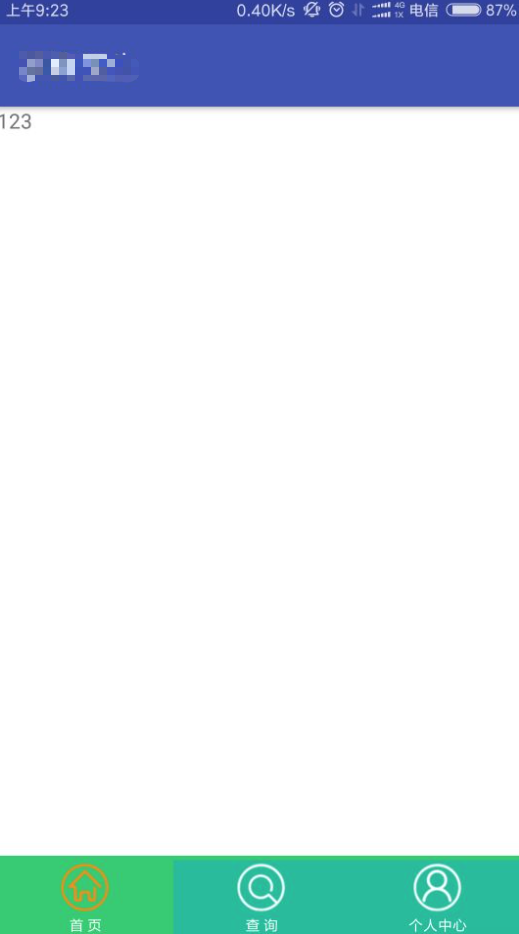
}3.fragment_main.xml
<?xml version="1.0" encoding="utf-8"?>
<LinearLayout xmlns:android="http://schemas.android.com/apk/res/android"
android:layout_width="match_parent"
android:layout_height="match_parent"
android:orientation="vertical">

<TextView
android:layout_width="wrap_content"
android:layout_height="wrap_content"
android:text="123"/>

</LinearLayout>
4.MainFragment.java
public class MainFragment extends Fragment {
@Override
public void onCreate(Bundle savedInstanceState) {
// TODO Auto-generated method stub
super.onCreate(savedInstanceState);
}
@Override
public View onCreateView(LayoutInflater inflater, ViewGroup container, Bundle savedInstanceState) {
View view= inflater.inflate(R.layout.fragment_main, null);
return view;
}
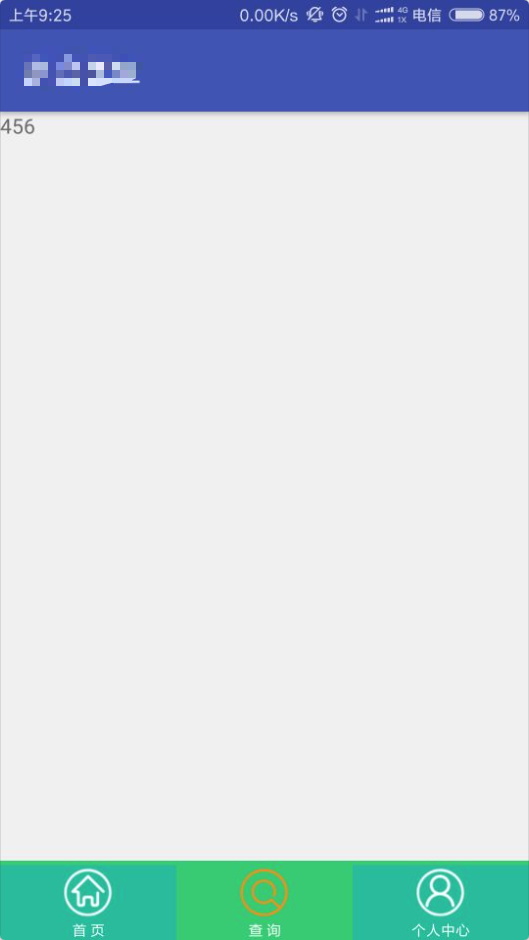
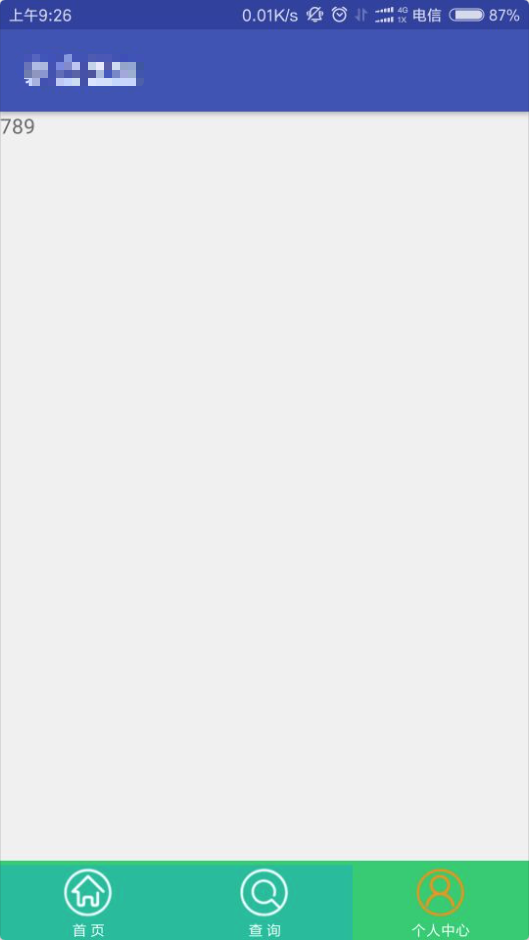
} 为节约资源,仅选其一Fragment进行展示,读者如需其他详细资源可以在文章末尾连接下载。文末:附一张运行截图。
Android学习笔记————2017.9.15 点我点我

相关文章推荐
- 使用Fragment+ViewPager实现底部导航栏
- Ecshop中导航栏中使用二级菜单显示并调用子分类
- android 中使用TabHost控件实现微信界面的底部菜单效果
- (二)Android导航栏和菜单资源的结合使用
- [置顶] Android:PopWindow — 对Android的底部弹窗、顶部弹窗菜单及自定义界面的使用封装
- Android使用RadioGroup实现底部导航栏
- android效果TapBarMenu绘制底部导航栏的使用方式示例
- 使用BottomNavigationView底部导航栏、添加数量角标提醒
- 使用ViewPager+Fragment实现底部导航栏
- 微信小程序tabBar底部导航栏菜单详细介绍
- 使用CoordinatorLayout实现底部弹出菜单
- android BottomTabBar的简单使用(类似:京东底部导航栏)
- UI进阶--Core Animation的简单使用:底部菜单旋转
- 底部导航栏—BottomNavigationView简单使用
- 关于使用bootstrap创建导航栏的一些学习心得(dropdown二级菜单)
- Android学习笔记之Menu一级菜单、二级菜单的使用
- Android之底部菜单 BottomNavigationBar的使用
- [置顶] Android 底部导航栏 BottomNavigationBar的简单使用
- Android使用开源组件PagerBottomTabStrip实现底部菜单和顶部导航功能
- 使用RadioButton+Fragment实现底部导航栏效果