eclipse创建activiti项目,mysql作数据库
2017-08-30 09:02
489 查看
准备:eclipse已成功安装activiti插件,MySQL
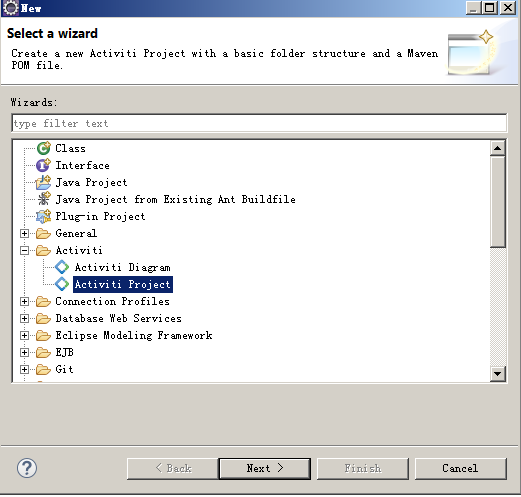
1.新建activiti项目
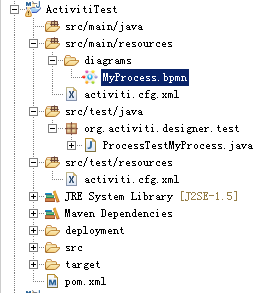
2.新建activiti diagram与设置配置文件
项目结构如下:
pom.xml,这里我用的是mysql
activiti.cfg.xml
有时xml报错,可能是依赖包版本变更,换一个版本;可能排版问题,使用快捷键ctrl+shift+F,自动排版
3.右键项目->create deployment artifact,右键bpmn->activiti->generate unit test,右键项目->Run As->JUnit Test
在数据库内能看到流程数据:
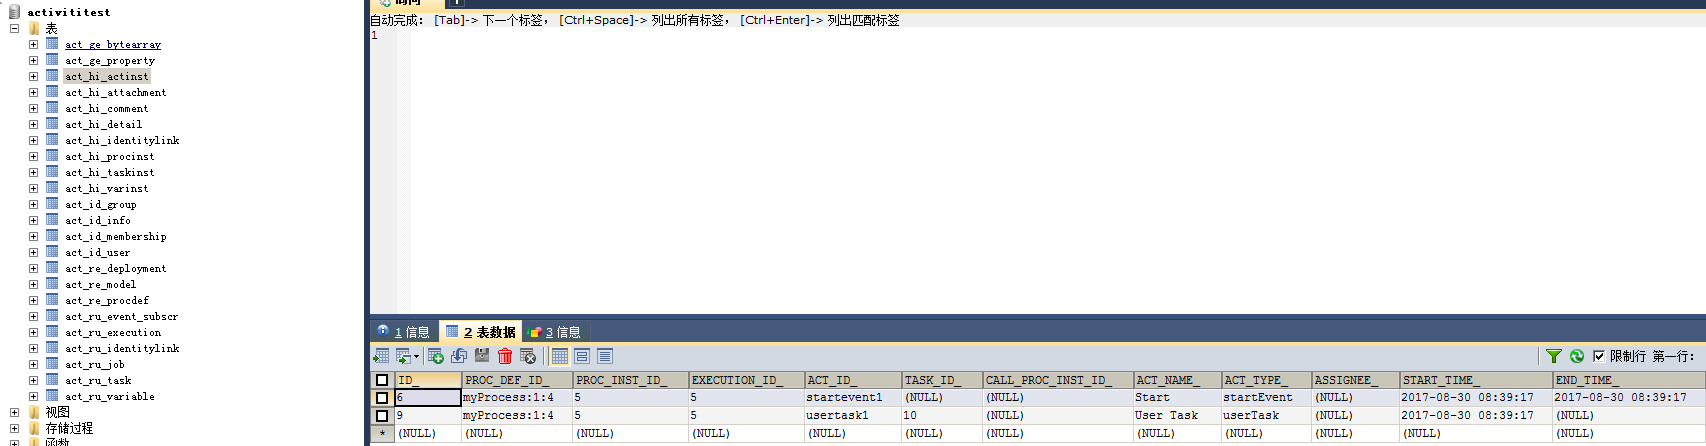
这里用的是SQLyog工具。
1.新建activiti项目
2.新建activiti diagram与设置配置文件
项目结构如下:
pom.xml,这里我用的是mysql
<project xmlns="http://maven.apache.org/POM/4.0.0" xmlns:xsi="http://www.w3.org/2001/XMLSchema-instance"
xsi:schemaLocation="http://maven.apache.org/POM/4.0.0 http://maven.apache.org/maven-v4_0_0.xsd"> <modelVersion>4.0.0</modelVersion>
<groupId>activitiTest</groupId>
<artifactId>activitiTest</artifactId>
<packaging>jar</packaging>
<version>0.0.1-SNAPSHOT</version>
<name>activitiTest Maven Webapp</name>
<url>http://maven.apache.org</url>
<properties>
<activiti-version>5.17.0</activiti-version>

</properties>
<dependencies>
<dependency>
<groupId>junit</groupId>
<artifactId>junit</artifactId>
<version>4.11</version>
<scope>test</scope>
</dependency>
<dependency>
<groupId>org.activiti</groupId>
<artifactId>activiti-engine</artifactId>
<version>${activiti-version}</version>
<scope>test</scope>
</dependency>

<dependency>
<groupId>org.activiti</groupId>
<artifactId>activiti-bpmn-converter</artifactId>
<version>${activiti-version}</version>
</dependency>
<dependency>
<groupId>org.activiti</groupId>
<artifactId>activiti-bpmn-model</artifactId>
<version>${activiti-version}</version>
</dependency>
<dependency>
<groupId>org.activiti</groupId>
<artifactId>activiti-bpmn-layout</artifactId>
<version>${activiti-version}</version>
</dependency>
<dependency>
<groupId>mysql</groupId>
<artifactId>mysql-connector-java</artifactId>
<version>5.1.36</version>
</dependency>
</dependencies>
<build>
<finalName>activitiTest</finalName>
</build>
</project>
activiti.cfg.xml
<?xml version="1.0" encoding="UTF-8"?>
<beans xmlns="http://www.springframework.org/schema/beans"
xmlns:xsi="http://www.w3.org/2001/XMLSchema-instance"
xsi:schemaLocation="http://www.springframework.org/schema/beans http://www.springframework.org/schema/beans/spring-beans.xsd">
<bean id="processEngineConfiguration"
class="org.activiti.engine.impl.cfg.StandaloneInMemProcessEngineConfiguration">
<property name="databaseType" value="mysql"></property>
<property name="jdbcDriver" value="com.mysql.jdbc.Driver"></property>
<property name="jdbcUrl"
value="jdbc:mysql://localhost:3306/activititest?useUnicode=true&characterEncoding=utf-8"></property>
<property name="jdbcUsername" value="root"></property>
<property name="jdbcPassword" value="******"></property>
<property name="databaseSchemaUpdate" value="true" />
<property name="jobExecutorActivate" value="false" />
<property name="history" value="full" />
</bean>
</beans>
注意:在xml配置文件中配置数据库URL时,要使用&的转义字符也就是&;
有时xml报错,可能是依赖包版本变更,换一个版本;可能排版问题,使用快捷键ctrl+shift+F,自动排版
3.右键项目->create deployment artifact,右键bpmn->activiti->generate unit test,右键项目->Run As->JUnit Test
在数据库内能看到流程数据:
这里用的是SQLyog工具。

相关文章推荐
- eclipse下创建ssm+MySQL+maven多模块项目
- Eclipse使用(四)—— 使用Eclipse创建带jar包的Java项目并使用JDBC连接数据库
- eclipse下创建ssm+MySQL+maven多模块项目
- Eclipse使用(七)—— 使用Eclipse创建JavaWeb项目并使用JDBC连接数据库实现简单的登陆注册功能
- 使用eclipse和maven创建activiti项目基础配置
- MYSQL创建、删除和选择数据库
- Maven创建EJB项目HelloWorld使用IDE为eclipse
- Eclipse中创建新的Spring Boot项目
- eclipse创建MAVEN项目是出现Could not resolve archetype的解决办法
- 数据库创建mysql_query($sql,$link)
- 在eclipse中创建具有依赖关系的java项目
- eclipse中maven多模块项目的创建、提交和检出
- window xp PHP5.2.17 apache2.2 mysql eclipse 数据库连接(mysql,oracle10)
- 创建支持eclipse的多模块maven项目
- 4、eclipse创建简单gradle项目
- Spring 4 mvc+shiro+thymeleaf+JPA(Hibernate)+MySql eclipse项目模板
- windows下安装MySQL 5.7,创建数据库和数据库表
- MySQL 创建数据库例子
- 在Eclipse下创建Jeecms项目图文指南 (转载)