AIDL简单使用
2017-08-18 12:18
381 查看
AIDL简单使用
1、概述
什么是AIDL?
Android系统中的进程之间不能共享内存,因此,需要提供一些机制在不同进程之间进行数据通信。为了使其他的应用程序也可以访问本应用程序提供的服务,Android系统采用了远程过程调用(Remote Procedure Call,RPC)方式来实现。与很多其他的基于RPC的解决方案一样,Android使用一种接口定义语言(Interface Definition Language,IDL)来公开服务的接口。我们知道4个Android应用程序组件中的3个(Activity、BroadcastReceiver和ContentProvider)都可以进行跨进程访问,另外一个Android应用程序组件Service同样可以。因此,可以将这种可以跨进程访问的服务称为AIDL(Android Interface Definition Language)服务。
2、建立AIDL服务
这里要注意以下几点:
1、这里是两个程序,程序A调用程序B提供的服务。这里设程序B为服务端,程序A为客户端。2、程序A的.aidl文件所在包名要与程序B的.aidl所在包名相同。
3、这里是service的隐式声明。
建立步骤如下:
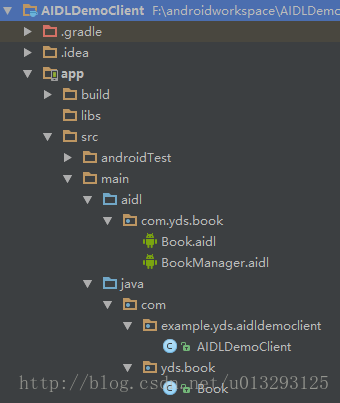
1、AIDLDemoService和AIDLDemoClient项目目录分级如下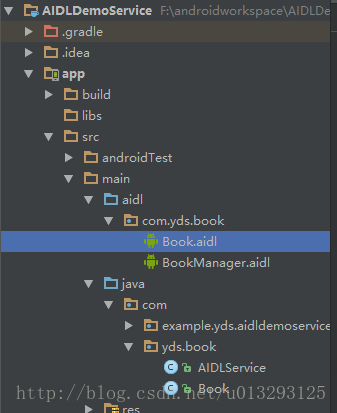
2、Book.aidl与BookManager.aidl内容如下
// Book.aidl
package com.yds.book;
parcelable Book;
// Declare any non-default types here with import statements
// BookManager.aidl
package com.yds.book;
import com.yds.book.Book;
// Declare any non-default types here with import statements

interface BookManager {
List<Book> getBooks();
void addBook(inout Book book);
}
3、建立Book.java类
package com.yds.book;
import android.os.Parcel;
import android.os.Parcelable;
/**
* Created by Administrator on 2017/8/18.
*/
public class Book implements Parcelable {
private String name;
private int price;
public String getName() {
return name;
}
public void setName(String name) {
this.name = name;
}
public int getPrice() {
return price;
}
public void setPrice(int price) {
this.price = price;
}
public static Creator<Book> getCREATOR() {
return CREATOR;
}
public Book(){}
protected Book(Parcel in) {
name = in.readString();
price = in.readInt();
}
public static final Creator<Book> CREATOR = new Creator<Book>() {
@Override
public Book createFromParcel(Parcel in) {
return new Book(in);
}
@Override
public Book[] newArray(int size) {
return new Book[size];
}
};
@Override
public int describeContents() {
return 0;
}
@Override
public void writeToParcel(Parcel dest, int flags) {
dest.writeString(name);
dest.writeInt(price);
}
public void readFromParcel(Parcel dest){
name = dest.readString();
price = dest.readInt();
}
public String toString(){
return "name : " + name + " , price : " + price;
}
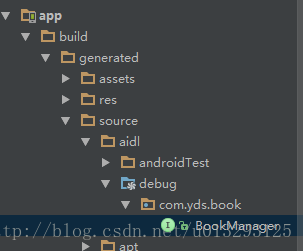
}到了这里,可以先点击工具栏的Build->Clear Project,这样系统就会在如下的目录里自动建立BookManager.java,这样,在写AIDLService.java时就不会报错。
4、AndroidManifest.xml配置内容:
<?xml version="1.0" encoding="utf-8"?>
<manifest xmlns:android="http://schemas.android.com/apk/res/android"
package="com.example.yds.aidldemoservice">

<application
android:allowBackup="true"
android:icon="@mipmap/ic_launcher"
android:label="@string/app_name"
android:supportsRtl="true"
android:theme="@style/AppTheme">
<activity android:name=".MainActivity">
<intent-filter>
<action android:name="android.intent.action.MAIN" />

<category android:name="android.intent.category.LAUNCHER" />
</intent-filter>
</activity>
<service android:name="com.yds.book.AIDLService">
<intent-filter>
<action android:name="android.intent.category.DEFAULT"></action>
</intent-filter>
</service>
</application>

</manifest>
以下都比较简单,就不一一说了,最后会有源码地址。那么我们就简单说下客户端的启动服务程序。
AIDLDemoClient.java程序
package com.example.yds.aidldemoclient;

import android.app.Activity;
import android.content.ComponentName;
import android.content.Context;
import android.content.Intent;
import android.content.ServiceConnection;
import android.os.Bundle;
import android.os.IBinder;
import android.os.RemoteException;
import android.view.View;
import android.widget.Button;
import android.widget.TextView;

import com.yds.book.Book;
import com.yds.book.BookManager;

import java.util.List;

public class AIDLDemoClient extends Activity {
private TextView tv;
private BookManager mBookManager = null;
private boolean mBound = false;
private Button btn1,btn2;
private List<Book> mBooks;

@Override
protected void onCreate(Bundle savedInstanceState) {
super.onCreate(savedInstanceState);
setContentView(R.layout.activity_main);

Intent intent = new Intent();
intent.setAction("android.intent.category.DEFAULT");
intent.setPackage("com.example.yds.aidldemoservice");
bindService(intent,mServiceConnection, Context.BIND_AUTO_CREATE);

tv = (TextView) findViewById(R.id.tv);

btn1 = (Button) findViewById(R.id.btn1);
btn2 = (Button) findViewById(R.id.btn2);
btn1.setOnClickListener(listener);
btn2.setOnClickListener(listener);

}
private View.OnClickListener listener = new View.OnClickListener() {
@Override
public void onClick(View v) {
switch (v.getId()){
case R.id.btn1:
try {
mBooks = mBookManager.getBooks();
for (int i=0;i<mBooks.size();i++){
String result = "书名:"+mBooks.get(i).getName()+",价格:"+mBooks.get(i).getPrice();
tv.setText(result);
}
} catch (RemoteException e) {
e.printStackTrace();
}
break;
case R.id.btn2:

break;
}
}
};
public void addBook(View view){

}

@Override
protected void onStop() {
unbindService(mServiceConnection);
super.onStop();
}

private ServiceConnection mServiceConnection = new ServiceConnection() {
@Override
public void onServiceConnected(ComponentName name, IBinder service) {
mBookManager = BookManager.Stub.asInterface(service);
}

@Override
public void onServiceDisconnected(ComponentName name) {
mBookManager = null;
}
};
}
主要的是下面的一段代码,这段代码不会报错:
Intent intent = new Intent();
intent.setAction("android.intent.category.DEFAULT");
intent.setPackage("com.example.yds.aidldemoservice");
bindService(intent,mServiceConnection, Context.BIND_AUTO_CREATE);
如果用下面的一段代码
Intent intent = new Intent("com.example.xxxx");
intent.putExtras(args);
bindService(intent, mServiceConnection, Context.BIND_AUTO_CREATE);
“在Activity中启动Service的时候报错: 服务意图必须是显性声明。 这是为了防止造成冲突(i.e. 有多个Service用同样的intent-filter的情况)这是Android 5.0 (Lollipop) 之后的规定。 不能用包名的方式定义Service Intent, 而要用显性声明。”这段话是从网上找到的,确实会报错java.lang.IllegalArgumentException: Service Intent must be explicit: Intent。
声明:以上内容有部分是借鉴他人的博客,地址http://blog.csdn.net/luoyanglizi/article/details/51980630
本例代码地址:http://download.csdn.net/download/u013293125/9939773
另外还有一个更加简单的示例,代码地址:http://download.csdn.net/download/u013293125/9939777

相关文章推荐
- 基于AndroidStudio3.0 AIDL的简单使用
- AIDL在Android Studio中简单使用
- AIDL简单使用(通过它跨应用传递对象(数据))
- 一个简单的demo学习Android远程Service(AIDL的使用)
- 四大组件之service简单介绍和AIDL的简单使用
- 一个简单的demo学习Android远程Service(AIDL的使用)
- IPC 主要是messenger和aidl的使用和简单分析
- 安卓AIDL的简单使用 (复杂情况下,在此基础扩展)
- AIDL简单使用
- aidl的简单使用
- AIDL的简单使用
- aidl 的简单介绍和使用
- 使用AIDL完成一次简单的Android进程间通信
- 使用AIDL实现IPC通信之——简单调用远程服务的方法
- AIDL旅行记之AIDL的简单使用
- Android Service AIDL 简单使用
- aidl的简单使用
- android简单的AIDL使用示例
- AIDL简单使用
- Aidl 的使用 简单 通讯