springboot(二)项目构建
2017-08-09 16:02
316 查看
一:项目的构建,这里使用Maven项目管理,则pom.xml如下:
二:创建项目的入口Application.Java
注解SpringBootApplication作用如下
@Target({ElementType.TYPE})
@Retention(RetentionPolicy.RUNTIME)
@Documented
@Inherited
@SpringBootConfiguration
@EnableAutoConfiguration
@ComponentScan(
excludeFilters = {@Filter(
type = FilterType.CUSTOM,
classes = {TypeExcludeFilter.class}
), @Filter(
type = FilterType.CUSTOM,
classes = {AutoConfigurationExcludeFilter.class}
)}
)
其中前四个注解@Target({ElementType.TYPE}),@Retention(RetentionPolicy.RUNTIME),@Documented,@Inherited为元注解(注解其他注解)
2.1 @Target:
@Target说明了Annotation所修饰的对象范围:Annotation可被用于 packages、types(类、接口、枚举、Annotation类型)、类型成员(方法、构造方法、成员变量、枚举值)、方法参数和本地变量(如循环变量、catch参数)。在Annotation类型的声明中使用了target可更加明晰其修饰的目标。
作用:用于描述注解的使用范围(即:被描述的注解可以用在什么地方)
取值(ElementType)有:
1.CONSTRUCTOR:用于描述构造器
2.FIELD:用于描述域
3.LOCAL_VARIABLE:用于描述局部变量
4.METHOD:用于描述方法
5.PACKAGE:用于描述包
6.PARAMETER:用于描述参数
7.TYPE:用于描述类、接口(包括注解类型) 或enum声明
2.2 @Retention:
@Retention定义了该Annotation被保留的时间长短:某些Annotation仅出现在源代码中,而被编译器丢弃;而另一些却被编译在class文件中;编译在class文件中的Annotation可能会被虚拟机忽略,而另一些在class被装载时将被读取(请注意并不影响class的执行,因为Annotation与class在使用上是被分离的)。使用这个meta-Annotation可以对 Annotation的“生命周期”限制。
作用:表示需要在什么级别保存该注释信息,用于描述注解的生命周期(即:被描述的注解在什么范围内有效)
取值(RetentionPoicy)有:
1.SOURCE:在源文件中有效(即源文件保留)
2.CLASS:在class文件中有效(即class保留)
3.RUNTIME:在运行时有效(即运行时保留)
2.3 @Documented:
@Documented用于描述其它类型的annotation应该被作为被标注的程序成员的公共API,因此可以被例如javadoc此类的工具文档化。Documented是一个标记注解,没有成员。
2.4 @Inherited:
@Inherited 元注解是一个标记注解,@Inherited阐述了某个被标注的类型是被继承的。如果一个使用了@Inherited修饰的annotation类型被用于一个class,则这个annotation将被用于该class的子类。
注意:@Inherited annotation类型是被标注过的class的子类所继承。类并不从它所实现的接口继承annotation,方法并不从它所重载的方法继承annotation。
当@Inherited annotation类型标注的annotation的Retention是RetentionPolicy.RUNTIME,则反射API增强了这种继承性。如果我们使用java.lang.reflect去查询一个@Inherited annotation类型的annotation时,反射代码检查将展开工作:检查class和其父类,直到发现指定的annotation类型被发现,或者到达类继承结构的顶层。
2.5 @SpringBootConfiguration
@SpringBootConfiguration表示当前类是一个配置类,就像xml配置文件,它会被@ComponentScan扫描到
2.6 @EnableAutoConfiguration
@EnableAutoConfiguration此注释自动载入应用程序所需的所有Bean
2.7 @ComponentScan
@ComponentScan用注解配置实现自动扫描,默认会扫描当前包和所有子包,和xml配置自动扫描效果一样
三:启动springBoot项目run
. _ _ _
/\ / ‘ _ ()_ _ _ _ \ \ \ \
( ( )___ | ‘_ | ‘| | ‘ \/ _` | \ \ \ \
\/ _)| |)| | | | | || (| | ) ) ) )
’ |_| .|| ||| |_, | / / / /
=========||==============|__/=///_/
:: Spring Boot :: (v1.5.6.RELEASE)
看到默认得spring标志则服务启动了
四:测试一个Rest案例
其中@RestController相当于@ResponseBody + @Controller合在一起的作用。
@GetMapping表示requestMethod=GET,参数为请求路径”/hello”表示/hello路径访问
重启服务器浏览器访问http://localhost:8080/hello?name=dy_bom
<modelVersion>4.0.0</modelVersion>
<groupId>com.dy</groupId>
<artifactId>spring-boot</artifactId>
<version>0.0.1-SNAPSHOT</version>
<packaging>jar</packaging>

<name>spring-boot</name>
<description>Demo project for Spring Boot</description>

<parent>
<groupId>org.springframework.boot</groupId>
<artifactId>spring-boot-starter-parent</artifactId>
<version>1.5.6.RELEASE</version>
<relativePath/> <!-- lookup parent from repository -->
</parent>

<properties>
<project.build.sourceEncoding>UTF-8</project.build.sourceEncoding>
<project.reporting.outputEncoding>UTF-8</project.reporting.outputEncoding>
<java.version>1.8</java.version>
</properties>

<dependencies>
<dependency>
<groupId>org.springframework.boot</groupId>
<artifactId>spring-boot-starter</artifactId>
</dependency>
<!--定义一个Web项目-->
<dependency>
<groupId>org.springframework.boot</groupId>
<artifactId>spring-boot-starter-web</artifactId>
</dependency>
<dependency>
<groupId>org.springframework.boot</groupId>
<artifactId>spring-boot-starter-test</artifactId>
<scope>test</scope>
</dependency>
</dependencies>
<build>
<plugins>
<plugin>
<groupId>org.springframework.boot</groupId>
<artifactId>spring-boot-maven-plugin</artifactId>
</plugin>
</plugins>
</build>
二:创建项目的入口Application.Java
@SpringBootApplication
public class Application {
public static void main(String[] args) {
SpringApplication.run(Application.class, args);
}
}
注解SpringBootApplication作用如下
@Target({ElementType.TYPE})
@Retention(RetentionPolicy.RUNTIME)
@Documented
@Inherited
@SpringBootConfiguration
@EnableAutoConfiguration
@ComponentScan(
excludeFilters = {@Filter(
type = FilterType.CUSTOM,
classes = {TypeExcludeFilter.class}
), @Filter(
type = FilterType.CUSTOM,
classes = {AutoConfigurationExcludeFilter.class}
)}
)
其中前四个注解@Target({ElementType.TYPE}),@Retention(RetentionPolicy.RUNTIME),@Documented,@Inherited为元注解(注解其他注解)
2.1 @Target:
@Target说明了Annotation所修饰的对象范围:Annotation可被用于 packages、types(类、接口、枚举、Annotation类型)、类型成员(方法、构造方法、成员变量、枚举值)、方法参数和本地变量(如循环变量、catch参数)。在Annotation类型的声明中使用了target可更加明晰其修饰的目标。
作用:用于描述注解的使用范围(即:被描述的注解可以用在什么地方)
取值(ElementType)有:
1.CONSTRUCTOR:用于描述构造器
2.FIELD:用于描述域
3.LOCAL_VARIABLE:用于描述局部变量
4.METHOD:用于描述方法
5.PACKAGE:用于描述包
6.PARAMETER:用于描述参数
7.TYPE:用于描述类、接口(包括注解类型) 或enum声明
2.2 @Retention:
@Retention定义了该Annotation被保留的时间长短:某些Annotation仅出现在源代码中,而被编译器丢弃;而另一些却被编译在class文件中;编译在class文件中的Annotation可能会被虚拟机忽略,而另一些在class被装载时将被读取(请注意并不影响class的执行,因为Annotation与class在使用上是被分离的)。使用这个meta-Annotation可以对 Annotation的“生命周期”限制。
作用:表示需要在什么级别保存该注释信息,用于描述注解的生命周期(即:被描述的注解在什么范围内有效)
取值(RetentionPoicy)有:
1.SOURCE:在源文件中有效(即源文件保留)
2.CLASS:在class文件中有效(即class保留)
3.RUNTIME:在运行时有效(即运行时保留)
2.3 @Documented:
@Documented用于描述其它类型的annotation应该被作为被标注的程序成员的公共API,因此可以被例如javadoc此类的工具文档化。Documented是一个标记注解,没有成员。
2.4 @Inherited:
@Inherited 元注解是一个标记注解,@Inherited阐述了某个被标注的类型是被继承的。如果一个使用了@Inherited修饰的annotation类型被用于一个class,则这个annotation将被用于该class的子类。
注意:@Inherited annotation类型是被标注过的class的子类所继承。类并不从它所实现的接口继承annotation,方法并不从它所重载的方法继承annotation。
当@Inherited annotation类型标注的annotation的Retention是RetentionPolicy.RUNTIME,则反射API增强了这种继承性。如果我们使用java.lang.reflect去查询一个@Inherited annotation类型的annotation时,反射代码检查将展开工作:检查class和其父类,直到发现指定的annotation类型被发现,或者到达类继承结构的顶层。
2.5 @SpringBootConfiguration
@SpringBootConfiguration表示当前类是一个配置类,就像xml配置文件,它会被@ComponentScan扫描到
2.6 @EnableAutoConfiguration
@EnableAutoConfiguration此注释自动载入应用程序所需的所有Bean
2.7 @ComponentScan
@ComponentScan用注解配置实现自动扫描,默认会扫描当前包和所有子包,和xml配置自动扫描效果一样
三:启动springBoot项目run
. _ _ _
/\ / ‘ _ ()_ _ _ _ \ \ \ \
( ( )___ | ‘_ | ‘| | ‘ \/ _` | \ \ \ \
\/ _)| |)| | | | | || (| | ) ) ) )
’ |_| .|| ||| |_, | / / / /
=========||==============|__/=///_/
:: Spring Boot :: (v1.5.6.RELEASE)
看到默认得spring标志则服务启动了
四:测试一个Rest案例
@RestController
public class TestController {
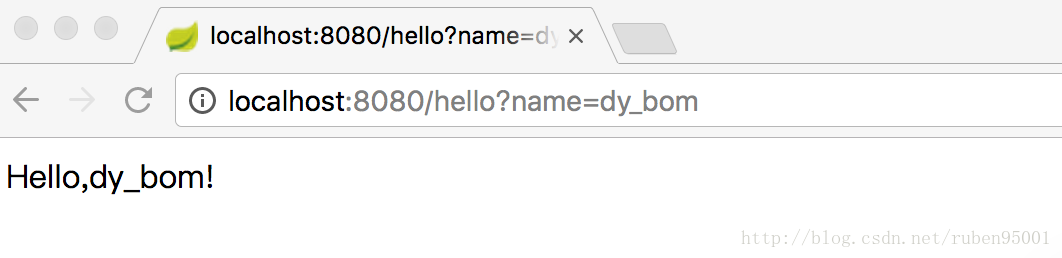
@GetMapping("/hello")
public Object Hello(@RequestParam String name){
return "Hello,"+name+"!";
}
}其中@RestController相当于@ResponseBody + @Controller合在一起的作用。
@GetMapping表示requestMethod=GET,参数为请求路径”/hello”表示/hello路径访问
重启服务器浏览器访问http://localhost:8080/hello?name=dy_bom

相关文章推荐
- Maven构建一个多模块的Spring Boot + Spring MVC项目,完全基于java config
- 快速构建可运行的Spring-boot项目(Hello World)
- 构建简单spring boot 项目
- SpringBoot+Maven 多模块项目的构建、运行、打包
- 使用命令构建(Maven)Spring Boot项目
- springboot 构建 spring cloud 微服务项目 搭建ARTHUR框架分享
- spring_Boot 项目搭建步骤 idea 构建
- 使用Maven插件构建SpringBoot项目,生成Docker镜像push到DockerHub上
- spring boot项目构建出错,编译失败提示少包解决办法
- Spring精藏(一)第一个SpringBoot项目构建及eclipse安装Springboot
- [Gradle中文教程系列]-跟我学Gradle-8.7.多模块项目之 - spring boot + gradle + 构建公共jsp页面的多模块项目
- gradle构建的springboot项目的三种启动方式
- 快速构建可运行的Spring-boot项目(Hello World)
- SpringBoot快速入门-基本项目构建
- 【springBoot】之快速构建一个web项目
- Springboot整合dubbo构建maven多模块项目(四) - 集成mybatis
- 使用gradle初始化构建SpringBoot项目
- 快速构建可运行的Spring-boot项目(Hello World)
- 构建 Zookeeper + Dubbo + Spring Boot 的分布式调用项目(二)
- ant构建spring boot 项目