CentOS 7搭建SVN服务器
2017-07-07 10:43
351 查看
安装步骤如下:
1、yum install subversion
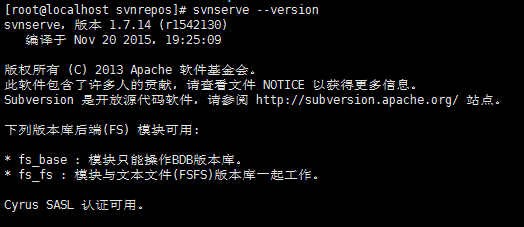
2、查看安装版本 svnserve --version
3、创建SVN版本库目录 mkdir -p /var/svn/svnrepos
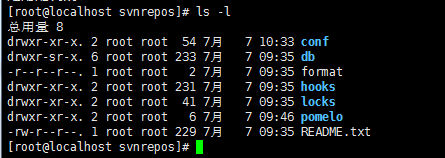
4、创建版本库 svnadmin create /var/svn/svnrepos
执行了这个命令之后会在/var/svn/svnrepos目录下生成如下这些文件
5、进入conf目录(该svn版本库配置文件)cd conf/
authz文件是权限控制文件
passwd是帐号密码文件
svnserve.conf SVN服务配置文件
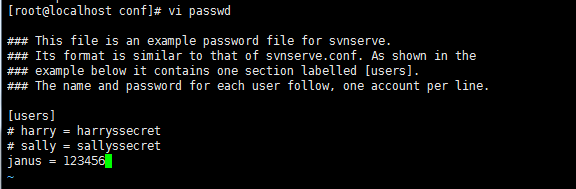
6、设置帐号密码 vi passwd
在[users]块中添加用户和密码,格式:帐号=密码,如janus=123456
7、设置权限 vi authz
在末尾添加如下代码:
[/]
janus = rw
意思是版本库的根目录quwenzhe对其有读写权限
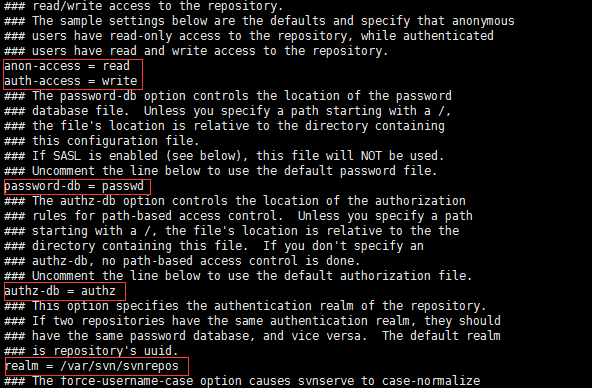
8、修改svnserve.conf文件 vi svnserve.conf
打开下面的几个注释:
anon-access = read #匿名用户可读
auth-access = write #授权用户可写
password-db = passwd #使用哪个文件作为账号文件
authz-db = authz #使用哪个文件作为权限文件
realm = /var/svn/svnrepos # 认证空间名,版本库所在目录
9、启动svn版本库 svnserve -d -r /var/svn/svnrepos
停止可以使用以下命令
10、在windows上测试
输入SVN地址,如下图:
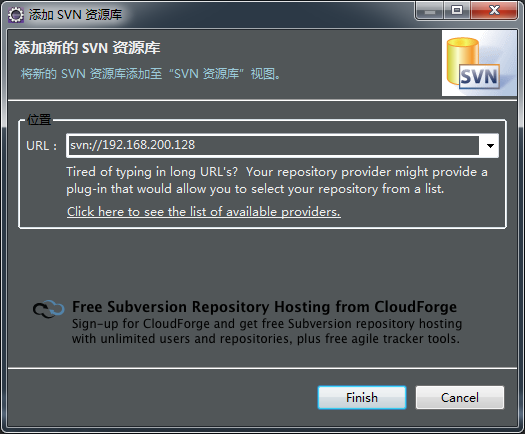
输入用户名、密码即可
1、yum install subversion
2、查看安装版本 svnserve --version
3、创建SVN版本库目录 mkdir -p /var/svn/svnrepos
4、创建版本库 svnadmin create /var/svn/svnrepos
执行了这个命令之后会在/var/svn/svnrepos目录下生成如下这些文件
5、进入conf目录(该svn版本库配置文件)cd conf/
authz文件是权限控制文件
passwd是帐号密码文件
svnserve.conf SVN服务配置文件
6、设置帐号密码 vi passwd
在[users]块中添加用户和密码,格式:帐号=密码,如janus=123456
7、设置权限 vi authz
在末尾添加如下代码:
[/]
janus = rw
### This file is an example authorization file for svnserve.
### Its format is identical to that of mod_authz_svn authorization
### files.
### As shown below each section defines authorizations for the path and
### (optional) repository specified by the section name.
### The authorizations follow. An authorization line can refer to:
###  - a single user,
###  - a group of users defined in a special [groups] section,
###  - an alias defined in a special [aliases] section,
###  - all authenticated users, using the '$authenticated' token,
###  - only anonymous users, using the '$anonymous' token,
###  - anyone, using the '*' wildcard.
###
### A match can be inverted by prefixing the rule with '~'. Rules can
### grant read ('r') access, read-write ('rw') access, or no access
### ('').

[aliases]
# joe = /C=XZ/ST=Dessert/L=Snake City/O=Snake Oil, Ltd./OU=Research Institute/CN=Joe Average

[groups]
# harry_and_sally = harry,sally
# harry_sally_and_joe = harry,sally,&joe

# [/foo/bar]
# harry = rw
# &joe = r
# * =

# [repository:/baz/fuz]
# @harry_and_sally = rw
# * = r

[/]
janus = rw
意思是版本库的根目录quwenzhe对其有读写权限
8、修改svnserve.conf文件 vi svnserve.conf
打开下面的几个注释:
anon-access = read #匿名用户可读
auth-access = write #授权用户可写
password-db = passwd #使用哪个文件作为账号文件
authz-db = authz #使用哪个文件作为权限文件
realm = /var/svn/svnrepos # 认证空间名,版本库所在目录
9、启动svn版本库 svnserve -d -r /var/svn/svnrepos
停止可以使用以下命令
[root@localhost conf]# ps aux |grep svn
root       7637  0.0  0.0 164236   904 ?        Ss   10:34   0:00 svnserve -d -r /var/svn/svnrepos
root       7674  0.0  0.0 114712   976 pts/2    R+   10:42   0:00 grep --color=auto svn
[root@localhost conf]# kill -9 7637
10、在windows上测试
输入SVN地址,如下图:
输入用户名、密码即可

相关文章推荐
- centos5.5上搭建svn服务器
- 【转载】CentOS 5.5下搭建部署独立SVN服务器全程详解
- CentOS搭建SVN(CollabNet Subversion)服务器
- CentOS下SVN服务器的搭建使用
- centos下svn服务器的搭建,CentOS SVN安装与配置
- Linux下SVN服务器搭建(CentOS+Subversion)
- Centos搭建SVN服务器三步曲
- 三步在Centos搭建SVN服务器
- redhat 下svn服务器搭建--CentOS 5.5下搭建部署独立SVN服务器全程详解
- Linux下SVN服务器搭建(CentOS+Subversion)
- CentOS 5.5下搭建部署独立SVN服务器全程详解
- CentOS 6.0 搭建SVN 服务器
- Linux下SVN服务器搭建(CentOS+Subversion)
- Centos搭建SVN服务器三步曲
- Centos搭建SVN服务器三步曲
- CentOS 5.5下搭建部署独立SVN服务器全程详解
- Linux下SVN服务器搭建(CentOS+Subversion)
- linux(centos)搭建独立SVN服务器
- Centos搭建SVN服务器三步曲
- Centos搭建SVN服务器三步曲