搭建Elasticsearch 5.4分布式集群
2017-07-06 11:27
483 查看
搭建Elasticsearch 5.4分布式集群
参考文献:http://blog.csdn.net/napoay/article/details/52202877
一、集群角色
多机集群中的节点可以分为master nodes和data nodes,在配置文件中使用Zen发现(Zen discovery)机制来管理不同节点。Zen发现是ES自带的默认发现机制,使用多播发现其它节点。只要启动一个新的ES节点并设置和集群相同的名称这个节点就会被加入到集群中。Elasticsearch集群中有的节点一般有三种角色:master node、data node和client node。
master node:master几点主要用于元数据(metadata)的处理,比如索引的新增、删除、分片分配等。
data node:data 节点上保存了数据分片。它负责数据相关操作,比如分片的 CRUD,以及搜索和整合操作。这些操作都比较消耗 CPU、内存和 I/O 资源;
client node:client 节点起到路由请求的作用,实际上可以看做负载均衡器。( 对于没有很多请求的业务,client node可以不加,master和data足矣)
二、基于2.X的集群配置
选取10.90.4.9这台机器做为client node,elasticsearch.yml中的配置如下:cluster.name: ucas node.name: node-09 node.master: true node.data: false network.host: 0.0.0.0 discovery.zen.ping.unicast.hosts: ["10.90.4.9"] discovery.zen.ping.multicast.enabled: true1
2
3
4
5
6
7
1
2
3
4
5
6
7
注意端口不是9200,而是9300。也可以不写端口。
启动10.90.4.9上的es服务器,现在只是一个单机集群。
在10.90.4.8这台机器上配置好同样的ES作为master node,elasticsearch.yml中的配置如下:
cluster.name: ucas
node.name:  node-08
node.master: true
node.data: true
network.host: 0.0.0.0
discovery.zen.ping.unicast.hosts: ["10.90.4.9"]
discovery.zen.ping.multicast.enabled: true
1
2
3
4
5
6
7
1
2
3
4
5
6
7
10.90.4.7作为data node,配置如下:
cluster.name: ucas
node.name: node-07
node.master: false
node.data: true
network.host: 0.0.0.0
discovery.zen.ping.unicast.hosts: ["10.90.4.9"]
discovery.zen.ping.multicast.enabled: true
1
2
3
4
5
6
7
1
2
3
4
5
6
7
访问http://10.90.4.9:9200/_plugin/head/
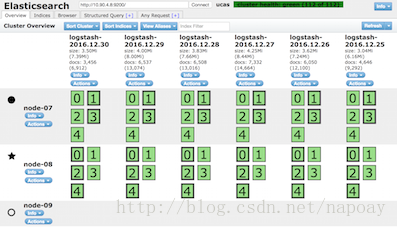
如图,node-09为client节点,不存储数据。
三、基于5.4的多机集群配置
ELasticsearch 5.4要求JDK版本最低为1.8,由于服务器上的JDK版本为1.7并且Java环境变量写在/etc/profile里面,改JDK会影响其他程序,这次基于5.4在我的mac和另外一台Ubuntu做测试。
mac上的本机ip为192.168.1.111,设为master节点,配置如下:
cluster.name: my-application
node.name: node-111

network.host: 192.168.1.111
http.port: 9200

http.cors.enabled: true
http.cors.allow-origin: "*"

node.master: true
node.data: true
discovery.zen.ping.unicast.hosts: ["192.168.1.111"]
1
2
3
4
5
6
7
8
9
10
11
12
13
14
1
2
3
4
5
6
7
8
9
10
11
12
13
14
Ubuntu机器的ip位192.168.1.102,配置如下:
cluster.name: my-application
node.name: node-102

network.host: 192.168.1.102
http.port: 9200

http.cors.enabled: true
http.cors.allow-origin: "*"

node.master: false
node.data: true
discovery.zen.ping.unicast.hosts: ["192.168.1.111"]
1
2
3
4
5
6
7
8
9
10
11
12
13
14
1
2
3
4
5
6
7
8
9
10
11
12
13
14
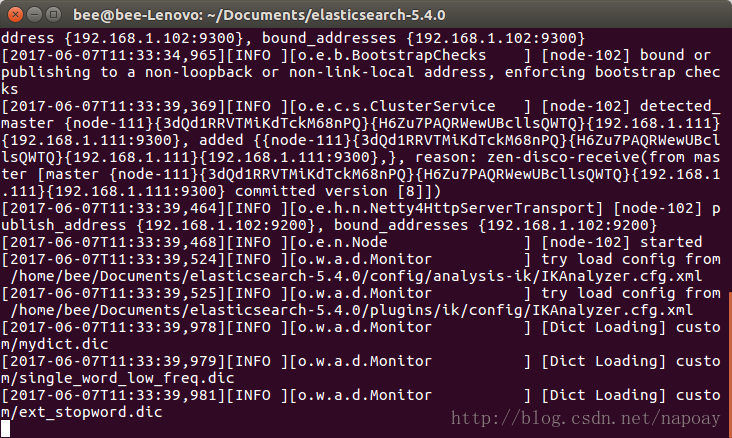
先启动mac上的master,再启动Ubuntu上的slave节点,观察输出,会有一个node-102探测到master节点的提示:
2017-06-07T11:33:39,369][INFO ][o.e.c.s.ClusterService ] [node-102] detected_master {node-111}{3dQd1RRVTMiKdTckM68nPQ}{H6Zu7PAQRWewUBcllsQWTQ}{192.168.1.111}{192.168.1.111:9300}, added {{node-111}{3dQd1RRVTMiKdTckM68nPQ}{H6Zu7PAQRWewUBcllsQWTQ}{192.168.1.111}{192.168.1.111:9300},}, reason: zen-disco-receive(from master [master {node-111}{3dQd1RRVTMiKdTckM68nPQ}{H6Zu7PAQRWewUBcllsQWTQ}{192.168.1.111}{192.168.1.111:9300} committed version [8]])'11
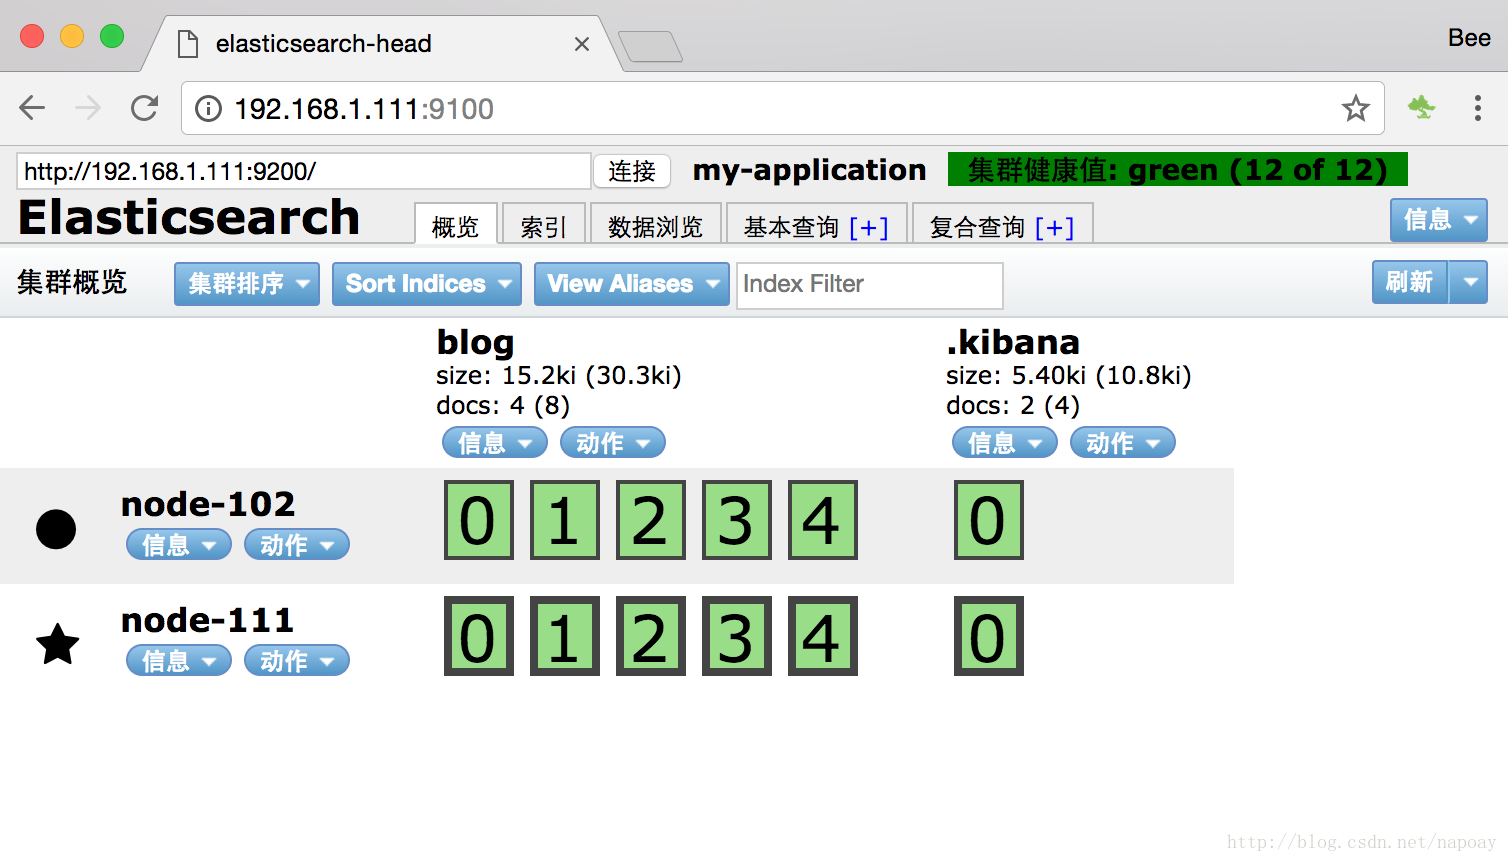
访问head,一个master一个slave组成集群,界面如下:
四、基于5.4的单机多节点集群配置
如果想要在一台机器上启动多个节点,步骤如下:复制一份ELasticsearch的安装包
修改端口,比如一个是9200,一个是9205
删除data目录下的数据(如果是新解压的安装包就不必了)

相关文章推荐
- 搭建Elasticsearch 5.4分布式集群
- ElasticSearch入门 —— 集群搭建
- elasticsearch 5.6.3 集群搭建
- elasticsearch 集群搭建
- ElasticSearch学习四:集群搭建实例
- elasticsearch集群搭建实例
- elasticsearch2.2 集群搭建各种坑
- ElasticSearch的基本用法与集群搭建
- Elasticsearch5.2.1集群搭建,动态加入节点,并添加监控诊断插件
- ElasticSearch学习 - (三)windows下单机集群搭建
- elasticsearch 集群搭建
- 详解ElasticSearch6.4.0集群搭建
- Elasticsearch与MongoDB 数据同步及分布式集群搭建 (二)
- Elasticsearch与MongoDB 数据同步及分布式集群搭建 (一)
- ElasticSearch系列09:ElasticSearch2.4集群搭建
- elasticsearch集群搭建
- [集群搭建]记录使用docker搭建elasticsearch集群
- Elasticsearch集群搭建
- ElasticSearch的基本用法与集群搭建
- Elasticsearch集群搭建