IOS通知(附带漂亮时钟制作)
2017-06-28 20:33
239 查看
1.我创建了三个页面,第一个页面记录第三个页面传过去的秒数,第二个页面过度作用,第三个计算产生数值传给第一个页面 (还有个漂亮时钟)
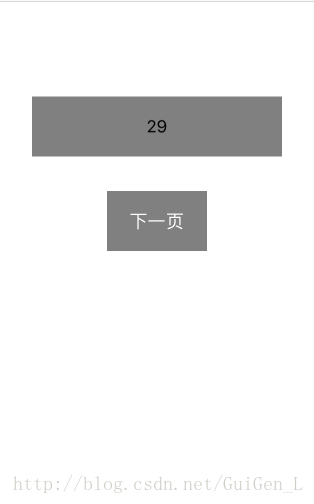
2.第一个页面
#import "ViewController.h"
#import "First_ViewController.h"
@interface ViewController ()
//显示
@property (retain)UILabel* label;
@end
@implementation ViewController
- (void)viewDidLoad {
[super viewDidLoad];
// Do any additional setup after loading the view, typically from a nib.
self.view.backgroundColor = [UIColor whiteColor];
//显示时间
_label = [[UILabel alloc]initWithFrame:CGRectMake( [UIScreen mainScreen].bounds.size.width/2-125, [UIScreen mainScreen].bounds.size.height/3-30, 250, 60)];
_label.backgroundColor = [UIColor grayColor];
//居中对齐
_label.textAlignment = NSTextAlignmentCenter;
//_label.text = [NSString stringWithFormat:@"%@",str];
[self.view addSubview:_label];
UIButton* btn = [UIButton buttonWithType:UIButtonTypeCustom];
btn.frame = CGRectMake( [UIScreen mainScreen].bounds.size.width/2-50, [UIScreen mainScreen].bounds.size.height/2-30, 100, 60);
btn.backgroundColor = [UIColor grayColor];
[btn setTitle:@"下一页" forState:UIControlStateNormal];
[btn addTarget:self action:@selector(btnAction:) forControlEvents:UIControlEventTouchUpInside];
[self.view addSubview:btn];
//注册监听者
[[NSNotificationCenter defaultCenter]addObserver:self selector:@selector(open:) name:@"open" object:nil];
}
-(void)btnAction:(UIButton*)sender
{
First_ViewController* firstVC = [[First_ViewController alloc]init];
//跳转到下一页
[self.navigationController pushViewController:firstVC animated:YES];
}
-(void)open:(NSNotification*)notification
{
//_label.text = notification.object;
//int seconds = [notification.object intValue];
//保存
NSUserDefaults* ud = [NSUserDefaults standardUserDefaults];
NSInteger teg = [[ud objectForKey:@"switch"] intValue];
_label.text = [NSString stringWithFormat:@"%ld", (long)teg];
}
- (void)didReceiveMemoryWarning {
[super didReceiveMemoryWarning];
// Dispose of any resources that can be recreated.
}
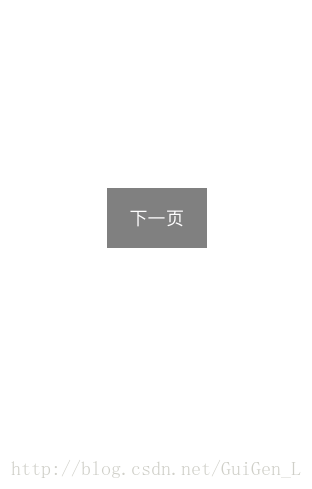
@end3.第二个页面
#import "First_ViewController.h"
#import "Second_ViewController.h"
@interface First_ViewController ()
@end
@implementation First_ViewController
- (void)viewDidLoad {
[super viewDidLoad];
// Do any additional setup after loading the view.
self.view.backgroundColor = [UIColor whiteColor];
UIButton* btn = [UIButton buttonWithType:UIButtonTypeCustom];
btn.frame = CGRectMake( [UIScreen mainScreen].bounds.size.width/2-50, [UIScreen mainScreen].bounds.size.height/2-30, 100, 60);
btn.backgroundColor = [UIColor grayColor];
[btn setTitle:@"下一页" forState:UIControlStateNormal];
[btn addTarget:self action:@selector(btnAction:) forControlEvents:UIControlEventTouchUpInside];
[self.view addSubview:btn];
}
-(void)btnAction:(UIButton*)sender
{
Second_ViewController* secondVC = [[Second_ViewController alloc]init];
//跳转到下一页
[self.navigationController pushViewController:secondVC animated:YES];
}
- (void)didReceiveMemoryWarning {
[super didReceiveMemoryWarning];
// Dispose of any resources that can be recreated.
}
/*
#pragma mark - Navigation
// In a storyboard-based application, you will often want to do a little preparation before navigation
- (void)prepareForSegue:(UIStoryboardSegue *)segue sender:(id)sender {
// Get the new view controller using [segue destinationViewController].
// Pass the selected object to the new view controller.
}
*/
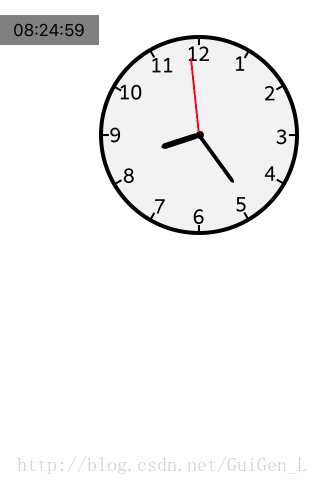
@end4.第三个页面
#import "Second_ViewController.h"

//获得当前的年月日 时分秒
#define  CURRENTSEC [[NSCalendar currentCalendar] component:NSCalendarUnitSecond fromDate:[NSDate date]]
#define  CURRENTMIN [[NSCalendar currentCalendar] component:NSCalendarUnitMinute fromDate:[NSDate date]]
#define  CURRENTHOUR [[NSCalendar currentCalendar] component:NSCalendarUnitHour fromDate:[NSDate date]]
#define  CURRENTDAY  [[NSCalendar currentCalendar] component:NSCalendarUnitDay fromDate:[NSDate date]]
#define  CURRENTMONTH [[NSCalendar currentCalendar] component:NSCale
d837
ndarUnitMonth fromDate:[NSDate date]]
#define  CURRENTYEAR [[NSCalendar currentCalendar] component:NSCalendarUnitYear fromDate:[NSDate date]]

//角度转换成弧度
#define  ANGEL(x) x/180.0 * M_PI

#define kPerSecondA     ANGEL(6)
#define kPerMinuteA     ANGEL(6)
#define kPerHourA       ANGEL(30)
#define kPerHourMinuteA ANGEL(0.5)

@interface Second_ViewController ()
//显示
@property (retain)UILabel* label;
//时间管理
@property (retain)NSTimer* timer;
//记录时间长度
@property (assign)NSInteger secs;

//===================================================

@property (nonatomic,strong) UIImageView *imageClock;

@property (nonatomic,strong) CALayer *layerSec;
@property (nonatomic,strong) CALayer *layerMin;
@property (nonatomic,strong) CALayer *layerHour;

@end

@implementation Second_ViewController

-(void)viewWillDisappear:(BOOL)animated
{
[super viewWillDisappear:YES];
NSLog(@"视图即将消失");
[_timer invalidate];

//发送通知
//NSNotificationCenter 通知中心
//defaultCenter 实例化通知中心
//postNotificationName: object: 发送通知的方法
//第一个参数是通知的名字
//第二个参数是通知所携带的参数,可以是任何类型的对象,没有填nil
[[NSNotificationCenter defaultCenter]postNotificationName:@"open" object:[NSString stringWithFormat:@"%ld",(long)_secs]];
}

- (void)viewDidLoad {
[super viewDidLoad];
// Do any additional setup after loading the view.
self.view.backgroundColor = [UIColor whiteColor];

//显示时间
_label = [[UILabel alloc]initWithFrame:CGRectMake(0,80,100,30)];
_label.backgroundColor = [UIColor grayColor];
//居中对齐
_label.textAlignment = NSTextAlignmentCenter;
//_label.text = [NSString stringWithFormat:@"%@",str];
[self.view addSubview:_label];

//时间管理类
_timer = [NSTimer scheduledTimerWithTimeInterval:1 target:self selector:@selector(changeFrame:) userInfo:nil repeats:YES];

//=======================================================================
[self.view addSubview:self.imageClock];
[self.imageClock.layer addSublayer:self.layerSec];
[self.imageClock.layer addSublayer:self.layerMin];
[self.imageClock.layer addSublayer:self.layerHour];

[self timeChange];
[NSTimer scheduledTimerWithTimeInterval:1 target:self selector:@selector(timeChange) userInfo:nil repeats:YES];

}

//随时间变化
-(void)changeFrame:(NSTimer*)time
{
//获取当前时间
NSDate* now = [NSDate date];
NSLog(@"now ----> %@",now);
//创建格式化时间
NSDateFormatter* df = [[NSDateFormatter alloc]init];
//设置格式
[df setDateFormat:@"hh:mm:ss"];
//把NSDate根据格式转换成NSString
NSString* str = [df stringFromDate:now];
NSLog(@"str ----> %@", str);
_label.text = [NSString stringWithFormat:@"%@",str];

//    实例化本地保存对象
NSUserDefaults* ud = [NSUserDefaults standardUserDefaults];
_secs = [[ud objectForKey:@"switch"] intValue];

_secs++;
//本地保存存储值
[ud setValue:[NSString stringWithFormat:@"%ld",(long)_secs] forKey:@"switch"];
NSLog(@"%ld",(long)_secs);

//    //本地永久性保存
//    //实例化本地保存对象
//    NSUserDefaults* ud = [NSUserDefaults standardUserDefaults];
//    //本地保存存储值
//    [ud setValue:[NSString stringWithFormat:@"%ld",(long)_secs] forKey:@"switch"];

NSLog(@"ud == %d", [[ud objectForKey:@"switch"]intValue]);
}

- (void)timeChange
{
self.layerSec.transform = CATransform3DMakeRotation(CURRENTSEC * kPerSecondA, 0, 0, 1);
self.layerMin.transform = CATransform3DMakeRotation(CURRENTMIN * kPerMinuteA, 0, 0, 1);

self.layerHour.transform = CATransform3DMakeRotation(CURRENTHOUR * kPerHourA, 0, 0, 1);
self.layerHour.transform = CATransform3DMakeRotation(CURRENTMIN * kPerHourMinuteA + CURRENTHOUR*kPerHourA, 0, 0, 1);
}

- (UIImageView *)imageClock
{
if (_imageClock == nil) {
_imageClock = [[UIImageView alloc]initWithImage:[UIImage imageNamed:@"60K58PICIuz_1024"]];//添加一张没有指针的图片
_imageClock.frame = CGRectMake(100, 100, 200, 200);
}

return _imageClock;
}

- (CALayer *)layerSec
{
if (_layerSec == nil) {
_layerSec = [CALayer layer];
_layerSec.bounds = CGRectMake(0, 0, 2, 80);
_layerSec.backgroundColor = [UIColor redColor].CGColor;
_layerSec.cornerRadius = 5;
_layerSec.anchorPoint = CGPointMake(0.5, 1);
_layerSec.position = CGPointMake(self.imageClock.bounds.size.width/2, self.imageClock.bounds.size.height/2);
}
return _layerSec;
}

- (CALayer *)layerMin
{
if (_layerMin == nil) {
_layerMin = [CALayer layer];
_layerMin.bounds = CGRectMake(0, 0, 4, 60);
_layerMin.backgroundColor = [UIColor blackColor].CGColor;
_layerMin.cornerRadius = 5;
_layerMin.anchorPoint = CGPointMake(0.5, 1);
_layerMin.position = CGPointMake(self.imageClock.bounds.size.width/2, self.imageClock.bounds.size.height/2);
}
return _layerMin;
}

- (CALayer *)layerHour
{
if (_layerHour == nil) {
_layerHour = [CALayer layer];
_layerHour.bounds = CGRectMake(0, 0, 6, 40);
_layerHour.backgroundColor = [UIColor blackColor].CGColor;
_layerHour.cornerRadius = 5;
_layerHour.anchorPoint = CGPointMake(0.5, 1);
_layerHour.position = CGPointMake(self.imageClock.bounds.size.width/2, self.imageClock.bounds.size.height/2);
}
return _layerHour;
}

- (void)didReceiveMemoryWarning {
[super didReceiveMemoryWarning];
// Dispose of any resources that can be recreated.
}

/*
#pragma mark - Navigation

// In a storyboard-based application, you will often want to do a little preparation before navigation
- (void)prepareForSegue:(UIStoryboardSegue *)segue sender:(id)sender {
// Get the new view controller using [segue destinationViewController].
// Pass the selected object to the new view controller.
}
*/

@end

相关文章推荐
- iOS 指南针的制作 附带源码
- 用Xamarin.iOS制作一个漂亮的汉堡按钮过渡动画
- 五步教你制作漂亮精致的HTML时钟
- iOS 指南针的制作 附带源码
- iOS开发之简易时钟的制作
- iOS开发--iOS通知中心扩展制作入门(iOS Extensions)
- iOS 通知中心扩展 制作总结与Demo(1)
- iOS 通知中心扩展制作入门
- IOS制作一个漂亮的登录界面
- iOS 通知中心扩展制作初步-b
- iOS证书与推送通知证书制作过程遇到的问题
- 使用 CSS & jQuery 制作一款漂亮的多彩时钟
- WWDC 2014 Session笔记 - iOS 通知中心扩展制作入门
- iOS 通知中心扩展制作入门
- 如何在 Swift 语言下使用 iOS Charts API 制作漂亮图表?
- 如何在 Swift 语言下使用 iOS Charts API 制作漂亮图表?
- WWDC 2014 Session笔记 - iOS 通知中心扩展制作入门
- iOS动画之漂亮的时钟
- iOS 指南针的制作 附带源码
- iOS 通知中心扩展制作入门