通过CardView和RecyclerView实现横向卡片式滑动效果
2017-06-10 16:49
716 查看
现在来介绍两种控件RecyclerView和CardView,并通过实例将它们结合在一起实现一种横向卡片式滑动效果.
使用过ListView的同学应该知道还需要一个子布局来填充RecyclerView
以下为recyclerView_item.xml的代码:
从代码中,我们会发现使用了CardView控件以及在控件中添加简易的两个TextView
现在来介绍CardView的一些常用属性,这也是现在卡片效果的关键所在
card_view:contentPadding 这个可以给你的内容加上padding属性
card_view:cardBackgroundColor这个可以改变cardview的背景
card_view:cardCornerRadius这个可以改变cardview圆角的大小
card_view:cardElevation这个比较难解释,CardView的Z轴阴影,被用来决定阴影的大小以及柔和度,以至于可以逼真的模拟出对于深度效果的描述。说白点可以理解为阴影的大小
andorid:foreground=”?android:attr/selectableItemBackground” 这个可以使CardView被点击后出现波纹效
通过以上常用属性可以使CardView出现各种不同的效果
现在回到Activity中来实现RecyclerView
跟ListView的一样,我们需要写一个适配器,代码如下:
写一个类继承RecyclerView.Adapter,重写RecyclerView.Adapter的三个重要方法 onBindViewHolder() getItemCount() 和 OncreateViewHolder()
在Activity中,代码如下:
在代码中,我们获取LayoutManager对象,设置其方向为水平方向,并设置RecyclerView的LayoutManager
然后实例化adapter对象,传入上下文和假数据lists,并设置RecyclerView.adapater
到此基本步骤已经完成,运行程序。
以下为运行截图:

作者:乐观的Smart
1.RecyclerView
RecyvlerView是android SDK 新增加的一种控件,也被官方推荐代替ListView来使用,因为其具有更好的灵活性和代替性。2.CardView
CardView是安卓5.0推出的一种卡片式控件,内部封装了许多有用的方法来实现美观效果。3.如何使用RecylerView和CardView在android studio中
在build.gradle中添加依赖再编辑即可compile 'com.android.support:recyclerview-v7:25.+' compile 'com.android.support:cardview-v7:25
4.通过实例,使用两种控件实现横向卡片式滑动效果
建立main.xml布局文件,代码如下:<?xml version="1.0" encoding="utf-8"?> <LinearLayout xmlns:android="http://schemas.android.com/apk/res/android" android:orientation="vertical" android:layout_width="match_parent" android:layout_height="match_parent" xmlns:app="http://schemas.android.com/apk/res-auto"> <android.support.v7.widget.RecyclerView android:layout_width="match_parent" android:layout_height="match_parent" android:id="@+id/recycler_View" > </android.support.v7.widget.RecyclerView> </LinearLayout>
使用过ListView的同学应该知道还需要一个子布局来填充RecyclerView
以下为recyclerView_item.xml的代码:
<?xml version="1.0" encoding="utf-8"?>
<LinearLayout xmlns:android="http://schemas.android.com/apk/res/android"
xmlns:app="http://schemas.android.com/apk/res-auto"
android:orientation="vertical"
android:layout_width="match_parent"
android:layout_height="match_parent"
android:id="@+id/recyclerview_item"
android:padding="30dp"

>

<android.support.v7.widget.CardView
android:layout_width="match_parent"
android:layout_height="match_parent"
android:orientation="vertical"
app:contentPadding="50dp"
app:cardCornerRadius="20dp"
android:clickable="true"

android:foreground="?android:attr/selectableItemBackground"
app:cardElevation="@dimen/cardview_compat_inset_shadow"
app:cardBackgroundColor="@color/cardview_light_background">

<LinearLayout
android:layout_width="match_parent"
android:layout_height="wrap_content">

<TextView
android:id="@+id/tv1"
android:layout_width="wrap_content"
android:layout_height="wrap_content"
android:layout_gravity="center"
android:text="作者"
android:textSize="22dp"/>
</LinearLayout>

<LinearLayout
android:layout_width="match_parent"
android:layout_height="114dp"
>
<TextView
android:id="@+id/tv2"
android:layout_width="wrap_content"
android:layout_height="wrap_content"
android:layout_gravity="center"
android:text="
锄禾日当午,汗滴禾下土"

android:textSize="22dp"/>
</LinearLayout>
</android.support.v7.widget.CardView>
</LinearLayout>
从代码中,我们会发现使用了CardView控件以及在控件中添加简易的两个TextView
现在来介绍CardView的一些常用属性,这也是现在卡片效果的关键所在
card_view:contentPadding 这个可以给你的内容加上padding属性
card_view:cardBackgroundColor这个可以改变cardview的背景
card_view:cardCornerRadius这个可以改变cardview圆角的大小
card_view:cardElevation这个比较难解释,CardView的Z轴阴影,被用来决定阴影的大小以及柔和度,以至于可以逼真的模拟出对于深度效果的描述。说白点可以理解为阴影的大小
andorid:foreground=”?android:attr/selectableItemBackground” 这个可以使CardView被点击后出现波纹效
通过以上常用属性可以使CardView出现各种不同的效果
现在回到Activity中来实现RecyclerView
跟ListView的一样,我们需要写一个适配器,代码如下:
public class recyclerViewadapter extends RecyclerView.Adapter {
private List<DataBean> lists;
private Context context;

public recyclerViewadapter(List<DataBean> lists, Context context) {
this.lists = lists;
this.context = context;
}

class myholder extends RecyclerView.ViewHolder{

private TextView tv1,tv2;
public myholder(View itemView) {
super(itemView);
tv1= (TextView) itemView.findViewById(R.id.tv1);
tv2= (TextView) itemView.findViewById(R.id.tv2);

}

a72a
}

@Override
public RecyclerView.ViewHolder onCreateViewHolder(ViewGroup parent, int viewType) {
myholder holder =new myholder(LayoutInflater.from(parent.getContext()).inflate(R.layout.recyclerview_item,parent,false));
return holder;
}

@Override
public void onBindViewHolder(RecyclerView.ViewHolder holder, int position) {
Log.d("TAG", "onBindViewHolder: "+lists.get(position).getAutor());
((myholder)holder).tv1.setText(lists.get(position).getAutor());
((myholder)holder).tv2.setText(lists.get(position).getContent());

}

@Override
public int getItemCount() {
return lists.size();
}
}
写一个类继承RecyclerView.Adapter,重写RecyclerView.Adapter的三个重要方法 onBindViewHolder() getItemCount() 和 OncreateViewHolder()
OncreateViewHolder(): 创建新的View,被LayoutManager所调用
OnBindViewHolder():将数据与界面进行绑定
getItemCount() :返回数据的数量
在Activity中,代码如下:
public class Frament1 extends android.support.v4.app.Fragment{

private Toolbar toolbar1;
private RecyclerView recycler_view;
private TextView tv1,tv2;
private View view;
private List<DataBean> lists;

@Override
public void onAttach(Context context) {

super.onAttach(context);
}

@Nullable
@Override
public View onCreateView(LayoutInflater inflater, @Nullable ViewGroup container, @Nullable Bundle savedInstanceState) {
setHasOptionsMenu(true);
view = inflater.inflate(R.layout.fragment1, container, false);

initView();
initData();
LinearLayoutManager m=new LinearLayoutManager(getContext());
m.setOrientation(LinearLayoutManager.HORIZONTAL);
recycler_view.setLayoutManager(m);
recyclerViewadapter adapter=new recyclerViewadapter(lists,getContext());
recycler_view.setAdapter(adapter);

return view;
}

@Override
public void onResume() {
super.onResume();

}

private void initData() {
lists=new ArrayList<>();
lists.add(new DataBean("Smart","青青原上草,一岁一枯荣"));
lists.add(new DataBean("Smart","青青原上草,一岁一枯荣"));
lists.add(new DataBean("Smart","青青原上草,一岁一枯荣"));
lists.add(new DataBean("Smart","青青原上草,一岁一枯荣"));
lists.add(new DataBean("Smart","青青原上草,一岁一枯荣"));
lists.add(new DataBean("Smart","青青原上草,一岁一枯荣"));

}

private void initView() {
recycler_view= (RecyclerView) view.findViewById(R.id.recycler_View);
tv1= (TextView) view.findViewById(R.id.tv1);
tv2= (TextView) view.findViewById(R.id.tv2);

}
}
在代码中,我们获取LayoutManager对象,设置其方向为水平方向,并设置RecyclerView的LayoutManager
然后实例化adapter对象,传入上下文和假数据lists,并设置RecyclerView.adapater
LinearLayoutManager m=new LinearLayoutManager(getContext());
m.setOrientation(LinearLayoutManager.HORIZONTAL);
recycler_view.setLayoutManager(m);
recyclerViewadapter adapter=new recyclerViewadapter(lists,getContext());
recycler_view.setAdapter(adapter);
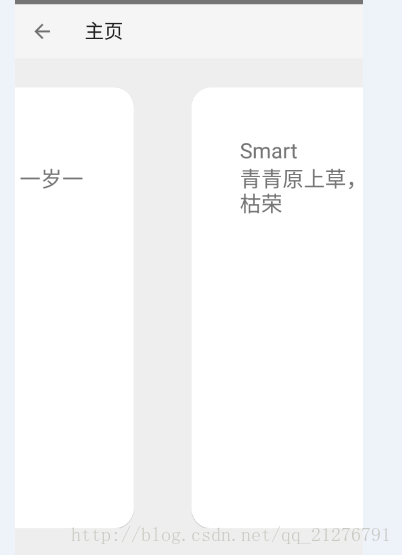
到此基本步骤已经完成,运行程序。
以下为运行截图:
作者:乐观的Smart

相关文章推荐
- 通过CardView和RecyclerView实现横向卡片式滑动效果
- Android手把手教你实现卡片式瀑布流效果(RecyclerView+CardView,附源码)
- Android学习笔记三十之RecyclerView和CardView实现拖拽和滑动
- (4.1.11.1)Android中使用RecyclerView和CardView实现瀑布流效果(StaggeredGrid)
- RecyclerView实现横向的GridView效果
- Android中使用RecyclerView和CardView实现瀑布流效果(StaggeredGrid)
- 自定义 LayoutManager 实现弧形以及滑动放大效果 RecyclerView
- Android RecyclerView 实现横向滚动效果
- 使用RecyclerView横向滑动实现仿到位的滑动(写的不好,还有未解决的地方)
- [置顶] RecyclerView探索之通过ItemDecoration实现StickyHeader效果
- 通过UICollectionView实现横向滚动照片效果
- Android 如何实现RecyclerView横向滑动
- Android控件RecyclerView实现横向滑动、瀑布流。
- RecyclerView实现Item滑动加载进入动画效果
- RecyclerView实现Item滑动加载进入动画效果
- RecyclerView 实现横向滚动效果
- 基于RecyclerView实现横向GridView效果
- 横向滑动ViewGoup(左边菜单右边内容)效果的实现
- 通过自定义ViewGroup来实现侧滑菜单效果,解决滑动冲突
- 一个 ScrollView 里面包含 viewpager 嵌套 listview 或 RecyclerView 极少代码实现的流畅滑动效果 处理一个两层滑动 view 的自定义布局,以最少的代码实现,