五步实现企业换肤
2017-06-07 00:00
218 查看
摘要: 需要做一个针对企业的识别并根据不同企业实现换肤
以后缀的方式实现,通过后缀名来区分不同的企业(www.baidu.com/index.github)。
以域名的方式区分企业(www.github.baidu.com/index.do),域名由企业提供(针对有域名的企业,没有域名的企业可以用本应用开发者分配二级域名)。
已不同的方法(www.baidu.com/github/index.do)。
三种方式的优缺点:设想一的优点:不需要企业提供域名,不需要配置域名参数,一个站点ICP备案即可,缺点:后缀面的方式不能让企业用户高度辨识企业站点,企业用户对站点的信任度较低,动态后缀配置繁琐。设想二的优点:各企业用户对站点的辨识度高,信任度高,配置一个域名对应一个企业来实现动态css和js配置,简单方便。缺点:需要企业提供域名,ICP备案信息多样。设想三优点:以企业名作为地址实现方便,配置少。缺点同设想一。
筛选过后实现就是技术问题了,我看了springmvc的动态css加载有一个类,ResourceBundleThemeSource类可以实现动态加载css,完全满足我们的不同企业的换肤需求,使用方便。
第一步:配置spring.xml文件,加上:
第二步:增加theme配置文件,在resource文件中增加theme文件夹,存放不同站点的对应的css文件配置。
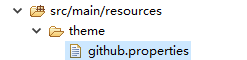
文件内容为:
第三步:配置站点对应的企业名:通过企业名查找对应的properties加载指向的css
为了方便读取properties文件,写个工具类来获取资源文件的配置,需要在spring配置文件配置此类。
第四步:controller判断域名并在页面加载动态css,代码如下:
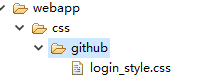
第五步:也就是最后一步,实现页面的动态加载css,先要有对应的css文件
页面代码:
验证后,完美实现了所要求的换肤需求。特此记录
做事之前先理清思路,自己需要实现怎样的功能,有哪几种实现方案,写例子查看几种方案的实现效果。择优选取最佳方案。
1、设想
我的设想是三种方式:以后缀的方式实现,通过后缀名来区分不同的企业(www.baidu.com/index.github)。
以域名的方式区分企业(www.github.baidu.com/index.do),域名由企业提供(针对有域名的企业,没有域名的企业可以用本应用开发者分配二级域名)。
已不同的方法(www.baidu.com/github/index.do)。
三种方式的优缺点:设想一的优点:不需要企业提供域名,不需要配置域名参数,一个站点ICP备案即可,缺点:后缀面的方式不能让企业用户高度辨识企业站点,企业用户对站点的信任度较低,动态后缀配置繁琐。设想二的优点:各企业用户对站点的辨识度高,信任度高,配置一个域名对应一个企业来实现动态css和js配置,简单方便。缺点:需要企业提供域名,ICP备案信息多样。设想三优点:以企业名作为地址实现方便,配置少。缺点同设想一。
2、实现
经过项目组筛选方案,选择方案二,以域名来辨识企业,一来多个域名可以对应一个IP,二来有利于推广,三来用户信任度高。筛选过后实现就是技术问题了,我看了springmvc的动态css加载有一个类,ResourceBundleThemeSource类可以实现动态加载css,完全满足我们的不同企业的换肤需求,使用方便。
第一步:配置spring.xml文件,加上:
<!-- 样式-->
<bean class="org.springframework.ui.context.support.ResourceBundleThemeSource"  id="themeSource">
<property name="basenamePrefix" value="theme."></property>
</bean>
<bean id="themeResolver"  class="org.springframework.web.servlet.theme.SessionThemeResolver">
<property name="defaultThemeName" value="github" />
</bean>
第二步:增加theme配置文件,在resource文件中增加theme文件夹,存放不同站点的对应的css文件配置。
文件内容为:
#ThemeSource配置code  <link rel="stylesheet" type="text/css" href="<spring:theme code='login_style'/>" />
login_style=css/github/login_style.css
第三步:配置站点对应的企业名:通过企业名查找对应的properties加载指向的css
github.oschina.com=github
为了方便读取properties文件,写个工具类来获取资源文件的配置,需要在spring配置文件配置此类。
public class PropertyPlaceholder extends PropertyPlaceholderConfigurer {

private static Map<String,String> propertyMap;

@Override
protected void processProperties(ConfigurableListableBeanFactory beanFactoryToProcess, Properties props) throws BeansException {
super.processProperties(beanFactoryToProcess, props
3ff0
);
propertyMap = new HashMap<String, String>();
for (Object key : props.keySet()) {
String keyStr = key.toString();
String value = props.getProperty(keyStr);
propertyMap.put(keyStr, value);
}
}

//static method for accessing context properties
public static String getProperty(String name) {
return propertyMap.get(name);
}
}
第四步:controller判断域名并在页面加载动态css,代码如下:
@Autowired
private ThemeResolver themeResolver;
@RequestMapping(value = "/changeTheme", method = RequestMethod.GET)
public String theme(HttpServletRequest request,
HttpServletResponse response, String bankName) {
String domain = request.getServerName();
logger.info("domain:"+domain);
String domainName = PropertyPlaceholder.getProperty(domain);
logger.info("domainName :"+domainName );
logger.info("current theme is "
+ themeResolver.resolveThemeName(request));
themeResolver.setThemeName(request, response, domainName);
logger.info("current theme change to "
+ themeResolver.resolveThemeName(request));
model.addAttribute("domainName ", domainName );
return "theme";
}
第五步:也就是最后一步,实现页面的动态加载css,先要有对应的css文件
页面代码:
<%@ taglib prefix="spring" uri="http://www.springframework.org/tags"%>
<!DOCTYPE HTML PUBLIC "-//W3C//DTD HTML 4.01 Transitional//EN"
"http://www.w3.org/TR/html4/loose.dtd">

<html>
<head>
<meta http-equiv="Content-Type" content="text/html; charset=UTF-8">
<title>JSP Page</title>
<link rel="stylesheet" type="text/css" href="<spring:theme code='login_style'/>" />
验证后,完美实现了所要求的换肤需求。特此记录

相关文章推荐
- 实现数据驱动型企业,只需五步!
- 实现企业安全存储策略的五步法
- 实现数据驱动型企业,只需五步!
- ASP.NET2.0中themes、Skins轻松实现网站换肤!
- [原创]利用CSS实现页面换肤
- SOA 实现企业IT规划的好方法
- 用PHP实现换肤
- 在企业环境下实现禁止使用USB的高安全措施
- 如何使用JCA (J2EE 连接器架构)实现企业应用
- ASP.NET 2.0中轻松实现网站换肤
- ASP.NET2.0中themes、Skins轻松实现网站换肤!
- 商务参考体系结构:企业对消费者 (B2C电子商务实践) 第 5 章:实现概述
- ASP.NET 2.0中轻松实现网站换肤
- WAS应用系列:WAS6 自定义用户注册接口代码 + 企业应用安全角色配置 + WAS安全配置 实现统一灵活的集成授权
- 用控件仅一条指令实现界面换肤和多语言版本(VB)
- 制造企业如何借力信息化实现动成长
- ASP Forum2.0学习笔记之三---换肤的vb实现
- ASP.NET2.0中themes、Skins轻松实现网站换肤!
- 偶然发现网站换肤一招:使页面动态加载不同CSS实现多界面