用Python玩转微信(一)
2017-06-06 10:23
288 查看
欢迎大家访问我的个人网站《刘江的博客和教程》:www.liujiangblog.com
主要分享Python 及Django教程以及相关的博客
今天偶然看见http://www.cnblogs.com/jiaoyu121/p/6944398.html#top博客,用Python玩转微信,写得非常好。然而,貌似用的Python2版本,并且每次执行都要重复扫码登录,这对于我这种Python3的用户是不行的。
动起手来,自己干!
1. 安装相应的库
pip install itchatpip install echarts-python
2. 实现登陆状态保存:
import itchat

itchat.auto_login(hotReload=True)
itchat.dump_login_status()
这样你就可以保持一段时间登录状态,而不用每次运行代码都要扫码登录了!
首次登录,程序会弹出一个二维码图片窗口,用微信手机客户端扫码就可以登录了!

3. 使用饼图展示个人好友性别分布
有一个echarts-python库可以帮助你方便的使用python代码在浏览器中展示百度Echart图。但是,但是,这个库是Python2的,Python3用起来水土不服,没办法只好根据错误修改库的源码!下图显示了应该改的两个地方(其实还有很多地方)。
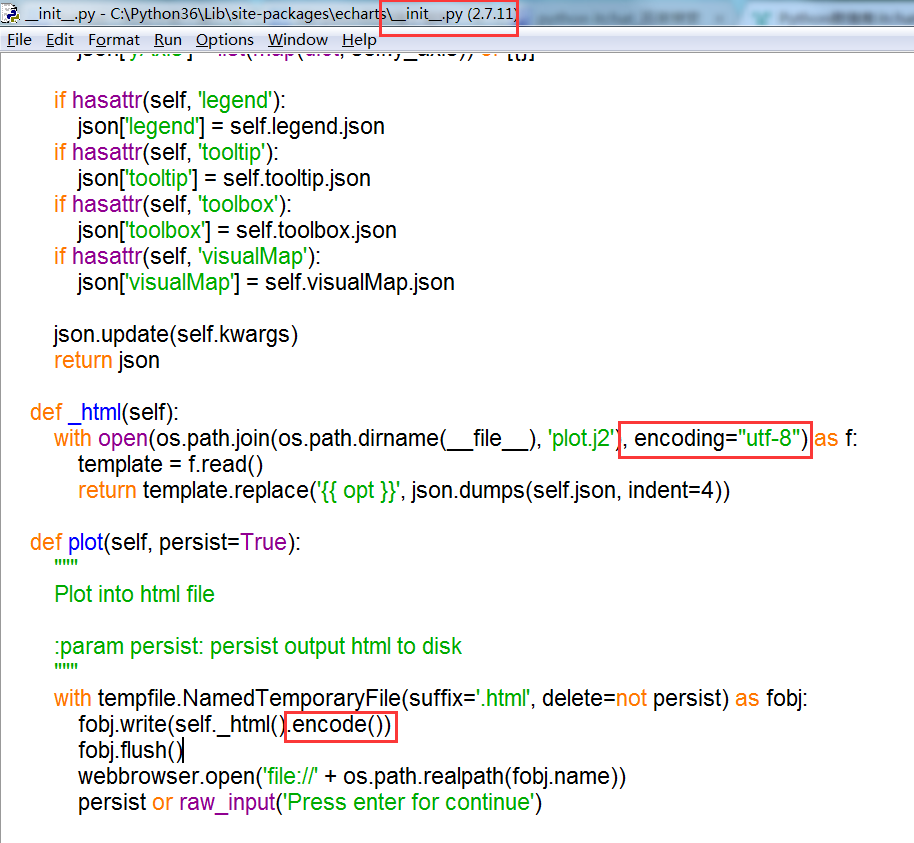
改完库的源码,就可以执行代码了。借用前人的代码,修改了一下:
#!/usr/bin/env python
# -*- coding:utf-8 -*-

import itchat

itchat.auto_login(hotReload=True)
itchat.dump_login_status()

friends = itchat.get_friends(update=True)[:]
total = len(friends) - 1
male = female = other = 0

for friend in friends[1:]:
sex = friend["Sex"]
if sex == 1:
male += 1
elif sex == 2:
female += 1
else:
other += 1
# print("男性好友:%.2f%%" % (float(male) / total * 100))
# print("女性好友:%.2f%%" % (float(female) / total * 100))
# print("其他:%.2f%%" % (float(other) / total * 100))

from echarts import Echart, Legend, Pie
chart = Echart('%s的微信好友性别比例' % (friends[0]['NickName']), 'from WeChat')
chart.use(Pie('WeChat',
[{'value': male, 'name': '男性 %.2f%%' % (float(male) / total * 100)},
{'value': female, 'name': '女性 %.2f%%' % (float(female) / total * 100)},
{'value': other, 'name': '其他 %.2f%%' % (float(other) / total * 100)}],
radius=["50%", "70%"]))
chart.use(Legend(["male", "female", "other"]))
del chart.json["xAxis"]
del chart.json["yAxis"]
chart.plot()
运行代码,测试一下,成功在浏览器展示出来了:

我好想暴露了什么....
4. 好友个性签名词云
分析好友信息,能发现个性签名,可以用它做词云。for friend in friends:
signature = friend["Signature"].strip()
signature = re.sub("<span.*>", "", signature)
signature_list.append(signature)
raw_signature_string = ''.join(signature_list)上面利用正则,去掉一些类似
<span class=....>以及空格之类的无用字符。然后把他们连成一个大的长的字符串
pip install jieba
这个库是用来将字符串拆分成不重复的一个一个的词的,貌似都是2字词。
pip install wordcloud
安装词云库,会弹出错误如下图
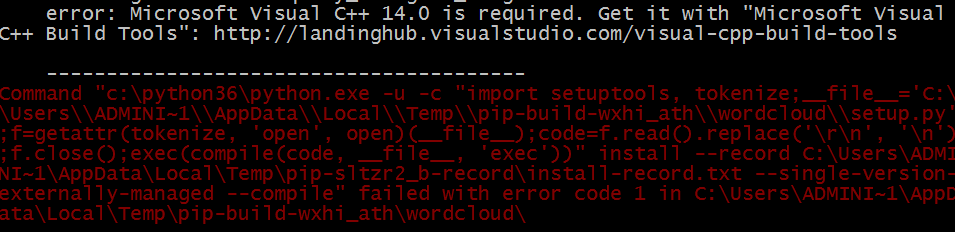
怎么办?去http://www.lfd.uci.edu/~gohlke/pythonlibs/#wordcloud 页面下载所需的wordcloud模块的whl文件
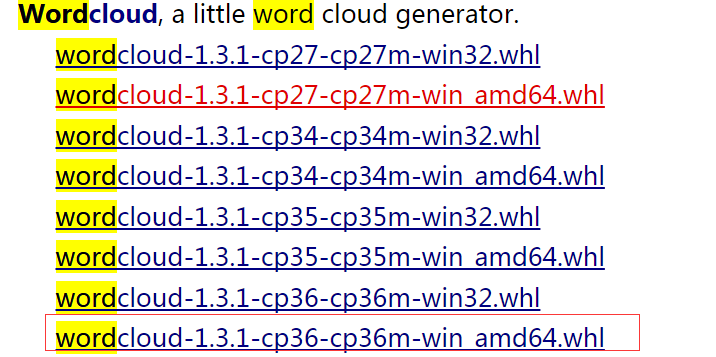
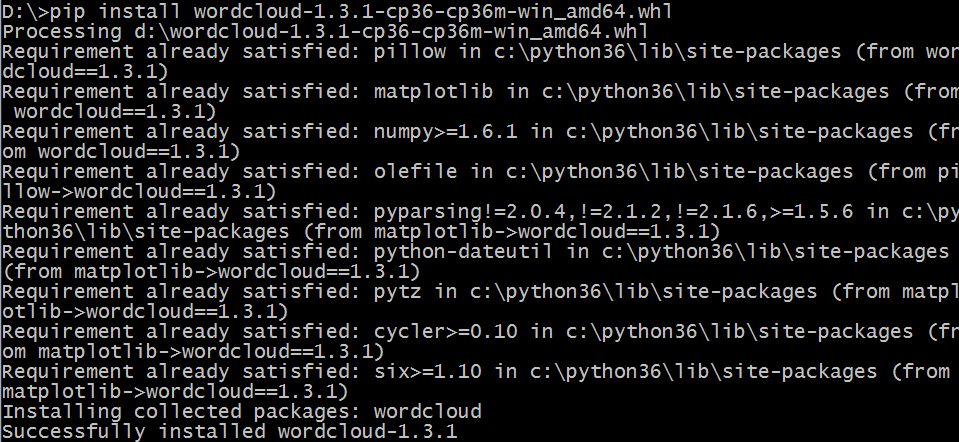
下载后进执行“pip install wordcloud-1.3.1-cp36-cp36m-win_amd64.whl”,就可以了。意文件路径。
利用jieba的cut方法将字符串裁成一个一个的词,然后用空格,将它们又连起来。注意是用空格哦!千万别看错了!
text = jieba.cut(raw_signature_string, cut_all=True) target_signatur_string = ' '.join(text)
再导入一些辅助的库
import matplotlib.pyplot as plt from wordcloud import WordCloud, ImageColorGenerator import PIL.Image as Image import os import numpy as np
这些库,有的会自动安装,有的可能要你自己装,比如pip install numpy
然后提供一张图片。

wordcloud会根据这张图片在x和y轴上的颜色以及范围等等,布置词云。这个过程是通过numpy的矩阵和matplot的画图能力实现的。
下面的源码是根据原文的代码略微修改后的。
#!/usr/bin/env python
# -*- coding:utf-8 -*-
import itchat
import re
import jieba
def echart_pie(friends):
total = len(friends) - 1
male = female = other = 0
for friend in friends[1:]:
sex = friend["Sex"]
if sex == 1:
male += 1
elif sex == 2:
female += 1
else:
other += 1
from echarts import Echart, Legend, Pie
chart = Echart('%s的微信好友性别比例' % (friends[0]['Name']), 'from WeChat')
chart.use(Pie('WeChat',
[{'value': male, 'name': '男性 %.2f%%' % (float(male) / total * 100)},
{'value': female, 'name': '女性 %.2f%%' % (float(female) / total * 100)},
{'value': other, 'name': '其他 %.2f%%' % (float(other) / total * 100)}],
radius=["50%", "70%"]))
chart.use(Legend(["male", "female", "other"]))
del chart.json["xAxis"]
del chart.json["yAxis"]
chart.plot()
def word_cloud(friends):
import matplotlib.pyplot as plt from wordcloud import WordCloud, ImageColorGenerator import PIL.Image as Image import os import numpy as np
d = os.path.dirname(__file__)
my_coloring = np.array(Image.open(os.path.join(d, "2.png")))
signature_list = []
for friend in friends:
signature = friend["Signature"].strip()
signature = re.sub("<span.*>", "", signature)
signature_list.append(signature)
raw_signature_string = ''.join(signature_list)
text = jieba.cut(raw_signature_string, cut_all=True)
target_signatur_string = ' '.join(text)
my_wordcloud = WordCloud(background_color="white", max_words=2000, mask=my_coloring,
max_font_size=40, random_state=42,
font_path=r"C:\Windows\Fonts\simhei.ttf").generate(target_signatur_string)
image_colors = ImageColorGenerator(my_coloring)
plt.imshow(my_wordcloud.recolor(color_func=image_colors))
plt.imshow(my_wordcloud)
plt.axis("off")
plt.show()
# 保存图片 并发送到手机
my_wordcloud.to_file(os.path.join(d, "wechat_cloud.png"))
itchat.send_image("wechat_cloud.png", 'filehelper')
itchat.auto_login(hotReload=True)
itchat.dump_login_status()
friends = itchat.get_friends(update=True)[:]
# echart_pie(friends)
word_cloud(friends)
运行后的效果是这样的:

windows下的显示效果真不怎么样!

相关文章推荐
- 玩转微信支付(python)
- 工作之余使用python玩转微信跳一跳(超详细的教程)
- 关于wxpy,使用Python玩转微信的问题
- 学习使用python玩转微信小游戏“跳一跳”
- 玩转微信支付(python)
- Python玩转微信 个性签名生成词云图
- 50行Python代码玩转微信小游戏"颜色王者"
- 玩转Python大数据分析 《Python for Data Analysis》的读书笔记-第09页
- 用微信玩转你的品牌-布乔
- 玩转Python大数据分析 《Python for Data Analysis》的读书笔记-第10页
- 如何进行微信营销?玩转微信公众平台营销理论手册
- python微信二响应各类消息
- 玩转Python大数据分析 《Python for Data Analysis》的读书笔记-第05页
- 使用python来玩转ensp~系列1-telnet方式登录管理设备
- 玩转Python大数据分析 《Python for Data Analysis》的读书笔记-第11页
- 如何玩转微信营销_薛永飞
- 玩转Python大数据分析 《Python for Data Analysis》的读书笔记-第01页
- 玩转Python大数据分析 《Python for Data Analysis》的读书笔记-第03页
- 玩转Python大数据分析 《Python for Data Analysis》的读书笔记-第07页