jsp+servlet实现简单商品上传、商品浏览、与商品分页技术
2017-05-24 22:23
686 查看
首先,来看一下程序的运行结果:
1. 商品展示部分

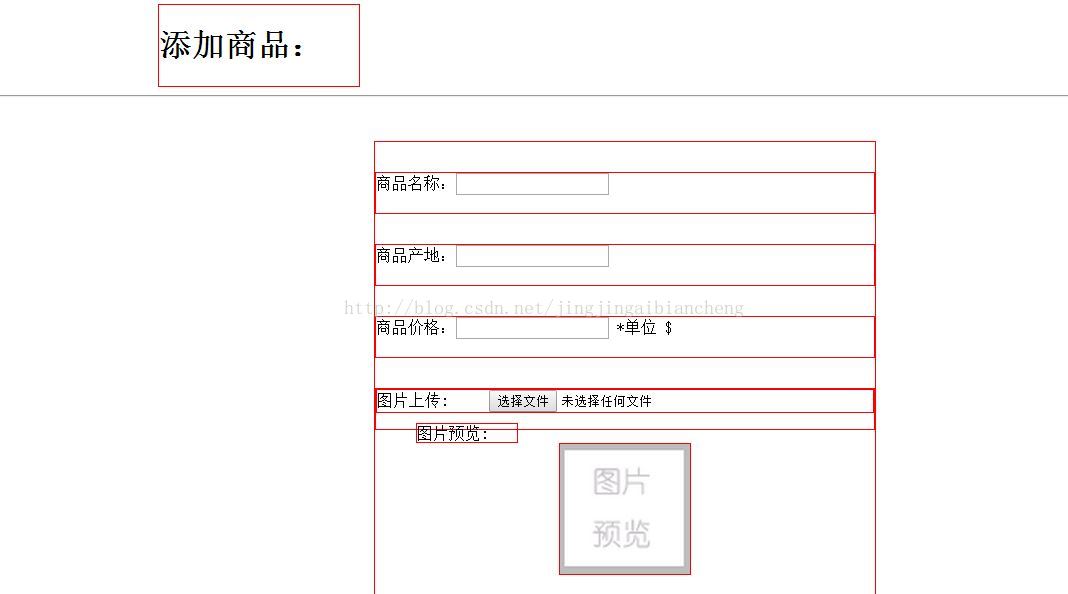
2.添加商品界面
下面说一下具体的实现过程:
1.创建数据库表,任何一个系统首先要做的事情就是建表,明确自己的需求建相应表,该表中我只说一下
pimg字段,其他的大家都应该懂的吧(paddr表示的是商品产地) ,pimg字段用于存放上传图片的文件名,比如 美
女.jpeg ,而不是在
项目中的路径,因为我们要用时直接在文件名前面添加相对路径(即图片的源文件地址)就 可以了,比如:web/img/美女.jpeg
CREATE TABLE `product` (
`pid` int(10) unsigned NOT NULL AUTO_INCREMENT,
`pname` varchar(50) NOT NULL,
`pprice` int(10) unsigned NOT NULL,
`paddr` varchar(10) NOT NULL,
`pimg` varchar(128) NOT NULL,
PRIMARY KEY (`pid`)
) ENGINE=InnoDB AUTO_INCREMENT=79 DEFAULT CHARSET=utf8
2. 建立数据库连接
package com.test.sqlconnection;
import java.sql.Connection;
import java.sql.DriverManager;
import java.sql.PreparedStatement;
import java.sql.ResultSet;
import java.sql.ResultSetMetaData;
import java.sql.SQLException;
import java.util.ArrayList;
import java.util.HashMap;
import java.util.List;
import java.util.Map;
public class MysqlConnection {
// 表示定义数据库的用户名
private static String USERNAME = "root";
// 定义数据库的密码
private static String PASSWORD = "123";
// 定义数据库的驱动信息
private static String DRIVER = "com.mysql.jdbc.Driver";
// 定义访问数据库的地址
private static String URL = "jdbc:mysql://127.0.0.1:3306/shop";
// 定义数据库的链接
private Connection connection;
// 定义sql语句的执行对象
private PreparedStatement pstmt;
// 定义查询返回的结果集合
private ResultSet resultSet;
public MysqlConnection() {
}
/**
* 获取数据库连接
*
* @return 数据库连接
*/
public Connection getConnection() {
try {
Class.forName(DRIVER); // 注册驱动
connection = DriverManager.getConnection(URL, USERNAME, PASSWORD); // 获取连接
} catch (Exception e) {
throw new RuntimeException("get connection error!", e);
}
return connection;
}
/**
* 执行更新操作
*
* @param sql
* sql语句
* @param params
* 执行参数
* @return 执行结果
* @throws SQLException
*/
public boolean updateByPreparedStatement(String sql, List<?> params)
throws SQLException {
boolean flag = false;
int result = -1;// 表示当用户执行添加删除和修改的时候所影响数据库的行数
pstmt = connection.prepareStatement(sql);
int index = 1;
// 填充sql语句中的占位符
if (params != null && !params.isEmpty()) {
for (int i = 0; i < params.size(); i++) {
pstmt.setObject(index++, params.get(i));
}
}
result = pstmt.executeUpdate();
flag = result > 0 ? true : false;
return flag;
}
/**
* 执行查询操作
*
* @param sql
* sql语句
* @param params
* 执行参数
* @return
* @throws SQLException
*/
public List<Map<String, Object>> findResult(String sql, List<?> params)
throws SQLException {
List<Map<String, Object>> list = new ArrayList<Map<String, Object>>();
int index = 1;
pstmt = connection.prepareStatement(sql);
if (params != null && !params.isEmpty()) {
for (int i = 0; i < params.size(); i++) {
pstmt.setObject(index++, params.get(i));
}
}
resultSet = pstmt.executeQuery();
ResultSetMetaData metaData = resultSet.getMetaData();
int cols_len = metaData.getColumnCount();
while (resultSet.next()) {
Map<String, Object> map = new HashMap<String, Object>();
for (int i = 0; i < cols_len; i++) {
String cols_name = metaData.getColumnName(i + 1);
Object cols_value = resultSet.getObject(cols_name);
if (cols_value == null) {
cols_value = "";
}
map.put(cols_name, cols_value);
}
list.add(map);
}
return list;
}
/**
* 释放资源
*/
public void releaseConn() {
if (resultSet != null) {
try {
resultSet.close();
} catch (SQLException e) {
e.printStackTrace();
}
}
if (pstmt != null) {
try {
pstmt.close();
} catch (SQLException e) {
e.printStackTrace();
}
}
if (connection != null) {
try {
connection.close();
} catch (SQLException e) {
e.printStackTrace();
}
}
}
}
这一步没什么好说的
3. 建立javabean类
package com.test.model;
import java.sql.ResultSet;
import java.sql.SQLException;
import java.util.ArrayList;
import java.util.List;
import java.util.Map;
import org.apache.jasper.tagplugins.jstl.core.ForEach;
import com.test.sqlconnection.MysqlConnection;
public class Product {
private int id;
private String pnameString;
private String paddresString;
private int pprice;
private String pimgString;
public Product(int id,String pnameString, String paddresString, int pprice, String pimgString) {
super();
this.id = id;
this.pnameString = pnameString;
this.paddresString = paddresString;
this.pprice = pprice;
this.pimgString = pimgString;
}
public Product(){
super();
this.id = 0;
this.pnameString = "";
this.paddresString = "";
this.pprice = 0;
this.pimgString = "";
}
public int getId() {
return id;
}
public void setId(int id) {
this.id = id;
}
public String getPnameString() {
return pnameString;
}
public void setPnameString(String pnameString) {
this.pnameString = pnameString;
}
public String getPaddresString() {
return paddresString;
}
public void setPaddresString(String paddresString) {
this.paddresString = paddresString;
}
public int getPprice() {
return pprice;
}
public void setPprice(int pprice) {
this.pprice = pprice;
}
public String getPimgString() {
return pimgString;
}
public void setPimgString(
12c0a
String pimgString) {
this.pimgString = pimgString;
}
//根据id获得商品信息
public static Product getProductById(int id){
Product product = new Product();
product.setId(id);
MysqlConnection con = new MysqlConnection();
con.getConnection();
String sql = "select* from product where pid = '"+id+"'";
try {
Map<String, Object> map = con.findResult(sql, null).get(0);
product.setPprice(Integer.parseInt(map.get("pprice").toString()));
product.setPnameString(map.get("pname").toString());
product.setPaddresString(map.get("paddr").toString());
product.setPimgString(map.get("pimg").toString());
} catch (SQLException e) {
// TODO Auto-generated catch block
e.printStackTrace();
}finally{
con.releaseConn();
}
return product;
}
//获得所有产品
public static List<Product> getAllProducts(){
String sql = "select * from product";
MysqlConnection con = new MysqlConnection();
con.getConnection();
List<Product> list = new ArrayList<Product>(); //此处犯下重大错误
try {
List<Map<String, Object>> mapList = con.findResult(sql, null);
//System.out.println(mapList.size());
for (Map<String, Object> map : mapList) {
int id = Integer.parseInt(map.get("pid").toString());
int price = Integer.parseInt(map.get("pprice").toString());
String name = map.get("pname").toString();
String addr = map.get("paddr").toString();
String imgurl = map.get("pimg").toString();
System.out.println(imgurl);
Product product = new Product(id, name, addr, price, imgurl);
// System.out.println(product.getId());
// product.setPnameString(map.get("pname").toString());
// System.out.println(product.getPnameString());
// product.setPaddresString(map.get("paddr").toString());
//
// System.out.println(product.getPaddresString());
// product.setPprice(Integer.parseInt(map.get("pprice").toString()));
// System.out.println(product.getPprice());
// product.setPimgString(map.get("pimg").toString());
// System.out.println(product.getPimgString());
list.add(product);
}
} catch (SQLException e) {
// TODO Auto-generated catch block
e.printStackTrace();
}finally{
con.releaseConn();
}
// for (Product product1 : list) {
// System.out.println(product1.getId()+product1.getPaddresString()+" "+product1.getPimgString());
// }
//
return list;
}
// public static void main(String[] args){
// List<Product> list = Product.getAllProducts();
//
// }
}
这一步也没什么好说的,就是一个普通的Javabean类,里面有两个方法,商品展示的时候会用到
4 商品添加页面 jsp
<%@ page language="java" import="java.util.*" pageEncoding="utf-8"%>
<%@ page contentType="text/html;charset=utf-8" %>
<%
String path = request.getContextPath();
String basePath = request.getScheme()+"://"+request.getServerName()+":"+request.getServerPort()+path+"/";
%>
<!DOCTYPE HTML PUBLIC "-//W3C//DTD HTML 4.01 Transitional//EN">
<html>
<head>
<base href="<%=basePath%>">
<title>My JSP 'UploadProduct.jsp' starting page</title>
<meta http-equiv="pragma" content="no-cache">
<meta http-equiv="cache-control" content="no-cache">
<meta http-equiv="expires" content="0">
<meta http-equiv="keywords" content="keyword1,keyword2,keyword3">
<meta http-equiv="description" content="This is my page">
<!--
<link rel="stylesheet" type="text/css" href="styles.css">
-->
<link rel="stylesheet" type="text/css" href="css/back.css"/>
<script type=text/javascript src="js/SubmitCheck.js" charset="utf-8"></script>
<script type="text/javascript" src="js/jquery-1.11.1.js" charset="utf-8"></script>
<script type="text/javascript" src="js/preview.js" charset="utf-8"></script>
</head>
<body>
<form action="/midTermTest1/UploadServlet" method="post" name="addform" enctype="multipart/form-data" onsubmit="return on_submit()">
<div id="Nav"><h1>添加商品:</h1></div><hr>
<br/><br/>
<div id="NavTop">
<div class="PName">
商品名称:<input type="text" name="pname" id="name">
</div>
<div class="PAddr">
商品产地:<input type="text" name="paddr" id="address">
</div>
<div class="PPrice">
商品价格:<input type="text" name="pprice" id="price"> *单位 $
</div>
<div class="PImg">
<div id="img">图片上传: <input type="file" id="imgs" name="pimgfile" onchange="showPreview(this)"></div>
<div id="scan">图片预览:</div>
<div id="sourceImg"></div>
<div id="img_url"><img id="img_urlj" src="preview_img/preview.jpg" width=130px height=130px></div>
<div id="submit"><input type="submit" value="提交" id="submitbutton"></div>
</div>
</div>
</form>
</body>
</html>
就是一个普通的商品添加页面,用js实现了图片预览的功能,你可以不用实现,这里在做的时候遇到一个麻烦,花了好久才解决,就是我在添加商品图片的时候,下面会显示我添加的图片,本来我是直接用js获取其上传图片的本地磁盘路径的,结果服务器为了安全是不允许访问服务器的本机文件地址的,结果本地磁盘路径就给我改掉了 改成c://fdsk/beaty.jpeg 解决办法就是,将你准备添加的存放图片的那个文件夹映射到tomcat中,即可显示,网上有教程,这里就不详说了。
5. 处理添加商品的servlet
package com.test.servlet;
import java.io.File;
import java.io.IOException;
import java.io.PrintWriter;
import java.sql.Connection;
import java.sql.Statement;
import java.util.Iterator;
import java.util.List;
import javax.servlet.DispatcherType;
import javax.servlet.RequestDispatcher;
import javax.servlet.ServletContext;
import javax.servlet.ServletException;
import javax.servlet.annotation.WebServlet;
import javax.servlet.http.HttpServlet;
import javax.servlet.http.HttpServletRequest;
import javax.servlet.http.HttpServletResponse;
import org.apache.commons.fileupload.FileItem;
import org.apache.commons.fileupload.disk.DiskFileItemFactory;
import org.apache.commons.fileupload.servlet.ServletFileUpload;
import com.mysql.fabric.Response;
import com.mysql.jdbc.MySQLConnection;
import com.test.sqlconnection.MysqlConnection;
import sun.rmi.server.Dispatcher;
/**
* Servlet implementation class UploadServlet
*/
@WebServlet("/UploadServlet")
public class UploadServlet extends HttpServlet {
private static final long serialVersionUID = 1L;
private String filePath; // 文件存放目录
private String tempPath; // 临时文件目录
private String pname;
private String paddr;
private String pprice;
private String filename ;
private String SQLFileName;
// 初始化
// public void init(ServletConfig config) throws ServletException {
// super.init(config);
// // 可以从配置文件中获得初始化参数
// //filePath = config.getInitParameter("filepath");
// //tempPath = config.getInitParameter("temppath");
// //ServletContext context = getServletContext();
// //filePath = context.getRealPath(filePath);
// //tempPath = context.getRealPath(tempPath);
// filePath="D:/ClassHelpFile/file";
// tempPath="D:/ClassHelpFile/temp";
// }
public UploadServlet() {
super();
// TODO Auto-generated constructor stub
}
/**
* @see HttpServlet#doGet(HttpServletRequest request, HttpServletResponse response)
*/
protected void doGet(HttpServletRequest req, HttpServletResponse res) throws ServletException, IOException {
// TODO Auto-generated method stub
}
protected void doPost(HttpServletRequest req, HttpServletResponse res) throws ServletException, IOException {
// TODO Auto-generated method stub
doGet(req, res);
//res.setCharacterEncoding("GBK");
PrintWriter pw = res.getWriter();
tempPath = getServletContext().getRealPath("/tempPImgs");
filePath = getServletContext().getRealPath("/pimgs");
System.out.println(tempPath);
// req.setAttribute("path", tempPath);
try {
DiskFileItemFactory diskFactory = new DiskFileItemFactory();
// threshold 极限、临界值,即硬盘缓存 1M
diskFactory.setSizeThreshold(10 * 1024);
// repository 贮藏室,即临时文件目录
diskFactory.setRepository(new File(tempPath));
ServletFileUpload upload = new ServletFileUpload(diskFactory);
//防止乱码
upload.setHeaderEncoding("utf-8");
// 设置允许上传的最大文件大小 4M
upload.setSizeMax(10 * 1024 * 1024);
// 解析HTTP请求消息头
List<FileItem> fileItems = upload.parseRequest(req);
Iterator<FileItem> iter = fileItems.iterator();
while (iter.hasNext()) {
FileItem item = (FileItem) iter.next();
if (item.isFormField()) {
processFormField(item, pw);//处理表单内容
} else {
processUploadFile(item, pw);//处理上传的文件
}
}
SQLFileName=filename;
System.out.println(SQLFileName);
//保存到数据库
//String sqlStart = "set names gbk";
String sql = "insert into product(pname,pprice,paddr,pimg) values('"+pname+"','"+pprice+"','"+paddr+"','"+SQLFileName+"')";
MysqlConnection con = new MysqlConnection();
con.getConnection();
//con.updateByPreparedStatement(sqlStart, null);
con.updateByPreparedStatement(sql, null);
con.releaseConn();
pw.println("<script>");
pw.println("alert('商品插入成功!即将跳转首页')");
pw.println("</script> ");
// pw.close();
} catch (Exception e) {
System.out.println("异常:使用 fileupload 包发生异常!");
e.printStackTrace();
}
res.setHeader("refresh", "1;url=jsp/showProduct.jsp");
// RequestDispatcher rd =req.getRequestDispatcher("/jsp/showProduct.jsp");
//
// try{
// rd.forward(req, res);
// return;
// }catch(Exception e){
// System.out.print(e.toString());
// }
// res.sendRedirect("/jsp/showProduct.jsp");
}
//处理表单内容
private void processFormField(FileItem item, PrintWriter pw)
throws Exception {
String name = item.getFieldName();
String value =new String((item.getString("iso8859-1")).getBytes("iso8859-1"),"utf-8");
// value = new String(value.getBytes("utf-8"));
// System.out.println(value);
if(name.equals("pname")){
pname = value;
}else if(name.equals("paddr")){
paddr = value;
}
else if(name.equals("pprice")){
pprice = value;
}
}
// 处理上传的文件
private void processUploadFile(FileItem item, PrintWriter pw)
throws Exception {
filename = item.getName();
int index = filename.lastIndexOf("\\");
filename = filename.substring(index + 1, filename.length());
long fileSize = item.getSize();
if ("".equals(filename) && fileSize == 0) {
System.out.println("文件名为空 !");
return;
}
File uploadFile = new File(filePath + "/" + filename);
if(!uploadFile.exists()){
item.write(uploadFile);
}
//pw.println(filename + " 文件保存完毕 !");
//pw.println("文件大小为 :" + fileSize + "\r\n");
}
}
这一步比较重要的就是上传文件与表单文本数据,如果是我们自己处理的话会比较麻烦,要将文件转化二进制流后再写入图片在保存,因此我直接用了fileupload组件(也可用smartyupload)处理表单,简单实用,其中需要用到两个包,commons-io 与 commons-fileuplaod包 网上也有教程,这里也不细说,要的留言
6.商品展示列表与分页实现 jsp 页面
<%@page import="com.test.model.Product"%>
<%@ page language="java" import="java.util.*" pageEncoding="utf-8"%>
<%
String path = request.getContextPath();
String basePath = request.getScheme()+"://"+request.getServerName()+":"+request.getServerPort()+path+"/";
%>
<!DOCTYPE HTML PUBLIC "-//W3C//DTD HTML 4.01 Transitional//EN">
<html>
<head>
<base href="<%=basePath%>">
<title>My JSP 'showProduct.jsp' starting page</title>
<meta http-equiv="pragma" content="no-cache">
<meta http-equiv="cache-control" content="no-cache">
<meta http-equiv="expires" content="0">
<meta http-equiv="keywords" content="keyword1,keyword2,keyword3">
<meta http-equiv="description" content="This is my page">
<!--
<link rel="stylesheet" type="text/css" href="styles.css">
-->
<link rel="stylesheet" type="text/css" href="css/showProductCss.css"/>
</head>
<body>
<br/><br/><br/>
<h1 id="nav">商品展示
<a id="back" href="jsp/UploadProduct.jsp" >添加商品</a></h1>
<br/><br/><br/>
<hr/>
<%!
public static final int PAGESIZE = 4; //单页容量
int pageCount; //记录页数
int curPage = 1; //当前页
int absolute; //定位到某条记录
%>
<%
List<Product> list = Product.getAllProducts();
int size = list.size();
pageCount = (size%PAGESIZE==0)?(size/PAGESIZE):(size/PAGESIZE+1);
String tmp = request.getParameter("curPage");
String pcount = request.getParameter("getPageCount");
if(tmp==null || tmp.equals("0")){
tmp="1";
}
curPage = Integer.parseInt(tmp);
if(pcount!=null){
curPage = Integer.parseInt(pcount);
}
if(curPage>=pageCount) curPage = pageCount;
absolute = (curPage-1)*PAGESIZE+1; //定位到当前页的第一条记录
// int count = 0;
for(int i =absolute-1;i<(absolute-1+PAGESIZE);i++){
if(i>size-1){break;}
Product product = list.get(i);
//out.println(i);
// out.println(product.getId()+product.getPnameString()+product.getPaddresString());
%>
<div>
<dl>
<dt>
<a href="jsp/productDetails.jsp?id=<%=product.getId()%>"><img alt="商品"
src="pimgs/<%=product.getPimgString()%>" width="130" height="130"
border="1" /></a>
</dt>
<dd class="dd_name"><%=product.getPnameString() %></dd>
<dd class="dd_city">
产地:<%=product.getPaddresString() %>
价格:<span id="redPrice"><%=product.getPprice()%></span>
</dd>
</dl>
</div>
<%
}
%>
<div id="linkPage">
<a href="jsp/showProduct.jsp?curPage=1">首页</a>
<a href="jsp/showProduct.jsp?curPage=<%if(curPage==1){out.print(1);}else{out.print(curPage-1);}%>">上一页</a>
<a href="jsp/showProduct.jsp?curPage=<%if(curPage==pageCount){out.print(curPage);}else{out.print(curPage+1);}%>">下一页</a>
<a href="jsp/showProduct.jsp?curPage=<%=pageCount%>">尾页</a> 第<%=curPage%>页/共<%=pageCount%>页
</div>
<div id="getPage">
<form action="jsp/showProduct.jsp?">
跳转至<input type="text" id="pageText" name="getPageCount"/>页
<input type="submit" id="pageSubmit" value="确定"/>
</form>
</div>
</body>
</html>
这里要说的是分页实现,注意是以httpget方式传递参数的,如 showProduct.jsp?curPage=<%=pageCount%>,将curPage传递过去看到底要取哪些数据在页面上显示
完结~~~
7.总结
这个实例看起来已经有点接近mvc的设计模式了,但商品展示的界面并没有交给相应的servlet处理,导致jsp中的java代码太多,下面将会对该实例进行一些升级,比如使用mysql语句进行分页查询,这样就不会加大查询负担,像该实例就是一次取出所有商品置于结果集中,然后再分页显示,但当商品数量很多的时候,服务器的压力会很大可能导致很久才能反应或者不响应,其次,将会采用JSP+SERVLET+JAVABEAN实现比较完整的mvc设计模式,敬请期待
1. 商品展示部分
2.添加商品界面
下面说一下具体的实现过程:
1.创建数据库表,任何一个系统首先要做的事情就是建表,明确自己的需求建相应表,该表中我只说一下
pimg字段,其他的大家都应该懂的吧(paddr表示的是商品产地) ,pimg字段用于存放上传图片的文件名,比如 美
女.jpeg ,而不是在
项目中的路径,因为我们要用时直接在文件名前面添加相对路径(即图片的源文件地址)就 可以了,比如:web/img/美女.jpeg
CREATE TABLE `product` (
`pid` int(10) unsigned NOT NULL AUTO_INCREMENT,
`pname` varchar(50) NOT NULL,
`pprice` int(10) unsigned NOT NULL,
`paddr` varchar(10) NOT NULL,
`pimg` varchar(128) NOT NULL,
PRIMARY KEY (`pid`)
) ENGINE=InnoDB AUTO_INCREMENT=79 DEFAULT CHARSET=utf8
2. 建立数据库连接
package com.test.sqlconnection;
import java.sql.Connection;
import java.sql.DriverManager;
import java.sql.PreparedStatement;
import java.sql.ResultSet;
import java.sql.ResultSetMetaData;
import java.sql.SQLException;
import java.util.ArrayList;
import java.util.HashMap;
import java.util.List;
import java.util.Map;
public class MysqlConnection {
// 表示定义数据库的用户名
private static String USERNAME = "root";
// 定义数据库的密码
private static String PASSWORD = "123";
// 定义数据库的驱动信息
private static String DRIVER = "com.mysql.jdbc.Driver";
// 定义访问数据库的地址
private static String URL = "jdbc:mysql://127.0.0.1:3306/shop";
// 定义数据库的链接
private Connection connection;
// 定义sql语句的执行对象
private PreparedStatement pstmt;
// 定义查询返回的结果集合
private ResultSet resultSet;
public MysqlConnection() {
}
/**
* 获取数据库连接
*
* @return 数据库连接
*/
public Connection getConnection() {
try {
Class.forName(DRIVER); // 注册驱动
connection = DriverManager.getConnection(URL, USERNAME, PASSWORD); // 获取连接
} catch (Exception e) {
throw new RuntimeException("get connection error!", e);
}
return connection;
}
/**
* 执行更新操作
*
* @param sql
* sql语句
* @param params
* 执行参数
* @return 执行结果
* @throws SQLException
*/
public boolean updateByPreparedStatement(String sql, List<?> params)
throws SQLException {
boolean flag = false;
int result = -1;// 表示当用户执行添加删除和修改的时候所影响数据库的行数
pstmt = connection.prepareStatement(sql);
int index = 1;
// 填充sql语句中的占位符
if (params != null && !params.isEmpty()) {
for (int i = 0; i < params.size(); i++) {
pstmt.setObject(index++, params.get(i));
}
}
result = pstmt.executeUpdate();
flag = result > 0 ? true : false;
return flag;
}
/**
* 执行查询操作
*
* @param sql
* sql语句
* @param params
* 执行参数
* @return
* @throws SQLException
*/
public List<Map<String, Object>> findResult(String sql, List<?> params)
throws SQLException {
List<Map<String, Object>> list = new ArrayList<Map<String, Object>>();
int index = 1;
pstmt = connection.prepareStatement(sql);
if (params != null && !params.isEmpty()) {
for (int i = 0; i < params.size(); i++) {
pstmt.setObject(index++, params.get(i));
}
}
resultSet = pstmt.executeQuery();
ResultSetMetaData metaData = resultSet.getMetaData();
int cols_len = metaData.getColumnCount();
while (resultSet.next()) {
Map<String, Object> map = new HashMap<String, Object>();
for (int i = 0; i < cols_len; i++) {
String cols_name = metaData.getColumnName(i + 1);
Object cols_value = resultSet.getObject(cols_name);
if (cols_value == null) {
cols_value = "";
}
map.put(cols_name, cols_value);
}
list.add(map);
}
return list;
}
/**
* 释放资源
*/
public void releaseConn() {
if (resultSet != null) {
try {
resultSet.close();
} catch (SQLException e) {
e.printStackTrace();
}
}
if (pstmt != null) {
try {
pstmt.close();
} catch (SQLException e) {
e.printStackTrace();
}
}
if (connection != null) {
try {
connection.close();
} catch (SQLException e) {
e.printStackTrace();
}
}
}
}
这一步没什么好说的
3. 建立javabean类
package com.test.model;
import java.sql.ResultSet;
import java.sql.SQLException;
import java.util.ArrayList;
import java.util.List;
import java.util.Map;
import org.apache.jasper.tagplugins.jstl.core.ForEach;
import com.test.sqlconnection.MysqlConnection;
public class Product {
private int id;
private String pnameString;
private String paddresString;
private int pprice;
private String pimgString;
public Product(int id,String pnameString, String paddresString, int pprice, String pimgString) {
super();
this.id = id;
this.pnameString = pnameString;
this.paddresString = paddresString;
this.pprice = pprice;
this.pimgString = pimgString;
}
public Product(){
super();
this.id = 0;
this.pnameString = "";
this.paddresString = "";
this.pprice = 0;
this.pimgString = "";
}
public int getId() {
return id;
}
public void setId(int id) {
this.id = id;
}
public String getPnameString() {
return pnameString;
}
public void setPnameString(String pnameString) {
this.pnameString = pnameString;
}
public String getPaddresString() {
return paddresString;
}
public void setPaddresString(String paddresString) {
this.paddresString = paddresString;
}
public int getPprice() {
return pprice;
}
public void setPprice(int pprice) {
this.pprice = pprice;
}
public String getPimgString() {
return pimgString;
}
public void setPimgString(
12c0a
String pimgString) {
this.pimgString = pimgString;
}
//根据id获得商品信息
public static Product getProductById(int id){
Product product = new Product();
product.setId(id);
MysqlConnection con = new MysqlConnection();
con.getConnection();
String sql = "select* from product where pid = '"+id+"'";
try {
Map<String, Object> map = con.findResult(sql, null).get(0);
product.setPprice(Integer.parseInt(map.get("pprice").toString()));
product.setPnameString(map.get("pname").toString());
product.setPaddresString(map.get("paddr").toString());
product.setPimgString(map.get("pimg").toString());
} catch (SQLException e) {
// TODO Auto-generated catch block
e.printStackTrace();
}finally{
con.releaseConn();
}
return product;
}
//获得所有产品
public static List<Product> getAllProducts(){
String sql = "select * from product";
MysqlConnection con = new MysqlConnection();
con.getConnection();
List<Product> list = new ArrayList<Product>(); //此处犯下重大错误
try {
List<Map<String, Object>> mapList = con.findResult(sql, null);
//System.out.println(mapList.size());
for (Map<String, Object> map : mapList) {
int id = Integer.parseInt(map.get("pid").toString());
int price = Integer.parseInt(map.get("pprice").toString());
String name = map.get("pname").toString();
String addr = map.get("paddr").toString();
String imgurl = map.get("pimg").toString();
System.out.println(imgurl);
Product product = new Product(id, name, addr, price, imgurl);
// System.out.println(product.getId());
// product.setPnameString(map.get("pname").toString());
// System.out.println(product.getPnameString());
// product.setPaddresString(map.get("paddr").toString());
//
// System.out.println(product.getPaddresString());
// product.setPprice(Integer.parseInt(map.get("pprice").toString()));
// System.out.println(product.getPprice());
// product.setPimgString(map.get("pimg").toString());
// System.out.println(product.getPimgString());
list.add(product);
}
} catch (SQLException e) {
// TODO Auto-generated catch block
e.printStackTrace();
}finally{
con.releaseConn();
}
// for (Product product1 : list) {
// System.out.println(product1.getId()+product1.getPaddresString()+" "+product1.getPimgString());
// }
//
return list;
}
// public static void main(String[] args){
// List<Product> list = Product.getAllProducts();
//
// }
}
这一步也没什么好说的,就是一个普通的Javabean类,里面有两个方法,商品展示的时候会用到
4 商品添加页面 jsp
<%@ page language="java" import="java.util.*" pageEncoding="utf-8"%>
<%@ page contentType="text/html;charset=utf-8" %>
<%
String path = request.getContextPath();
String basePath = request.getScheme()+"://"+request.getServerName()+":"+request.getServerPort()+path+"/";
%>
<!DOCTYPE HTML PUBLIC "-//W3C//DTD HTML 4.01 Transitional//EN">
<html>
<head>
<base href="<%=basePath%>">
<title>My JSP 'UploadProduct.jsp' starting page</title>
<meta http-equiv="pragma" content="no-cache">
<meta http-equiv="cache-control" content="no-cache">
<meta http-equiv="expires" content="0">
<meta http-equiv="keywords" content="keyword1,keyword2,keyword3">
<meta http-equiv="description" content="This is my page">
<!--
<link rel="stylesheet" type="text/css" href="styles.css">
-->
<link rel="stylesheet" type="text/css" href="css/back.css"/>
<script type=text/javascript src="js/SubmitCheck.js" charset="utf-8"></script>
<script type="text/javascript" src="js/jquery-1.11.1.js" charset="utf-8"></script>
<script type="text/javascript" src="js/preview.js" charset="utf-8"></script>
</head>
<body>
<form action="/midTermTest1/UploadServlet" method="post" name="addform" enctype="multipart/form-data" onsubmit="return on_submit()">
<div id="Nav"><h1>添加商品:</h1></div><hr>
<br/><br/>
<div id="NavTop">
<div class="PName">
商品名称:<input type="text" name="pname" id="name">
</div>
<div class="PAddr">
商品产地:<input type="text" name="paddr" id="address">
</div>
<div class="PPrice">
商品价格:<input type="text" name="pprice" id="price"> *单位 $
</div>
<div class="PImg">
<div id="img">图片上传: <input type="file" id="imgs" name="pimgfile" onchange="showPreview(this)"></div>
<div id="scan">图片预览:</div>
<div id="sourceImg"></div>
<div id="img_url"><img id="img_urlj" src="preview_img/preview.jpg" width=130px height=130px></div>
<div id="submit"><input type="submit" value="提交" id="submitbutton"></div>
</div>
</div>
</form>
</body>
</html>
就是一个普通的商品添加页面,用js实现了图片预览的功能,你可以不用实现,这里在做的时候遇到一个麻烦,花了好久才解决,就是我在添加商品图片的时候,下面会显示我添加的图片,本来我是直接用js获取其上传图片的本地磁盘路径的,结果服务器为了安全是不允许访问服务器的本机文件地址的,结果本地磁盘路径就给我改掉了 改成c://fdsk/beaty.jpeg 解决办法就是,将你准备添加的存放图片的那个文件夹映射到tomcat中,即可显示,网上有教程,这里就不详说了。
5. 处理添加商品的servlet
package com.test.servlet;
import java.io.File;
import java.io.IOException;
import java.io.PrintWriter;
import java.sql.Connection;
import java.sql.Statement;
import java.util.Iterator;
import java.util.List;
import javax.servlet.DispatcherType;
import javax.servlet.RequestDispatcher;
import javax.servlet.ServletContext;
import javax.servlet.ServletException;
import javax.servlet.annotation.WebServlet;
import javax.servlet.http.HttpServlet;
import javax.servlet.http.HttpServletRequest;
import javax.servlet.http.HttpServletResponse;
import org.apache.commons.fileupload.FileItem;
import org.apache.commons.fileupload.disk.DiskFileItemFactory;
import org.apache.commons.fileupload.servlet.ServletFileUpload;
import com.mysql.fabric.Response;
import com.mysql.jdbc.MySQLConnection;
import com.test.sqlconnection.MysqlConnection;
import sun.rmi.server.Dispatcher;
/**
* Servlet implementation class UploadServlet
*/
@WebServlet("/UploadServlet")
public class UploadServlet extends HttpServlet {
private static final long serialVersionUID = 1L;
private String filePath; // 文件存放目录
private String tempPath; // 临时文件目录
private String pname;
private String paddr;
private String pprice;
private String filename ;
private String SQLFileName;
// 初始化
// public void init(ServletConfig config) throws ServletException {
// super.init(config);
// // 可以从配置文件中获得初始化参数
// //filePath = config.getInitParameter("filepath");
// //tempPath = config.getInitParameter("temppath");
// //ServletContext context = getServletContext();
// //filePath = context.getRealPath(filePath);
// //tempPath = context.getRealPath(tempPath);
// filePath="D:/ClassHelpFile/file";
// tempPath="D:/ClassHelpFile/temp";
// }
public UploadServlet() {
super();
// TODO Auto-generated constructor stub
}
/**
* @see HttpServlet#doGet(HttpServletRequest request, HttpServletResponse response)
*/
protected void doGet(HttpServletRequest req, HttpServletResponse res) throws ServletException, IOException {
// TODO Auto-generated method stub
}
protected void doPost(HttpServletRequest req, HttpServletResponse res) throws ServletException, IOException {
// TODO Auto-generated method stub
doGet(req, res);
//res.setCharacterEncoding("GBK");
PrintWriter pw = res.getWriter();
tempPath = getServletContext().getRealPath("/tempPImgs");
filePath = getServletContext().getRealPath("/pimgs");
System.out.println(tempPath);
// req.setAttribute("path", tempPath);
try {
DiskFileItemFactory diskFactory = new DiskFileItemFactory();
// threshold 极限、临界值,即硬盘缓存 1M
diskFactory.setSizeThreshold(10 * 1024);
// repository 贮藏室,即临时文件目录
diskFactory.setRepository(new File(tempPath));
ServletFileUpload upload = new ServletFileUpload(diskFactory);
//防止乱码
upload.setHeaderEncoding("utf-8");
// 设置允许上传的最大文件大小 4M
upload.setSizeMax(10 * 1024 * 1024);
// 解析HTTP请求消息头
List<FileItem> fileItems = upload.parseRequest(req);
Iterator<FileItem> iter = fileItems.iterator();
while (iter.hasNext()) {
FileItem item = (FileItem) iter.next();
if (item.isFormField()) {
processFormField(item, pw);//处理表单内容
} else {
processUploadFile(item, pw);//处理上传的文件
}
}
SQLFileName=filename;
System.out.println(SQLFileName);
//保存到数据库
//String sqlStart = "set names gbk";
String sql = "insert into product(pname,pprice,paddr,pimg) values('"+pname+"','"+pprice+"','"+paddr+"','"+SQLFileName+"')";
MysqlConnection con = new MysqlConnection();
con.getConnection();
//con.updateByPreparedStatement(sqlStart, null);
con.updateByPreparedStatement(sql, null);
con.releaseConn();
pw.println("<script>");
pw.println("alert('商品插入成功!即将跳转首页')");
pw.println("</script> ");
// pw.close();
} catch (Exception e) {
System.out.println("异常:使用 fileupload 包发生异常!");
e.printStackTrace();
}
res.setHeader("refresh", "1;url=jsp/showProduct.jsp");
// RequestDispatcher rd =req.getRequestDispatcher("/jsp/showProduct.jsp");
//
// try{
// rd.forward(req, res);
// return;
// }catch(Exception e){
// System.out.print(e.toString());
// }
// res.sendRedirect("/jsp/showProduct.jsp");
}
//处理表单内容
private void processFormField(FileItem item, PrintWriter pw)
throws Exception {
String name = item.getFieldName();
String value =new String((item.getString("iso8859-1")).getBytes("iso8859-1"),"utf-8");
// value = new String(value.getBytes("utf-8"));
// System.out.println(value);
if(name.equals("pname")){
pname = value;
}else if(name.equals("paddr")){
paddr = value;
}
else if(name.equals("pprice")){
pprice = value;
}
}
// 处理上传的文件
private void processUploadFile(FileItem item, PrintWriter pw)
throws Exception {
filename = item.getName();
int index = filename.lastIndexOf("\\");
filename = filename.substring(index + 1, filename.length());
long fileSize = item.getSize();
if ("".equals(filename) && fileSize == 0) {
System.out.println("文件名为空 !");
return;
}
File uploadFile = new File(filePath + "/" + filename);
if(!uploadFile.exists()){
item.write(uploadFile);
}
//pw.println(filename + " 文件保存完毕 !");
//pw.println("文件大小为 :" + fileSize + "\r\n");
}
}
这一步比较重要的就是上传文件与表单文本数据,如果是我们自己处理的话会比较麻烦,要将文件转化二进制流后再写入图片在保存,因此我直接用了fileupload组件(也可用smartyupload)处理表单,简单实用,其中需要用到两个包,commons-io 与 commons-fileuplaod包 网上也有教程,这里也不细说,要的留言
6.商品展示列表与分页实现 jsp 页面
<%@page import="com.test.model.Product"%>
<%@ page language="java" import="java.util.*" pageEncoding="utf-8"%>
<%
String path = request.getContextPath();
String basePath = request.getScheme()+"://"+request.getServerName()+":"+request.getServerPort()+path+"/";
%>
<!DOCTYPE HTML PUBLIC "-//W3C//DTD HTML 4.01 Transitional//EN">
<html>
<head>
<base href="<%=basePath%>">
<title>My JSP 'showProduct.jsp' starting page</title>
<meta http-equiv="pragma" content="no-cache">
<meta http-equiv="cache-control" content="no-cache">
<meta http-equiv="expires" content="0">
<meta http-equiv="keywords" content="keyword1,keyword2,keyword3">
<meta http-equiv="description" content="This is my page">
<!--
<link rel="stylesheet" type="text/css" href="styles.css">
-->
<link rel="stylesheet" type="text/css" href="css/showProductCss.css"/>
</head>
<body>
<br/><br/><br/>
<h1 id="nav">商品展示
<a id="back" href="jsp/UploadProduct.jsp" >添加商品</a></h1>
<br/><br/><br/>
<hr/>
<%!
public static final int PAGESIZE = 4; //单页容量
int pageCount; //记录页数
int curPage = 1; //当前页
int absolute; //定位到某条记录
%>
<%
List<Product> list = Product.getAllProducts();
int size = list.size();
pageCount = (size%PAGESIZE==0)?(size/PAGESIZE):(size/PAGESIZE+1);
String tmp = request.getParameter("curPage");
String pcount = request.getParameter("getPageCount");
if(tmp==null || tmp.equals("0")){
tmp="1";
}
curPage = Integer.parseInt(tmp);
if(pcount!=null){
curPage = Integer.parseInt(pcount);
}
if(curPage>=pageCount) curPage = pageCount;
absolute = (curPage-1)*PAGESIZE+1; //定位到当前页的第一条记录
// int count = 0;
for(int i =absolute-1;i<(absolute-1+PAGESIZE);i++){
if(i>size-1){break;}
Product product = list.get(i);
//out.println(i);
// out.println(product.getId()+product.getPnameString()+product.getPaddresString());
%>
<div>
<dl>
<dt>
<a href="jsp/productDetails.jsp?id=<%=product.getId()%>"><img alt="商品"
src="pimgs/<%=product.getPimgString()%>" width="130" height="130"
border="1" /></a>
</dt>
<dd class="dd_name"><%=product.getPnameString() %></dd>
<dd class="dd_city">
产地:<%=product.getPaddresString() %>
价格:<span id="redPrice"><%=product.getPprice()%></span>
</dd>
</dl>
</div>
<%
}
%>
<div id="linkPage">
<a href="jsp/showProduct.jsp?curPage=1">首页</a>
<a href="jsp/showProduct.jsp?curPage=<%if(curPage==1){out.print(1);}else{out.print(curPage-1);}%>">上一页</a>
<a href="jsp/showProduct.jsp?curPage=<%if(curPage==pageCount){out.print(curPage);}else{out.print(curPage+1);}%>">下一页</a>
<a href="jsp/showProduct.jsp?curPage=<%=pageCount%>">尾页</a> 第<%=curPage%>页/共<%=pageCount%>页
</div>
<div id="getPage">
<form action="jsp/showProduct.jsp?">
跳转至<input type="text" id="pageText" name="getPageCount"/>页
<input type="submit" id="pageSubmit" value="确定"/>
</form>
</div>
</body>
</html>
这里要说的是分页实现,注意是以httpget方式传递参数的,如 showProduct.jsp?curPage=<%=pageCount%>,将curPage传递过去看到底要取哪些数据在页面上显示
完结~~~
7.总结
这个实例看起来已经有点接近mvc的设计模式了,但商品展示的界面并没有交给相应的servlet处理,导致jsp中的java代码太多,下面将会对该实例进行一些升级,比如使用mysql语句进行分页查询,这样就不会加大查询负担,像该实例就是一次取出所有商品置于结果集中,然后再分页显示,但当商品数量很多的时候,服务器的压力会很大可能导致很久才能反应或者不响应,其次,将会采用JSP+SERVLET+JAVABEAN实现比较完整的mvc设计模式,敬请期待

相关文章推荐
- JavaWeb基础+oracle实现简单简单分页商品浏览与加入购物车系统
- JSP中分页技术的实现(jstl,servlet,javabean三种不同实现方式)
- 使用jsp/servlet简单实现文件上传与下载
- jsp+servlet实现的简单分页
- 使用jsp/servlet简单实现文件上传与下载
- 使用jsp/servlet简单实现文件上传所遇到的问题
- JSP+Servlet技术实现分页 首页 下一页 每一页显示10条页码 下一页 尾页 第页/共页 (利用PageBean实现)
- JAVA_WEB项目(结合Servlet+jsp+ckEditor编辑器+jquery easyui技术)实现新闻发布管理系统第四篇:前台首页,新闻分类(体育新闻,科技新闻等),新闻列表分页的实现
- 简单的分页效果(servlet实现)
- JSP分页技术实现
- JSP分页技术实现
- JSP+servlet+javabean实现分页
- 一个jsp和servlet实现上传的例子
- JSP分页技术的实现
- 一个非常简单的分页技术MYSQL+JSP 利用了mysql的LIMIT参数
- JSP+JavaBean+Servlet实现分页
- JSP实现简单的文件上传
- JSP分页技术实现[转]
- 关于session的介绍以及实现跨context的session方法(jsp-servlet 技术)
- jsp文件上传原理简单实现