使用Nexus搭建Maven私服
2017-05-23 14:43
369 查看
1. 私服简介
私服是指私有服务器,是架设在局域网的一种特殊的远程仓库,目的是代理远程仓库及部署第三方构建。有了私服之后,当 Maven 需要下载构件时,直接请求私服,私服上存在则下载到本地仓库;否则,私服请求外部的远程仓库,将构件下载到私服,再提供给本地仓库下载。 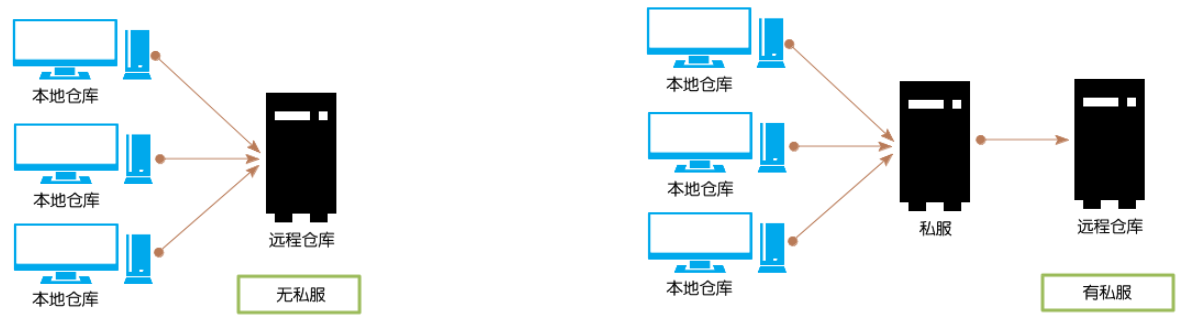
2. nexus3的环境安装
nexus3的下载地址:https://www.sonatype.com/download-oss-sonatype 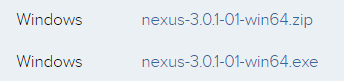
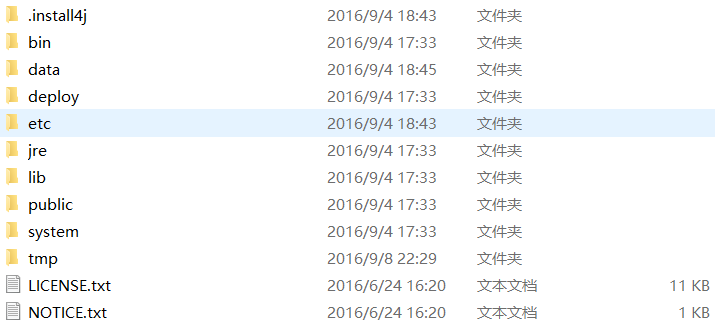
这里我下载的是zip包,解压如下:
打开bin/nexus.vmoptions文件,配置一下-Dkaraf.data和-Djava.io.tmpdir这两个参数,其他参数可以根据需要进行配置。

打开etc/org.sonatype.nexus.cfg这个文件
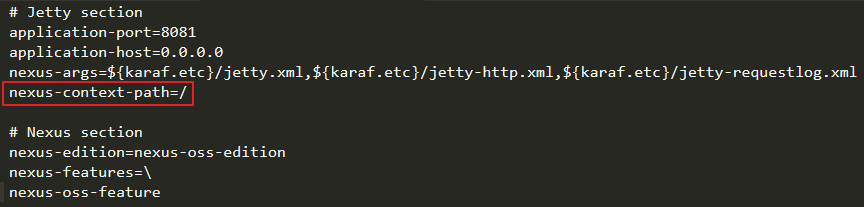
这里可以根据需要来配置nexus-context-path这个参数,这个是nexus启动时的根路径,默认是“/”。
3. nexus3的启动
配置完成后,cmd打开远程客户端,进入nexus-3.0.1-01\bin下。这里可以在环境变量里把nexus配置path,这样就不需要在每次启动的时候,还要进入nexus目录下。接下来执行命令:nexus.exe /run。 当看到如下界面时,即为启动成功。

启动成功后,访问:localhost:8081。
默认的用户名和密码:admin/admin123,登录后看到如下图所示:

4. component的介绍
component name的一些说明: - maven-central:maven中央库,默认从https://repo1.maven.org/maven2/拉取jar
- maven-releases:私库发行版jar
- maven-snapshots:私库快照(调试版本)jar
- maven-public:仓库分组,把上面三个仓库组合在一起对外提供服务,在本地maven基础配置settings.xml中使用。
component type的一些说明:
- hosted:类型的仓库,内部项目的发布仓库
- releases:内部的模块中release模块的发布仓库
- snapshots:发布内部的SNAPSHOT模块的仓库
- 3rd party:第三方依赖的仓库,这个数据通常是由内部人员自行下载之后发布上去
- proxy:类型的仓库,从远程中央仓库中寻找数据的仓库

5. settings.xml配置
这里提供下settings.xml的配置,如下:<?xml version="1.0" encoding="UTF-8"?> <settings> <localRepository>D:\JWCMS_HOME\maven_repository</localRepository> <pluginGroups> <pluginGroup>org.sonatype.plugins</pluginGroup> </pluginGroups> <servers> <server> <id>nexus</id> <username>admin</username> <password>admin123</password> </server> </servers> <mirrors> <mirror> <id>nexus</id> <mirrorOf>*</mirrorOf> <url>http://localhost:8081/repository/maven-public/</url> </mirror> <mirror> <id>repo2</id> <mirrorOf>central</mirrorOf> <name>Human Readable Name for this Mirror.</name> <url>http://repo2.maven.org/maven2/</url> </mirror> </mirrors> <profiles> <profile> <id>nexus</id> <repositories> <repository> <id>central</id> <url>http://central</url> <releases> <enabled>true</enabled> </releases> <snapshots> <enabled>true</enabled> </snapshots> </repository> </repositories> <pluginRepositories> <pluginRepository> <id>central</id> <url>http://central</url> <releases> <enabled>true</enabled> </releases> <snapshots> <enabled>true</enabled> </snapshots> </pluginRepository> </pluginRepositories> </profile> </profiles> <activeProfiles> <activeProfile>nexus</activeProfile> </activ 4000 eProfiles> </settings>1
2
3
4
5
6
7
8
9
10
11
12
13
14
15
16
17
18
19
20
21
22
23
24
25
26
27
28
29
30
31
32
33
34
35
36
37
38
39
40
41
42
43
44
45
46
47
48
49
50
51
52
53
54
55
56
57
58
59
60
61
62
63
64
65
1
2
3
4
5
6
7
8
9
10
11
12
13
14
15
16
17
18
19
20
21
22
23
24
25
26
27
28
29
30
31
32
33
34
35
36
37
38
39
40
41
42
43
44
45
46
47
48
49
50
51
52
53
54
55
56
57
58
59
60
61
62
63
64
65
6. pom.xml配置
这里提供下pom.xml的配置,如下:<distributionManagement> <repository> <id>nexus</id> <name>Releases</name> <url>http://localhost:8081/repository/maven-releases</url> </repository> <snapshotRepository> <id>nexus</id> <name>Snapshot</name> <url>http://localhost:8081/repository/maven-snapshots</url> </snapshotRepository> </distributionManagement>1
2
3
4
5
6
7
8
9
10
11
12
1
2
3
4
5
6
7
8
9
10
11
12
7.发布
最后在eclipse中,打开Run/Run Configurations…,界面如下: 
配置好相关参数,执行run。
当在eclipse的console里看到如下内容时,即为本地工程已经上传到私服成功。

注意:它在上传的过程中,如果私服有jar包,则使用私服上的jar包。如果私服没有jar,它会去远程仓库拉取,并放到私服仓库中。

相关文章推荐
- 使用nexus搭建maven私服、手动更新索引
- 使用Nexus搭建Maven私服
- 使用Nexus搭建Maven私服
- 不错的maven学习笔记,收藏——Maven学习 (四) 使用Nexus搭建Maven私服
- 使用Nexus搭建Maven私服
- 使用Nexus搭建Maven私服
- 使用Nexus搭建Maven私服
- 使用Sonatype Nexus搭建Maven私服后如何添加第三方JAR包?
- Maven学习 (四) 使用Nexus搭建Maven私服
- 搭建配置私服-nexus ,Maven中的使用——3
- Maven学习 (四) 使用Nexus搭建Maven私服
- Maven学习:使用Nexus搭建Maven私服
- Maven学习 (四) 使用Nexus搭建Maven私服
- Maven学习 (四) 使用Nexus搭建Maven私服
- 在操作系统Centos 6.3 上使用Nexus 2.8搭建MAVEN私服 及 cloudstack 开发环境
- Maven学习 (四) 使用Nexus搭建Maven私服
- 使用nexus搭建maven私服、手动更新索引
- maven--私服的搭建(Nexus的使用)
- 使用nexus为maven搭建私服
- maven--私服的搭建(Nexus的使用)