Elasticsearch-5.3.0集群搭建
2017-05-23 00:00
381 查看
本文档为Elasticsearch(以下简称ES)集群的安装配置文档。本次安装的ES集群由服务器xwhadoop225、xwhadoop226两个节点组成。
1 安装之前需要配置好Java环境,需要Java8及以上版本
1.1 验证java已正确安装
2 创建用户bd,属组bd(ES将以此用户安装、运行)
3 xwhadoop225安装ES
4 配置ES
4.1 进入ES的配置文件目录
4.2 进行如下配置
5 启动ES
5.1 进入ES的可执行文件目录
5.2 启动ES
5.3 启动之后打开另一个终端进行测试,看到如下信息则说明启动成功,本地访问正常:
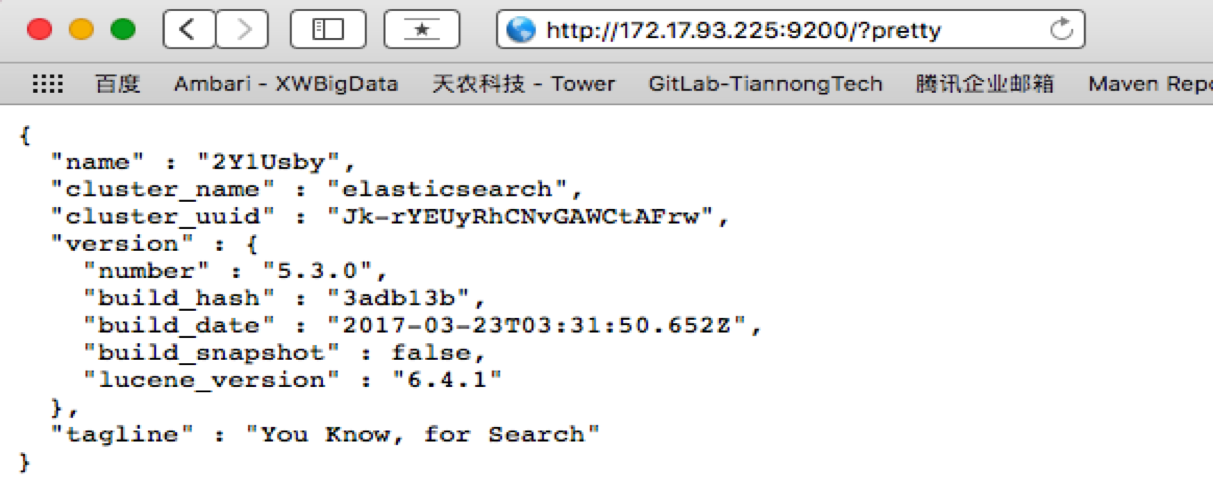
5.4 验证非本地访问是否成功,打开一个非本地浏览器,请求http://172.17.93.225:9200/?pretty,返回以下信息则说明非本地访问正常:
6 配置xwhadoop226服务器,组建ES集群
参照上述步骤1~5,完成服务器xwhadoop226上ES的安装,注意:4.2中的配置需要做相应改动
7 启动ES集群
xwhadoop225、xwhadoop226分别安装、配置ES,并成功启动后,查看集群状态
1 安装之前需要配置好Java环境,需要Java8及以上版本
1.1 验证java已正确安装
[root@xwhadoop225 ~]$ java -version

java version "1.8.0_121"

Java(TM) SE Runtime Environment (build 1.8.0_121-b13)

Java HotSpot(TM) 64-Bit Server VM (build 25.121-b13, mixed mode)
2 创建用户bd,属组bd(ES将以此用户安装、运行)
# 创建用户组bd

groupadd bd

# 创建用户bd,属组bd

useradd bd -g bd

# 给用户bd设置密码

passwd bd
3 xwhadoop225安装ES
# bd用户ssh登录至xwhadoop225

ssh bd@xwhadoop225

# 创建ES安装包存放目录

mkdir /bigdata/package/elasticsearch

# 进入ES安装包存放目录

cd /bigdata/package/elasticsearch

# 下载ES安装包

wget https://artifacts.elastic.co/downloads/elasticsearch/elasticsearch-5.3.0.tar.gz
# 创建ES安装目录

mkdir /bigdata/software/elasticsearch

# 解压elasticsearch-5.3.0.tar.gz至安装目录

tar –zxvf elasticsearch-5.3.0.tar.gz –C /bigdata/software/elasticsearch
4 配置ES
4.1 进入ES的配置文件目录
cd /bigdata/software/elasticsearch/elasticsearch-5.3.0/config
4.2 进行如下配置
# 编辑elasticsearch.yml

vi elasticsearch.yml

# 配置ES集群的名称

cluster.name: xw-es-225_226

# 配置ES集群当前节点的名称

node.name: es-xwhadoop225

# 配置ES绑定的ip地址。默认为127.0.0.1,客户端和ES集群的其他非本机节点都无法访问

network.host: 0.0.0.0

# 配置ES集群各个节点的ip列表。默认为127.0.0.1

discovery.zen.ping.unicast.hosts: ["xwhadoop225", "xwhadoop226"]
5 启动ES
5.1 进入ES的可执行文件目录
cd /bigdata/software/elasticsearch/elasticsearch-5.3.0/bin
5.2 启动ES
./elasticsearch

# 后台启动ES

# ./elasticsearch -d
5.3 启动之后打开另一个终端进行测试,看到如下信息则说明启动成功,本地访问正常:
[bd@xwhadoop225 ~]$ curl 'http://localhost:9200/?pretty'

{

"name" : "2Y1Usby",

"cluster_name" : "elasticsearch",

"cluster_uuid" : "Jk-rYEUyRhCNvGAWCtAFrw",

"version" : {

"number" : "5.3.0",

"build_hash" : "3adb13b",

"build_date" : "2017-03-23T03:31:50.652Z",

"build_snapshot" : false,

"lucene_version" : "6.4.1"

},

"tagline" : "You Know, for Search"

}
5.4 验证非本地访问是否成功,打开一个非本地浏览器,请求http://172.17.93.225:9200/?pretty,返回以下信息则说明非本地访问正常:
6 配置xwhadoop226服务器,组建ES集群
参照上述步骤1~5,完成服务器xwhadoop226上ES的安装,注意:4.2中的配置需要做相应改动
7 启动ES集群
xwhadoop225、xwhadoop226分别安装、配置ES,并成功启动后,查看集群状态
# 请求url:http://xwhadoop225:9200/_cluster/health?pretty,如下所示,集群正常运行

KangdeMacBook-Pro:Documents Kang$ curl xwhadoop225:9200/_cluster/health?pretty

{

"cluster_name" : "xw-es-225_226",

"status" : "green",

"timed_out" : false,

"number_of_nodes" : 2,

"number_of_data_nodes" : 2,

"active_primary_shards" : 0,

"active_shards" : 0,

"relocating_shards" : 0,

"initializing_shards" : 0,

"unassigned_shards" : 0,

"delayed_unassigned_shards" : 0,

"number_of_pending_tasks" : 0,

"number_of_in_flight_fetch" : 0,

"task_max_waiting_in_queue_millis" : 0,

"active_shards_percent_as_number" : 100.0

}es-head安装:
yum install git npm nodejs npm install grunt-cli npm install grunt git clone git://github.com/mobz/elasticsearch-head.git cd elasticsearch-head vim _site/app.js 修改http://localhost:9200 为http://xwhadoop225:9200 npm install phantomjs-prebuilt@2.1.13 --ignore-scripts (如果npm install有问题,先执行这句) npm install grunt server >>head.log 2>&1 & open http://xwhadoop225:9100/[/code] 注:es-head安装文件不要放在$Elasticsearch_HOME/plugins或modules目录下,否则Elasticsearch将不能正常启动FAQ:
I. 出于安全方面的考虑,ES默认禁止使用root用户启动,异常信息如下:[root@xwhadoop225 bin]# ./elasticsearch [2017-03-30T15:39:40,951][WARN ][o.e.b.ElasticsearchUncaughtExceptionHandler] [] uncaught exception in thread [main] org.elasticsearch.bootstrap.StartupException: java.lang.RuntimeException: can not run elasticsearch as root at org.elasticsearch.bootstrap.Elasticsearch.init(Elasticsearch.java:127) ~[elasticsearch-5.3.0.jar:5.3.0] at org.elasticsearch.bootstrap.Elasticsearch.execute(Elasticsearch.java:114) ~[elasticsearch-5.3.0.jar:5.3.0] at org.elasticsearch.cli.EnvironmentAwareCommand.execute(EnvironmentAwareCommand.java:58) ~[elasticsearch-5.3.0.jar:5.3.0] at org.elasticsearch.cli.Command.mainWithoutErrorHandling(Command.java:122) ~[elasticsearch-5.3.0.jar:5.3.0] at org.elasticsearch.cli.Command.main(Command.java:88) ~[elasticsearch-5.3.0.jar:5.3.0] at org.elasticsearch.bootstrap.Elasticsearch.main(Elasticsearch.java:91) ~[elasticsearch-5.3.0.jar:5.3.0] at org.elasticsearch.bootstrap.Elasticsearch.main(Elasticsearch.java:84) ~[elasticsearch-5.3.0.jar:5.3.0] Caused by: java.lang.RuntimeException: can not run elasticsearch as root at org.elasticsearch.bootstrap.Bootstrap.initializeNatives(Bootstrap.java:106) ~[elasticsearch-5.3.0.jar:5.3.0] at org.elasticsearch.bootstrap.Bootstrap.setup(Bootstrap.java:204) ~[elasticsearch-5.3.0.jar:5.3.0] at org.elasticsearch.bootstrap.Bootstrap.init(Bootstrap.java:360) ~[elasticsearch-5.3.0.jar:5.3.0] at org.elasticsearch.bootstrap.Elasticsearch.init(Elasticsearch.java:123) ~[elasticsearch-5.3.0.jar:5.3.0] ... 6 more
解决方案:
A. 需要使用非root用户来启动ES,以解决此问题。
II. 需要按提示配置系统参数max file descriptors和max virtual memory areas vm.max_map_count,异常信息如下:[bd@xwhadoop225 bin]$ ./elasticsearch [2017-03-30T15:54:39,673][INFO ][o.e.n.Node ] [] initializing ... [2017-03-30T15:54:39,767][INFO ][o.e.e.NodeEnvironment ] [2Y1Usby] using [1] data paths, mounts [[/mnt (/dev/vdb1)]], net usable_space [455.5gb], net total_space [492gb], spins? [possibly], types [ext3] [2017-03-30T15:54:39,767][INFO ][o.e.e.NodeEnvironment ] [2Y1Usby] heap size [1.9gb], compressed ordinary object pointers [true] [2017-03-30T15:54:39,768][INFO ][o.e.n.Node ] node name [2Y1Usby] derived from node ID [2Y1UsbyoT-yXjr10Ckf2bw]; set [node.name] to override [2017-03-30T15:54:39,769][INFO ][o.e.n.Node ] version[5.3.0], pid[17908], build[3adb13b/2017-03-23T03:31:50.652Z], OS[Linux/3.10.0-514.6.2.el7.x86_64/amd64], JVM[Oracle Corporation/Java HotSpot(TM) 64-Bit Server VM/1.8.0_121/25.121-b13] [2017-03-30T15:54:40,458][INFO ][o.e.p.PluginsService ] [2Y1Usby] loaded module [aggs-matrix-stats] [2017-03-30T15:54:40,458][INFO ][o.e.p.PluginsService ] [2Y1Usby] loaded module [ingest-common] [2017-03-30T15:54:40,458][INFO ][o.e.p.PluginsService ] [2Y1Usby] loaded module [lang-expression] [2017-03-30T15:54:40,458][INFO ][o.e.p.PluginsService ] [2Y1Usby] loaded module [lang-groovy] [2017-03-30T15:54:40,458][INFO ][o.e.p.PluginsService ] [2Y1Usby] loaded module [lang-mustache] [2017-03-30T15:54:40,458][INFO ][o.e.p.PluginsService ] [2Y1Usby] loaded module [lang-painless] [2017-03-30T15:54:40,458][INFO ][o.e.p.PluginsService ] [2Y1Usby] loaded module [percolator] [2017-03-30T15:54:40,458][INFO ][o.e.p.PluginsService ] [2Y1Usby] loaded module [reindex] [2017-03-30T15:54:40,459][INFO ][o.e.p.PluginsService ] [2Y1Usby] loaded module [transport-netty3] [2017-03-30T15:54:40,459][INFO ][o.e.p.PluginsService ] [2Y1Usby] loaded module [transport-netty4] [2017-03-30T15:54:40,459][INFO ][o.e.p.PluginsService ] [2Y1Usby] no plugins loaded [2017-03-30T15:54:42,409][INFO ][o.e.n.Node ] initialized [2017-03-30T15:54:42,410][INFO ][o.e.n.Node ] [2Y1Usby] starting ... [2017-03-30T15:54:42,548][INFO ][o.e.t.TransportService ] [2Y1Usby] publish_address {172.17.93.225:9300}, bound_addresses {0.0.0.0:9300} [2017-03-30T15:54:42,554][INFO ][o.e.b.BootstrapChecks ] [2Y1Usby] bound or publishing to a non-loopback or non-link-local address, enforcing bootstrap checks ERROR: bootstrap checks failed max file descriptors [65535] for elasticsearch process is too low, increase to at least [65536] max virtual memory areas vm.max_map_count [65530] is too low, increase to at least [262144] [2017-03-30T15:54:42,595][INFO ][o.e.n.Node ] [2Y1Usby] stopping ... [2017-03-30T15:54:42,615][INFO ][o.e.n.Node ] [2Y1Usby] stopped [2017-03-30T15:54:42,615][INFO ][o.e.n.Node ] [2Y1Usby] closing ... [2017-03-30T15:54:42,625][INFO ][o.e.n.Node ] [2Y1Usby] closed
解决方案:
A. 配置max file descriptors
从异常信息可知,需要将max file descriptors的值由65535调整为65536(或以上)
i. 确认当前max file descriptors的值[bd@xwhadoop225 ~]$ ulimit -n 65535
ii. 调整max file descriptors的值# 以root身份编辑limits.conf sudo vi /etc/security/limits.conf # 增加以下内容 bd soft nofile 65536 bd hard nofile 65536 # 因为是改了配置文件,需退出重新登录 exit ssh bd@xwhadoop225
iii. 确认修改后的max file descriptors的值[bd@xwhadoop225 ~]$ ulimit -n 65536
B. 配置vm.max_map_count
从异常信息可知,需要将vm.max_map_count的值由65530调整为262144(或以上)
i. 确认当前vm.max_map_count的值[bd@xwhadoop225 ~]$ sysctl vm.max_map_count vm.max_map_count = 65530
ii. 调整vm.max_map_count的值# 以root身份修改系统参数vm.max_map_count的值 sudo sysctl vm.max_map_count=262144
iii. 确认修改后的vm.max_map_count的值[bd@xwhadoop225 ~]$ sysctl vm.max_map_count vm.max_map_count = 262144

相关文章推荐
- ElasticSearch-5.3.1集群环境搭建,安装ElasticSearch-head插件,安装错误解决
- ElasticSearch基于单机多节点下的集群搭建
- kafka zookeeper elasticsearch集群环境搭建
- ELasticsearch集群搭建
- ElasticSearch入门 —— 集群搭建
- ElasticSearch集群搭建及插件安装
- 用docker搭建elasticsearch集群
- ElasticSearch的基本用法与集群搭建 good
- ElasticSearch教程(三)————ElasticSearch集群搭建
- elasticSearch 2.0搭建集群注意事项
- ElasticSearch的基本用法与集群搭建
- 基于docker 搭建Elasticsearch分布式集群
- elasticsearch 集群搭建步骤
- Elasticsearch集群的简单搭建
- elasticsearch 集群环境搭建
- 分布式集群环境hadoop1.2.0、hbase0.94.4、zookeeper、elasticsearch搭建2
- Elasticsearch2.4集群环境搭建
- ElasticSearch集群搭建及插件安装
- ElasticSearch系列(三) 集群搭建
- Elasticsearch集群搭建