android中表格布局实现,以及拖动Scroll
2017-05-20 19:40
411 查看
在布局id/ll_consult_detail_table 中添加表格布局代码实现表格,首先把整个背景设为对应表格线颜色,然后根据布局需要设置子空间背景颜色,缩小一个像素显示线条。另ScrollView下滑动到底会滑不到最底部,主要原因是第一个子控件layout_margin设置导致,再包一层LinearLayout就可以了 代码如下:
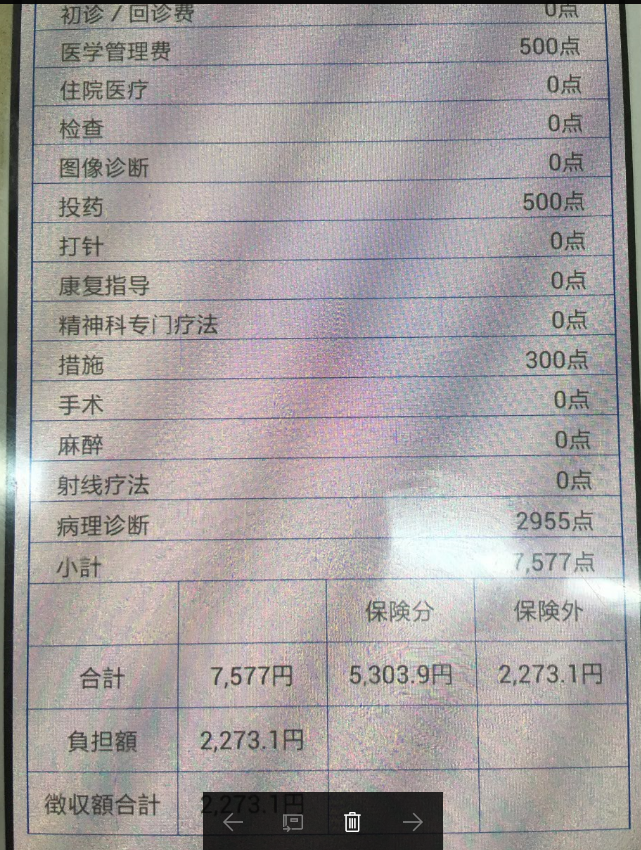
实现效果如下:
private void addView1() {

mLl_parent = (LinearLayout) this.findViewById(R.id.ll_consult_detail_table);

for ( int i = 0; i < costInfoList.size(); i++){
RelativeLayout rl_layout = new RelativeLayout(this);
RelativeLayout.LayoutParams rl_params = new RelativeLayout.LayoutParams(
ViewGroup.LayoutParams.MATCH_PARENT,
ViewGroup.LayoutParams.WRAP_CONTENT);
rl_layout.setPaddingRelative(0,0,0,1);
rl_layout.setLayoutParams(rl_params);

RelativeLayout rl_layout0 = new RelativeLayout(this);
RelativeLayout.LayoutParams rl_params0 = new RelativeLayout.LayoutParams(
ViewGroup.LayoutParams.MATCH_PARENT,
ViewGroup.LayoutParams.WRAP_CONTENT);
rl_layout0.setBackgroundColor(Color.argb(255,255,255,255));

RelativeLayout.LayoutParams rl_params01 = new RelativeLayout.LayoutParams(
ViewGroup.LayoutParams.WRAP_CONTENT,
ViewGroup.LayoutParams.WRAP_CONTENT);
rl_params01.addRule(RelativeLayout.ALIGN_PARENT_LEFT);
rl_params01.leftMargin = 30;
rl_params01.topMargin = 8;
rl_params01.bottomMargin = 8;
TextView text1 = new TextView(this);
text1.setText(costInfoList.get(i).getTitle());
text1.setBackgroundColor(Color.argb(255,255,255,255));
rl_layout0.addView(text1, rl_params01);

RelativeLayout.LayoutParams rl_params02 = new RelativeLayout.LayoutParams(
ViewGroup.LayoutParams.WRAP_CONTENT,
ViewGroup.LayoutParams.WRAP_CONTENT);
rl_params02.addRule(RelativeLayout.ALIGN_PARENT_RIGHT);
rl_params02.rightMargin = 30;
rl_params02.topMargin = 8;
rl_params02.bottomMargin = 8;
TextView text2 = new TextView(this);
text2.setText(costInfoList.get(i).getPrice());
rl_layout0.addView(text2, rl_params02);

rl_layout.addView(rl_layout0, rl_params0);

mLl_parent.addView(rl_layout);
}

for(int i = 0; i < titleData.length; i++){
LinearLayout rl_layout = new LinearLayout(this);
LinearLayout.LayoutParams rl_params = new LinearLayout.LayoutParams(
ViewGroup.LayoutParams.MATCH_PARENT,
ViewGroup.LayoutParams.WRAP_CONTENT);
rl_layout.setLayoutParams(rl_params);

LinearLayout ll_layout0 = new LinearLayout(this);
LinearLayout.LayoutParams ll_params0 = new LinearLayout.LayoutParams(
ViewGroup.LayoutParams.MATCH_PARENT,
ViewGroup.LayoutParams.WRAP_CONTENT,1.0f);
ll_layout0.setBackgroundColor(Color.argb(255,255,255,255));
ll_params0.bottomMargin = 1;
ll_layout0.setGravity(Gravity.CENTER);
ll_layout0.setPaddingRelative(0,16,0,16);
ll_layout0.setLayoutParams(ll_params0);
TextView text1 = new TextView(this);
//   reSizeTextView(text1,this.titleData[i][0],maxWidth);
text1.setText(this.titleData[i][0]);
ll_layout0.addView(text1);

LinearLayout ll_layout01 = new LinearLayout(this);
LinearLayout.LayoutParams ll_params01 = new LinearLayout.LayoutParams(
ViewGroup.LayoutParams.WRAP_CONTENT,
ViewGroup.LayoutParams.WRAP_CONTENT);
ll_params01.setMargins(0,0,1,ViewGroup.LayoutParams.WRAP_CONTENT);
ll_layout01.setLayoutParams(ll_params01);

LinearLayout ll_layout1 = new LinearLayout(this);
LinearLayout.LayoutParams ll_params1 = new LinearLayout.LayoutParams(
ViewGroup.LayoutParams.MATCH_PARENT,
ViewGroup.LayoutParams.WRAP_CONTENT,1.0f);
ll_layout1.setBackgroundColor(Color.argb(255,255,255,255));
ll_params1.bottomMargin = 1;
ll_layout1.setGravity(Gravity.CENTER);
ll_layout1.setPaddingRelative(0,16,0,16);
ll_layout1.setLayoutParams(ll_params1);
TextView text2 = new TextView(this);
//   reSizeTextView(text1,this.titleData[i][1],maxWidth);
text2.setText(this.titleData[i][1]);

ll_layout1.addView(text2);

LinearLayout ll_layout12 = new LinearLayout(this);
LinearLayout.LayoutParams ll_params12 = new LinearLayout.LayoutParams(
ViewGroup.LayoutParams.WRAP_CONTENT,
ViewGroup.LayoutParams.WRAP_CONTENT);
ll_params12.setMargins(0,0,1,ViewGroup.LayoutParams.WRAP_CONTENT);
ll_layout12.setLayoutParams(ll_params12);

LinearLayout ll_layout2 = new LinearLayout(this);
LinearLayout.LayoutParams ll_params2 = new LinearLayout.LayoutParams(
ViewGroup.LayoutParams.MATCH_PARENT,
ViewGroup.LayoutParams.WRAP_CONTENT,1.0f);
ll_layout2.setBackgroundColor(Color.argb(255,255,255,255));
ll_params2.bottomMargin = 1;
ll_layout2.setGravity(Gravity.CENTER);
ll_layout2.setPaddingRelative(0,16,0,16);
ll_layout2.setLayoutParams(ll_params2);
TextView text3 = new TextView(this);
//   reSizeTextView(text1,this.titleData[i][2],maxWidth);
text3.setText(this.titleData[i][2]);

ll_layout2.addView(text3);

LinearLayout ll_layout23 = new LinearLayout(this);
LinearLayout.LayoutParams ll_params23 = new LinearLayout.LayoutParams(
ViewGroup.LayoutParams.WRAP_CONTENT,
ViewGroup.LayoutParams.WRAP_CONTENT);
ll_params23.setMargins(0,0,1,ViewGroup.LayoutParams.WRAP_CONTENT);
ll_layout23.setLayoutParams(ll_params23);

LinearLayout ll_layout3 = new LinearLayout(this);
LinearLayout.LayoutParams ll_params3 = new LinearLayout.LayoutParams(
ViewGroup.LayoutParams.MATCH_PARENT,
ViewGroup.LayoutParams.WRAP_CONTENT,1.0f);
ll_layout3.setBackgroundColor(Color.argb(255,255,255,255));
ll_params3.bottomMargin = 1;
ll_layout3.setGravity(Gravity.CENTER);
ll_layout3.setPaddingRelative(0,16,0,16);
ll_layout3.setLayoutParams(ll_params3);
TextView text4 = new TextView(this);
//   reSizeTextView(text1,this.titleData[i][3],maxWidth);
text4.setText(this.titleData[i][3]);

ll_layout3.addView(text4);

rl_layout.addView(ll_layout0);
rl_layout.addView(ll_layout01);
rl_layout.addView(ll_layout1);
rl_layout.addView(ll_layout12);
rl_layout.addView(ll_layout2);
rl_layout.addView(ll_layout23);
rl_layout.addView(ll_layout3);

mLl_parent.addView(rl_layout);
}

}
实现效果如下:

相关文章推荐
- 关于android实现拖动旋转角度,调整布局参数的思路
- Android——自定义view实现标题栏、梯形布局以及二维码扫描
- Android照片墙实现 -- 布局设计以及数据处理
- Android布局中的空格以及占一个汉字宽度的空格的实现
- Android 对Layout_weight属性完全解析以及使用ListView来实现表格
- DHTMLX中对dhtmlxgrid表格行的置顶置底功能,以及拖动排序功能的实现
- [Android实例] Android 圆角仿网页表格布局实现
- Android实现对imageview的拖动以及缩放
- android中UIColletionView瀑布流布局实现思路以及封装的实现
- Android 布局详解 -三表格布局(TableLayout)以及重要属性
- Android 对Layout_weight属性完全解析以及使用ListView来实现表格
- 实现android布局的左右拖动及动画效果的代码范例
- Android 通过手势类实现的可拖动布局实例
- Android实现带边框的表格布局
- Android布局中的空格以及占一个汉字宽度的空格的实现
- Android仿京东、天猫app的商品详情页的布局架构, 以及功能实现
- Android 对Layout_weight属性完全解析以及使用ListView来实现表格
- Android 中的用HorizontalScrollView布局实现类似Gallery效果
- Android 对Layout_weight属性完全解析以及使用ListView来实现表格
- android动态布局:用java代码实现LinearLayout以及TextView