Android编程基础之异步任务的简单实现
2017-05-18 10:05
781 查看
Android APP的主线程或者说UI线程主要用来处理和UI的相关的操作的,而比较耗时的操作一般会放在子线程中去运行,操作过程当中一般还会涉及主线程和子线程的消息传递过程。在Android SDK套件中,异步任务的实现可以很好的解决这个问题。本文只是通过举一个小例子来简单的说一说异步任务的使用。
编写一个实现异步任务的小例子:实现这样一个功能,在子线程中循环的对一个数字加一,然后把这个数字通过UI控件显示出来。我们知道子线程本身一般是不能直接对UI控件进行操作的,这个需要子线程和主线程进行通信,把要显示的数字传递给主线程,由主线程进行显示。
首先编写一个异步类的派生类对象,它的具体实现如下所示:
package cn.edu.syau.yl_app_async_task;
import android.os.AsyncTask;
import android.widget.TextView;
/**
* Created by yule on 2017/5/18.
*/
public class MyAsyncTask extends AsyncTask<Object, Integer, Object>{
private TextView flag = null;
private TextView content = null;
public MyAsyncTask(TextView flag, TextView content){
this.flag = flag;
this.content = content;
}
@Override
protected void onPreExecute() {
super.onPreExecute();
flag.setText("开始异步任务!");
}
@Override
protected void onPostExecute(Object o) {
super.onPostExecute(o);
flag.setText("结束异步任务!");
}
@Override
protected Object doInBackground(Object... params) {
int i = 0;
for(i = 1; i <= 10; i++){
publishProgress(i);
try {
Thread.sleep(1 * 1000);
} catch (InterruptedException e) {
e.printStackTrace();
}
}
return null;
}
@Override
protected void onProgressUpdate(Integer... values) {
super.onProgressUpdate(values);
content.setText("value = " + values[0]);
}
}
主程序的实现如下:
package cn.edu.syau.yl_app_async_task;
import android.support.v7.app.AppCompatActivity;
import android.os.Bundle;
import android.view.View;
import android.widget.Button;
import android.widget.TextView;
public class MainActivity extends AppCompatActivity {
private TextView textViewFlag = null;
private TextView textViewContent = null;
private Button button = null;
@Override
protected void onCreate(Bundle savedInstanceState) {
super.onCreate(savedInstanceState);
setContentView(R.layout.activity_main);
textViewFlag = (TextView) findViewById(R.id.textFlag);
textViewContent = (TextView) findViewById(R.id.textContent);
button = (Button) findViewById(R.id.button);
button.setOnClickListener(new View.OnClickListener() {
@Override
public void onClick(View v) {
MyAsyncTask myAsyncTask = new MyAsyncTask(textViewFlag, textViewContent);
myAsyncTask.execute();
}
});
}
}
在布局文件中实现了两个TextView和一个Button控件,他们的xml布局如下所示:
<TextView
android:layout_width="match_parent"
android:layout_height="wrap_content"
android:layout_margin="10dp"
android:id="@+id/textFlag"/>
<TextView
android:layout_width="match_parent"
android:layout_height="wrap_content"
android:layout_margin="10dp"
android:id="@+id/textContent"/>
<Button
android:layout_width="match_parent"
android:layout_height="wrap_content"
android:layout_margin="10dp"
android:text="StartSync"
android:id="@+id/button"/> 其中第一个TextView控件主要是用来表示异步任务的开始和结束;第二个TextView控件主要是将异步任务的数字给打印出来;Button控件是主线程用来启动UI线程。
对上面的程序进行编译运行,结果如下:
刚开始运行时:
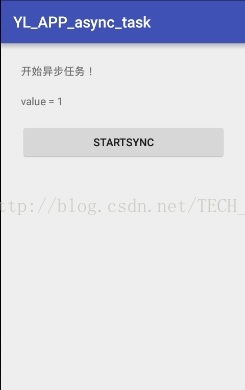
运行结束时:
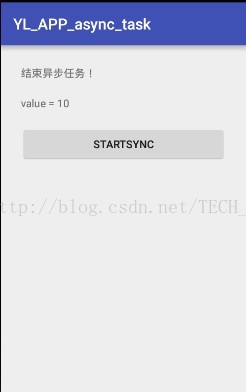
从上面结果可以看出,基本完成了功能,实现了异步任务的简单用法,关于异步任务的消息资料请读者自行参考相关书籍或者文档。
编写一个实现异步任务的小例子:实现这样一个功能,在子线程中循环的对一个数字加一,然后把这个数字通过UI控件显示出来。我们知道子线程本身一般是不能直接对UI控件进行操作的,这个需要子线程和主线程进行通信,把要显示的数字传递给主线程,由主线程进行显示。
首先编写一个异步类的派生类对象,它的具体实现如下所示:
package cn.edu.syau.yl_app_async_task;
import android.os.AsyncTask;
import android.widget.TextView;
/**
* Created by yule on 2017/5/18.
*/
public class MyAsyncTask extends AsyncTask<Object, Integer, Object>{
private TextView flag = null;
private TextView content = null;
public MyAsyncTask(TextView flag, TextView content){
this.flag = flag;
this.content = content;
}
@Override
protected void onPreExecute() {
super.onPreExecute();
flag.setText("开始异步任务!");
}
@Override
protected void onPostExecute(Object o) {
super.onPostExecute(o);
flag.setText("结束异步任务!");
}
@Override
protected Object doInBackground(Object... params) {
int i = 0;
for(i = 1; i <= 10; i++){
publishProgress(i);
try {
Thread.sleep(1 * 1000);
} catch (InterruptedException e) {
e.printStackTrace();
}
}
return null;
}
@Override
protected void onProgressUpdate(Integer... values) {
super.onProgressUpdate(values);
content.setText("value = " + values[0]);
}
}
主程序的实现如下:
package cn.edu.syau.yl_app_async_task;
import android.support.v7.app.AppCompatActivity;
import android.os.Bundle;
import android.view.View;
import android.widget.Button;
import android.widget.TextView;
public class MainActivity extends AppCompatActivity {
private TextView textViewFlag = null;
private TextView textViewContent = null;
private Button button = null;
@Override
protected void onCreate(Bundle savedInstanceState) {
super.onCreate(savedInstanceState);
setContentView(R.layout.activity_main);
textViewFlag = (TextView) findViewById(R.id.textFlag);
textViewContent = (TextView) findViewById(R.id.textContent);
button = (Button) findViewById(R.id.button);
button.setOnClickListener(new View.OnClickListener() {
@Override
public void onClick(View v) {
MyAsyncTask myAsyncTask = new MyAsyncTask(textViewFlag, textViewContent);
myAsyncTask.execute();
}
});
}
}
在布局文件中实现了两个TextView和一个Button控件,他们的xml布局如下所示:
<TextView
android:layout_width="match_parent"
android:layout_height="wrap_content"
android:layout_margin="10dp"
android:id="@+id/textFlag"/>
<TextView
android:layout_width="match_parent"
android:layout_height="wrap_content"
android:layout_margin="10dp"
android:id="@+id/textContent"/>
<Button
android:layout_width="match_parent"
android:layout_height="wrap_content"
android:layout_margin="10dp"
android:text="StartSync"
android:id="@+id/button"/> 其中第一个TextView控件主要是用来表示异步任务的开始和结束;第二个TextView控件主要是将异步任务的数字给打印出来;Button控件是主线程用来启动UI线程。
对上面的程序进行编译运行,结果如下:
刚开始运行时:
运行结束时:
从上面结果可以看出,基本完成了功能,实现了异步任务的简单用法,关于异步任务的消息资料请读者自行参考相关书籍或者文档。

相关文章推荐
- Java基础知识强化之网络编程笔记15:Android网络通信之 Android异步任务处理(AsyncTask使用)
- android基础---Timer和TimerTask简单实现定时任务
- 在C#中使用异步Socket编程实现TCP网络服务的C/S的通讯构架(一)----基础类库部分
- 在C#中使用异步Socket编程实现TCP网络服务的C/S的通讯构架(一)----基础类库部分
- Android异步任务AsyncTask实现方式
- Android异步任务的简单呢操作,以及运行过程。
- android的Socket编程---实现简单的服务器,并与客户端通信
- Android Socket 编程简单实现
- 介绍一种在大循环就可实现的简单多任务编程方法
- LinuxC/C++编程基础(10) quicksort的简单实现
- Android开发:后台异步任务之AsyncTask实现
- 在C#中使用异步Socket编程实现TCP网络服务的C/S的通讯构架(一)----基础类库部分(来源:http://blog.csdn.net/yangjundeng/archive/2005/03/17/321920.aspx)
- Linux 网络编程基础(一) ---------------客户端/服务器的简单实现
- 在C#中使用异步Socket编程实现TCP网络服务的C/S的通讯构架(一)----基础类库部分(转)
- C#中使用异步Socket编程实现TCP网络服务的CS的通讯构架(一)----基础类库部分
- Java Web应用中如何实现任务有效调度-Java基础-Java-编程开发
- Linux 网络编程基础(一) ---------------客户端/服务器的简单实现
- android-基础知识:实现简单的拨打电话功能_intent_study
- java/vc单点登录的简单实现-Java基础-Java-编程开发
- 在C#中使用异步Socket编程实现TCP网络服务的C/S的通讯构架(一)----基础类库部分