[UWP]了解模板化控件(1):基础知识
2017-03-21 08:40
417 查看
1.概述
UWP允许开发者通过两种方式创建自定义的控件:UserControl和TemplatedControl(模板化控件)。这个主题主要讲述如何创建和理解模板化控件,目标是能理解模板化控件常见的知识点,并且可以创建扩展性良好的模板化控件。1.1 ControlTemplate
UWP的控件有很多属性,使用这些属性可以为控件定制不同的外观,例如将Button的Border变粗,Background改为红色等,但通过这种改造控件,能做到的仍十分有限。通过为控件赋予新的ControlTemplate,可以为控件创建全新的外观。在下面的例子中,通过ControlTemplate将Button改成一个圆形按钮。
<Button Content="Orginal" Margin="0,0,20,0"/>
<Button Content="Custom">
<Button.Template>
<ControlTemplate TargetType="Button">
<Grid>
<Ellipse  Stroke="DarkOrange" StrokeThickness="3" Fill="LightPink"/>
<ContentPresenter Margin="10,20" Foreground="White"/>
</Grid>
</ControlTemplate>
</Button.Template>
</Button>

ControlTemplate的内容是定义控件可视结构的XAML。有时,这段XAML的根元素包含VisualStateManager.VisualStateGroups附加属性,用于定义不同状态下控件的外观变化。将ControlTemplate赋值到Control.Template即可改变控件的外观。ControlTemplate的TargetType需要和使用它的控件匹配。
注意:UserControl不能使用ControlTemplate。
1.2 模板化控件
可以使用ControlTemplate的控件即为模板化控件(TemplatedControl),在UWP中,所有派生自Control的控件(除了UserControl)都是模板化控件,例如Button、ComboBox等,它们中的大部分都有默认的ControlTemplate。模板化控件包含以下两个部分:
代码: 定义控件属性及行为。
DefaultStyle: 定义控件属性默认样式,包括属性值及ControlTemplate。可以不存在DefaultStyle,所以某些场合会把模板化控件称为“无外观控件”。
2. 创建第一个模板化控件
下面介绍如何使用VisualStudio在一个新项目中创建一个模板化控件。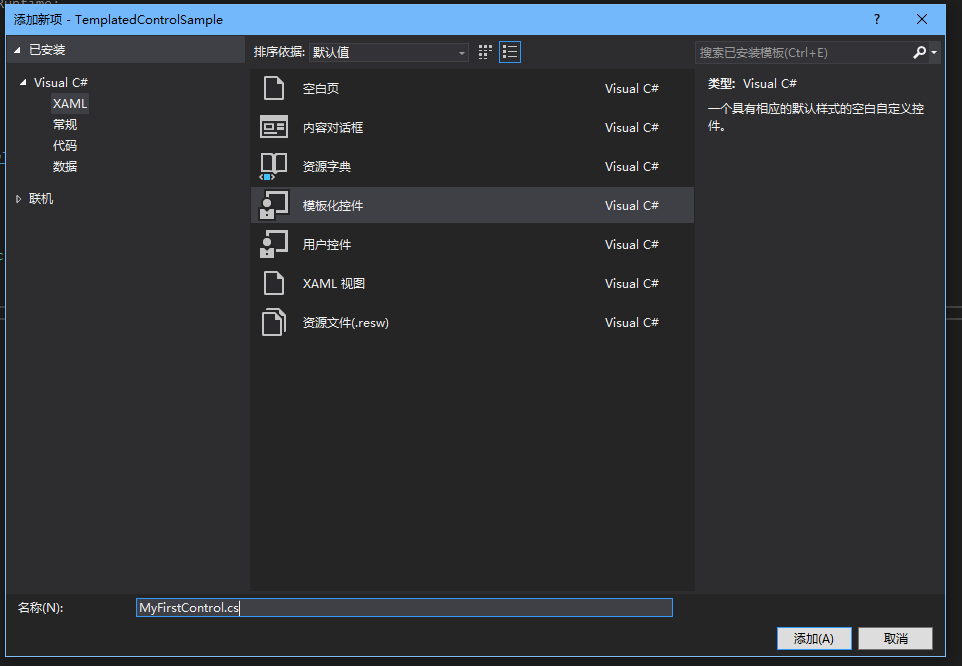
如图所示,在“添加新项对”话框中选中TemplatedControl,名称部分输入“MyFirstControl”,点击“添加”后VisualStudio会自动在项目中添加两个文件:MyFirstControl.cs和Themes/Generic.xaml:

2.1 MyFirstControl.cs
public sealed class MyFirstControl : Control
{
public MyFirstControl()
{
this.DefaultStyleKey = typeof(MyFirstControl);
}
}
类文件负责定义控件的结构和行为。MyFirstControl.cs的代码如图所示,只包含一个构造函数及一句 this.DefaultStyleKey = typeof(MyFirstControl)。DefaultStyleKey是用于查找控件样式的键,没有这句代码控件就找不到默认UI。
如果控件需要被继承的话,最好把sealed关键字移除。
2.2 Themes/Generic.xaml
<Style TargetType="local:MyFirstControl" >
<Setter Property="Template">
<Setter.Value>
<ControlTemplate TargetType="local:MyFirstControl">
<Border
Background="{TemplateBinding Background}"
BorderBrush="{TemplateBinding BorderBrush}"
BorderThickness="{TemplateBinding BorderThickness}">
</Border>
</ControlTemplate>
</Setter.Value>
</Setter>
</Style>
XAML负责定义控件的外观。在第一次创建控件后VisualStudio会自动创建这个文件,并且插入图中的代码。注意其中两个TargetType="local:MyFirstControl",第一个用于匹配MyFirstControl.cs中的DefaultStyleKey,第二个确定ControlTemplete针对的控件类型。两个都不可以移除。Style的内容是一组Setter的集合,除了Template外,还可以添加其它的Setter指定控件的默认外观。
2.3 使用MyFirstControl
<Page
x:Class="App3.MainPage"
xmlns="http://schemas.microsoft.com/winfx/2006/xaml/presentation"
xmlns:x="http://schemas.microsoft.com/winfx/2006/xaml"
xmlns:local="using:App3"
xmlns:d="http://schemas.microsoft.com/expression/blend/2008"
xmlns:mc="http://schemas.openxmlformats.org/markup-compatibility/2006"
mc:Ignorable="d">

<Grid Background="{ThemeResource ApplicationPageBackgroundThemeBrush}">
<local:MyFirstControl />
</Grid>
</Page>
通常情况下MainPage已经引用了local命名控件,所以只需这段xaml即可轻松使用刚刚创建好的控件。
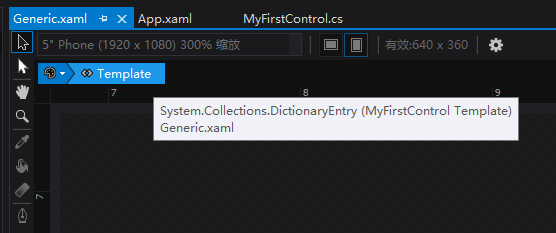
2.4 使用Blend修改DefaultStyle
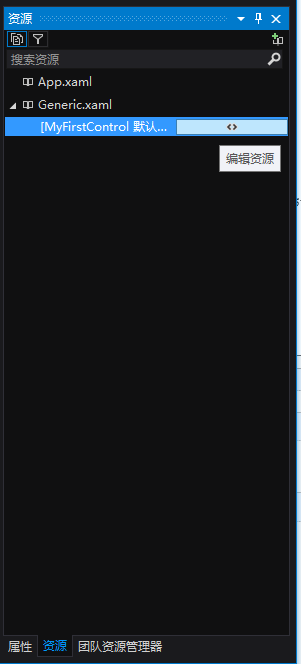
就算经验丰富的开发者仍免不了使用Blend这个工具来编辑Style和ControlTemplate,幸好Blend上手十分简单。使用Blend打开项目后,在“资源”面板展开Generic.xaml节点,选中MyFirstControl,点击编辑资源:
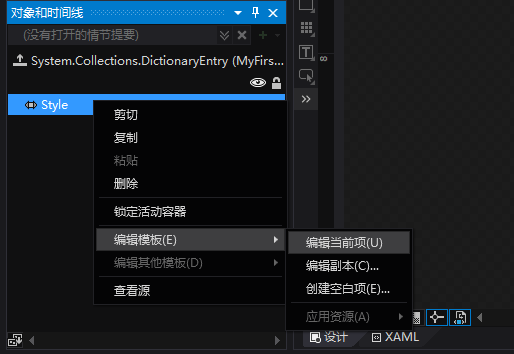
在“对象与时间线”面板,选中“Style”节点可在右侧“属性”面板编辑Style中除Template以外的属性:

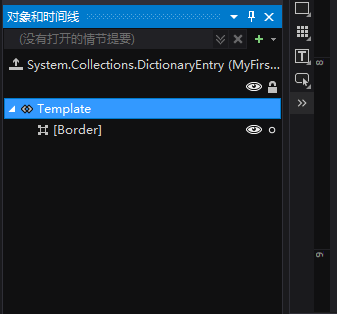
在“Style”节点,右键打开菜单,选中“编辑模版”->“编辑当前项”开始编辑Template,此时左侧“对象与时间线”面板展示Template中的结构:
此后,可在编辑区域的上方选择编辑Style或者编辑Template:
由于这个主题主要目的是介绍模板化控件,所以不会深入讨论Blend的操作。

相关文章推荐
- [UWP]了解模板化控件(1):基础知识
- [UWP 自定义控件]了解模板化控件(1):基础知识
- 使您的软件运行起来: 了解有关缓冲区溢出方面的基础知识
- Java 应了解的基础知识
- 测测您--对敏捷基础知识了解多少?
- 今天看了ps的简介,决定一定要把它给学会,首先了解一下基础知识
- struts2基础知识了解(总结)
- Java 应了解的基础知识(转载)
- 090819项目进展:了解emule基础知识,猜想实现的方向
- 090818项目进展:了解emule基础知识
- LINUX初学者需要了解的基础知识
- 个人网站站长应了解的基础知识
- 了解 Perl/Tk 模块,第 1 部分 Perl/Tk 基础知识
- 光盘启动区基础知识(二) 深入了解“TXTSETUP.SIF”
- 17点基础知识 教你详细了解进程和病毒
- 网络基础知识讲座十九:了解多播路由协议
- Win32汇编必须了解的基础知识
- 了解 Eclipse 中的 JFace 数据绑定,第 2 部分: 绑定的基础知识
- opengl es 基础知识了解
- 网站优化必须了解的三个基础知识