django之Form组件
2017-03-19 18:51
417 查看
Django的Form主要具有一下几大功能:
生成HTML标签
验证用户数据(显示错误信息)
HTML Form提交保留上次提交数据
初始化页面显示内容
一.创建Form类
2.view函数处理
3,生成html标签
1、Django内置字段如下:
示例:
Django内置字段如下:
需求: 在页面上不用加self直接显示input框
效果:
代码如下:
text.html
<body>
{{txt}}
</body>
views.py
注:UUID是根据MAC以及当前时间等创建的不重复的随机字符串
2、Django内置插件:
常用选择插件
示例:
方法一:(推荐使用)
models.py
urls.py
views.py
test.html
方法二:(不推荐使用)
使用django提供的ModelChoiceField和ModelMultipChoiceField字段来实现
(这种django内置的方法不推荐使用,如果要在前端显示数据库中的用户名,需要依赖models中的__str__方法,而且一个class中只有一个__str__, 如果在有的场景中需要同时显示如id user, age等多个字段名时,这个方法就做不到)
urls.py
test.html
views.py
models.py
Form组件
1、form表单(验证;保留上次内容)
django中的form一般有两种功能
输入html
验证用户输入
2、Ajax(验证;无需上次内容)
返回HttpResponse
前端:跳转或错误信息
如果想要ajax提交数据到django后台,对页面进行跳转,需要在ajax 中进行跳转,在后台进行跳转不生效
示例代码
views.py
from.py
ajax.html
3、Form组件扩展
1.简单扩展
利用Form组件自带的正则扩展:
a. 方式一
b. 方式二
2.基于源码流程
c、_post_clean 支持自定制方法(但不常用)
4、Django序列化
关于Django中的序列化主要应用在将数据库中检索的数据返回给客户端用户,特别的Ajax请求一般返回的为Json格式。
a.对象
b.字典
c.元祖
1、serializers
2、json.dumps
由于json.dumps时无法处理datetime日期,所以可以通过自定义处理器来做扩展,如:
示例:
urls.py
views.py
get_data.html
xuliehua.html
生成HTML标签
验证用户数据(显示错误信息)
HTML Form提交保留上次提交数据
初始化页面显示内容
一.创建Form类
#!/usr/bin/env python

from django.forms import Form
from django.forms import widgets
from django.forms import fields

class MyForm(Form):
user = fields.CharField(
widget=widgets.TextInput(attrs={"id": "i1", "class": "c1"}),  # 定制html标签
label="用户名"
)

gender = fields.ChoiceField(
choices=((1, "男"), (2, "女")),
initial=2,  # 设置默认值
widget=widgets.RadioSelect,
label="性别"

)

city = fields.CharField(
initial=2,
widget=widgets.Select(choices=((1,"上海"), (2,"北京"), (3,"重庆"))),
label="城市"

)

pwd = fields.CharField(
widget=widgets.PasswordInput(attrs={"class":"p1"}, render_value=True),
label="性别"
)
2.view函数处理
from django.shortcuts import render, redirect

# Create your views here.
from day60app.form_cls import MyForm

def index(request):
if request.method == "GET":
obj = MyForm()
return render(request, "index.html", {"obj": obj})
elif request.method == "POST":
obj = MyForm(request.POST, request.FILES)
if obj.is_valid():
v = obj.cleaned_data
print("用户验证成功信息", v)
return redirect("http://www.jd.com")
else:
v = obj.errors
print("错误信息", v)
return render(request, "index.html", {"obj": obj})
3,生成html标签
<!DOCTYPE html>
<html lang="en">
<head>
<meta charset="UTF-8">
<title>Title</title>
</head>
<body>
<h1>Hello World</h1>

<form action="/index/" method="post" enctype="multipart/form-data" novalidate>
<p>{{ obj.user.label }}{{ obj.user }}{{ obj.user.errors.0 }}</p>
<p>{{ obj.gender.label }}{{ obj.gender }}{{ obj.gender.errors.0 }}</p>
<p>{{ obj.pwd.label }}{{ obj.pwd }}{{ obj.pwd.errors.0 }}</p>
<p>{{ obj.city.label }}{{ obj.city }}{{ obj.city.errors.0 }}</p>

<input type="submit" value="提交">
</form>
</body>
Form类
创建Form类时,主要涉及到 【字段】 和 【插件】,字段用于对用户请求数据的验证,插件用于自动生成HTML;1、Django内置字段如下:
Field
required=True,               是否允许为空
widget=None,                 HTML插件
label=None,                  用于生成Label标签或显示内容
initial=None,                初始值
help_text='',                帮助信息(在标签旁边显示)
error_messages=None,         错误信息 {'required': '不能为空', 'invalid': '格式错误'}
show_hidden_initial=False,   是否在当前插件后面再加一个隐藏的且具有默认值的插件(可用于检验两次输入是否一直)
validators=[],               自定义验证规则
localize=False,              是否支持本地化
disabled=False,              是否可以编辑
label_suffix=None            Label内容后缀
示例:
class TestForm(forms.Form):
user = fields.CharField(
required=True,
max_length=12,
min_length=3,
error_messages={},
widget = widgets.TextInput(attrs={"class":123}),  # 定制html插件,属性:用attrs参数
# widget= widgets.Textarea()
label="姓名",
initial='laiying',
show_hidden_initial=False,
# validators=[]  #自定制验证规则
# disabled=True
label_suffix=":"

)
Django内置字段如下:
CharField(Field)
max_length=None, 最大长度
min_length=None, 最小长度
strip=True 是否移除用户输入空白
IntegerField(Field)
max_value=None, 最大值
min_value=None, 最小值
FloatField(IntegerField)
...
DecimalField(IntegerField)
max_value=None, 最大值
min_value=None, 最小值
max_digits=None, 总长度
decimal_places=None, 小数位长度
BaseTemporalField(Field)
input_formats=None 时间格式化
DateField(BaseTemporalField) 格式:2015-09-01
TimeField(BaseTemporalField) 格式:11:12
DateTimeField(BaseTemporalField)格式:2015-09-01 11:12
DurationField(Field) 时间间隔:%d %H:%M:%S.%f
...
RegexField(CharField)
regex, 自定制正则表达式
max_length=None, 最大长度
min_length=None, 最小长度
error_message=None, 忽略,错误信息使用 error_messages={'invalid': '...'}
EmailField(CharField)
...
FileField(Field)
allow_empty_file=False 是否允许空文件
ImageField(FileField)
...
注:需要PIL模块,pip3 install Pillow
以上两个字典使用时,需要注意两点:
- form表单中 enctype="multipart/form-data"
- view函数中 obj = MyForm(request.POST, request.FILES)
URLField(Field)
...
BooleanField(Field)
...
NullBooleanField(BooleanField)
...
ChoiceField(Field)
...
choices=(), 选项,如:choices = ((0,'上海'),(1,'北京'),)
required=True, 是否必填
widget=None, 插件,默认select插件
label=None, Label内容
initial=None, 初始值
help_text='', 帮助提示
ModelChoiceField(ChoiceField)
... django.forms.models.ModelChoiceField
queryset, # 查询数据库中的数据
empty_label="---------", # 默认空显示内容
to_field_name=None, # HTML中value的值对应的字段
limit_choices_to=None # ModelForm中对queryset二次筛选
ModelMultipleChoiceField(ModelChoiceField)
... django.forms.models.ModelMultipleChoiceField
TypedChoiceField(ChoiceField)
coerce = lambda val: val 对选中的值进行一次转换
empty_value= '' 空值的默认值
MultipleChoiceField(ChoiceField)
...
TypedMultipleChoiceField(MultipleChoiceField)
coerce = lambda val: val 对选中的每一个值进行一次转换
empty_value= '' 空值的默认值
ComboField(Field)
fields=() 使用多个验证,如下:即验证最大长度20,又验证邮箱格式
fields.ComboField(fields=[fields.CharField(max_length=20), fields.EmailField(),])
MultiValueField(Field)
PS: 抽象类,子类中可以实现聚合多个字典去匹配一个值,要配合MultiWidget使用
SplitDateTimeField(MultiValueField)
input_date_formats=None, 格式列表:['%Y--%m--%d', '%m%d/%Y', '%m/%d/%y']
input_time_formats=None 格式列表:['%H:%M:%S', '%H:%M:%S.%f', '%H:%M']
FilePathField(ChoiceField) 文件选项,目录下文件显示在页面中
path, 文件夹路径
match=None, 正则匹配
recursive=False, 递归下面的文件夹
allow_files=True, 允许文件
allow_folders=False, 允许文件夹
required=True,
widget=None,
label=None,
initial=None,
help_text=''
GenericIPAddressField
protocol='both', both,ipv4,ipv6支持的IP格式
unpack_ipv4=False 解析ipv4地址,如果是::ffff:192.0.2.1时候,可解析为192.0.2.1, PS:protocol必须为both才能启用
SlugField(CharField) 数字,字母,下划线,减号(连字符)
...
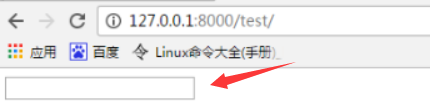
UUIDField(CharField) uuid类型需求: 在页面上不用加self直接显示input框
效果:
代码如下:
text.html
<body>
{{txt}}
</body>
views.py
def test(request):
if request.methon == 'GET':
txt = "<input type='text' />"
from django.utils.safestring import mark_safe
txt = mark_safe(txt)
return render(request,'text.html',{'txt':txt})
注:UUID是根据MAC以及当前时间等创建的不重复的随机字符串
>>> import uuid

# make a UUID based on the host ID and current time
>>> uuid.uuid1()    # doctest: +SKIP
UUID('a8098c1a-f86e-11da-bd1a-00112444be1e')

# make a UUID using an MD5 hash of a namespace UUID and a name
>>> uuid.uuid3(uuid.NAMESPACE_DNS, 'python.org')
UUID('6fa459ea-ee8a-3ca4-894e-db77e160355e')

# make a random UUID
>>> uuid.uuid4()    # doctest: +SKIP
UUID('16fd2706-8baf-433b-82eb-8c7fada847da')

# make a UUID using a SHA-1 hash of a namespace UUID and a name
>>> uuid.uuid5(uuid.NAMESPACE_DNS, 'python.org')
UUID('886313e1-3b8a-5372-9b90-0c9aee199e5d')

# make a UUID from a string of hex digits (braces and hyphens ignored)
>>> x = uuid.UUID('{00010203-0405-0607-0809-0a0b0c0d0e0f}')

# convert a UUID to a string of hex digits in standard form
>>> str(x)
'00010203-0405-0607-0809-0a0b0c0d0e0f'

# get the raw 16 bytes of the UUID
>>> x.bytes
b'\x00\x01\x02\x03\x04\x05\x06\x07\x08\t\n\x0b\x0c\r\x0e\x0f'

# make a UUID from a 16-byte string
>>> uuid.UUID(bytes=x.bytes)
UUID('00010203-0405-0607-0809-0a0b0c0d0e0f')
2、Django内置插件:
TextInput(Input)
NumberInput(TextInput)
EmailInput(TextInput)
URLInput(TextInput)
PasswordInput(TextInput)
HiddenInput(TextInput)
Textarea(Widget)
DateInput(DateTimeBaseInput)
DateTimeInput(DateTimeBaseInput)
TimeInput(DateTimeBaseInput)
CheckboxInput
Select
NullBooleanSelect
SelectMultiple
RadioSelect
CheckboxSelectMultiple
FileInput
ClearableFileInput
MultipleHiddenInput
SplitDateTimeWidget
SplitHiddenDateTimeWidget
SelectDateWidget
常用选择插件
# 单radio,值为字符串
# user = fields.CharField(
#     initial=2,
#     widget=widgets.RadioSelect(choices=((1,'上海'),(2,'北京'),))
# )

# 单radio,值为字符串
# user = fields.ChoiceField(
#     choices=((1, '上海'), (2, '北京'),),
#     initial=2,
#     widget=widgets.RadioSelect
# )

# 单select,值为字符串
# user = fields.CharField(
#     initial=2,
#     widget=widgets.Select(choices=((1,'上海'),(2,'北京'),))
# )

# 单select,值为字符串
# user = fields.ChoiceField(
#     choices=((1, '上海'), (2, '北京'),),
#     initial=2,
#     widget=widgets.Select
# )

# 多选select,值为列表
# user = fields.MultipleChoiceField(
#     choices=((1,'上海'),(2,'北京'),),
#     initial=[1,],
#     widget=widgets.SelectMultiple
# )

# 单checkbox
# user = fields.CharField(
#     widget=widgets.CheckboxInput()
# )

# 多选checkbox,值为列表
# user = fields.MultipleChoiceField(
#     initial=[2, ],
#     choices=((1, '上海'), (2, '北京'),),
#     widget=widgets.CheckboxSelectMultiple
# )
示例:
#select框的两种写法
#方法一:
# xdb = fields.CharField(
# widget=widgets.Select(choices=[(1,'刚娘'),(2,'铁娘'),(3,'钢弹')])
# )
#方法二:
# xdb = fields.IntegerField(
# widget=widgets.Select(choices=[(1,'刚娘'),(2,'铁娘'),(3,'钢弹')])
# )
# xdb = fields.ChoiceField(
# choices=[(1,'刚娘'),(2,'铁娘'),(3,'钢弹')]
# )
#多选下拉框(有自定义属性)
# xdb = fields.MultipleChoiceField(
# choices=[(1, '刚娘'), (2, '铁娘'), (3, '钢弹')],
# widget=widgets.SelectMultiple(attrs={'class':'c1'}) #后面参数是定制属性
# )
#单选checkbox
# xdb = fields.CharField(
# widget=widgets.CheckboxInput()
# )
#多选checkbox (多个checkbox,二选一)
# xdb = fields.MultipleChoiceField(
# initial=[2, ],
# choices=((1, '上海'), (2, '北京'),),
# widget=widgets.CheckboxSelectMultiple
# )
#多个选项Radio (互斥 三选一)
# xdb = fields.ChoiceField(
# choices=((1, '上海'), (2, '北京'),(3, '北京1'),),
# initial=2,
# widget=widgets.RadioSelect
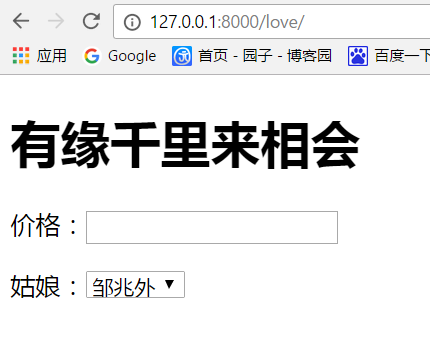
# )实现:下拉框里获取到的数据源实现实时更新
在使用选择标签时,需要注意Choices 的选项可以从数据库中获取,但是由于是静态字段***获取的值无法实时更新***,那么需要自定义构造方法从而达到此目的。方法一:(推荐使用)
models.py
from django.db import models

class UserInfo(models.Model):
username = models.CharField(max_length=32)
email = models.EmailField(max_length=32)
urls.py
from django.conf.urls import url
from django.contrib import admin
from app02 import views as v2
urlpatterns = [
url(r'^admin/', admin.site.urls),
url(r'^love/', v2.love),
]
views.py
from app01 import models

class LoveForm(forms.Form):
price = fields.IntegerField()
user_id = fields.IntegerField(
# widget=widgets.Select(choices=[(0,'alex'),(1,'刘皓宸'),(2,'杨建'),])
widget=widgets.Select()
)
#自定义构造方法,实时刷新页面数据
def __init__(self, *args, **kwargs):
super(LoveForm, self).__init__(*args, **kwargs)
self.fields['user_id'].widget.choices = models.UserInfo.objects.values_list('id', 'username')
test.html
<!DOCTYPE html>
<html lang="en">
<head>
<meta charset="UTF-8">
<title>Title</title>
</head>
<body>
<h1>有缘千里来相会</h1>
<p>价格:{{ obj.price }}</p>
<p>姑娘:{{ obj.user_id }}</p>
</body>
</html>
方法二:(不推荐使用)
使用django提供的ModelChoiceField和ModelMultipChoiceField字段来实现
(这种django内置的方法不推荐使用,如果要在前端显示数据库中的用户名,需要依赖models中的__str__方法,而且一个class中只有一个__str__, 如果在有的场景中需要同时显示如id user, age等多个字段名时,这个方法就做不到)
urls.py
from django.conf.urls import url
from django.contrib import admin
from app02 import views as v2
urlpatterns = [
url(r'^admin/', admin.site.urls),
url(r'^love/', v2.love),
]
test.html
<!DOCTYPE html>
<html lang="en">
<head>
<meta charset="UTF-8">
<title>Title</title>
</head>
<body>
<h1>有缘千里来相会</h1>
<p>价格:{{ obj.price }}</p>
<p>姑娘:{{ obj.user_id2 }}</p>
</body>
</html>
views.py
from django.forms.models import ModelChoiceField

class LoveForm(forms.Form):
price = fields.IntegerField()

user_id2 = ModelChoiceField(
queryset=models.UserInfo.objects.all(),
to_field_name='id'
)
models.py
from django.db import models

class UserInfo(models.Model):
username = models.CharField(max_length=32)
email = models.EmailField(max_length=32)

def __str__(self):
return self.username

# 注意:依赖models中的str方法
Form组件
1、form表单(验证;保留上次内容)
django中的form一般有两种功能
输入html
验证用户输入
#!/usr/bin/env python
# -*- coding:utf-8 -*-
import re
from django import forms
from django.core.exceptions import ValidationError

def mobile_validate(value):
mobile_re = re.compile(r'^(13[0-9]|15[012356789]|17[678]|18[0-9]|14[57])[0-9]{8}$')
if not mobile_re.match(value):
raise ValidationError('手机号码格式错误')

class PublishForm(forms.Form):

user_type_choice = (
(0, u'普通用户'),
(1, u'高级用户'),
)

user_type = forms.IntegerField(widget=forms.widgets.Select(choices=user_type_choice,
attrs={'class': "form-control"}))

title = forms.CharField(max_length=20,
min_length=5,
error_messages={'required': u'标题不能为空',
'min_length': u'标题最少为5个字符',
'max_length': u'标题最多为20个字符'},
widget=forms.TextInput(attrs={'class': "form-control",
'placeholder': u'标题5-20个字符'}))

memo = forms.CharField(required=False,
max_length=256,
widget=forms.widgets.Textarea(attrs={'class': "form-control no-radius", 'placeholder': u'详细描述', 'rows': 3}))

phone = forms.CharField(validators=[mobile_validate, ],
error_messages={'required': u'手机不能为空'},
widget=forms.TextInput(attrs={'class': "form-control",
'placeholder': u'手机号码'}))

email = forms.EmailField(required=False,
error_messages={'required': u'邮箱不能为空','invalid': u'邮箱格式错误'},
widget=forms.TextInput(attrs={'class': "form-control", 'placeholder': u'邮箱'}))
2、Ajax(验证;无需上次内容)
返回HttpResponse
前端:跳转或错误信息
如果想要ajax提交数据到django后台,对页面进行跳转,需要在ajax 中进行跳转,在后台进行跳转不生效
示例代码
views.py
from django.shortcuts import render, redirect, HttpResponse

# Create your views here.
from day60app.form_cls import AForm
import json
from django.forms.utils import ErrorDict

def ajax(request):
if request.method == "GET":
obj = AForm()
return render(request, "ajax.html", {"obj": obj})
elif request.method == "POST":
obj = AForm(request.POST)
ret = {"status": None, "message": None}
print("31----", obj)

if obj.is_valid():
ret["status"] = "成功"
print("35", ret)
return HttpResponse(json.dumps(ret))
else:
# err = obj.errors
ret["message"] = obj.errors
return HttpResponse(json.dumps(ret))
from.py
from django.forms import Form
from django.forms import widgets
from django.forms import fields
from django.forms.models import ModelChoiceField
from day60app import models

class AForm(Form):
user_id = fields.IntegerField(
widget=widgets.Select(choices=[(1, "小明"), (2, "小江"), (3, "小星")])
)
age = fields.IntegerField()
ajax.html
<!DOCTYPE html>
<html lang="en">
<head>
<meta charset="UTF-8">
<title>Title</title>
</head>
<body>
<form id="fm" action="/ajax/" method="post" novalidate>
{{ obj.as_p }}

<input type="button" value="ajax提交" id="but">

</form>
<script src="/static/jquery-3.1.1.js"></script>

<script>
$(function () {
$("#but").click(function () {
$.ajax({
url:"/ajax/",
type:"POST",
data:$("#fm").serialize(),
dataType:"JSON",
success:function(arg){
console.log("26----",arg);
if (arg["status"] == "成功"){
window.location.href = "http://www.jd.com"

}
{#else:#}

}

})
})
})

</script>
</body>
</html>
3、Form组件扩展
1.简单扩展
利用Form组件自带的正则扩展:
a. 方式一
from django.forms import Form
from django.forms import widgets
from django.forms import fields
from django.core.validators import RegexValidator

class MyForm(Form):
user = fields.CharField(
  error_messages={'invalid': '...'},  #错误提示
  validators=[RegexValidator(r'^[0-9]+$', '请输入数字'), RegexValidator
b. 方式二
from django.forms import Form
from django.forms import widgets
from django.forms import fields
from django.core.validators import RegexValidator

class MyForm(Form):
user = fields.RegexField(r'^[0-9]+$',error_messages={'invalid': '...'})
2.基于源码流程
a. 单字段
from django.core.exceptions import NON_FIELD_ERRORS, ValidationError
class AjaxForm(forms.Form):
username = fields.CharField()
user_id = fields.IntegerField(
widget=widgets.Select(choices=[(0,'alex'),(1,'刘皓宸'),(2,'杨建'),])
)
# 自定义方法 clean_字段名
# 必须返回值self.cleaned_data['username']
# 如果出错:raise ValidationError('用户名已存在')
def clean_username(self):
v = self.cleaned_data['username']
if models.UserInfo.objects.filter(username=v).count():
# 整体错了
# 自己详细错误信息
raise ValidationError('用户名已存在')
return v
def clean_user_id(self):
return self.cleaned_data['user_id']
b. 整体错误验证
class AjaxForm(forms.Form):
username = fields.CharField()
user_id = fields.IntegerField(
widget=widgets.Select(choices=[(0,'alex'),(1,'刘皓宸'),(2,'杨建'),])
)
# 自定义方法 clean_字段名
# 必须返回值self.cleaned_data['username']
# 如果出错:raise ValidationError('用户名已存在')
def clean_username(self):
v = self.cleaned_data['username']
if models.UserInfo.objects.filter(username=v).count():
# 整体错了
# 自己详细错误信息
raise ValidationError('用户名已存在')
return v
def clean_user_id(self):
return self.cleaned_data['user_id']

def clean(self):
value_dict = self.cleaned_data
v1 = value_dict.get('username')
v2 = value_dict.get('user_id')
if v1 == 'root' and v2==1:
raise ValidationError('整体错误信息')
return self.cleaned_data
c、_post_clean 支持自定制方法(但不常用)
4、Django序列化
关于Django中的序列化主要应用在将数据库中检索的数据返回给客户端用户,特别的Ajax请求一般返回的为Json格式。
a.对象
b.字典
c.元祖
1、serializers
from django.core import serializers

ret = models.BookType.objects.all()

data = serializers.serialize("json", ret)
2、json.dumps
import json

#ret = models.BookType.objects.all().values('caption')
ret = models.BookType.objects.all().values_list('caption')

ret=list(ret)

result = json.dumps(ret)
由于json.dumps时无法处理datetime日期,所以可以通过自定义处理器来做扩展,如:
import json
from datetime import date
from datetime import datetime

class JsonCustomEncoder(json.JSONEncoder):

def default(self, field):

if isinstance(field, datetime):
return o.strftime('%Y-%m-%d %H:%M:%S')
elif isinstance(field, date):
return o.strftime('%Y-%m-%d')
else:
return json.JSONEncoder.default(self, field)

# ds = json.dumps(d, cls=JsonCustomEncoder)
示例:
urls.py
from django.conf.urls import url
from django.contrib import admin
from app03 import views as v3

urlpatterns = [
url(r'^admin/', admin.site.urls),
url(r'^xuliehua/', v3.xuliehua),
url(r'^get_data/', v3.get_data),
]
views.py
from django.shortcuts import render
from django.shortcuts import HttpResponse
from app01 import models
import json
def xuliehua(request):

return render(request,'xuliehua.html')

"""
def get_data(request):
user_list = models.UserInfo.objects.all()
return render(request,'get_data.html',{'user_list':user_list})
"""
def get_data(request):
from django.core import serializers

ret = {'status':True,'data':None}
try:
#方式一:
user_list = models.UserInfo.objects.all()
# QuerySet【obj,obj,obj】如果里面是Obj对象才用这种方法
ret['data'] = serializers.serialize("json",user_list)
# var
v = JSON.parse(arg.data);
console.log(v);

#方法二:
user_list = models.UserInfo.objects.all().values('id','username')
ret['data'] = list(user_list)
console.log(arg.data);

#方法三:
user_list = models.UserInfo.objects.all().values_list('id', 'username')
ret['data'] = list(user_list)
console.log(arg.data);

except Exception as e:
ret['status'] = False
result = json.dumps(ret)
return HttpResponse(result)
get_data.html
{% for row in user_list %}
<tr>
<td>{{ row.id }}</td>
<td>{{ row.username }}</td>
<td>{{ row.email }}</td>
</tr>
{% endfor %}
xuliehua.html
<!DOCTYPE html>
<html lang="en">
<head>
<meta charset="UTF-8">
<title>Title</title>
</head>
<body>
<h1>用户列表</h1>
<table id="tb">

</table>
<script src="/static/jquery-3.1.1.js"></script>
<script>
$(function () {
initData();
});
function initData() {
$.ajax({
url :'/get_data/',
type:'GET',
dataType:'JSON',
success:function (arg) {
//$('#tb').append(arg);
if(arg.status){
console.log(arg.data);
//var v = JSON.parse(arg.data);
//console.log(v);
}
}
})
}
</script>
</body>
</html>
相关文章推荐
- python,day22-Django之Form组件,信号
- Django 之Form组件
- Python3 之 Django Web框架Form组件(二)
- django学习笔记---form组件验证,如何给form组件添加样式
- Django之Form组件校验de几种方式
- django 的form组件(验证原理的流程)--2
- Python3 之 Django Web框架优化查询和Form组件(一)
- Django之Form组件
- python3-开发进阶Django-form组件中model form组件
- Django之modelform组件
- 框架----Django之ModelForm组件
- python Django之Form组件
- Python之路【第二十一篇】:Django之Form组件
- django的form组件的插件相关参数和保留内容
- Django-form组件补充
- Django之ModelForm组件
- Django之Form组件
- django-Form组件
- Django之ModelForm组件
- Django之Form组件