Nginx使用memcached集群
2017-01-17 11:34
441 查看
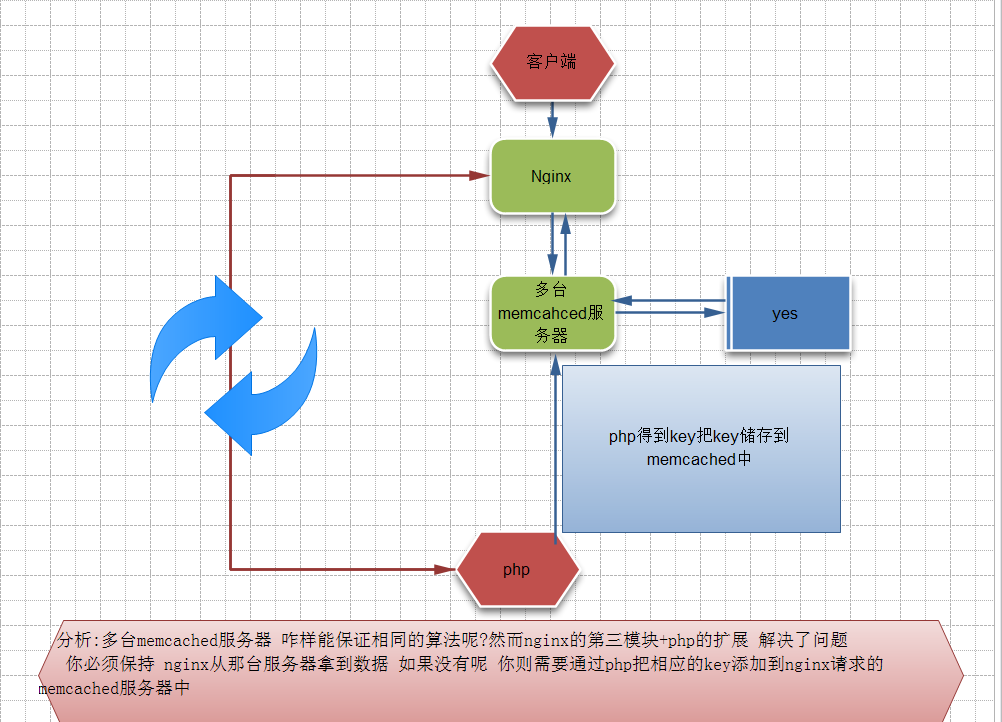
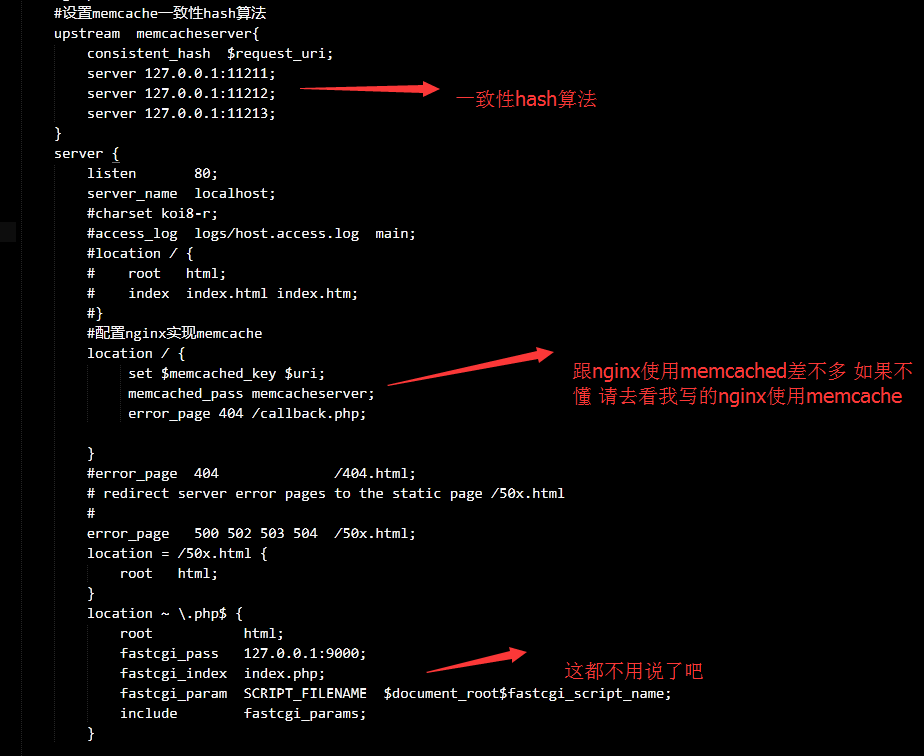
第一步:不多说了 Nginx + memcached + PHP必备Memached扩展 用到了第三模块
这个模块就是用一致性hash来请求后端结节,并且其算法,与PHP中的memcache模块的一致性hash算法,兼容.

下载地址 https://github.com/replay/ngx_http_consistent_hash/archive/master.zip 解压 模块
unzip ngx_http_consistent_hash-master.zip

这是要给Nginx编译扩展的啊
找到你安装的nginx原始目录 重新编译一份
如:
./configure --prefix=/xxx/xxx --add-module=/path/ngx_module
make && make install

修改配置Nginx的配置文件 如:
#user  nobody;
worker_processes  1;
#error_log  logs/error.log;
#error_log  logs/error.log  notice;
#error_log  logs/error.log  info;
#pid        logs/nginx.pid;
events {
worker_connections  1024;
}
http {
include       mime.types;
default_type  application/octet-stream;
#log_format  main  '$remote_addr - $remote_user [$time_local] "$request" '
#                  '$status $body_bytes_sent "$http_referer" '
#                  '"$http_user_agent" "$http_x_forwarded_for"';
#access_log  logs/access.log  main;
sendfile        on;
#tcp_nopush     on;
#keepalive_timeout  0;
keepalive_timeout  65;
#gzip  on;
#设置memcache一致性hash算法
upstream  memcacheserver{
consistent_hash  $request_uri;
server 127.0.0.1:11211;
server 127.0.0.1:11212;
server 127.0.0.1:11213;
}
server {
listen       80;
server_name  localhost;
#charset koi8-r;
#access_log  logs/host.access.log  main;
#location / {
#    root   html;
#    index  index.html index.htm;
#}
#配置nginx实现memcache
location / {
set $memcached_key $uri;
memcached_pass memcacheserver;
error_page 404 /callback.php;

}
#error_page  404              /404.html;
# redirect server error pages to the static page /50x.html
#
error_page   500 502 503 504  /50x.html;
location = /50x.html {
root   html;
}
location ~ \.php$ {
root           html;
fastcgi_pass   127.0.0.1:9000;
fastcgi_index  index.php;
fastcgi_param  SCRIPT_FILENAME  $document_root$fastcgi_script_name;
include        fastcgi_params;
}

}

}
同时记住启动三个memcached进程 只需要指定不同的端口就ok了啊
我上面用的是 11212 11213 如 : /usr/local/memcached/bin/memcached -m 64 -p 11212 -u nobody -vv

第二步:上面的是把nginx搞定了 memcached搞定了
php的memcache扩展编译 也改安装上了 (扩展默认用的是余数算法 如果开启一致性hash 在php.ini中加上一句话
在你引入memcache扩展下面加上 memcache.hash_strategy = consistent)
重启php-fpm

第三步:编辑你在callback.php 如
//获取uri
$uri = $_SERVER['REQUEST_URI'];
//new一个memcache对象出来
$memcache = new Memcache;
$memcache->addServer('127.0.0.1', 11211);
$memcache->addServer('127.0.0.1', 11212);
$memcache->addServer('127.0.0.1', 11213);
$num = rand(1,999).$uri.'not use databases';
$memcache->add($uri,$num );
echo 'This is a',$uri,'sb memcache';

第四步:ok了

相关文章推荐
- Nginx+Tomcat+Memcached 集群Session共享[memcached服务安装、tomcat使用memcache存储session、nginx安装配置实现tomcat负载均衡]
- nginx与PHP使用一致性哈希算法对memcached的集群与负载均衡
- Nginx+Tomcat+Memcached集群
- nginx+memcached+tomcat创建集群
- Windows7 + Nginx + Memcached + Tomcat 集群 session 共享
- nginx+memcached+tomcat集群 session共享完整版
- tomcat使用memcached完成集群(session共享实现方式)
- NGINX+TOMCAT+MEMCACHED 架构分布式集群
- window7环境下配置nginx+tomcat+memcached集群
- Nginx+Tomcat+Memcached集群Session共享
- 使用magent搭建memcached集群
- 使用Nginx+Keepalived组建高可用负载平衡Web server集群
- Nginx+Tomcat+Memcached+kryo序列化集群Session共享
- nginx+tomcat+memcached构建session共享集群 推荐
- Nginx + Memcached + Tomcat 集群
- nginx+apache+mysql+php+memcached+squid搭建集群web环境
- tomcat+nginx +memcached集群
- Windows系统中配置Nginx+Tomcat+Memcached集群和Session共享
- tomcat使用memcached完成集群
- 使用nginx搭建高可用,高并发的wcf集群