Freemark与Spring MVC的整合
2016-12-26 14:07
555 查看
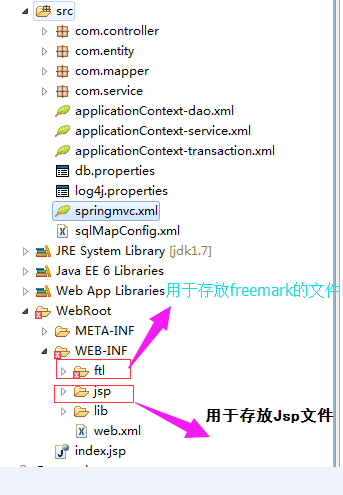
1、项目的视图存放位置
2、整合Spring MVC 的配置,web.xml的配置如下
MVC的配置文件,
springmvc.xml
3、Spring相关配置文件的加载
3.1 db.properties
3.2 applicationContext-dao.xml
3.3 applicationContext-transaction.xml
3.4 applicationContext-service.xml
4、Mybatis相关的配置文件
4.1 sqlMapConfig.xml
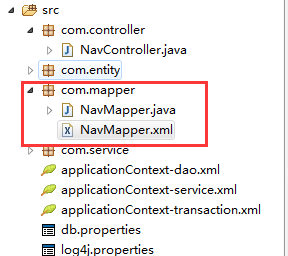
4.2 NavMapper.xml
4.3 NavMapper.java与NavMapper.xml
5、log4j相关的配置文件
7、NavController的实现
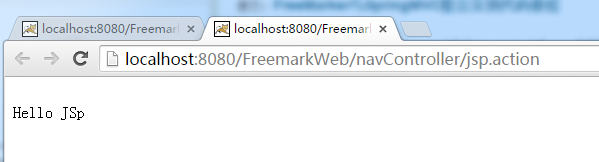
8、访问测试
9、源码下载
2、整合Spring MVC 的配置,web.xml的配置如下
<?xml version="1.0" encoding="UTF-8"?> <web-app version="3.0" xmlns="http://java.sun.com/xml/ns/javaee" xmlns:xsi="http://www.w3.org/2001/XMLSchema-instance" xsi:schemaLocation="http://java.sun.com/xml/ns/javaee http://java.sun.com/xml/ns/javaee/web-app_3_0.xsd"> <display-name></display-name> <!-- 加载spring容器 --> <context-param> <param-name>contextConfigLocation</param-name> <param-value>classpath:applicationContext-*.xml</param-value> </context-param> <listener> <listener-class>org.springframework.web.context.ContextLoaderListener</listener-class> </listener> <!-- springMVC前端控制器 --> <servlet> <servlet-name>springmvc</servlet-name> <servlet-class>org.springframework.web.servlet.DispatcherServlet</servlet-class> <init-param> <param-name>contextConfigLocation</param-name> <param-value>classpath:springmvc.xml</param-value> </init-param> </servlet> <servlet-mapping> <servlet-name>springmvc</servlet-name> <url-pattern>*.action</url-pattern> </servlet-mapping> <!--主页的配置 --> <welcome-file-list> <welcome-file>index.jsp</welcome-file> </welcome-file-list> </web-app>2、FreeMarker与SpringMVC整合,首先,在springmvc的配置文件普通视图之前,加入freemarker的视图。Spring
MVC的配置文件,
springmvc.xml
<?xml version="1.0" encoding="UTF-8"?>
<beans xmlns="http://www.springframework.org/schema/beans"
xmlns:xsi="http://www.w3.org/2001/XMLSchema-instance" xmlns:mvc="http://www.springframework.org/schema/mvc"
xmlns:context="http://www.springframework.org/schema/context"
xmlns:aop="http://www.springframework.org/schema/aop" xmlns:tx="http://www.springframework.org/schema/tx"
xsi:schemaLocation="http://www.springframework.org/schema/beans http://www.springframework.org/schema/beans/spring-beans-3.2.xsd http://www.springframework.org/schema/mvc http://www.springframework.org/schema/mvc/spring-mvc-3.2.xsd http://www.springframework.org/schema/context http://www.springframework.org/schema/context/spring-context-3.2.xsd http://www.springframework.org/schema/aop http://www.springframework.org/schema/aop/spring-aop-3.2.xsd http://www.springframework.org/schema/tx http://www.springframework.org/schema/tx/spring-tx-3.2.xsd ">

<!-- 可以扫描controller、service、... 这里让扫描controller,指定controller的包 -->
<context:component-scan base-package="com.controller"></context:component-scan>
<!--静态资源的处理 -->
<mvc:resources location="/resources/" mapping="/resources/**" />
<!--mvc的注解开发 -->
<mvc:annotation-driven></mvc:annotation-driven>

<!-- freemarker config -->
<bean id="freemarkerConfig"
class="org.springframework.web.servlet.view.freemarker.FreeMarkerConfigurer">
<property name="templateLoaderPath" value="/WEB-INF/ftl/" />
<!-- 设置FreeMarker环境属性 -->
<property name="freemarkerSettings">
<props>
<!--刷新模板的周期,单位为秒 -->
<prop key="template_update_delay">20</prop>
<!--模板的编码格式 -->
<prop key="default_encoding">UTF-8</prop>
<!--本地化设置 -->
<prop key="locale">UTF-8</prop>
<prop key="datetime_format">yyyy-MM-dd HH:mm:ss</prop>
<prop key="time_format">HH:mm:ss</prop>
<prop key="number_format">0.####</prop>
<prop key="boolean_format">true,false</prop>
<prop key="whitespace_stripping">true</prop>
<prop key="tag_syntax">auto_detect</prop>
<prop key="url_escaping_charset">UTF-8</prop>
</props>
</property>

</bean>

<!-- View resolvers can also be configured with ResourceBundles or XML files.
If you need different view resolving based on Locale, you have to use the
resource bundle resolver. -->
<bean id="viewResolver"
class="org.springframework.web.servlet.view.freemarker.FreeMarkerViewResolver">
<property name="cache" value="true" />
<property name="prefix" value="" />
<property name="suffix" value=".ftl" />
<property name="contentType" value="text/html; charset=UTF-8"></property>
<property name="viewClass">
<value>org.springframework.web.servlet.view.freemarker.FreeMarkerView
</value>
</property>
</bean>

<!-- 视图解析器 解析jsp解析,默认使用jstl标签,classpath下的得有jstl的包 -->
<bean
class="org.springframework.web.servlet.view.InternalResourceViewResolver">
<!-- 配置jsp路径的前缀 -->
<property name="prefix" value="/WEB-INF/jsp/" />
<!-- 配置jsp路径的后缀 -->
<property name="suffix" value=".jsp" />
</bean>

</beans>
3、Spring相关配置文件的加载
3.1 db.properties
jdbc.driver=com.mysql.jdbc.Driver
jdbc.url=jdbc:mysql://localhost:3306/student
jdbc.username=root
jdbc.password=1234
3.2 applicationContext-dao.xml
<beans xmlns="http://www.springframework.org/schema/beans"
xmlns:xsi="http://www.w3.org/2001/XMLSchema-instance" xmlns:mvc="http://www.springframework.org/schema/mvc"
xmlns:context="http://www.springframework.org/schema/context"
xmlns:aop="http://www.springframework.org/schema/aop" xmlns:tx="http://www.springframework.org/schema/tx"
xsi:schemaLocation="http://www.springframework.org/schema/beans http://www.springframework.org/schema/beans/spring-beans-3.2.xsd http://www.springframework.org/schema/mvc http://www.springframework.org/schema/mvc/spring-mvc-3.2.xsd http://www.springframework.org/schema/context http://www.springframework.org/schema/context/spring-context-3.2.xsd http://www.springframework.org/schema/aop http://www.springframework.org/schema/aop/spring-aop-3.2.xsd http://www.springframework.org/schema/tx http://www.springframework.org/schema/tx/spring-tx-3.2.xsd ">

<!-- 加载db.properties文件中的内容,db.properties文件中key命名要有一定的特殊规则 -->
<context:property-placeholder location="classpath:db.properties" />

<!-- 配置数据源,dbcp -->
<bean id="dataSource" class="org.apache.commons.dbcp.BasicDataSource"
destroy-method="close">
<property name="driverClassName" value="${jdbc.driver}" />
<property name="url" value="${jdbc.url}" />
<property name="username" value="${jdbc.username}" />
<property name="password" value="${jdbc.password}" />
<property name="maxActive" value="30" />
<property name="maxIdle" value="5" />
</bean>

<!-- sqlSessionFactory -->
<bean id="sqlSessionFactory" class="org.mybatis.spring.SqlSessionFactoryBean">
<!-- 数据库连接池 -->
<property name="dataSource" ref="dataSource" />
<!-- 加载mybatis的全局配置文件 -->
<property name="configLocation" value="classpath:sqlMapConfig.xml" />
</bean>

<!-- mapper扫描器 -->
<bean class="org.mybatis.spring.mapper.MapperScannerConfigurer">
<!-- 扫描包路径,如果需要扫描多个包,中间使用半角逗号隔开 -->
<property name="basePackage" value="com.mapper"></property>
<property name="sqlSessionFactoryBeanName" value="sqlSessionFactory"></property>
</bean>

</beans>
3.3 applicationContext-transaction.xml
<beans xmlns="http://www.springframework.org/schema/beans"
xmlns:xsi="http://www.w3.org/2001/XMLSchema-instance" xmlns:mvc="http://www.springframework.org/schema/mvc"
xmlns:context="http://www.springframework.org/schema/context"
xmlns:aop="http://www.springframework.org/schema/aop" xmlns:tx="http://www.springframework.org/schema/tx"
xsi:schemaLocation="http://www.springframework.org/schema/beans http://www.springframework.org/schema/beans/spring-beans-3.2.xsd http://www.springframework.org/schema/mvc http://www.springframework.org/schema/mvc/spring-mvc-3.2.xsd http://www.springframework.org/schema/context http://www.springframework.org/schema/context/spring-context-3.2.xsd http://www.springframework.org/schema/aop http://www.springframework.org/schema/aop/spring-aop-3.2.xsd http://www.springframework.org/schema/tx http://www.springframework.org/schema/tx/spring-tx-3.2.xsd ">

<!-- 事务管理器 对mybatis操作数据库进行事务控制,spring使用jdbc的事务控制类 -->
<bean id="transactionManager"
class="org.springframework.jdbc.datasource.DataSourceTransactionManager">
<!-- 数据源 dataSource在applicationContext-dao.xml中已经配置 -->
<property name="dataSource" ref="dataSource" />
</bean>
<!-- 通知 -->
<tx:advice id="txAdvice" transaction-manager="transactionManager">
<tx:attributes>
<!-- 传播行为 -->
<tx:method name="save*" propagation="REQUIRED" />
<tx:method name="delete*" propagation="REQUIRED" />
<tx:method name="insert*" propagation="REQUIRED" />
<tx:method name="update*" propagation="REQUIRED" />
<tx:method name="find*" propagation="SUPPORTS" read-only="true" />
<tx:method name="get*" propagation="SUPPORTS" read-only="true" />
<tx:method name="select*" propagation="SUPPORTS" read-only="true" />
</tx:attributes>
</tx:advice>

<!-- aop -->
<aop:config>
<aop:advisor advice-ref="txAdvice" pointcut="execution(* com.service.*.*(..))" />
</aop:config>
</beans>
3.4 applicationContext-service.xml
<beans xmlns="http://www.springframework.org/schema/beans"
xmlns:xsi="http://www.w3.org/2001/XMLSchema-instance" xmlns:mvc="http://www.springframework.org/schema/mvc"
xmlns:context="http://www.springframework.org/schema/context"
xmlns:aop="http://www.springframework.org/schema/aop" xmlns:tx="http://www.springframework.org/schema/tx"
xsi:schemaLocation="http://www.springframework.org/schema/beans http://www.springframework.org/schema/beans/spring-beans-3.2.xsd http://www.springframework.org/schema/mvc http://www.springframework.org/schema/mvc/spring-mvc-3.2.xsd http://www.springframework.org/schema/context http://www.springframework.org/schema/context/spring-context-3.2.xsd http://www.springframework.org/schema/aop http://www.springframework.org/schema/aop/spring-aop-3.2.xsd http://www.springframework.org/schema/tx http://www.springframework.org/schema/tx/spring-tx-3.2.xsd ">
<context:spring-configured />
<!--扫描Service的package -->
<context:component-scan base-package="com.service" />

</beans>
4、Mybatis相关的配置文件
4.1 sqlMapConfig.xml
<?xml version="1.0" encoding="UTF-8" ?>
<!DOCTYPE configuration
PUBLIC "-//mybatis.org//DTD Config 3.0//EN"
"http://mybatis.org/dtd/mybatis-3-config.dtd">
<configuration>

<!-- 全局setting配置 ,根据需要再添加 -->

<!-- 配置别名 -->
<typeAliases>
<!-- 批量扫描别名 -->
<package name="com.entity" />
</typeAliases>

<!-- 配置mapper
由于使用spring和mybatis的整合包进行整合,这了无需配置
但必须遵循:mapper.java和mapper.xml文件同名且在同一目录 -->
<!--<mappers></mappers> -->
</configu
4.2 NavMapper.xml
<?xml version="1.0" encoding="UTF-8" ?>
<!DOCTYPE mapper
PUBLIC "-//mybatis.org//DTD Mapper 3.0//EN"
"http://mybatis.org/dtd/mybatis-3-mapper.dtd">

<!-- namespace命名空间,作用就是对sql进行分类化管理,理解sql隔离 注意:使用mapper代理方法开发,namespace有特殊重要的作用 -->
<mapper namespace="com.mapper.NavMapper">

<select id="findNavById" parameterType="int" resultType="nav">
SELECT
*
FROM nav WHERE id=#{id}
</select>

<select id="findAll" resultType="nav">
SELECT
* FROM
nav
</select>

<insert id="add" parameterType="nav">
insert into nav(name)
values(#{name})
</insert>

<update id="update" parameterType="nav">
update nav set name=#{name}
where id=#{id}
</update>
<delete id="delete" parameterType="int">
delete from nav where id=#{id}
</delete>
</mapper>
4.3 NavMapper.java与NavMapper.xml
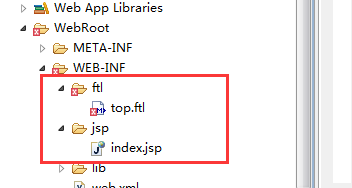
5、log4j相关的配置文件
# Global logging configuration
log4j.rootLogger=DEBUG, stdout
# Console output...
log4j.appender.stdout=org.apache.log4j.ConsoleAppender
log4j.appender.stdout.layout=org.apache.log4j.PatternLayout
log4j.appender.stdout.layout.ConversionPattern=%5p [%t] - %m%n
6、关于页面的放置
7、NavController的实现
import java.util.List;
import java.util.Map;
import javax.annotation.Resource;
import org.springframework.stereotype.Controller;
import org.springframework.web.bind.annotation.RequestMapping;
import com.entity.Nav;
import com.service.NavService;
@Controller
@RequestMapping("/navController")
public class NavController {
@Resource
private NavService navService;
public void setNavService(NavService navService) {
this.navService = navService;
}
@RequestMapping("/jsp")
public String toJspPage() {
return "index";
}
@RequestMapping("/freemark")
public String toFreemarkPage(Map<String, Object> model) {
List<Nav> navs = navService.findAll();
model.put("navs", navs);
return "top";
}
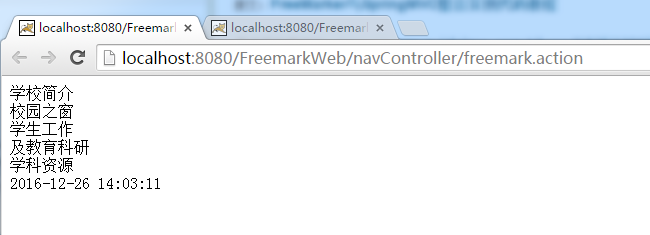
}8、访问测试
9、源码下载

相关文章推荐
- QQ第三方登录 SpringMVC + Spring data JPA + Freemark
- java 导出word几种方法总结
- Java使用freemark生成word
- freemark如何判空容错
- freemark常见用法
- freemark 条件判断
- Freemark的使用总结
- freemark 模板解析
- javaWeb开发过程中小细节总结(1)
- javaWeb开发过程中小细节总结(2)
- freemark和bootstrap中页面布局,页签,左右菜单
- fremark导出word,带图片的
- freemark ftl指令
- 【SpringBoot教程四】:SpringBoot+FreeMark模板引擎
- freemark 应用以及优势
- SpringMVC配置JSON、JSP、FreeMark多视图解析器配置
- freemarker 集合类型
- Java html转word,用freemark生成复杂word格式
- freeMark标签的使用和批量删除
- freeMark学习案例