Spring Boot之配置文件
2016-12-19 00:00
274 查看
Spring Boot默认的配置文件为application.properties,放在src/main/resources目录下或者类路径的/config目录下,作为Spring Boot的全局配置文件,对一些默认的配置进行修改。
接下来使用例子展示Spring Boot配置文件的用法:
首先在src/main/resources下新建application.properties文件,内容如下
创建controller类
创建入口类
执行:

那么如何使用其他的配置文件呢?
新建author.properties,内容如下:
修改DemoController为:
运行,如图
上例中属性都是通过@Value逐个注入的,但是如果注入的属性很多就会很麻烦,接下来使用@ConfigurationProperties将配置文件属性和Bean的属性关联
创建Author类:
修改DemoController类:
运行App类,结果如下图:
更多内容请访问微儿博客
接下来使用例子展示Spring Boot配置文件的用法:
首先在src/main/resources下新建application.properties文件,内容如下
author.name=微儿博客
author.sex=男
创建controller类
ackage com.springboot.properties;

import org.springframework.beans.factory.annotation.Value;
import org.springframework.web.bind.annotation.RequestMapping;
import org.springframework.web.bind.annotation.RestController;
//不需要指定配置文件的位置,因为使用的默认的配置文件
@RestController
public class DemoController {

@Value("${author.name}")//注入配置文件中的值
private String name;
@Value("${author.sex}")
private String sex;

@RequestMapping("/")
public String index(){
return name + ":" + sex;
}
}
创建入口类
package com.springboot.properties;

import org.springframework.boot.SpringApplication;
import org.springframework.boot.autoconfigure.SpringBootApplication;

@SpringBootApplication
public class App {

public static void main(String[] args) {
SpringApplication.run(App.class, args);
}
}
执行:
那么如何使用其他的配置文件呢?
新建author.properties,内容如下:
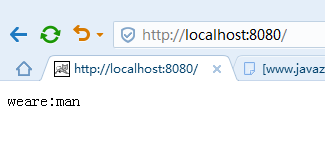
person.name=weare
person.sex=man
修改DemoController为:
@RestController
@PropertySource("classpath:author.properties")//指定配置文件
public class DemoController {

@Value("${person.name}")
private String name;
@Value("${person.sex}")
private String sex;

@RequestMapping("/")
public String index(){
return name + ":" + sex;
}
}
运行,如图
上例中属性都是通过@Value逐个注入的,但是如果注入的属性很多就会很麻烦,接下来使用@ConfigurationProperties将配置文件属性和Bean的属性关联
创建Author类:
package com.springboot.properties;

import org.springframework.boot.context.properties.ConfigurationProperties;
import org.springframework.stereotype.Component;

@Component//声明这是一个Bean
@ConfigurationProperties(prefix="author")//指定配置文件中的前缀
public class Author {

private String name;

private String sex;

public String getName() {
return name;
}

public void setName(String name) {
this.name = name;
}

public String getSex() {
return sex;
}

public void setSex(String sex) {
this.sex = sex;
}
}
修改DemoController类:
@RestController
@ConfigurationProperties
public class DemoController {

@Autowired
private Author author;

@RequestMapping("/")
public String index(){
return author.getName() + ":" + author.getSex();
}
}
运行App类,结果如下图:
更多内容请访问微儿博客

相关文章推荐
- 微服务框架Spring Cloud介绍 Part2: Spring Cloud与微服务
- java对世界各个时区(TimeZone)的通用转换处理方法(转载)
- java-注解annotation
- java-模拟tomcat服务器
- java-用HttpURLConnection发送Http请求.
- java-WEB中的监听器Lisener
- Android IPC进程间通讯机制
- Android Native 绘图方法
- Android java 与 javascript互访(相互调用)的方法例子
- 一键搭建WordPress博客环境(OneStep to WordPress)
- Debian 7.x 安装Oracle JAVA
- springmvc实现url路由功能
- spring boot 配置 druid/** * 配置druid * Created by adam on 4/11/16. */ @Configuration public class D
- springboot打包成war部署