S4.1_Struts2_ActionAdvance 在action动作类里定义增删改方法,在struts.xml中的action method属性如何设置?
2016-12-12 12:40
435 查看
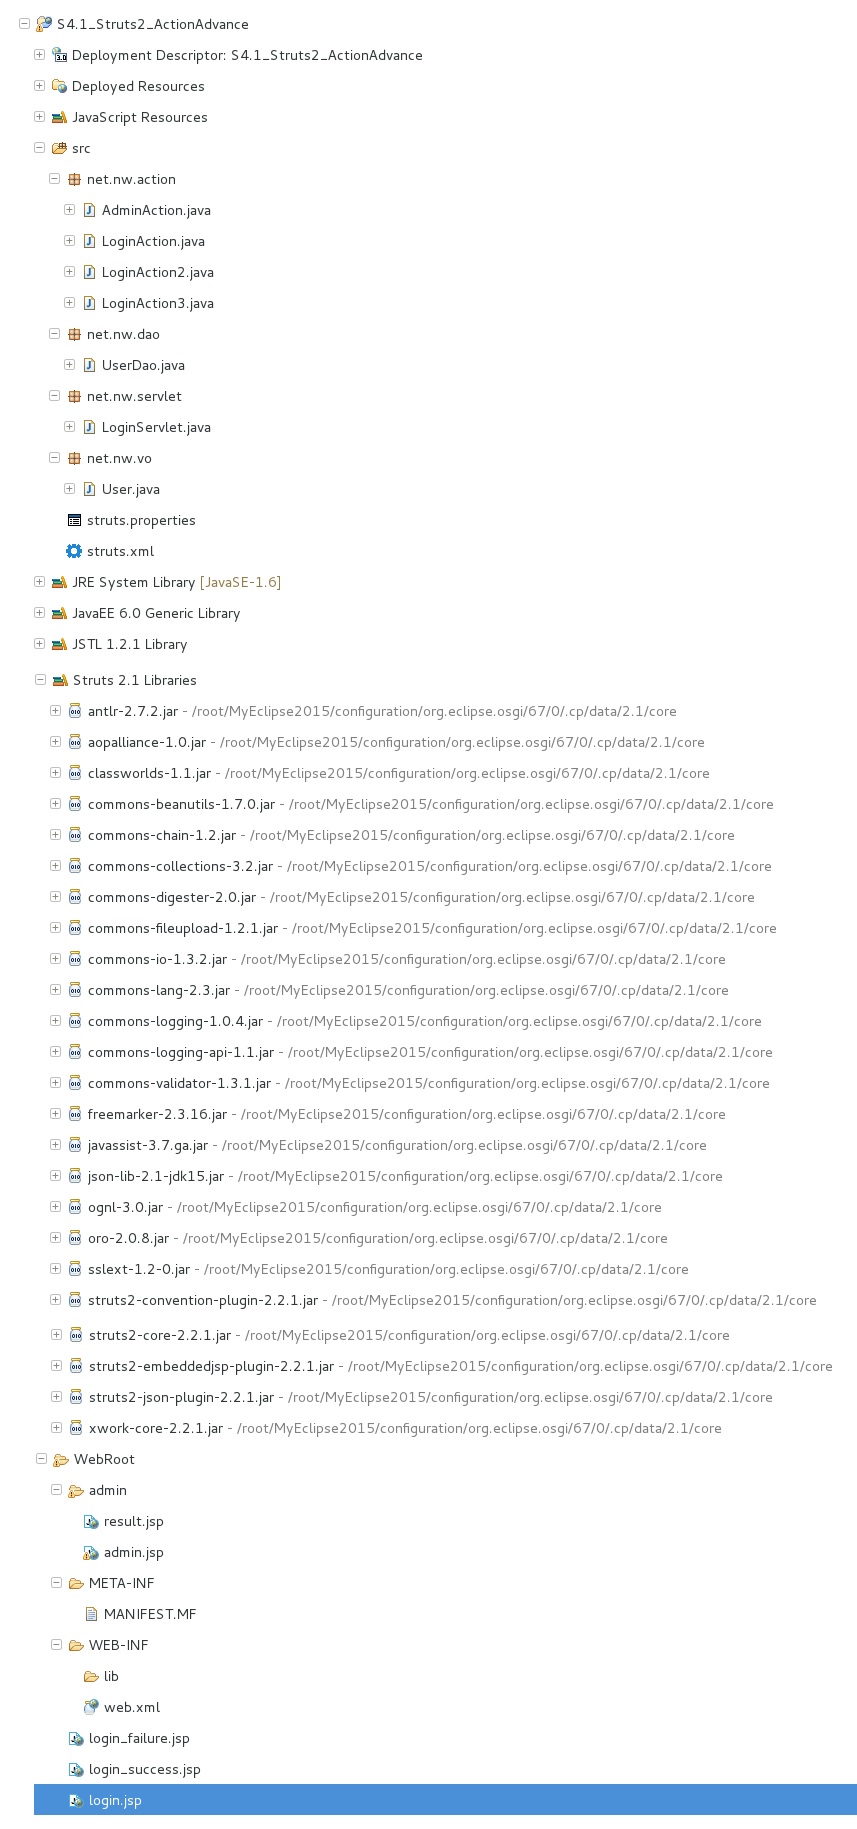
我们接下来将要创建的项目目录结构如下:
由项目S3.1_Struts2_BasicConfiguration (如何下载它:点击打开链接)复制粘贴生成一个新项目 ------S4.1_Struts2_ActionAdvance
详细操作截图参考S1.2_Struts2_ByManual 手工编写第一个Struts2范例篇,位置在项目目录结构图下面。
第1步:在src/struts.properties这个文件中,找到struts.action.extension=do,将其删除 ------ 目的是为了使用默认的action扩展。
第2步:在WebRoot/login.jsp文件中 找到login.do 将其改成login.action,主意红色字体标识的地方,调整后的login.jsp页面代码如下:
<%@ page language="java" import="java.util.*" %>
<%@ page contentType="text/html; charset=UTF-8" %>
<%
String path = request.getContextPath();
String basePath = request.getScheme()+"://"+request.getServerName()+":"+request.getServerPort()+path+"/";
%>
<!DOCTYPE HTML PUBLIC "-//W3C//DTD HTML 4.01 Transitional//EN">
<html>
<head>
<base href="<%=basePath%>">
<title>系统登录</title>
<meta http-equiv="pragma" content="no-cache">
<meta http-equiv="cache-control" content="no-cache">
<meta http-equiv="expires" content="0">
<meta http-equiv="keywords" content="keyword1,keyword2,keyword3">
<meta http-equiv="description" content="This is my page">
<!--
<link rel="stylesheet" type="text/css" href="styles.css">
-->
</head>
<body>
<center>
<h1>系统登录</h1>
<hr>
<form name="loginForm" action="<%=path%>/user/login.action" method="post" >
用户名称:<input type="text" name="username"/><br>
用户密码:<input type="password" name="password"/><br>
<input type="submit" value="登录"/><br>
<br>
<br><a href="<%=path%>/admin/login.action">管理员登录</a>
</form>
</center>
</body>
</html>
第3步:在WebRoot/login_failure.jsp文件中 找到exit.do 将其改成exit.action,主意红色字体标识的地方,调整后的login_failure.jsp页面代码如下:
<%@ page language="java" import="java.util.*" %>
<%@ page contentType="text/html; charset=UTF-8" %>
<%@ taglib uri="/struts-tags" prefix="s" %>
<%
String path = request.getContextPath();
String basePath = request.getScheme()+"://"+request.getServerName()+":"+request.getServerPort()+path+"/";
%>
<!DOCTYPE HTML PUBLIC "-//W3C//DTD HTML 4.01 Transitional//EN">
<html>
<head>
<base href="<%=basePath%>">
<title>登录失败</title>
<meta http-equiv="pragma" content="no-cache">
<meta http-equiv="cache-control" content="no-cache">
<meta http-equiv="expires" content="0">
<meta http-equiv="keywords" content="keyword1,keyword2,keyword3">
<meta http-equiv="description" content="This is my page">
<!--
<link rel="stylesheet" type="text/css" href="styles.css">
-->
</head>
<body>
<center>
<h1>登录失败</h1>
<hr>
<s:fielderror value="login_error" theme="simple"></s:fielderror>
<a href="<%=path%>/exit.action">返回</a>
</center>
</body>
</html>
第4步:在WebRoot/admin/admin.jsp文件中,插入红色字体标识的代码:
<%@ page language="java" import="java.util.*" %>
<%@ page contentType="text/html; charset=UTF-8" %>
<%@ taglib uri="/struts-tags" prefix="s" %>
<%
String path = request.getContextPath();
String basePath = request.getScheme()+"://"+request.getServerName()+":"+request.getServerPort()+path+"/";
%>
<!DOCTYPE HTML PUBLIC "-//W3C//DTD HTML 4.01 Transitional//EN">
<html>
<head>
<base href="<%=basePath%>">
<title>管理员界面</title>
<meta http-equiv="pragma" content="no-cache">
<meta http-equiv="cache-control" content="no-cache">
<meta http-equiv="expires" content="0">
<meta http-equiv="keywords" content="keyword1,keyword2,keyword3">
<meta http-equiv="description" content="This is my page">
<!--
<link rel="stylesheet" type="text/css" href="styles.css">
-->
</head>
<body>
<center>
<h1>管理员界面</h1>
<hr>
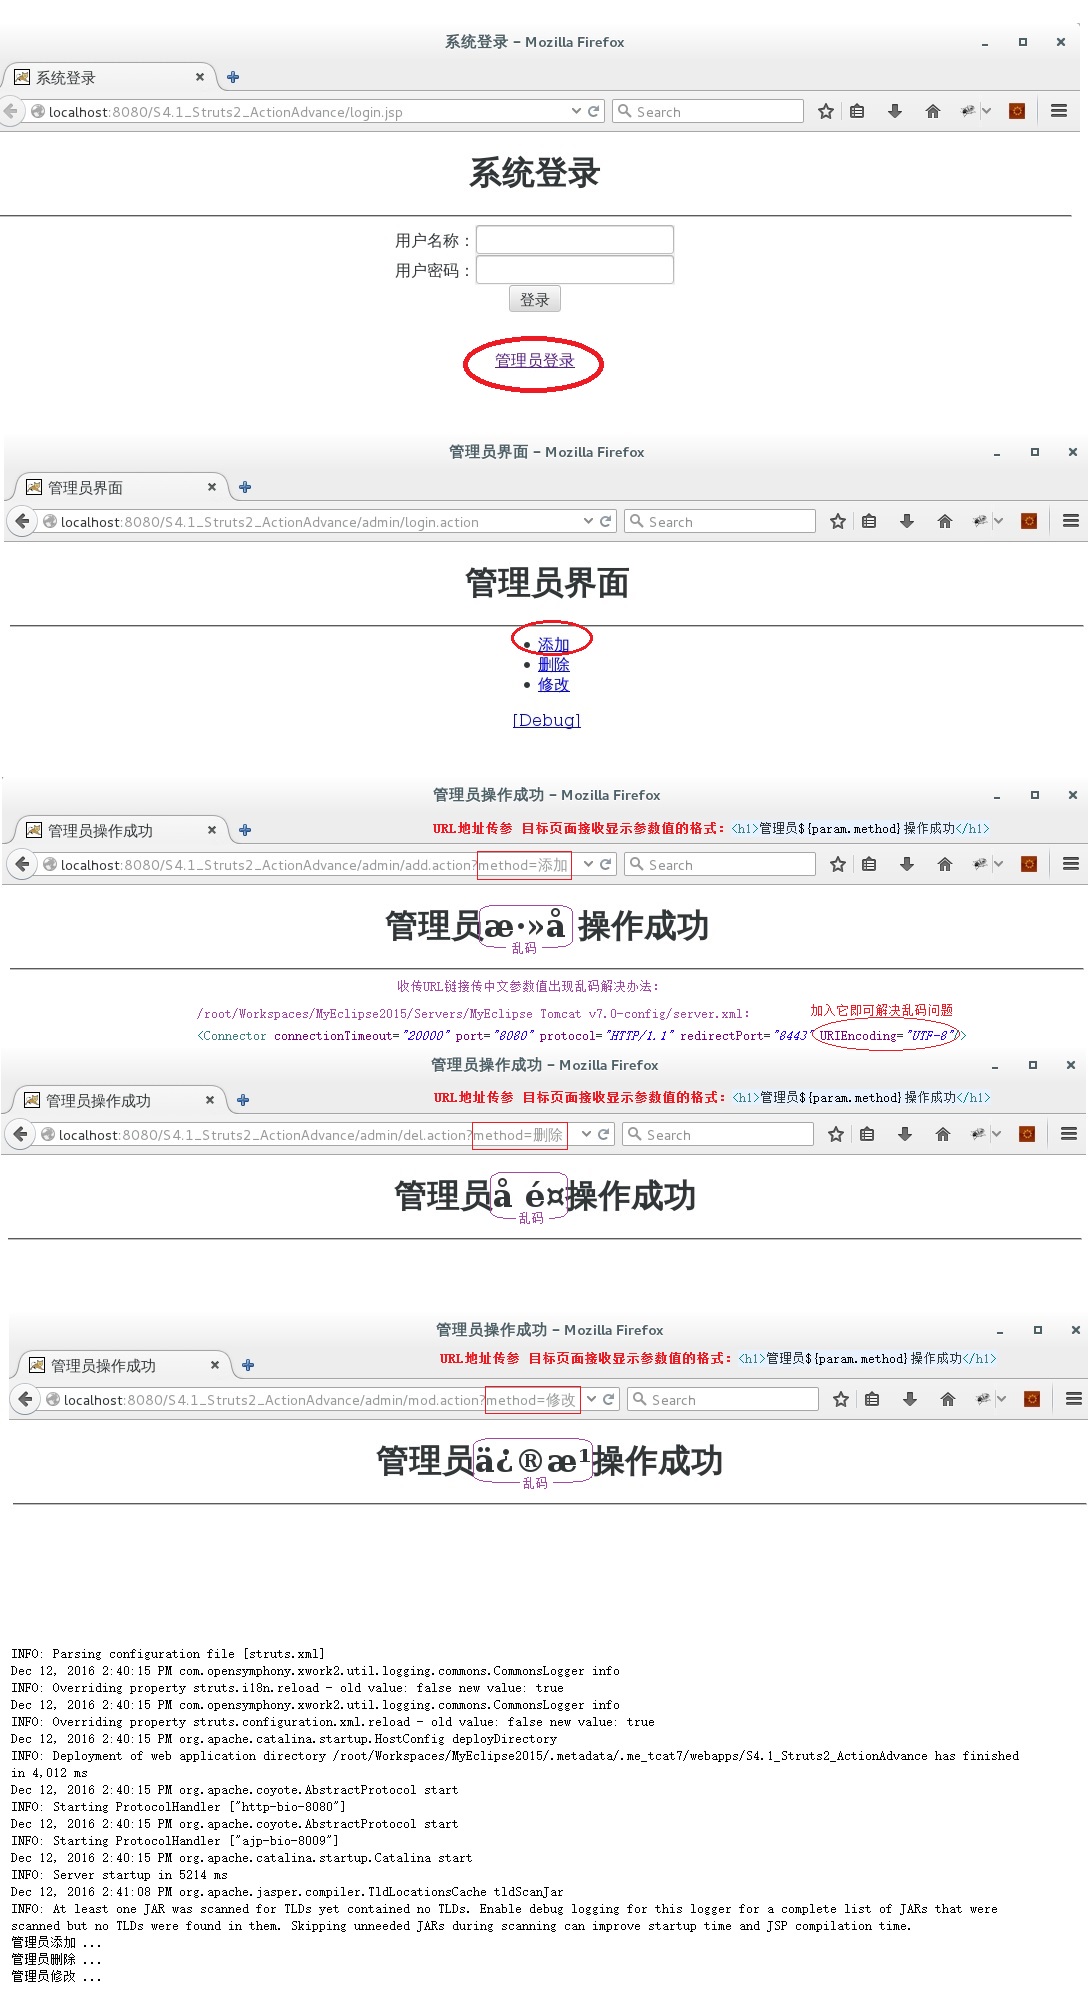
<li><a href="<%=path%>/admin/add.action?method=添加">添加</a></li>
<li><a href="<%=path%>/admin/del.action?method=删除">删除</a></li>
<li><a href="<%=path%>/admin/mod.action?method=修改">修改</a></li>
<s:debug></s:debug>
</center>
</body>
</html>
第5步:创建WebRoot/admin/result.jsp页面文件,其代码如下:
<%@ page language="java" import="java.util.*" %>
<%@ page contentType="text/html; charset=UTF-8" %>
<%@ taglib uri="/struts-tags" prefix="s" %>
<%
String path = request.getContextPath();
String basePath = request.getScheme()+"://"+request.getServerName()+":"+request.getServerPort()+path+"/";
%>
<!DOCTYPE HTML PUBLIC "-//W3C//DTD HTML 4.01 Transitional//EN">
<html>
<head>
<base href="<%=basePath%>">
<title>管理员操作成功</title>
<meta http-equiv="pragma" content="no-cache">
<meta http-equiv="cache-control" content="no-cache">
<meta http-equiv="expires" content="0">
<meta http-equiv="keywords" content="keyword1,keyword2,keyword3">
<meta http-equiv="description" content="This is my page">
<!--
<link rel="stylesheet" type="text/css" href="styles.css">
-->
</head>
<body>
<center>
<h1>管理员${param.method}操作成功</h1>
<hr>
</center>
</body>
</html>
第6步:在net.nw.action/AdminAction.java动作类里面实现add,delete,modify方法的代码,其简单演示实现代码已用红色字体标识如下:
package net.nw.action;
import com.opensymphony.xwork2.ActionSupport;
public class AdminAction extends ActionSupport {
/**
* 对象序列化需要此serialVersionUID
*/
private static final long serialVersionUID = 1L;
public String add(){
System.out.println("管理员添加 ...");
return SUCCESS;
}
public String delete(){
System.out.println("管理员删除 ...");
return SUCCESS;
}
public String modify(){
System.out.println("管理员修改 ...");
return SUCCESS;
}
}
第7步:在src/struts.xml文件中找到子包admin,在该子包内添加红色字体标识的代码:
<?xml version="1.0" encoding="UTF-8" ?>
<!DOCTYPE struts PUBLIC
"-//Apache Software Foundation//DTD Struts Configuration 2.3//EN"
"http://struts.apache.org/dtds/struts-2.3.dtd">
<struts>
<constant name="struts.devMode" value="true" ></constant>
<constant name="struts.i18n.encoding" value="utf-8" ></constant>
<!-- 父包default -->
<package name="default" namespace="" extends="struts-default">
<global-results>
<result name="login_success">/login_success.jsp</result>
<result name="login_failure">/login_failure.jsp</result>
</global-results>
<action name="exit">
<result>/login.jsp</result>
</action>
</package>
<!-- 子包user继承于父包default -->
<package name="user" namespace="/user" extends="default">
<action name="login" class="net.nw.action.LoginAction3">
</action>
</package>
<!-- 子包admin继承于父包default -->
<package name="admin" namespace="/admin" extends="default">
<action name="login" class="net.nw.action.AdminAction">
<result>/admin/admin.jsp</result>
</action>
<action name="add" class="net.nw.action.AdminAction" method="add">
<result>/admin/result.jsp</result>
</action>
<action name="del" class="net.nw.action.AdminAction" method="delete">
<result>/admin/result.jsp</result>
</action>
<action name="mod" class="net.nw.action.AdminAction" method="modify">
<result>/admin/result.jsp</result>
</action>
</package>
</struts>
上面src/struts.xml配置文件里红色标识部分里面的多个独立结果元素值都一样(/admin/result.jsp),可以抽取出来放在global-results标签里,
这样更简化,调整后的struts.xml文件代码如下:
<?xml version="1.0" encoding="UTF-8" ?>
<!DOCTYPE struts PUBLIC
"-//Apache Software Foundation//DTD Struts Configuration 2.3//EN"
"http://struts.apache.org/dtds/struts-2.3.dtd">
<struts>
<constant name="struts.devMode" value="true" ></constant>
<constant name="struts.i18n.encoding" value="utf-8" ></constant>
<!-- 父包default -->
<package name="default" namespace="" extends="struts-default">
<global-results>
<result name="login_success">/login_success.jsp</result>
<result name="login_failure">/login_failure.jsp</result>
</global-results>
<action name="exit">
<result>/login.jsp</result>
</action>
</package>
<!-- 子包user继承于父包default -->
<package name="user" namespace="/user" extends="default">
<action name="login" class="net.nw.action.LoginAction3">
</action>
</package>
<!-- 子包admin继承于父包default -->
<package name="admin" namespace="/admin" extends="default">
<global-results>
<result>/admin/result.jsp</result>
</global-results>
<action name="login" class="net.nw.action.AdminAction">
<result>/admin/admin.jsp</result>
</action>
<action name="add" class="net.nw.action.AdminAction" method="add">
</action>
<action name="del" class="net.nw.action.AdminAction" method="delete">
</action>
<action name="mod" class="net.nw.action.AdminAction" method="modify">
</action>
</package>
</struts>
第8步:发布项目运行程序
此步操作的详细过程参考S1.1_Struts2_Model2 手动创建一个简单的servlet项目,未使用Struts技术 点击打开链接 位置在最下面------发布项目运行程序
若成功发布运行本项目代码,启动后您会看到欢迎页地址:http://localhost:8080/S4.1_Struts2_ActionAdvance/login.jsp
运行效果截图如下:
本项目下载地址:点击打开链接
由项目S3.1_Struts2_BasicConfiguration (如何下载它:点击打开链接)复制粘贴生成一个新项目 ------S4.1_Struts2_ActionAdvance
详细操作截图参考S1.2_Struts2_ByManual 手工编写第一个Struts2范例篇,位置在项目目录结构图下面。
第1步:在src/struts.properties这个文件中,找到struts.action.extension=do,将其删除 ------ 目的是为了使用默认的action扩展。
第2步:在WebRoot/login.jsp文件中 找到login.do 将其改成login.action,主意红色字体标识的地方,调整后的login.jsp页面代码如下:
<%@ page language="java" import="java.util.*" %>
<%@ page contentType="text/html; charset=UTF-8" %>
<%
String path = request.getContextPath();
String basePath = request.getScheme()+"://"+request.getServerName()+":"+request.getServerPort()+path+"/";
%>
<!DOCTYPE HTML PUBLIC "-//W3C//DTD HTML 4.01 Transitional//EN">
<html>
<head>
<base href="<%=basePath%>">
<title>系统登录</title>
<meta http-equiv="pragma" content="no-cache">
<meta http-equiv="cache-control" content="no-cache">
<meta http-equiv="expires" content="0">
<meta http-equiv="keywords" content="keyword1,keyword2,keyword3">
<meta http-equiv="description" content="This is my page">
<!--
<link rel="stylesheet" type="text/css" href="styles.css">
-->
</head>
<body>
<center>
<h1>系统登录</h1>
<hr>
<form name="loginForm" action="<%=path%>/user/login.action" method="post" >
用户名称:<input type="text" name="username"/><br>
用户密码:<input type="password" name="password"/><br>
<input type="submit" value="登录"/><br>
<br>
<br><a href="<%=path%>/admin/login.action">管理员登录</a>
</form>
</center>
</body>
</html>
第3步:在WebRoot/login_failure.jsp文件中 找到exit.do 将其改成exit.action,主意红色字体标识的地方,调整后的login_failure.jsp页面代码如下:
<%@ page language="java" import="java.util.*" %>
<%@ page contentType="text/html; charset=UTF-8" %>
<%@ taglib uri="/struts-tags" prefix="s" %>
<%
String path = request.getContextPath();
String basePath = request.getScheme()+"://"+request.getServerName()+":"+request.getServerPort()+path+"/";
%>
<!DOCTYPE HTML PUBLIC "-//W3C//DTD HTML 4.01 Transitional//EN">
<html>
<head>
<base href="<%=basePath%>">
<title>登录失败</title>
<meta http-equiv="pragma" content="no-cache">
<meta http-equiv="cache-control" content="no-cache">
<meta http-equiv="expires" content="0">
<meta http-equiv="keywords" content="keyword1,keyword2,keyword3">
<meta http-equiv="description" content="This is my page">
<!--
<link rel="stylesheet" type="text/css" href="styles.css">
-->
</head>
<body>
<center>
<h1>登录失败</h1>
<hr>
<s:fielderror value="login_error" theme="simple"></s:fielderror>
<a href="<%=path%>/exit.action">返回</a>
</center>
</body>
</html>
第4步:在WebRoot/admin/admin.jsp文件中,插入红色字体标识的代码:
<%@ page language="java" import="java.util.*" %>
<%@ page contentType="text/html; charset=UTF-8" %>
<%@ taglib uri="/struts-tags" prefix="s" %>
<%
String path = request.getContextPath();
String basePath = request.getScheme()+"://"+request.getServerName()+":"+request.getServerPort()+path+"/";
%>
<!DOCTYPE HTML PUBLIC "-//W3C//DTD HTML 4.01 Transitional//EN">
<html>
<head>
<base href="<%=basePath%>">
<title>管理员界面</title>
<meta http-equiv="pragma" content="no-cache">
<meta http-equiv="cache-control" content="no-cache">
<meta http-equiv="expires" content="0">
<meta http-equiv="keywords" content="keyword1,keyword2,keyword3">
<meta http-equiv="description" content="This is my page">
<!--
<link rel="stylesheet" type="text/css" href="styles.css">
-->
</head>
<body>
<center>
<h1>管理员界面</h1>
<hr>
<li><a href="<%=path%>/admin/add.action?method=添加">添加</a></li>
<li><a href="<%=path%>/admin/del.action?method=删除">删除</a></li>
<li><a href="<%=path%>/admin/mod.action?method=修改">修改</a></li>
<s:debug></s:debug>
</center>
</body>
</html>
第5步:创建WebRoot/admin/result.jsp页面文件,其代码如下:
<%@ page language="java" import="java.util.*" %>
<%@ page contentType="text/html; charset=UTF-8" %>
<%@ taglib uri="/struts-tags" prefix="s" %>
<%
String path = request.getContextPath();
String basePath = request.getScheme()+"://"+request.getServerName()+":"+request.getServerPort()+path+"/";
%>
<!DOCTYPE HTML PUBLIC "-//W3C//DTD HTML 4.01 Transitional//EN">
<html>
<head>
<base href="<%=basePath%>">
<title>管理员操作成功</title>
<meta http-equiv="pragma" content="no-cache">
<meta http-equiv="cache-control" content="no-cache">
<meta http-equiv="expires" content="0">
<meta http-equiv="keywords" content="keyword1,keyword2,keyword3">
<meta http-equiv="description" content="This is my page">
<!--
<link rel="stylesheet" type="text/css" href="styles.css">
-->
</head>
<body>
<center>
<h1>管理员${param.method}操作成功</h1>
<hr>
</center>
</body>
</html>
第6步:在net.nw.action/AdminAction.java动作类里面实现add,delete,modify方法的代码,其简单演示实现代码已用红色字体标识如下:
package net.nw.action;
import com.opensymphony.xwork2.ActionSupport;
public class AdminAction extends ActionSupport {
/**
* 对象序列化需要此serialVersionUID
*/
private static final long serialVersionUID = 1L;
public String add(){
System.out.println("管理员添加 ...");
return SUCCESS;
}
public String delete(){
System.out.println("管理员删除 ...");
return SUCCESS;
}
public String modify(){
System.out.println("管理员修改 ...");
return SUCCESS;
}
}
第7步:在src/struts.xml文件中找到子包admin,在该子包内添加红色字体标识的代码:
<?xml version="1.0" encoding="UTF-8" ?>
<!DOCTYPE struts PUBLIC
"-//Apache Software Foundation//DTD Struts Configuration 2.3//EN"
"http://struts.apache.org/dtds/struts-2.3.dtd">
<struts>
<constant name="struts.devMode" value="true" ></constant>
<constant name="struts.i18n.encoding" value="utf-8" ></constant>
<!-- 父包default -->
<package name="default" namespace="" extends="struts-default">
<global-results>
<result name="login_success">/login_success.jsp</result>
<result name="login_failure">/login_failure.jsp</result>
</global-results>
<action name="exit">
<result>/login.jsp</result>
</action>
</package>
<!-- 子包user继承于父包default -->
<package name="user" namespace="/user" extends="default">
<action name="login" class="net.nw.action.LoginAction3">
</action>
</package>
<!-- 子包admin继承于父包default -->
<package name="admin" namespace="/admin" extends="default">
<action name="login" class="net.nw.action.AdminAction">
<result>/admin/admin.jsp</result>
</action>
<action name="add" class="net.nw.action.AdminAction" method="add">
<result>/admin/result.jsp</result>
</action>
<action name="del" class="net.nw.action.AdminAction" method="delete">
<result>/admin/result.jsp</result>
</action>
<action name="mod" class="net.nw.action.AdminAction" method="modify">
<result>/admin/result.jsp</result>
</action>
</package>
</struts>
上面src/struts.xml配置文件里红色标识部分里面的多个独立结果元素值都一样(/admin/result.jsp),可以抽取出来放在global-results标签里,
这样更简化,调整后的struts.xml文件代码如下:
<?xml version="1.0" encoding="UTF-8" ?>
<!DOCTYPE struts PUBLIC
"-//Apache Software Foundation//DTD Struts Configuration 2.3//EN"
"http://struts.apache.org/dtds/struts-2.3.dtd">
<struts>
<constant name="struts.devMode" value="true" ></constant>
<constant name="struts.i18n.encoding" value="utf-8" ></constant>
<!-- 父包default -->
<package name="default" namespace="" extends="struts-default">
<global-results>
<result name="login_success">/login_success.jsp</result>
<result name="login_failure">/login_failure.jsp</result>
</global-results>
<action name="exit">
<result>/login.jsp</result>
</action>
</package>
<!-- 子包user继承于父包default -->
<package name="user" namespace="/user" extends="default">
<action name="login" class="net.nw.action.LoginAction3">
</action>
</package>
<!-- 子包admin继承于父包default -->
<package name="admin" namespace="/admin" extends="default">
<global-results>
<result>/admin/result.jsp</result>
</global-results>
<action name="login" class="net.nw.action.AdminAction">
<result>/admin/admin.jsp</result>
</action>
<action name="add" class="net.nw.action.AdminAction" method="add">
</action>
<action name="del" class="net.nw.action.AdminAction" method="delete">
</action>
<action name="mod" class="net.nw.action.AdminAction" method="modify">
</action>
</package>
</struts>
第8步:发布项目运行程序
此步操作的详细过程参考S1.1_Struts2_Model2 手动创建一个简单的servlet项目,未使用Struts技术 点击打开链接 位置在最下面------发布项目运行程序
若成功发布运行本项目代码,启动后您会看到欢迎页地址:http://localhost:8080/S4.1_Struts2_ActionAdvance/login.jsp
运行效果截图如下:
本项目下载地址:点击打开链接

相关文章推荐
- struts2在struts.xml文件中获取或设置action中的属性
- struts2中struts.xml中的action标签的method属性配置为"{1}"的时候是什么意味
- Struts2学习笔记之与struts.xml配置和Action有关的属性
- Struts.xml中Action的method与路径的三种匹配方法
- [转]Struts2理解--动态方法和method属性及通配符_默认Action
- Struts2-2.了解struts.xml>package>action>result的name属性
- 动态方法调用 在Struts2中动态方法调用有三种方式,动态方法调用就是为了解决一个Action对应多个请求的处理,以免Action太多 第一种方式:指定method属性 这种方式我们前面已经用到过
- Struts2的学习Struts,web.xml,Struts.xml设置,Struts属性读取顺序
- Struts2理解--动态方法和method属性及通配符_默认Action
- Struts2理解--动态方法和method属性及通配符_默认Action
- Struts2一个Action内包含多个请求处理方法的处理,method的使用方法,struts2中的路径问题,通配符映射
- Struts2学习笔记之与struts.xml配置和Action有关的属性
- Struts.xml中Action的method与路径的三种匹配方法
- Struts.xml中Action的method与路径的三种匹配方法
- Struts2理解--动态方法和method属性及通配符_默认Action
- Struts2理解--动态方法和method属性及通配符_默认Action
- Struts2理解--动态方法和method属性及通配符_默认Action
- Struts2理解--动态方法和method属性及通配符_默认Action
- Struts2理解--动态方法和method属性及通配符_默认Action
- Struts.xml中Action的method与路径的三种匹配方法