wxpython Menus and toolbars
Menus and toolbars
A common part in a GUI application is a menubar. A menubar consists of objects called menus. Top-level menus have their labels on the menubar. The menus have menu items. Menu items are commands that perform a specific action inside the application. Menus can also have submenus, which have their own menu items. The following three classes are used to create menubars in wxPython. A
wx.MenuBar, a
wx.Menuand a
wx.MenuItem.
Simple menu
In our first example, we will create a menubar with one file menu. The menu will have only one menu item. By selecting the item the application quits.
#!/usr/bin/python
# -*- coding: utf-8 -*-

'''
ZetCode wxPython tutorial

This example shows a simple menu.

author: Jan Bodnar
website: www.zetcode.com
last modified: September 2011
'''

import wx

class Example(wx.Frame):

def __init__(self, *args, **kwargs):
super(Example, self).__init__(*args, **kwargs)

self.InitUI()

def InitUI(self):

menubar = wx.MenuBar()fileMenu = wx.Menu()fitem = fileMenu.Append(wx.ID_EXIT, 'Quit', 'Quit application')menubar.Append(fileMenu, '&File')
self.SetMenuBar(menubar)
self.Bind(wx.EVT_MENU, self.OnQuit, fitem)
self.SetSize((300, 200))
self.SetTitle('Simple menu')
self.Centre()
self.Show(True)

def OnQuit(self, e):
self.Close()

def main():

ex = wx.App()
Example(None)
ex.MainLoop()

if __name__ == '__main__':
main()
This is a small example with minimal menubar functionality.
menubar = wx.MenuBar()
First we create a menubar object.
fileMenu = wx.Menu()
Next we create a menu object.
fitem = fileMenu.Append(wx.ID_EXIT, 'Quit', 'Quit application')
We append a menu item into the menu object. The first parameter is the id of the menu item. The standard id will automatically add an icon and a shortcut, Ctrl+Q in our case. The second parameter is the name of the menu item. The last parameter defines the short help string that is displayed on the statusbar, when the menu item is selected. Here we did not create a
wx.MenuItemexplicitly. It was created by the
Append()method behind the scenes. The method returns the created menu item. This reference will be used later to bind an event.
self.Bind(wx.EVT_MENU, self.OnQuit, fitem)
We bind the
wx.EVT_MENUof the menu item to the custom
OnQuit()method. This method will close the application.
menubar.Append(fileMenu, '&File')
self.SetMenuBar(menubar)
After that, we append a menu into the menubar. The & character creates an accelerator key. The character that follows the & is underlined. This way the menu is accessible via the Alt+F shortcut. In the end, we call the
SetMenuBar()method. This method belongs to the
wx.Framewidget. It sets up the menubar.
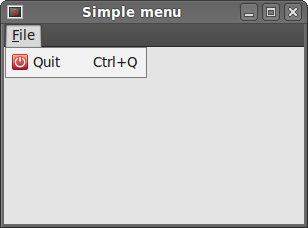 Figure: A simple menu example
Icons and shortcuts
The next example is essentially the same as the previous one. This time, we manually create a
wx.MenuItem.
#!/usr/bin/python
# -*- coding: utf-8 -*-

'''
ZetCode wxPython tutorial

In this example, we manually create
a menu item.

author: Jan Bodnar
website: www.zetcode.com
last modified: September 2011
'''

import wx

APP_EXIT = 1

class Example(wx.Frame):

def __init__(self, *args, **kwargs):
super(Example, self).__init__(*args, **kwargs)

self.InitUI()

def InitUI(self):

menubar = wx.MenuBar()fileMenu = wx.Menu()qmi = wx.MenuItem(fileMenu, APP_EXIT, '&Quit\tCtrl+Q')
qmi.SetBitmap(wx.Bitmap('exit.png'))
fileMenu.AppendItem(qmi)
self.Bind(wx.EVT_MENU, self.OnQuit, id=APP_EXIT)
menubar.Append(fileMenu, '&File')
self.SetMenuBar(menubar)
self.SetSize((250, 200))
self.SetTitle('Icons and shortcuts')
self.Centre()
self.Show(True)

def OnQuit(self, e):
self.Close()

def main():

ex = wx.App()
Example(None)
ex.MainLoop()

if __name__ == '__main__':
main()
In this example, we create a quit menu item. We choose a custom icon and shortcut for the menu item.
qmi = wx.MenuItem(fileMenu, APP_EXIT, '&Quit\tCtrl+Q')
qmi.SetBitmap(wx.Bitmap('exit.png'))
fileMenu.AppendItem(qmi)
We create a
wx.MenuItemobject. The & character specifies an accelerator key. The character following the ampersand is underlined. The actual shortcut is defined by the combination of characters. We have specified Ctrl+Q characters. So if we press Ctrl+Q, we close the application. We put a tab character between the & character and the shortcut. This way, we manage to put some space between them. To provide an icon for a menu item, we call a
SetBitmap()method. A manually created menu item is appended to the menu by calling the
AppendItem()method.
self.Bind(wx.EVT_MENU, self.OnQuit, id=APP_EXIT)
When we select the created menu item, the OnQuit() method is called.
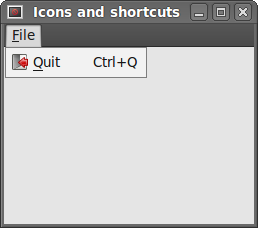 Figure: Icons and shortcuts
Submenus and separators
Each menu can also have a submenu. This way we can place similar commands into groups. For example we can place commands that hide/show various toolbars like personal bar, address bar, status bar or navigation bar into a submenu called toolbars. Within a menu, we can seperate commands with a separator. It is a simple line. It is common practice to separate commands like New, Open, Save from commands like Print, Print preview with a single separator. In our example we will see, how we can create submenus and menu separators.
#!/usr/bin/python
# -*- coding: utf-8 -*-

'''
ZetCode wxPython tutorial

In this example, we create a submenu and a menu
separator.

author: Jan Bodnar
website: www.zetcode.com
last modified: September 2011
'''

import wx

class Example(wx.Frame):

def __init__(self, *args, **kwargs):
super(Example, self).__init__(*args, **kwargs)

self.InitUI()

def InitUI(self):

menubar = wx.MenuBar()
fileMenu = wx.Menu()fileMenu.Append(wx.ID_NEW, '&New')
fileMenu.Append(wx.ID_OPEN, '&Open')
fileMenu.Append(wx.ID_SAVE, '&Save')fileMenu.AppendSeparator()
imp = wx.Menu()
imp.Append(wx.ID_ANY, 'Import newsfeed list...')
imp.Append(wx.ID_ANY, 'Import bookmarks...')
imp.Append(wx.ID_ANY, 'Import mail...')

fileMenu.AppendMenu(wx.ID_ANY, 'I&mport', imp)
qmi = wx.MenuItem(fileMenu, wx.ID_EXIT, '&Quit\tCtrl+W')
fileMenu.AppendItem(qmi)

self.Bind(wx.EVT_MENU, self.OnQuit, qmi)

menubar.Append(fileMenu, '&File')
self.SetMenuBar(menubar)
self.SetSize((350, 250))
self.SetTitle('Submenu')
self.Centre()
self.Show(True)

def OnQuit(self, e):
self.Close()

def main():

ex = wx.App()
Example(None)
ex.MainLoop()

if __name__ == '__main__':
main()
In the above example, we create New, Open, and Save standard menu items. These are separated from a submenu with a horizontal separator. A submenu has additional three menu items.
fileMenu.Append(wx.ID_NEW, '&New')
fileMenu.Append(wx.ID_OPEN, '&Open')
fileMenu.Append(wx.ID_SAVE, '&Save')
Here we have three common menu items: New, Open, and Save.
fileMenu.AppendSeparator()
A menu separator is appended with the
AppendSeparator()method.
imp = wx.Menu()
imp.Append(wx.ID_ANY, 'Import newsfeed list...')
imp.Append(wx.ID_ANY, 'Import bookmarks...')
imp.Append(wx.ID_ANY, 'Import mail...')

fileMenu.AppendMenu(wx.ID_ANY, 'I&mport', imp)
A submenu is also a
wx.Menu. Three menu items are appended to the menu. The submenu is appended to the file menu with the
AppenMenu()method.
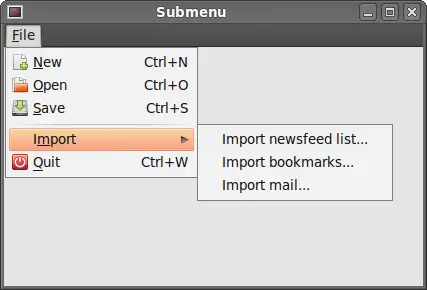 Figure: A submenu example
Check menu item
There are tree kinds of menu items.
- normal item
- check item
- radio item
In the following example, we will demonstrate the check menu item. A check menu item is visually represented by a tick in the menu.
#!/usr/bin/python
# -*- coding: utf-8 -*-

'''
ZetCode wxPython tutorial

This example creates a checked
menu item.

author: Jan Bodnar
website: www.zetcode.com
last modified: September 2011
'''

import wx

class Example(wx.Frame):

def __init__(self, *args, **kwargs):
super(Example, self).__init__(*args, **kwargs)

self.InitUI()

def InitUI(self):

menubar = wx.MenuBar()fileMenu = wx.Menu()viewMenu = wx.Menu()

self.shst = viewMenu.Append(wx.ID_ANY, 'Show statubar',
'Show Statusbar', kind=wx.ITEM_CHECK)
self.shtl = viewMenu.Append(wx.ID_ANY, 'Show toolbar',
'Show Toolbar', kind=wx.ITEM_CHECK)
viewMenu.Check(self.shst.GetId(), True)
viewMenu.Check(self.shtl.GetId(), True)
self.Bind(wx.EVT_MENU, self.ToggleStatusBar, self.shst)
self.Bind(wx.EVT_MENU, self.ToggleToolBar, self.shtl)

menubar.Append(fileMenu, '&File')
menubar.Append(viewMenu, '&View')
self.SetMenuBar(menubar)

self.toolbar = self.CreateToolBar()self.toolbar.AddLabelTool(1, '', wx.Bitmap('texit.png'))
self.toolbar.Realize()
self.statusbar = self.CreateStatusBar()
self.statusbar.SetStatusText('Ready')

self.SetSize((350, 250))
self.SetTitle('Check menu item')
self.Centre()
self.Show(True)

def ToggleStatusBar(self, e):

if self.shst.IsChecked():
self.statusbar.Show()
else:
self.statusbar.Hide()
def ToggleToolBar(self, e):

if self.shtl.IsChecked():
self.toolbar.Show()
else:
self.toolbar.Hide()

def main():

ex = wx.App()
Example(None)
ex.MainLoop()

if __name__ == '__main__':
main()
We have a view menu, where we have two check menu items. These two menu items will show and hide a statusbar and a toolbar.
self.shst = viewMenu.Append(wx.ID_ANY, 'Show statubar',
'Show Statusbar', kind=wx.ITEM_CHECK)
self.shtl = viewMenu.Append(wx.ID_ANY, 'Show toolbar',
'Show Toolbar', kind=wx.ITEM_CHECK)
If we want to append a check menu item, we set a
kindparameter to
wx.ITEM_CHECK. The default parameter is
wx.ITEM_NORMAL. The
Append()method returns a
wx.MenuItem.
viewMenu.Check(self.shst.GetId(), True)
viewMenu.Check(self.shtl.GetId(), True)
When the application starts, both statusbar and toolbar are visible. So we check both menu items with the
Check()method.
def ToggleStatusBar(self, e):

if self.shst.IsChecked():
self.statusbar.Show()
else:
self.statusbar.Hide()
We show or hide the statusbar according to the state of the check menu item. We find out the state of the check menu item with the
IsChecked()method. Same with toolbar.
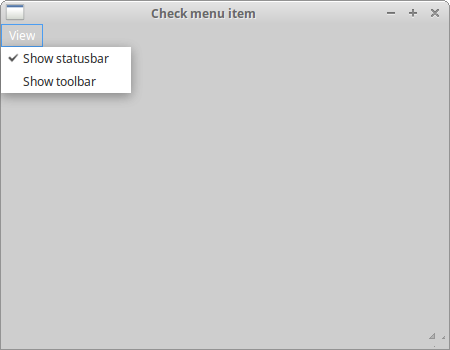 Figure: Check menu item
Context menu
A context menu is a list of commands that appears under some context. For example, in a Firefox web browser, when we right click on a web page, we get a context menu. Here we can reload a page, go back or view page source. If we right click on a toolbar, we get another context menu for managing toolbars. Context menus are sometimes called popup menus.
#!/usr/bin/python
# -*- coding: utf-8 -*-

'''
ZetCode wxPython tutorial

In this example, we create a context menu.

author: Jan Bodnar
website: www.zetcode.com
last modified: September 2011
'''

import wx

class MyPopupMenu(wx.Menu):

def __init__(self, parent):
super(MyPopupMenu, self).__init__()
self.parent = parent

mmi = wx.MenuItem(self, wx.NewId(), 'Minimize')
self.AppendItem(mmi)
self.Bind(wx.EVT_MENU, self.OnMinimize, mmi)
cmi = wx.MenuItem(self, wx.NewId(), 'Close')
self.AppendItem(cmi)
self.Bind(wx.EVT_MENU, self.OnClose, cmi)

def OnMinimize(self, e):
self.parent.Iconize()

def OnClose(self, e):
self.parent.Close()

class Example(wx.Frame):

def __init__(self, *args, **kwargs):
super(Example, self).__init__(*args, **kwargs)

self.InitUI()

def InitUI(self):

self.Bind(wx.EVT_RIGHT_DOWN, self.OnRightDown)
self.SetSize((250, 200))
self.SetTitle('Context menu')
self.Centre()
self.Show(True)

def OnRightDown(self, e):
self.PopupMenu(MyPopupMenu(self), e.GetPosition())
def main():

ex = wx.App()
Example(None)
ex.MainLoop()

if __name__ == '__main__':
main()
In the example, we create a context menu for the main window. It has two items. One will minimize the application, the other one will terminate it.
class MyPopupMenu(wx.Menu):

def __init__(self, parent):
super(MyPopupMenu, self).__init__()
We create a separate
wx.Menuclass.
mmi = wx.MenuItem(self, wx.NewId(), 'Minimize')
self.AppendItem(mmi)
self.Bind(wx.EVT_MENU, self.OnMinimize, mmi)
A menu item is created. Appended to the context menu. An event handler is binded to this menu item.
self.Bind(wx.EVT_RIGHT_DOWN, self.OnRightDown)
If we right click on the frame, we call the
OnRightDown()method. For this, we use the
wx.EVT_RIGHT_DOWNevent binder.
def OnRightDown(self, e):
self.PopupMenu(MyPopupMenu(self), e.GetPosition())
In the
OnRightDown()method, we call the
PopupMenu()method. This method shows the context menu. The first parameter is the menu to be shown. The second parameter is the position, where the context menu appears. The context menus appear at the point of the mouse cursor. To get the actual mouse position, we call the
GetPosition()method of the supplied event object.
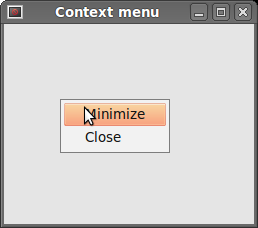 Figure: Context menu
Toolbars
Menus group all commands that we can use in an application. Toolbars provide a quick access to the most frequently used commands.
To create a toolbar, we call the
CreateToolBar()method of the frame widget.
#!/usr/bin/python
# -*- coding: utf-8 -*-

'''
ZetCode wxPython tutorial

This example creates a simple toolbar.

author: Jan Bodnar
website: www.zetcode.com
last modified: September 2011
'''

import wx

class Example(wx.Frame):

def __init__(self, *args, **kwargs):
super(Example, self).__init__(*args, **kwargs)

self.InitUI()

def InitUI(self):

toolbar = self.CreateToolBar()qtool = toolbar.AddLabelTool(wx.ID_ANY, 'Quit', wx.Bitmap('texit.png'))toolbar.Realize()
self.Bind(wx.EVT_TOOL, self.OnQuit, qtool)
self.SetSize((250, 200))
self.SetTitle('Simple toolbar')
self.Centre()
self.Show(True)

def OnQuit(self, e):
self.Close()

def main():

ex = wx.App()
Example(None)
ex.MainLoop()

if __name__ == '__main__':
main()
In our example, we have a toolbar with one tool. The tool will close the application, when we click on it.
toolbar = self.CreateToolBar()
We create a toolbar. By default, the toolbar is horizontal, has no borders and displays icons.
qtool = toolbar.AddLabelTool(wx.ID_ANY, 'Quit', wx.Bitmap('texit.png'))
To create a toolbar tool, we call the
AddLabelTool()method. The second parameter is the tool's label, the third is the tool's image. Note that the label is not visible, because the default style shows only icons.
toolbar.Realize()
After we have put our items to the toolbar, we call the
Realize()method. Calling this method is not obligatory on Linux. On windows it is.
self.Bind(wx.EVT_TOOL, self.OnQuit, qtool)
To handle toolbar events, we use the
wx.EVT_TOOLevent binder.
 Figure: Simple toolbar
If we want to create more than one toolbars, we must do it differently.
#!/usr/bin/python
# -*- coding: utf-8 -*-

'''
ZetCode wxPython tutorial

In this example, we create two horizontal
toolbars.

author: Jan Bodnar
website: www.zetcode.com
last modified: September 2011
'''

import wx

class Example(wx.Frame):

def __init__(self, *args, **kwargs):
super(Example, self).__init__(*args, **kwargs)

self.InitUI()

def InitUI(self):

vbox = wx.BoxSizer(wx.VERTICAL)

toolbar1 = wx.ToolBar(self)
toolbar1.AddLabelTool(wx.ID_ANY, '', wx.Bitmap('tnew.png'))
toolbar1.AddLabelTool(wx.ID_ANY, '', wx.Bitmap('topen.png'))
toolbar1.AddLabelTool(wx.ID_ANY, '', wx.Bitmap('tsave.png'))
toolbar1.Realize()

toolbar2 = wx.ToolBar(self)
qtool = toolbar2.AddLabelTool(wx.ID_EXIT, '', wx.Bitmap('texit.png'))
toolbar2.Realize()

vbox.Add(toolbar1, 0, wx.EXPAND)
vbox.Add(toolbar2, 0, wx.EXPAND)

self.Bind(wx.EVT_TOOL, self.OnQuit, qtool)
self.SetSizer(vbox)

self.SetSize((300, 250))
self.SetTitle('Toolbars')
self.Centre()
self.Show(True)

def OnQuit(self, e):
self.Close()

def main():

ex = wx.App()
Example(None)
ex.MainLoop()

if __name__ == '__main__':
main()
In the above example, we create two horizontal toolbars.
toolbar1 = wx.ToolBar(self)
...
toolbar2 = wx.ToolBar(self)
We create two toolbar objects. And put them into a vertical box.
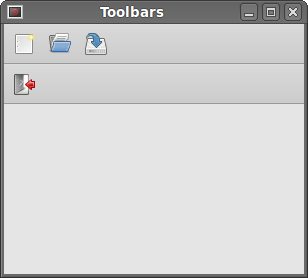 Figure: Toolbars
Enable, disable
In the following example, we will show, how we can enable and disable toolbar buttons. We will also see a separator line.
#!/usr/bin/python
# -*- coding: utf-8 -*-

'''
ZetCode wxPython tutorial

In this example, we create two horizontal
toolbars.

author: Jan Bodnar
website: www.zetcode.com
last modified: September 2011
'''

import wx

class Example(wx.Frame):

def __init__(self, *args, **kwargs):
super(Example, self).__init__(*args, **kwargs)

self.InitUI()

def InitUI(self):

self.count = 5

self.toolbar = self.CreateToolBar()tundo = self.toolbar.AddLabelTool(wx.ID_UNDO, '', wx.Bitmap('tundo.png'))
tredo = self.toolbar.AddLabelTool(wx.ID_REDO, '', wx.Bitmap('tredo.png'))
self.toolbar.EnableTool(wx.ID_REDO, False)
self.toolbar.AddSeparator()texit = self.toolbar.AddLabelTool(wx.ID_EXIT, '', wx.Bitmap('texit.png'))
self.toolbar.Realize()
self.Bind(wx.EVT_TOOL, self.OnQuit, texit)
self.Bind(wx.EVT_TOOL, self.OnUndo, tundo)
self.Bind(wx.EVT_TOOL, self.OnRedo, tredo)

self.SetSize((250, 200))
self.SetTitle('Undo redo')
self.Centre()
self.Show(True)

def OnUndo(self, e):
if self.count > 1 and self.count <= 5:
self.count = self.count - 1

if self.count == 1:
self.toolbar.EnableTool(wx.ID_UNDO, False)

if self.count == 4:
self.toolbar.EnableTool(wx.ID_REDO, True)
def OnRedo(self, e):
if self.count < 5 and self.count >= 1:
self.count = self.count + 1

if self.count == 5:
self.toolbar.EnableTool(wx.ID_REDO, False)

if self.count == 2:
self.toolbar.EnableTool(wx.ID_UNDO, True)

def OnQuit(self, e):
self.Close()

def main():

ex = wx.App()
Example(None)
ex.MainLoop()

if __name__ == '__main__':
main()
In our example, we have three toolbar buttons. One button is for exiting the application. The other two buttons are undo and redo buttons. They simulate undo/redo functionality in an application. (For a real example, see tips and tricks) We have 4 changes. The undo and redo buttons are disabled accordingly.
self.toolbar.EnableTool(wx.ID_REDO, False)
self.toolbar.AddSeparator()
In the beginning, the redo button is disabled. We do it by calling the
EnableTool()method. We can create some logical groups within a toolbar. We can separate various groups of buttons by a small vertical line. To do this, we call the
AddSeparator()method.
def OnUndo(self, e):
if self.count > 1 and self.count <= 5:
self.count = self.count - 1

if self.count == 1:
self.toolbar.EnableTool(wx.ID_UNDO, False)

if self.count == 4:
self.toolbar.EnableTool(wx.ID_REDO, True)
We simulate undo and redo functionality. We have 4 changes. If there is nothing left to undo, the undo button is disabled. After undoing the first change, we enable the redo button. Same logic applies for the
OnRedo()method.
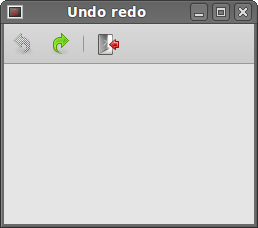 Figure: Undo redo

- CodeProject每日精选: Menus and Toolbars
- (转)3.2 创建菜单和工具栏(Creating Menus and Toolbars)
- Extending Word with VSTO 2005 – Adding icons to toolbars and menus
- 3-2 创建菜单和工具条(Creating Menus and Toolbars)
- ZetCode PyQt4 tutorial work with menus, toolbars, a statusbar, and a main application window
- Menus and toolbars in PyQt5
- 使用Gtreamer获得摄像头数据并显示(Webcam streaming using Python--pyGTK, wxPython and Gstreamer)
- 使用Gtreamer获得摄像头数据并显示(Webcam streaming using Python--pyGTK, wxPython and Gstreamer)
- WTL for MFC Programmers, Part III - Toolbars and Status Bars
- Creating and Deleting Custom Menus in Visio
- Action、Menus、ToolBars主窗体构成的实现
- WTL for MFC Programmers, Part III - Toolbars and Status Bars
- WTL for MFC Programmers, Part III - Toolbars and Status Bars
- Creating and Using Menus on Windows Mobile Pocket PCs
- Use blocks and menus
- qt可停靠控件和工具栏(Dock Widgets and Toolbars)
- [转] How to change font settings for all UI elements (toolbar and context menus, property editors, etc.)
- Windows Mobile 5.0 and Pocket PC menus (zhuan)
- OpenERP Server Developers Documentation (Openerp服务器开发文档)之 Menus and Actions(菜单和动作)
- wxDesigner - dialog editor, RAD tool, IDE for wxWidgets, wxPython, wxPerl and wx.NET