关于流式布局与热门标签
2016-11-01 20:10
211 查看
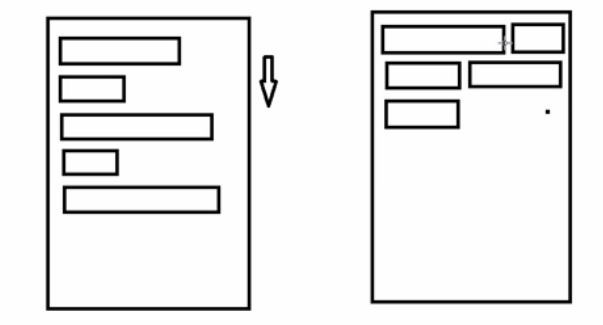
流式布局特点:当上面一行的空间不够容纳新的View时候,
才开辟下一行的空间。原理图如:
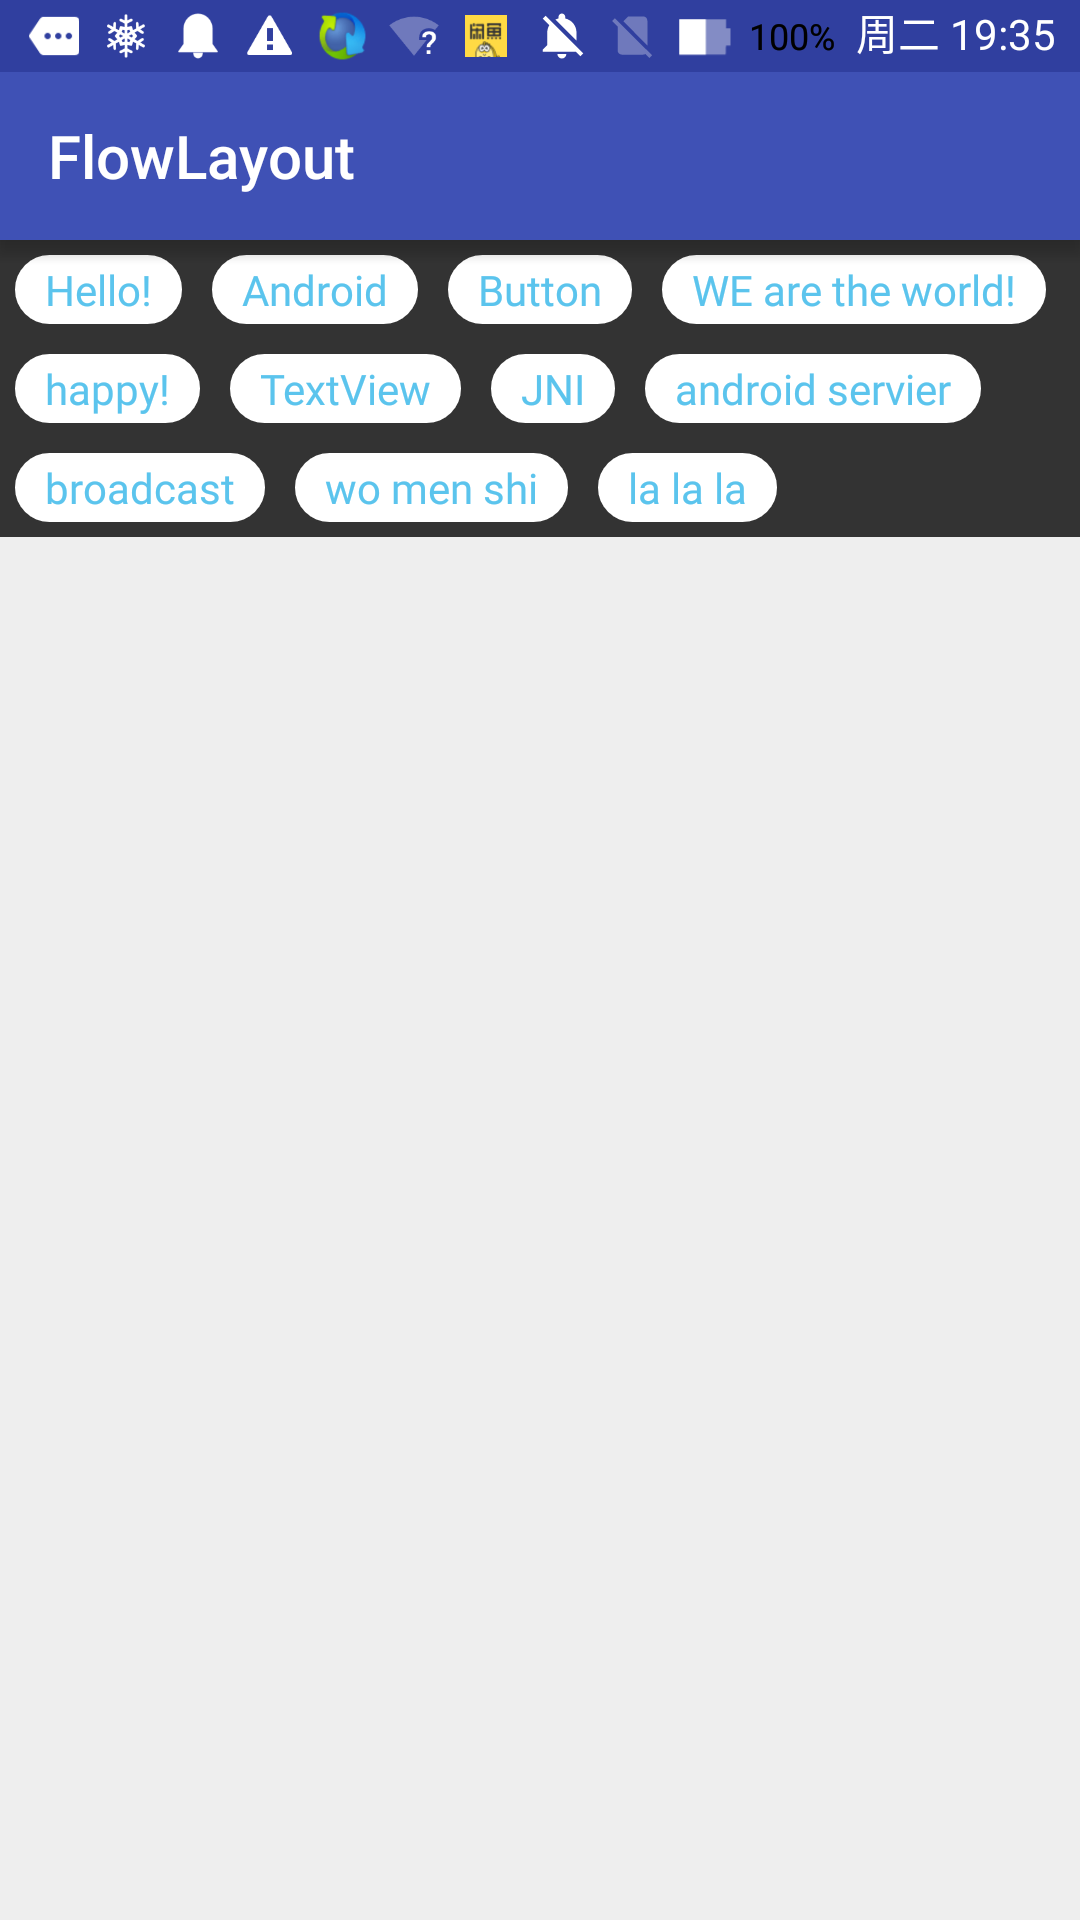
应用场景:一般热门搜索,或者在不指定一行的宽高时用,例如热门标签。
今天我们就来实现热门标签,如图:
实现方法:
自定义ViewGroup
1.实现onMeasure() 方法:测量子view的宽和高,设置自己的宽和高
2.实现onLayout()方法:设置子view 的位置
上代码:
实现onMeasure() 方法
子view的测量过程还受到父容器的影响(子view的LayoutParams和父容器的MeasureSpec一起决定View的大小),在测量过程中,系统会将View的LayoutParams根据父容器的规格转换成对应的MeasureSpec,然后根据这个MeasureSpec来测量子view的宽/高,这里的宽/高是测量值不是最终值。下面是一个子view受父容器影响后得到的MeasureSpec表

其中 测量 = 测量模式 + 测量值 ;MeasureSpec代表一个32位的int值,前两位代表测量模式,后30为代表测量值。
实现onLayout()方法
关于LayoutParams 子view得到的这个参数是付布局的类型,流式布局用的是MarginLayoutParams.
才开辟下一行的空间。原理图如:
应用场景:一般热门搜索,或者在不指定一行的宽高时用,例如热门标签。
今天我们就来实现热门标签,如图:
实现方法:
自定义ViewGroup
1.实现onMeasure() 方法:测量子view的宽和高,设置自己的宽和高
2.实现onLayout()方法:设置子view 的位置
上代码:
实现onMeasure() 方法
子view的测量过程还受到父容器的影响(子view的LayoutParams和父容器的MeasureSpec一起决定View的大小),在测量过程中,系统会将View的LayoutParams根据父容器的规格转换成对应的MeasureSpec,然后根据这个MeasureSpec来测量子view的宽/高,这里的宽/高是测量值不是最终值。下面是一个子view受父容器影响后得到的MeasureSpec表
@Override
protected void onMeasure(int widthMeasureSpec, int heightMeasureSpec) {
super.onMeasure(widthMeasureSpec, heightMeasureSpec);
//测量值
int sizeWidth = MeasureSpec.getSize(widthMeasureSpec);
int sizeHeight = MeasureSpec.getSize(heightMeasureSpec);
//测量模式
int modeWidth = MeasureSpec.getMode(widthMeasureSpec);
int modeHeight = MeasureSpec.getMode(heightMeasureSpec);

//如果是wrap_content的情况下的宽度和高度
int width = 0;
int height = 0;

int lineHeight = 0;
int lineWidth = 0;

int cCount = getChildCount();
for (int i = 0; i < cCount; i++) {
View child = getChildAt(i);
//测量子view的宽和高
measureChild(child, widthMeasureSpec, heightMeasureSpec);
MarginLayoutParams lp = (MarginLayoutParams) child
.getLayoutParams();
//子view占据的宽度
int childWidth = child.getMeasuredWidth() + lp.leftMargin + lp
.rightMargin;
int childHeight = child.getMeasuredHeight() + lp.topMargin + lp
.bottomMargin;
//换行 sizeWidth此时是多少? 为父容器指定的大小
if (lineWidth + childWidth > sizeWidth) {
//对比得到最大的宽度
width = Math.max(width, lineWidth);
lineWidth = childWidth;
height += lineHeight;
lineHeight = childHeight;
} else {
lineWidth += childWidth;
lineHeight = Math.max(lineHeight, childHeight);
}
if (i == cCount - 1) {
width = Math.max(lineHeight, width);
height += lineHeight;
}
}
Log.d(TAG, "onMeasure: " + sizeWidth);
Log.d(TAG, "onMeasure: " + sizeHeight);

//如果模式是AT_MOST而宽高用的是wrap_content 则宽高的值为上面的width和height
//            if (modeWidth == MeasureSpec.AT_MOST) {
//                setMeasuredDimension(width,height);
//            }else {
//                setMeasuredDimension(sizeWidth,sizeHeight);
//            }
//
setMeasuredDimension(modeWidth == MeasureSpec.EXACTLY ? sizeWidth :
width,
modeHeight == MeasureSpec.AT_MOST ? sizeHeight : height);
}
其中 测量 = 测量模式 + 测量值 ;MeasureSpec代表一个32位的int值,前两位代表测量模式,后30为代表测量值。
实现onLayout()方法
@Override
protected void onLayout(boolean changed, int l, int t, int r, int b) {
mAllViews.clear();
mLineHeight.clear();

//当前viewGroup的宽度
int width = getWidth();

int lineWidth = 0;
int lineHeight = 0;
//每一行的view
List<View> mLineViews = new ArrayList<>();
int cCount = getChildCount();

for (int i = 0; i < cCount; i++) {
View child = getChildAt(i);

MarginLayoutParams lp = (MarginLayoutParams)                   child.getLayoutParams();
int childWidth = child.getMeasuredWidth();
int childHeight = child.getMeasuredHeight();
//换行
if (childWidth + lp.rightMargin + lp.leftMargin + lineWidth >
width) {
//记录行高
mLineHeight.add(lineHeight);
mAllViews.add(mLineViews);
//重置
lineWidth = 0;
lineHeight = childHeight + lp.bottomMargin + lp.topMargin;
mLineViews.add(child);
mLineViews = new ArrayList<View>();
}
lineWidth += childWidth + lp.leftMargin + lp.rightMargin;
lineHeight = Math.max(lineHeight, childHeight + lp.bottomMargin +
lp.topMargin);
mLineViews.add(child);
}
//最后一行
mLineHeight.add(lineHeight);
mAllViews.add(mLineViews);

//设置子VIEW的位置
int top = getPaddingTop();
int left = getPaddingLeft();

int lineNum = mAllViews.size();
for (int i = 0; i < lineNum; i++) {

mLineViews = mAllViews.get(i);

4000
lineHeight = mLineHeight.get(i);

for (int j = 0; j < mLineViews.size(); j++) {
View child = mLineViews.get(j);
//判断子view的状态
if (child.getVisibility() == View.GONE) {
continue;
}
MarginLayoutParams lp = (MarginLayoutParams) child
.getLayoutParams();
int lc = left + lp.leftMargin ;
int tc = top + lp.topMargin;
int rc = lc +child.getMeasuredWidth();
int rb = tc +child.getMeasuredHeight();
//为子view进行布局
child.layout(lc,tc,rc,rb);
left += child.getMeasuredWidth() + lp.rightMargin + lp.leftMargin;
}
left = 0;
top += lineHeight;
}

}
关于LayoutParams 子view得到的这个参数是付布局的类型,流式布局用的是MarginLayoutParams.

相关文章推荐
- imooc学习笔记——流式布局和热门标签
- Android 自定义View修炼-Android中常见的热门标签的流式布局的实现
- Android中常见的热门标签的流式布局的实现
- Android中常见的热门标签的流式布局的实现
- android搜索热词(热门标签)流式布局的实现
- Android中常见的热门标签的流式布局的实现
- 解决:Android中常见的热门标签的流式布局flowlayout不能wrap_content
- Android中常见的热门标签的流式布局的实现——云标签
- android 流式布局(热门标签)
- Android中常见的热门标签的流式布局的实现
- Android笔记:热门标签,流式布局
- 热门标签推荐的流式布局
- Andorid 流式布局 热门标签解决方案
- Android实现热门标签的流式布局
- Android中常见的热门标签的流式布局的实现
- Android 搜索界面提示语 根据不同字的个数实现不规则的 弹幕效果 流式布局,热门标签
- Android 总结:打造Android中的流式布局和热门标签(源码有详细注释)
- android自定义view实现流式布局(FlowLayout)和热门标签
- android搜索热词(热门标签)流式布局的实现
- Android中常见的热门标签的流式布局的实现