tabhost基本用法(一)
2016-10-31 22:55
218 查看
TabHost基本用法(一)
接下来将会介绍两种TabHost的基本使用,虽然现在已经很少用(被废弃),但是要学习的话还是要认真从最基础的开始研究。一、TabHost的组成
TabHosat组件包含两部分:1. TabWidget 其中tabwidget就是选项卡部分,有图标的部分,按下就可以跳到响应的页面。
2. FrameLayout
而FrameLayout就是页面内容部分,显示内容数据。
二、TabHost的xml用法(静态加载)
xml布局:<RelativeLayout xmlns:android="http://schemas.android.com/apk/res/android"
xmlns:tools="http://schemas.android.com/tools"
android:layout_width="match_parent"
android:layout_height="match_parent"
tools:context="${relativePackage}.${activityClass}" >
<TabHost
android:id="@+id/myFirst_TabHost"
android:layout_width="match_parent"
android:layout_height="match_parent"
>
<LinearLayout
android:layout_width="match_parent"
android:layout_height="match_parent"
android:orientation="vertical"
>
<!-- 切换栏 -->
<!-- 系统默认的id,不然会报错 -->
<TabWidget
android:id="@android:id/tabs"
android:layout_width="match_parent"
android:layout_height="wrap_content"
>
<!-- 内容栏 -->
<FrameLayout
android:id="@android:id/tabcontent"
android:layout_width="match_parent"
android:layout_height="0dp"
android:layout_weight="1"
>
<!-- 第一个layout -->
<LinearLayout
android:id="@+id/tab1"
android:layout_width="match_parent"
android:layout_height="wrap_content"
android:gravity="center"
>
<TextView
android:text="我是第一个"
android:layout_width="wrap_content"
android:layout_height="wrap_content"
android:gravity="center"
/>
</LinearLayout>
<!-- 第二个layout -->
<LinearLayout
android:id="@+id/tab2"
android:layout_width="match_parent"
android:layout_height="wrap_content"
android:gravity="center"
>
<TextView
android:text="我是第二个"
android:layout_width="wrap_content"
android:layout_height="wrap_content"
android:gravity="center"
/>
</LinearLayout>
<!-- 第三个layout -->
<LinearLayout
android:id="@+id/tab3"
android:layout_width="match_parent"
android:layout_height="wrap_content"
android:gravity="center"
>
<TextView
android:text="我是第三个"
android:layout_width="wrap_content"
android:layout_height="wrap_content"
android:gravity="center"
/>
</LinearLayout>
</FrameLayout>
</TabWidget>
</LinearLayout>
</TabHost>
</RelativeLayout>可以看到Tabhost布局是有一个LinearLayout布局,其中有一个TabWidget选项卡部件布局,FrameLayout内容区布局。其中FrameLayout有三个linearlayout线性布局。 注意:tabwidget的id必须是系统的id tabs,framelayout的id也必须是系统的id tabcontent,因为其内部帮我们初始化了这些控件。不然会报错。
public class MainActivity extends Activity implements OnTabChangeListener {
private TabHost th;
protected void onCreate(Bundle savedInstanceState) {
super.onCreate(savedInstanceState);
setContentView(R.layout.activity_main);
th=(TabHost) findViewById(R.id.myFirst_TabHost);
//Call setup() before adding tabs if loading TabHost using findViewById().
//However: You do not need to call setup() after getTabHost() in TabActivity.
th.setup();
//4.1之后getResources().getDrawble(id)方法已废弃,使用Context.getDrawble(id)或者getResources().getDrawble(int id,int Theme);
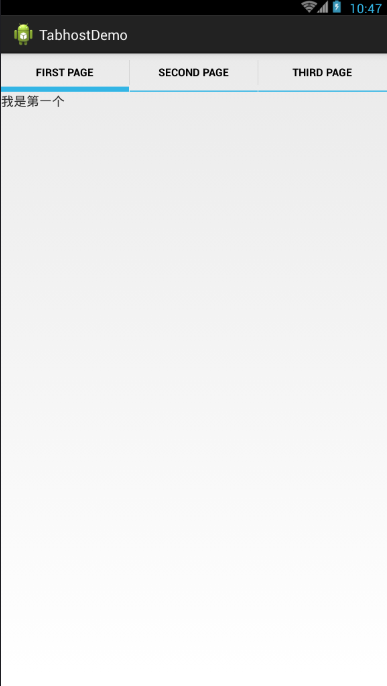
th.addTab(th.newTabSpec("tab1").setIndicator("first page").setContent(R.id.tab1));
th.addTab(th.newTabSpec("tab2").setIndicator("second page")).setContent(R.id.tab2));
th.addTab(th.newTabSpec("tab3").setIndicator("third page").setContent(R.id.tab3));
TabWidget tw=th.getTabWidget();
//分割线去掉,自定义view时没有
tw.setDividerDrawable(null);
}在以上代码中首先得到tabhost的对象,然后调用==setup==()方法初始化,然后再调用addTab()方法来进行添加内容。
首先必须调用setup()方法,其内部是进行tabwidget和FrameLayout的初始化。源码如下:
public void setup() {
mTabWidget = (TabWidget) findViewById(com.android.internal.R.id.tabs);
if (mTabWidget == null) {
throw new RuntimeException(
"Your TabHost must have a TabWidget whose id attribute is 'android.R.id.tabs'");
}
.     .......
mTabContent = (FrameLayout) findViewById(com.android.internal.R.id.tabcontent);
if (mTabContent == null) {
throw new RuntimeException(
"Your TabHost must have a FrameLayout whose id attribute is "
+ "'android.R.id.tabcontent'");
}
}
可以看到在setup中做了TabWidget,TabContent的初始化操作以及其他操作,这里也就明白了为什么xml里为什么要使用系统的id。
其次必须调用addTab方法。
其中参数为TabSpec对象,我们可以通过Tabhost对象调用newTabSpec(String tag)得到,其中tag标签必须唯一,我们后面可以用来查找。
然后通过调用setIndicator()方法来添加我们的指示器。其有三种方法重载setIndicator(CharSequence label),setIndicator(CharSequence label, Drawable icon),setIndicator(View view),分别为添加标签,添加标签和图片,添加自定义的view。
setContent()方法来添加内容,其中id为我们xml中的linearlayout中的id。
三、TabHost的动态加载
xml布局:<RelativeLayout xmlns:android="http://schemas.android.com/apk/res/android"
xmlns:tools="http://schemas.android.com/tools"
android:layout_width="match_parent"
android:layout_height="match_parent"
tools:context="${relativePackage}.${activityClass}" >
<TabHost
android:id="@+id/myFirst_TabHost"
android:layout_width="match_parent"
android:layout_height="match_parent"
>
<LinearLayout
android:layout_width="match_parent"
android:layout_height="match_parent"
android:orientation="vertical"
>
<!-- 内容栏 -->
<FrameLayout
android:id="@android:id/tabcontent"
android:layout_width="match_parent"
android:layout_height="0dp"
android:layout_weight="1"
>
</FrameLayout>
<!-- 切换栏 -->
<!-- 系统默认的id,不然会报错 -->
<TabWidget
android:id="@android:id/tabs"
android:layout_width="match_parent"
android:layout_height="wrap_content"
android:background="@drawable/tabweiget"
>
</TabWidget>
</LinearLayout>
</TabHost>
</RelativeLayout>就是FrameLayout布局里面的内容区域先不填充,后面代码里动态添加,其中内容区域的xml和静态加载一样,只不过布局分开写了。
public class MainActivity extends Activity {
private TabHost th;
@Override
protected void onCreate(Bundle savedInstanceState) {
super.onCreate(savedInstanceState);
setContentView(R.layout.activity_main);

th=(TabHost) findViewById(R.id.MyTabHost);
th.setup();//初始化
LayoutInflater lay=LayoutInflater.from(this);
lay.inflate(R.layout.tab_content1, th.getTabContentView());
lay.inflate(R.layout.tab_content2, th.getTabContentView());
lay.inflate(R.layout.tab_content3, th.getTabContentView());
//setContent()源码调用的是FrameLayout中的findviewByid 所以要先把布局添加到TabContentView()中去
th.addTab(th.newTabSpec("tab1").setIndicator("first page").setContent(R.id.tab1));
th.addTab(th.newTabSpec("tab2").setIndicator("second page").setContent(R.id.tab2));
th.addTab(th.newTabSpec("tab3").setIndicator("third page").setContent(R.id.tab3));
}
}代码中我们也只需要将我们的内容tab_content1.xml使用inflate添加到通过getTabContentView()得到的内容viewgroup中即可。这样才可以再setcontent的时候找到id。因为setcontent的时候,源码中调用mTabcontent.findviewById(id),不把布局添加到内容view中是找不到id的。
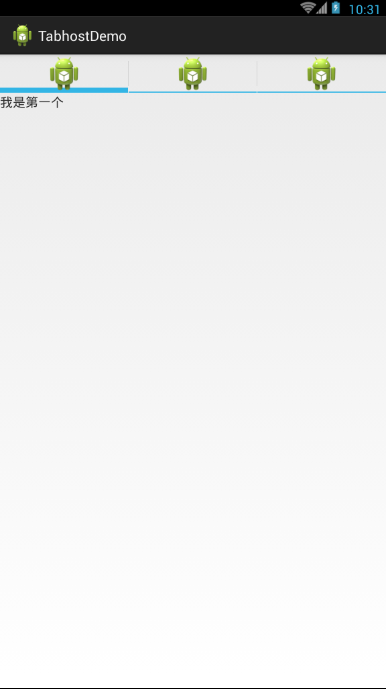
运行结果:
四、setIndicator问题解析
看到上图的运行结果的标签Indicator是只有一个字符,因为我们用了setIndicator(CharSequence label)。但是当我们想要添加图片时,使用setIndicator(CharSequence label, Drawable icon),但是运行后并无图片,图片不能加载出来。只有将第一个参数label设为null时才可以显示图片,我去网上查原因好像是讲版本问题,于是带着这个问题我去查了一下源码,终于明白了原因。参数label设为null时:
源码分析:
/**
* Specify a label and icon as the tab indicator.
*/
public TabSpec setIndicator(CharSequence label, Drawable icon) {
mIndicatorStrategy = new LabelAndIconIndicatorStrategy(label, icon);
return this;
}
setIndicator(CharSequence label, Drawable icon)跟进,可以看到调用了LabelAndIconIndicatorStrategy,传入了label和icon,继续跟进。
/**
* How we create a tab indicator that has a label and an icon
*/
private class LabelAndIconIndicatorStrategy implements IndicatorStrategy {

private final CharSequence mLabel;
private final Drawable mIcon;

private LabelAndIconIndicatorStrategy(CharSequence label, Drawable icon) {
mLabel = label;
mIcon = icon;
}

public View createIndicatorView() {
final Context context = getContext();
LayoutInflater inflater =
(LayoutInflater) context.getSystemService(Context.LAYOUT_INFLATER_SERVICE);
View tabIndicator = inflater.inflate(mTabLayoutId,
mTabWidget, // tab widget is the parent
false); // no inflate params

final TextView tv = (TextView) tabIndicator.findViewById(R.id.title);
final ImageView iconView = (ImageView) tabIndicator.findViewById(R.id.icon);

// when icon is gone by default, we're in exclusive mode
final boolean exclusive = iconView.getVisibility() == View.GONE;
final boolean bindIcon = !exclusive || TextUtils.isEmpty(mLabel);

tv.setText(mLabel);

if (bindIcon && mIcon != null) {
iconView.setImageDrawable(mIcon);
iconView.setVisibility(VISIBLE);
}

if (context.getApplicationInfo().targetSdkVersion <= Build.VERSION_CODES.DONUT) {
// Donut apps get old color scheme
tabIndicator.setBackgroundResource(R.drawable.tab_indicator_v4);
tv.setTextColor(context.getResources().getColorStateList(R.color.tab_indicator_text_v4));
}

return tabIndicator;
}
}
可以看到这个类实现了IndicatorStrategy接口,用来告诉我们一个Indicator指示器是如何创建的,其中可以看到系统先是实例化了一个Textview和一个ImageView,接着ImageView的icon默认是Gone不可见的,所以exclusive为true。而bindIcon则是由TextUtils.isEmpty(mLabel)来决定的,我们传入的mLabel是null时,为true,反之为false。接着向下看textView直接设置传入的mlable,而ImageView的设置则加了一层判断,bindIcon为true且我们传入的mIcon不为null时才可以设置ImageView的图片并且可见。
至此我们得知,为什么设置图片了却不显示,textview设置为null时,图片才可以显示。

相关文章推荐
- tabhost基本用法(二)
- tabhost基本用法(三)
- 安卓开发:TabHost 选项卡的基本用法
- TabHost的基本用法及常见问题
- FragmentTabHost的基本用法
- TabHost基本简单功能用法
- TabHost基本用法
- Android学习历程16-TabHost的基本用法
- 4000 TabHost 和 FragmentTabHost的基本用法
- gcc编译基本用法
- Git基本用法
- Android数据库高手秘籍(二):创建表和LitePal的基本用法
- Processing初探-基本用法、简单动画
- vector的用法及基本操作
- JPA hql各种基本用法 通过EntityManager
- NSSet、NSMutableSet基本用法
- gulp基本用法
- zookeeper学习笔记-基本用法进阶
- "synchronized" 的四种基本用法
- StackView的基本功能与用法(叠在一起的图片)