Faster_rcnn训练自己的数据集(2)
2016-10-27 21:30
483 查看
在看了一些深度学习的目标检测的论文后,想着去用开源的代码去跑一下,看看实际的效果。于是小菜就想着直接把faster_rcnn用起来,包括前期的faster_rcnn安装和配置并运行其中的一个demo.py。后面是用自己的数据集训练faster_rcnn的模型。
1. 准备工作:
1) 搭建caffe框架
这个可以参考Linux先搭建caffe的笔记。
2) 安装第三方依赖包:Cython、 Python-OpenCV、easydict
2
3
1
2
3
3) 下载py-faster-rcnn
2
1
2
4) 编译faster_rcnn
进入py-faster-rcnn/lib,执行make
2
1
2
5) 配置faster_rcnn
进入py-faster-rcnn\caffe-fast-rcnn,执行
1
然后,配置Makefile.config文件,配置好Makefile.config文件后,执行:
1
注:我在这一步出错了,老是不能编译成功。问题应该是出在Makefile.config文件内容中的,应该是出在路径添加中出错。
解决:
在原来搭建的caffe文件中将Makefile.config文件内容直接复制过来。
接下来下载已经训练好的faster模型,进入py-faster_rcnn/data/scripts目录,执行./fech-faster_rcnn_models,sh
6) 测试faster_rcnn
运行网络和加载下载的模型进行最后的测试demo
执行:
1
出现问题:
ImportError:No module named yaml
解决:
1
2. 训练步骤:
1) 下载VOC2007数据集
提供一个百度云地址:http://pan.baidu.com/s/1mhMKKw4
解压,然后,将该数据集放在py-faster-rcnn\data下,用自己的数据集替换VOC2007数据集。(替换Annotations,ImageSets和JPEGImages)(用你的Annotations,ImagesSets和JPEGImages替换py-faster-rcnn\data\VOCdevkit2007\VOC2007中对应文件夹)。
2) 下载ImageNet数据集下预训练得到的模型参数(用来初始化)
提供一个百度云地址:http://pan.baidu.com/s/1hsxx8OW解压,然后将该文件放在py-faster-rcnn\data下。
3) 修改训练的配置文件
1.py-fasterrcnn/models/pascal_voc/ZF/faster_rcnn_alt_opt/
stage1_fast_rcnn_train.pt修改
2
3
4
5
6
7
8
9
10
11
12
13
14
15
1
2
3
4
5
6
7
8
9
10
11
12
13
14
15
2
3
4
5
6
7
8
9
10
11
12
13
14
15
16
17
18
19
1
2
3
4
5
6
7
8
9
10
11
12
13
14
15
16
17
18
19
2
3
4
5
6
7
8
9
10
11
12
13
14
15
16
17
18
19
1
2
3
4
5
6
7
8
9
10
11
12
13
14
15
16
17
18
19
2.py-faster-rcnn/models/pascal_voc/ZF/faster_rcnn_alt_opt/stage1_rpn_train.pt修改
2
3
4
5
6
7
8
9
10
11
12
1
2
3
4
5
6
7
8
9
10
11
12
3.py-faster-rcnn/models/pascal_voc/ZF/faster_rcnn_alt_opt/stage2_fast_rcnn_train.pt修改
2
3
4
5
6
7
8
9
10
11
12
13
14
15
1
2
3
4
5
6
7
8
9
10
11
12
13
14
15
2
3
4
5
6
7
8
9
10
11
12
13
14
15
16
17
18
19
1
2
3
4
5
6
7
8
9
10
11
12
13
14
15
16
17
18
19
2
3
4
5
6
7
8
9
10
11
12
13
14
15
16
17
18
19
1
2
3
4
5
6
7
8
9
10
11
12
13
14
15
16
17
18
19
4.py-faster-rcnn/models/pascal_voc/ZF/faster_rcnn_alt_opt/stage2_rpn_train.pt修改
2
3
4
5
6
7
8
9
10
11
12
1
2
3
4
5
6
7
8
9
10
11
12
5.py-faster-rcnn/models/pascal_voc/ZF/faster_rcnn_alt_opt/faster_rcnn_test.pt修改
2
3
4
5
6
7
8
9
1
2
3
4
5
6
7
8
9
2
3
4
5
6
7
8
9
1
2
3
4
5
6
7
8
9
6.py-faster-rcnn/lib/datasets/pascal_voc.py修改
2
3
4
5
6
7
8
9
10
11
1
2
3
4
5
6
7
8
9
10
11
上面要改的地方是
修改训练集文件夹:
1
用你的数据集直接替换原来VOC2007内的Annotations,ImageSets和JPEGImages就不用修改,以免出现各种错误。
修改标签:
self._classes = (‘background‘, # always index 0
‘你的标签1’,’你的标签2’,’你的标签3’,’你的标签4’)
修改成你的数据集的标签就行。
(2)
cls = self._class_to_ind[obj.find(‘name’).text.lower().strip()]
这里把标签转成小写,如果你的标签含有大写字母,可能会出现KeyError的错误,所以建议标签用小写字母。建议训练的标签还是用小写的字母,如果最终需要用大写字母或中文显示标签,可参考:http://blog.csdn.net/sinat_30071459/article/details/51694037
7.py-faster-rcnn/lib/datasets/imdb.py修改
该文件的append_flipped_images(self)函数修改为:
2
3
4
5
6
7
8
9
10
11
12
13
14
15
16
17
18
19
1
2
3
4
5
6
7
8
9
10
11
12
13
14
15
16
17
18
19
注:为防止与之前的模型搞混,训练前把output文件夹删除(或改个其他名),还要把py-faster-rcnn/data/cache中的文件和
py-faster-rcnn/data/VOCdevkit2007/annotations_cache中的文件删除(如果有的话)。
4) 训练参数设置
可在py-faster-rcnn/models/pascal_voc/ZF/faster_rcnn_alt_opt中的solve文件设置,迭代次数可在py-faster-rcnn\tools的train_faster_rcnn_alt_opt.py中修改:
max_iters = [80000, 40000, 80000, 40000]
分别为4个阶段(rpn第1阶段,fast rcnn第1阶段,rpn第2阶段,fast rcnn第2阶段)的迭代次数。可改成你希望的迭代次数。如果改了这些数值,最好把py-faster-rcnn/models/pascal_voc/ZF/faster_rcnn_alt_opt里对应的solver文件(有4个)也修改,stepsize小于上面修改的数值。
5) 开始训练
进入py-faster-rcnn,
执行
1
这样,就开始训练了。
我训练这里出错:
开始数据集的制作中,标签的名字是数字1,出现KeyError ‘3’
解决:在生成XML文件的代码中修改标签的name为小写英文字母。
错误:
File “/py-faster-rcnn/tools/../lib/datasets/imdb.py”, line 108, in append_flipped_images
assert (boxes[:, 2] >= boxes[:, 0]).all()
解决:检查自己数据发现,左上角坐标(x,y)可能为0,或标定区域溢出图片
1、修改lib/datasets/imdb.py,append_flipped_images()函数
数据整理,在一行代码为 boxes[:, 2] = widths[i] - oldx1 - 1下加入代码:
for b in range(len(boxes)):
if boxes[b][2]< boxes[b][0]:
boxes[b][0] = 0
2、修改lib/datasets/pascal_voc.py,_load_pascal_annotation(,)函数
将对Xmin,Ymin,Xmax,Ymax减一去掉,变为:
6) 测试
将训练得到的py-faster-rcnn\output\faster_rcnn_alt_opt***_trainval中ZF的caffemodel拷贝至py-faster-rcnn\data\faster_rcnn_models(如果没有这个文件夹,就新建一个),然后,修改:py-faster-rcnn\tools\demo.py,主要修改:
2
1
2
改成你的数据集标签:
2
3
4
1
2
3
4
上面ZF的caffemodel改成你的caffemodel。
1
改成你的测试图片。(测试图片放在py-faster-rcnn\data\demo中)
7) 结果
在py-faster-rcnn下,
执行:./tools/demo.py –net zf
或者将默认的模型改为zf:
2
1
2
修改:
default=’zf’
执行:./tools/demo.py
在安装完成caffe后,并且编译完成github上的faster-rcnn Python版之后,可以采用自己的数据来训练faster-rcnn了。
一,文件修改:
1,在py-faster-rcnn目录下,找到lib/datasets/pascal_voc.py 文件打开逐一修改相应的函数:
如果打算添加中文注释请,在文件开图添加
以下为修改的细节:
1)、初始化函数init的修改,同时修改类名:
2
3
4
5
6
7
8
9
10
11
12
13
14
15
16
17
18
19
20
21
22
23
24
25
26
27
28
29
30
1
2
3
4
5
6
7
8
9
10
11
12
13
14
15
16
17
18
19
20
21
22
23
24
25
26
27
28
29
30
2)修改image_path_from_index函数的修改:
2
3
4
5
6
7
8
1
2
3
4
5
6
7
8
3)修改_load_image_set_index函数:
2
3
4
5
6
7
8
9
10
11
12
1
2
3
4
5
6
7
8
9
10
11
12
4)修改_load_pascal_annotation(self, index):
2
3
4
5
6
7
8
9
10
11
12
13
14
15
16
17
18
19
20
21
22
23
24
25
26
27
28
29
30
31
32
33
34
35
36
37
38
39
40
41
42
43
44
45
1
2
3
4
5
6
7
8
9
10
11
12
13
14
15
16
17
18
19
20
21
22
23
24
25
26
27
28
29
30
31
32
33
34
35
36
37
38
39
40
41
42
43
44
45
5)main下面修改相应的路径:
2
3
4
5
6
1
2
3
4
5
6
2,在py-faster-rcnn目录下,找到lib/datasets/factory.py 并修改,修改后的文件如下:
2
3
4
5
6
7
8
9
10
11
12
13
14
15
16
17
18
19
20
21
22
23
24
25
26
27
28
29
30
31
32
33
34
35
36
37
38
39
40
41
42
43
44
45
1
2
3
4
5
6
7
8
9
10
11
12
13
14
15
16
17
18
19
20
21
22
23
24
25
26
27
28
29
30
31
32
33
34
35
36
37
38
39
40
41
42
43
44
45
二、模型的选择、训练以及测试:
1.预训练模型介绍
在github官网上的py-faster-rcnn的编译安装教程中有一步如下:
2
1
2
执行完成之后会在/data/scripts下产生压缩文件faster_rcnn_models.tgz,解压得到faster_rcnn_model文件夹,faster_rcnn_model文件夹下面是作者用faster rcnn训练好的三个网络,分别对应着小、中、大型网络,大家可以试用一下这几个网络,看一些检测效果,他们训练都迭代了80000次,数据集都是pascal_voc的数据集。
可以通过执行如下命令下载Imagenet上训练好的通用模型:
2
1
2
执行完成之后会在/data/scripts下产生压缩文件imagenet_models.tgz,解压得到imagenet_models文件夹,imagenet_model文件夹下面是在Imagenet上训练好的通用模型,在这里用来初始化网络的参数.
2.修改模型文件配置
模型文件在models下面对应的网络文件夹下,在这里我用中型网络的配置文件修改为例子
比如:我的检测目标物是3类 ,那么我的类别就有两个类别即 background 和 3类目标
因此,首先打开网络的模型文件夹,打开train.prototxt修改的地方重要有三个
分别是个地方
如果你要进一步修改网络训练中的学习速率,步长,gamma值,以及输出模型的名字,需要在同目录下的solver.prototxt中修改。
3.启动Fast RCNN网络训练
1
命令解析:
1)、train_net.py是网络的训练文件,之后的参数都是附带的输入参数。
3)、–gpu 代表机器上的GPU编号,如果是nvidia系列的tesla显卡,可以在终端中输入nvidia-smi来查看当前的显卡负荷,选择合适的显卡。
4)、–solver 代表模型的配置文件,train.prototxt的文件路径已经包含在这个文件之中。
5)、-weights 代表初始化的权重文件,这里用的是Imagenet上预训练好的模型,中型的网络我们选择用VGG_CNN_M_1024.v2.caffemodel,此步可以省略,省略后会自动初始化。
6)、–imdb 这里给出的训练的数据库名字需要在factory.py的_sets中,我在文件里面有。_sets[‘hs’],train_net.py这个文件会调用factory.py再生成hs这个类,来读取数据。
4.启动Fast RCNN网络检测
可以参考tools下面的demo.py 文件,来做检测,并且将检测的坐标结果输出到相应的txt文件中。
1. 准备工作:
1) 搭建caffe框架
这个可以参考Linux先搭建caffe的笔记。
2) 安装第三方依赖包:Cython、 Python-OpenCV、easydict
pip install cython
pip install easydict
apt-get install python-opencv
1
2
3
1
2
3
3) 下载py-faster-rcnn
# Make sure to clone with --recursive
git clone --recursive https://github.com/rbgirshick/py-faster-rcnn.git
1
2
1
2
4) 编译faster_rcnn
进入py-faster-rcnn/lib,执行make
cd py-faster-rcnn/lib
make
1
2
1
2
5) 配置faster_rcnn
进入py-faster-rcnn\caffe-fast-rcnn,执行
cp Makefile.config.example Makefile.config1
1
然后,配置Makefile.config文件,配置好Makefile.config文件后,执行:
make –j4 && make pycaffe1
1
注:我在这一步出错了,老是不能编译成功。问题应该是出在Makefile.config文件内容中的,应该是出在路径添加中出错。
解决:
在原来搭建的caffe文件中将Makefile.config文件内容直接复制过来。
接下来下载已经训练好的faster模型,进入py-faster_rcnn/data/scripts目录,执行./fech-faster_rcnn_models,sh
6) 测试faster_rcnn
运行网络和加载下载的模型进行最后的测试demo
执行:
./tools/demo.py1
1
出现问题:
ImportError:No module named yaml
解决:
sudo apt-get install python-yaml1
1
2. 训练步骤:
1) 下载VOC2007数据集
提供一个百度云地址:http://pan.baidu.com/s/1mhMKKw4
解压,然后,将该数据集放在py-faster-rcnn\data下,用自己的数据集替换VOC2007数据集。(替换Annotations,ImageSets和JPEGImages)(用你的Annotations,ImagesSets和JPEGImages替换py-faster-rcnn\data\VOCdevkit2007\VOC2007中对应文件夹)。
2) 下载ImageNet数据集下预训练得到的模型参数(用来初始化)
提供一个百度云地址:http://pan.baidu.com/s/1hsxx8OW解压,然后将该文件放在py-faster-rcnn\data下。
3) 修改训练的配置文件
1.py-fasterrcnn/models/pascal_voc/ZF/faster_rcnn_alt_opt/
stage1_fast_rcnn_train.pt修改
1.  layer {
2.    name: 'data'
3.    type: 'Python'
4.    top: 'data'
5.    top: 'rois'
6.    top: 'labels'
7.    top: 'bbox_targets'
8.    top: 'bbox_inside_weights'
9.    top: 'bbox_outside_weights'
10.   python_param {
11.     module: 'roi_data_layer.layer'
12.     layer: 'RoIDataLayer'
13.     param_str: "'num_classes': 16" #按训练集类别改,该值为类别数+1
14.   }
15. }12
3
4
5
6
7
8
9
10
11
12
13
14
15
1
2
3
4
5
6
7
8
9
10
11
12
13
14
15
1.  layer {
2.    name: "cls_score"
3.    type: "InnerProduct"
4.    bottom: "fc7"
5.    top: "cls_score"
6.    param { lr_mult: 1.0 }
7.    param { lr_mult: 2.0 }
8.    inner_product_param {
9.      num_output: 16 #按训练集类别改,该值为类别数+1
10.     weight_filler {
11.       type: "gaussian"
12.       std: 0.01
13.     }
14.     bias_filler {
15.       type: "constant"
16.       value: 0
17.     }
18.   }
19. }12
3
4
5
6
7
8
9
10
11
12
13
14
15
16
17
18
19
1
2
3
4
5
6
7
8
9
10
11
12
13
14
15
16
17
18
19
1.  layer {
2.    name: "bbox_pred"
3.    type: "InnerProduct"
4.    bottom: "fc7"
5.    top: "bbox_pred"
6.    param { lr_mult: 1.0 }
7.    param { lr_mult: 2.0 }
8.    inner_product_param {
9.      num_output: 64 #按训练集类别改,该值为(类别数+1)*4
10.     weight_filler {
11.       type: "gaussian"
12.       std: 0.001
13.     }
14.     bias_filler {
15.       type: "constant"
16.       value: 0
17.     }
18.   }
19. }12
3
4
5
6
7
8
9
10
11
12
13
14
15
16
17
18
19
1
2
3
4
5
6
7
8
9
10
11
12
13
14
15
16
17
18
19
2.py-faster-rcnn/models/pascal_voc/ZF/faster_rcnn_alt_opt/stage1_rpn_train.pt修改
1.  layer {
2.    name: 'input-data'
3.    type: 'Python'
4.    top: 'data'
5.    top: 'im_info'
6.    top: 'gt_boxes'
7.    python_param {
8.      module: 'roi_data_layer.layer'
9.      layer: 'RoIDataLayer'
10.     param_str: "'num_classes': 16" #按训练集类别改,该值为类别数+1
11.   }
12. }12
3
4
5
6
7
8
9
10
11
12
1
2
3
4
5
6
7
8
9
10
11
12
3.py-faster-rcnn/models/pascal_voc/ZF/faster_rcnn_alt_opt/stage2_fast_rcnn_train.pt修改
1.  layer {
2.    name: 'data'
3.    type: 'Python'
4.    top: 'data'
5.    top: 'rois'
6.    top: 'labels'
7.    top: 'bbox_targets'
8.    top: 'bbox_inside_weights'
9.    top: 'bbox_outside_weights'
10.   python_param {
11.     module: 'roi_data_layer.layer'
12.     layer: 'RoIDataLayer'
13.     param_str: "'num_classes': 16" #按训练集类别改,该值为类别数+1
14.   }
15. }12
3
4
5
6
7
8
9
10
11
12
13
14
15
1
2
3
4
5
6
7
8
9
10
11
12
13
14
15
1. layer {
2.    name: "cls_score"
3.    type: "InnerProduct"
4.    bottom: "fc7"
5.    top: "cls_score"
6.    param { lr_mult: 1.0 }
7.    param { lr_mult: 2.0 }
8.    inner_product_param {
9.      num_output: 16 #按训练集类别改,该值为类别数+1
10.     weight_filler {
11.       type: "gaussian"
12.       std: 0.01
13.     }
14.     bias_filler {
15.       type: "constant"
16.       value: 0
17.     }
18.   }
19. }12
3
4
5
6
7
8
9
10
11
12
13
14
15
16
17
18
19
1
2
3
4
5
6
7
8
9
10
11
12
13
14
15
16
17
18
19
1.  layer {
2.    name: "bbox_pred"
3.    type: "InnerProduct"
4.    bottom: "fc7"
5.    top: "bbox_pred"
6.    param { lr_mult: 1.0 }
7.    param { lr_mult: 2.0 }
8.    inner_product_param {
9.      num_output: 64 #按训练集类别改,该值为(类别数+1)*4
10.     weight_filler {
11.       type: "gaussian"
12.       std: 0.001
13.     }
14.     bias_filler {
15.       type: "constant"
16.       value: 0
17.     }
18.   }
19. }12
3
4
5
6
7
8
9
10
11
12
13
14
15
16
17
18
19
1
2
3
4
5
6
7
8
9
10
11
12
13
14
15
16
17
18
19
4.py-faster-rcnn/models/pascal_voc/ZF/faster_rcnn_alt_opt/stage2_rpn_train.pt修改
1.  layer {
2.    name: 'input-data'
3.    type: 'Python'
4.    top: 'data'
5.    top: 'im_info'
6.    top: 'gt_boxes'
7.    python_param {
8.      module: 'roi_data_layer.layer'
9.      layer: 'RoIDataLayer'
10.     param_str: "'num_classes': 16" #按训练集类别改,该值为类别数+1
11.   }
12. } 12
3
4
5
6
7
8
9
10
11
12
1
2
3
4
5
6
7
8
9
10
11
12
5.py-faster-rcnn/models/pascal_voc/ZF/faster_rcnn_alt_opt/faster_rcnn_test.pt修改
1.  layer {
2.    name: "cls_score"
3.    type: "InnerProduct"
4.    bottom: "fc7"
5.    top: "cls_score"
6.    inner_product_param {
7.      num_output: 16 #按训练集类别改,该值为类别数+1
8.    }
9. }12
3
4
5
6
7
8
9
1
2
3
4
5
6
7
8
9
1.  layer {
2.    name: "bbox_pred"
3.    type: "InnerProduct"
4.    bottom: "fc7"
5.    top: "bbox_pred"
6.    inner_product_param {
7.      num_output: 64 #按训练集类别改,该值为(类别数+1)*4
8.    }
9. }12
3
4
5
6
7
8
9
1
2
3
4
5
6
7
8
9
6.py-faster-rcnn/lib/datasets/pascal_voc.py修改
1.class pascal_voc(imdb):
-    def __init__(self, image_set, year, devkit_path=None):
-        imdb.__init__(self, 'voc_' + year + '_' + image_set)
-        self._year = year
-        self._image_set = image_set
-        self._devkit_path = self._get_default_path() if devkit_path is None \
-                            else devkit_path
-        self._data_path = os.path.join(self._devkit_path, 'VOC' + self._year)
-        self._classes = ('__background__', # always index 0
-                         '你的标签1','你的标签2',你的标签3','你的标签4'
- )12
3
4
5
6
7
8
9
10
11
1
2
3
4
5
6
7
8
9
10
11
上面要改的地方是
修改训练集文件夹:
self._data_path = os.path.join(self._devkit_path, 'VOC'+self._year)1
1
用你的数据集直接替换原来VOC2007内的Annotations,ImageSets和JPEGImages就不用修改,以免出现各种错误。
修改标签:
self._classes = (‘background‘, # always index 0
‘你的标签1’,’你的标签2’,’你的标签3’,’你的标签4’)
修改成你的数据集的标签就行。
(2)
cls = self._class_to_ind[obj.find(‘name’).text.lower().strip()]
这里把标签转成小写,如果你的标签含有大写字母,可能会出现KeyError的错误,所以建议标签用小写字母。建议训练的标签还是用小写的字母,如果最终需要用大写字母或中文显示标签,可参考:http://blog.csdn.net/sinat_30071459/article/details/51694037
7.py-faster-rcnn/lib/datasets/imdb.py修改
该文件的append_flipped_images(self)函数修改为:
1.  def append_flipped_images(self):
2.          num_images = self.num_images
3.          widths = [PIL.Image.open(self.image_path_at(i)).size[0]
4.                    for i in xrange(num_images)]
5.          for i in xrange(num_images):
6.              boxes = self.roidb[i]['boxes'].copy()
7.              oldx1 = boxes[:, 0].copy()
8.              oldx2 = boxes[:, 2].copy()
9.              boxes[:, 0] = widths[i] - oldx2 - 1
10.             print boxes[:, 0]
11.             boxes[:, 2] = widths[i] - oldx1 - 1
12.             print boxes[:, 0]
13.             assert (boxes[:, 2] >= boxes[:, 0]).all()
14.             entry = {'boxes' : boxes,
15.                      'gt_overlaps' : self.roidb[i]['gt_overlaps'],
16.                      'gt_classes' : self.roidb[i]['gt_classes'],
17.                      'flipped' : True}
18.             self.roidb.append(entry)
19. self._image_index = self._image_index * 212
3
4
5
6
7
8
9
10
11
12
13
14
15
16
17
18
19
1
2
3
4
5
6
7
8
9
10
11
12
13
14
15
16
17
18
19
注:为防止与之前的模型搞混,训练前把output文件夹删除(或改个其他名),还要把py-faster-rcnn/data/cache中的文件和
py-faster-rcnn/data/VOCdevkit2007/annotations_cache中的文件删除(如果有的话)。
4) 训练参数设置
可在py-faster-rcnn/models/pascal_voc/ZF/faster_rcnn_alt_opt中的solve文件设置,迭代次数可在py-faster-rcnn\tools的train_faster_rcnn_alt_opt.py中修改:
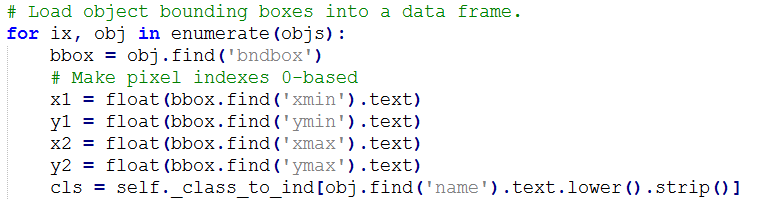
max_iters = [80000, 40000, 80000, 40000]
分别为4个阶段(rpn第1阶段,fast rcnn第1阶段,rpn第2阶段,fast rcnn第2阶段)的迭代次数。可改成你希望的迭代次数。如果改了这些数值,最好把py-faster-rcnn/models/pascal_voc/ZF/faster_rcnn_alt_opt里对应的solver文件(有4个)也修改,stepsize小于上面修改的数值。
5) 开始训练
进入py-faster-rcnn,
执行
./experiments/scripts/faster_rcnn_alt_opt.sh 0 ZF pascal_voc1
1
这样,就开始训练了。
我训练这里出错:
开始数据集的制作中,标签的名字是数字1,出现KeyError ‘3’
解决:在生成XML文件的代码中修改标签的name为小写英文字母。
错误:
File “/py-faster-rcnn/tools/../lib/datasets/imdb.py”, line 108, in append_flipped_images
assert (boxes[:, 2] >= boxes[:, 0]).all()
解决:检查自己数据发现,左上角坐标(x,y)可能为0,或标定区域溢出图片
1、修改lib/datasets/imdb.py,append_flipped_images()函数
数据整理,在一行代码为 boxes[:, 2] = widths[i] - oldx1 - 1下加入代码:
for b in range(len(boxes)):
if boxes[b][2]< boxes[b][0]:
boxes[b][0] = 0
2、修改lib/datasets/pascal_voc.py,_load_pascal_annotation(,)函数
将对Xmin,Ymin,Xmax,Ymax减一去掉,变为:
6) 测试
将训练得到的py-faster-rcnn\output\faster_rcnn_alt_opt***_trainval中ZF的caffemodel拷贝至py-faster-rcnn\data\faster_rcnn_models(如果没有这个文件夹,就新建一个),然后,修改:py-faster-rcnn\tools\demo.py,主要修改:
1.  CLASSES = ('__background__',
2. '你的标签1', '你的标签2', '你的标签3', '你的标签4')12
1
2
改成你的数据集标签:
1.  NETS = {'vgg16': ('VGG16',
2.                    'VGG16_faster_rcnn_final.caffemodel'),
3.          'zf': ('ZF',
4. 'ZF_faster_rcnn_final.caffemodel')}12
3
4
1
2
3
4
上面ZF的caffemodel改成你的caffemodel。
1. im_names = ['1559.jpg','1564.jpg']1
1
改成你的测试图片。(测试图片放在py-faster-rcnn\data\demo中)
7) 结果
在py-faster-rcnn下,
执行:./tools/demo.py –net zf
或者将默认的模型改为zf:
parser.add_argument('--net', dest='demo_net', help='Network to use [vgg16]',
choices=NETS.keys(), default='vgg16')12
1
2
修改:
default=’zf’
执行:./tools/demo.py
在安装完成caffe后,并且编译完成github上的faster-rcnn Python版之后,可以采用自己的数据来训练faster-rcnn了。
一,文件修改:
1,在py-faster-rcnn目录下,找到lib/datasets/pascal_voc.py 文件打开逐一修改相应的函数:
如果打算添加中文注释请,在文件开图添加
#encoding:utf-8,不然会报错。
以下为修改的细节:
1)、初始化函数init的修改,同时修改类名:
class hs(imdb):
def __init__(self, image_set, devkit_path=None):  # modified
imdb.__init__(self, image_set)
self._image_set = image_set
self._devkit_path = devkit_path#datasets路径
self._data_path = os.path.join(self._devkit_path,image_set)   #图片文件夹路径
self._classes = ('__background__', # always index 0
'jyz','fzc','qnq')   #two classes
self._class_to_ind = dict(zip(self.classes, xrange(self.num_classes)))
# form the dict{'__background__':'0','person':'1'}
self._image_ext = '.jpg'
self._image_index = self._load_image_set_index('ImageList.txt')
# Default to roidb handler
self._roidb_handler = self.selective_search_roidb
self._salt = str(uuid.uuid4())
self._comp_id = 'comp4'

# PASCAL specific config options
self.config = {'cleanup'     : True,
'use_salt'    : True,
'use_diff'    : False,
'matlab_eval' : False,
'rpn_file'    : None,
'min_size'    : 16}  #小于16个像素的框扔掉

assert os.path.exists(self._devkit_path), \
'VOCdevkit path does not exist: {}'.format(self._devkit_path)
assert os.path.exists(self._data_path), \
'Path does not exist: {}'.format(self._data_path)12
3
4
5
6
7
8
9
10
11
12
13
14
15
16
17
18
19
20
21
22
23
24
25
26
27
28
29
30
1
2
3
4
5
6
7
8
9
10
11
12
13
14
15
16
17
18
19
20
21
22
23
24
25
26
27
28
29
30
2)修改image_path_from_index函数的修改:
def image_path_from_index(self, index): #modified
"""
Construct an image path from the image's "index" identifier.
"""
image_path = os.path.join(self._data_path,index +'.jpg')
assert os.path.exists(image_path), \
'Path does not exist: {}'.format(image_path)
return image_path12
3
4
5
6
7
8
1
2
3
4
5
6
7
8
3)修改_load_image_set_index函数:
def _load_image_set_index(self,imagelist): # modified
"""
Load the indexes listed in this dataset's image set file.
"""
# Example path to image set file:
# self._devkit_path + /VOCdevkit2007/VOC2007/ImageSets/Main/val.txt
image_set_file = os.path.join(self._devkit_path, imagelist)
assert os.path.exists(image_set_file), \
'Path does not exist: {}'.format(image_set_file)
with open(image_set_file) as f:
image_index = [x.strip() for x in f.readlines()]
return image_index12
3
4
5
6
7
8
9
10
11
12
1
2
3
4
5
6
7
8
9
10
11
12
4)修改_load_pascal_annotation(self, index):
def _load_pascal_annotation(self, index):    #modified
"""
Load image and bounding boxes info from XML file in the PASCAL VOC
format.
"""
filename = os.path.join(self._devkit_path, 'Annotations', index + '.xml')
tree = ET.parse(filename)
objs = tree.findall('object')
if not self.config['use_diff']:
# Exclude the samples labeled as difficult
non_diff_objs = [
obj for obj in objs if int(obj.find('difficult').text) == 0]
# if len(non_diff_objs) != len(objs):
#     print 'Removed {} difficult objects'.format(
#         len(objs) - len(non_diff_objs))
objs = non_diff_objs
num_objs = len(objs)

boxes = np.zeros((num_objs, 4), dtype=np.uint16)
gt_classes = np.zeros((num_objs), dtype=np.int32)
overlaps = np.zeros((num_objs, self.num_classes), dtype=np.float32)
# "Seg" area for pascal is just the box area
seg_areas = np.zeros((num_objs), dtype=np.float32)

# Load object bounding boxes into a data frame.
for ix, obj in enumerate(objs):
bbox = obj.find('bndbox')
# Make pixel indexes 0-based
x1 = float(bbox.find('xmin').text)
y1 = float(bbox.find('ymin').text)
x2 = float(bbox.find('xmax').text)
y2 = float(bbox.find('ymax').text)
cls = self._class_to_ind[obj.find('name').text.lower().strip()]
boxes[ix, :] = [x1, y1, x2, y2]
gt_classes[ix] = cls
overlaps[ix, cls] = 1.0
seg_areas[ix] = (x2 - x1 + 1) * (y2 - y1 + 1)

overlaps = scipy.sparse.csr_matrix(overlaps)

return {'boxes' : boxes,
'gt_classes': gt_classes,
'gt_overlaps' : overlaps,
'flipped' : False,
'seg_areas' : seg_areas}12
3
4
5
6
7
8
9
10
11
12
13
14
15
16
17
18
19
20
21
22
23
24
25
26
27
28
29
30
31
32
33
34
35
36
37
38
39
40
41
42
43
44
45
1
2
3
4
5
6
7
8
9
10
11
12
13
14
15
16
17
18
19
20
21
22
23
24
25
26
27
28
29
30
31
32
33
34
35
36
37
38
39
40
41
42
43
44
45
5)main下面修改相应的路径:
if __name__ == '__main__':
from datasets.hs import hs
d = hs('hs', '/home/panyiming/py-faster-rcnn/lib/datasets')
res = d.roidb
from IPython import embed; embed()12
3
4
5
6
1
2
3
4
5
6
2,在py-faster-rcnn目录下,找到lib/datasets/factory.py 并修改,修改后的文件如下:
# --------------------------------------------------------
# Fast R-CNN
# Copyright (c) 2015 Microsoft
# Licensed under The MIT License [see LICENSE for details]
# Written by Ross Girshick
# --------------------------------------------------------

"""Factory method for easily getting imdbs by name."""

__sets = {}

from datasets.hs import hs
import numpy as np

# # Set up voc_<year>_<split> using selective search "fast" mode
# for year in ['2007', '2012']:
#     for split in ['train', 'val', 'trainval', 'test']:
#         name = 'voc_{}_{}'.format(year, split)
#         __sets[name] = (lambda split=split, year=year: pascal_voc(split, year))
#
# # Set up coco_2014_<split>
# for year in ['2014']:
#     for split in ['train', 'val', 'minival', 'valminusminival']:
#         name = 'coco_{}_{}'.format(year, split)
#         __sets[name] = (lambda split=split, year=year: coco(split, year))
#
# # Set up coco_2015_<split>
# for year in ['2015']:
#     for split in ['test', 'test-dev']:
#         name = 'coco_{}_{}'.format(year, split)
#         __sets[name] = (lambda split=split, year=year: coco(split, year))

name = 'hs'
devkit = '/home/panyiming/py-faster-rcnn/lib/datasets'
__sets['hs'] = (lambda name = name,devkit = devkit: hs(name,devkit))

def get_imdb(name):
"""Get an imdb (image database) by name."""
if not __sets.has_key(name):
raise KeyError('Unknown dataset: {}'.format(name))
return __sets[name]()

def list_imdbs():
"""List all registered imdbs."""
return __sets.keys()12
3
4
5
6
7
8
9
10
11
12
13
14
15
16
17
18
19
20
21
22
23
24
25
26
27
28
29
30
31
32
33
34
35
36
37
38
39
40
41
42
43
44
45
1
2
3
4
5
6
7
8
9
10
11
12
13
14
15
16
17
18
19
20
21
22
23
24
25
26
27
28
29
30
31
32
33
34
35
36
37
38
39
40
41
42
43
44
45
二、模型的选择、训练以及测试:
1.预训练模型介绍
在github官网上的py-faster-rcnn的编译安装教程中有一步如下:
cd $FRCN_ROOT
./data/scripts/fetch_faster_rcnn_models.sh
1
2
1
2
执行完成之后会在/data/scripts下产生压缩文件faster_rcnn_models.tgz,解压得到faster_rcnn_model文件夹,faster_rcnn_model文件夹下面是作者用faster rcnn训练好的三个网络,分别对应着小、中、大型网络,大家可以试用一下这几个网络,看一些检测效果,他们训练都迭代了80000次,数据集都是pascal_voc的数据集。
可以通过执行如下命令下载Imagenet上训练好的通用模型:
cd $FRCN_ROOT
./data/scripts/fetch_imagenet_models.sh
1
2
1
2
执行完成之后会在/data/scripts下产生压缩文件imagenet_models.tgz,解压得到imagenet_models文件夹,imagenet_model文件夹下面是在Imagenet上训练好的通用模型,在这里用来初始化网络的参数.
2.修改模型文件配置
模型文件在models下面对应的网络文件夹下,在这里我用中型网络的配置文件修改为例子
比如:我的检测目标物是3类 ,那么我的类别就有两个类别即 background 和 3类目标
因此,首先打开网络的模型文件夹,打开train.prototxt修改的地方重要有三个
分别是个地方
首先在data层把num_classes 从原来的21类 20类+背景 ,改成 4类 3类目标+背景
接在在cls_score层把num_output 从原来的21 改成 4
RoI Proposal下有个名为name: 'roi-data'的层,将其num_classes修改为4
在bbox_pred层把num_output 从原来的84 改成16, 为检测类别个数乘以4,
如果你要进一步修改网络训练中的学习速率,步长,gamma值,以及输出模型的名字,需要在同目录下的solver.prototxt中修改。
3.启动Fast RCNN网络训练
python ./tools/train_net.py --gpu 1 --solver models/hs/faster_rcnn_end2end/solver.prototxt --weights data/imagenet_models/VGG_CNN_M_1024.v2.caffemodel --imdb hs --iters 80000 --cfg experiments/cfgs/faster_rcnn_end2end.yml1
1
命令解析:
1)、train_net.py是网络的训练文件,之后的参数都是附带的输入参数。
3)、–gpu 代表机器上的GPU编号,如果是nvidia系列的tesla显卡,可以在终端中输入nvidia-smi来查看当前的显卡负荷,选择合适的显卡。
4)、–solver 代表模型的配置文件,train.prototxt的文件路径已经包含在这个文件之中。
5)、-weights 代表初始化的权重文件,这里用的是Imagenet上预训练好的模型,中型的网络我们选择用VGG_CNN_M_1024.v2.caffemodel,此步可以省略,省略后会自动初始化。
6)、–imdb 这里给出的训练的数据库名字需要在factory.py的_sets中,我在文件里面有。_sets[‘hs’],train_net.py这个文件会调用factory.py再生成hs这个类,来读取数据。
4.启动Fast RCNN网络检测
可以参考tools下面的demo.py 文件,来做检测,并且将检测的坐标结果输出到相应的txt文件中。

相关文章推荐
- Faster-RCNN训练自己的数据集
- 【faster-rcnn】训练自己的数据集时的坑
- Faster_rcnn训练自己的数据集
- 使用labelIImg制作自己的数据集(VOC2007格式)用于Faster-RCNN训练
- Caffe学习系列——Faster-RCNN训练自己的数据集
- Faster-RCNN训练自己数据集遇到的问题集锦
- 用faster-rcnn训练自己的数据集(VOC2007格式,python版)
- 【faster-rcnn】训练自己的数据集时的坑
- 【faster-rcnn】训练自己的数据集时的坑
- Faster_rcnn训练自己的数据集
- Faster-Rcnn训练自己的数据集
- faster-rcnn训练自己的数据集以及遇到的一些问题
- 用faster-rcnn训练自己的数据集(VOC2007格式,python版)
- 不能再详细!!!手把手教你用Faster-RCNN训练自己的数据集
- py-faster-rcnn训练自己数据集需要修改的参数
- 【faster-rcnn】训练自己的数据集时的坑
- Faster-RCNN 训练自己数据集的坑记录
- win10 Faster-RCNN训练自己数据集遇到的问题集锦 (转)
- win10 caffe python Faster-RCNN训练自己数据集(转)
- Faster-RCNN训练自己的数据集