IOS 实例一 登录注册界面搭建
2016-10-27 20:52
405 查看
创建两个类,一个RegisterViewController为注册类,ViewController为登录界面类,往项目中添加两张图片,用于用户名和密码右边的图片(如果不需要显示右边的图片也可以不要);
在ViewController.m文件中,先来编写登录界面的代码,这里将用户名输入框和密码输入框声明成员变量,方便其他函数中使用这些对象,代码如下:
声明一个的常量,定义屏幕的尺寸
整个ViewController登录界面代码如下
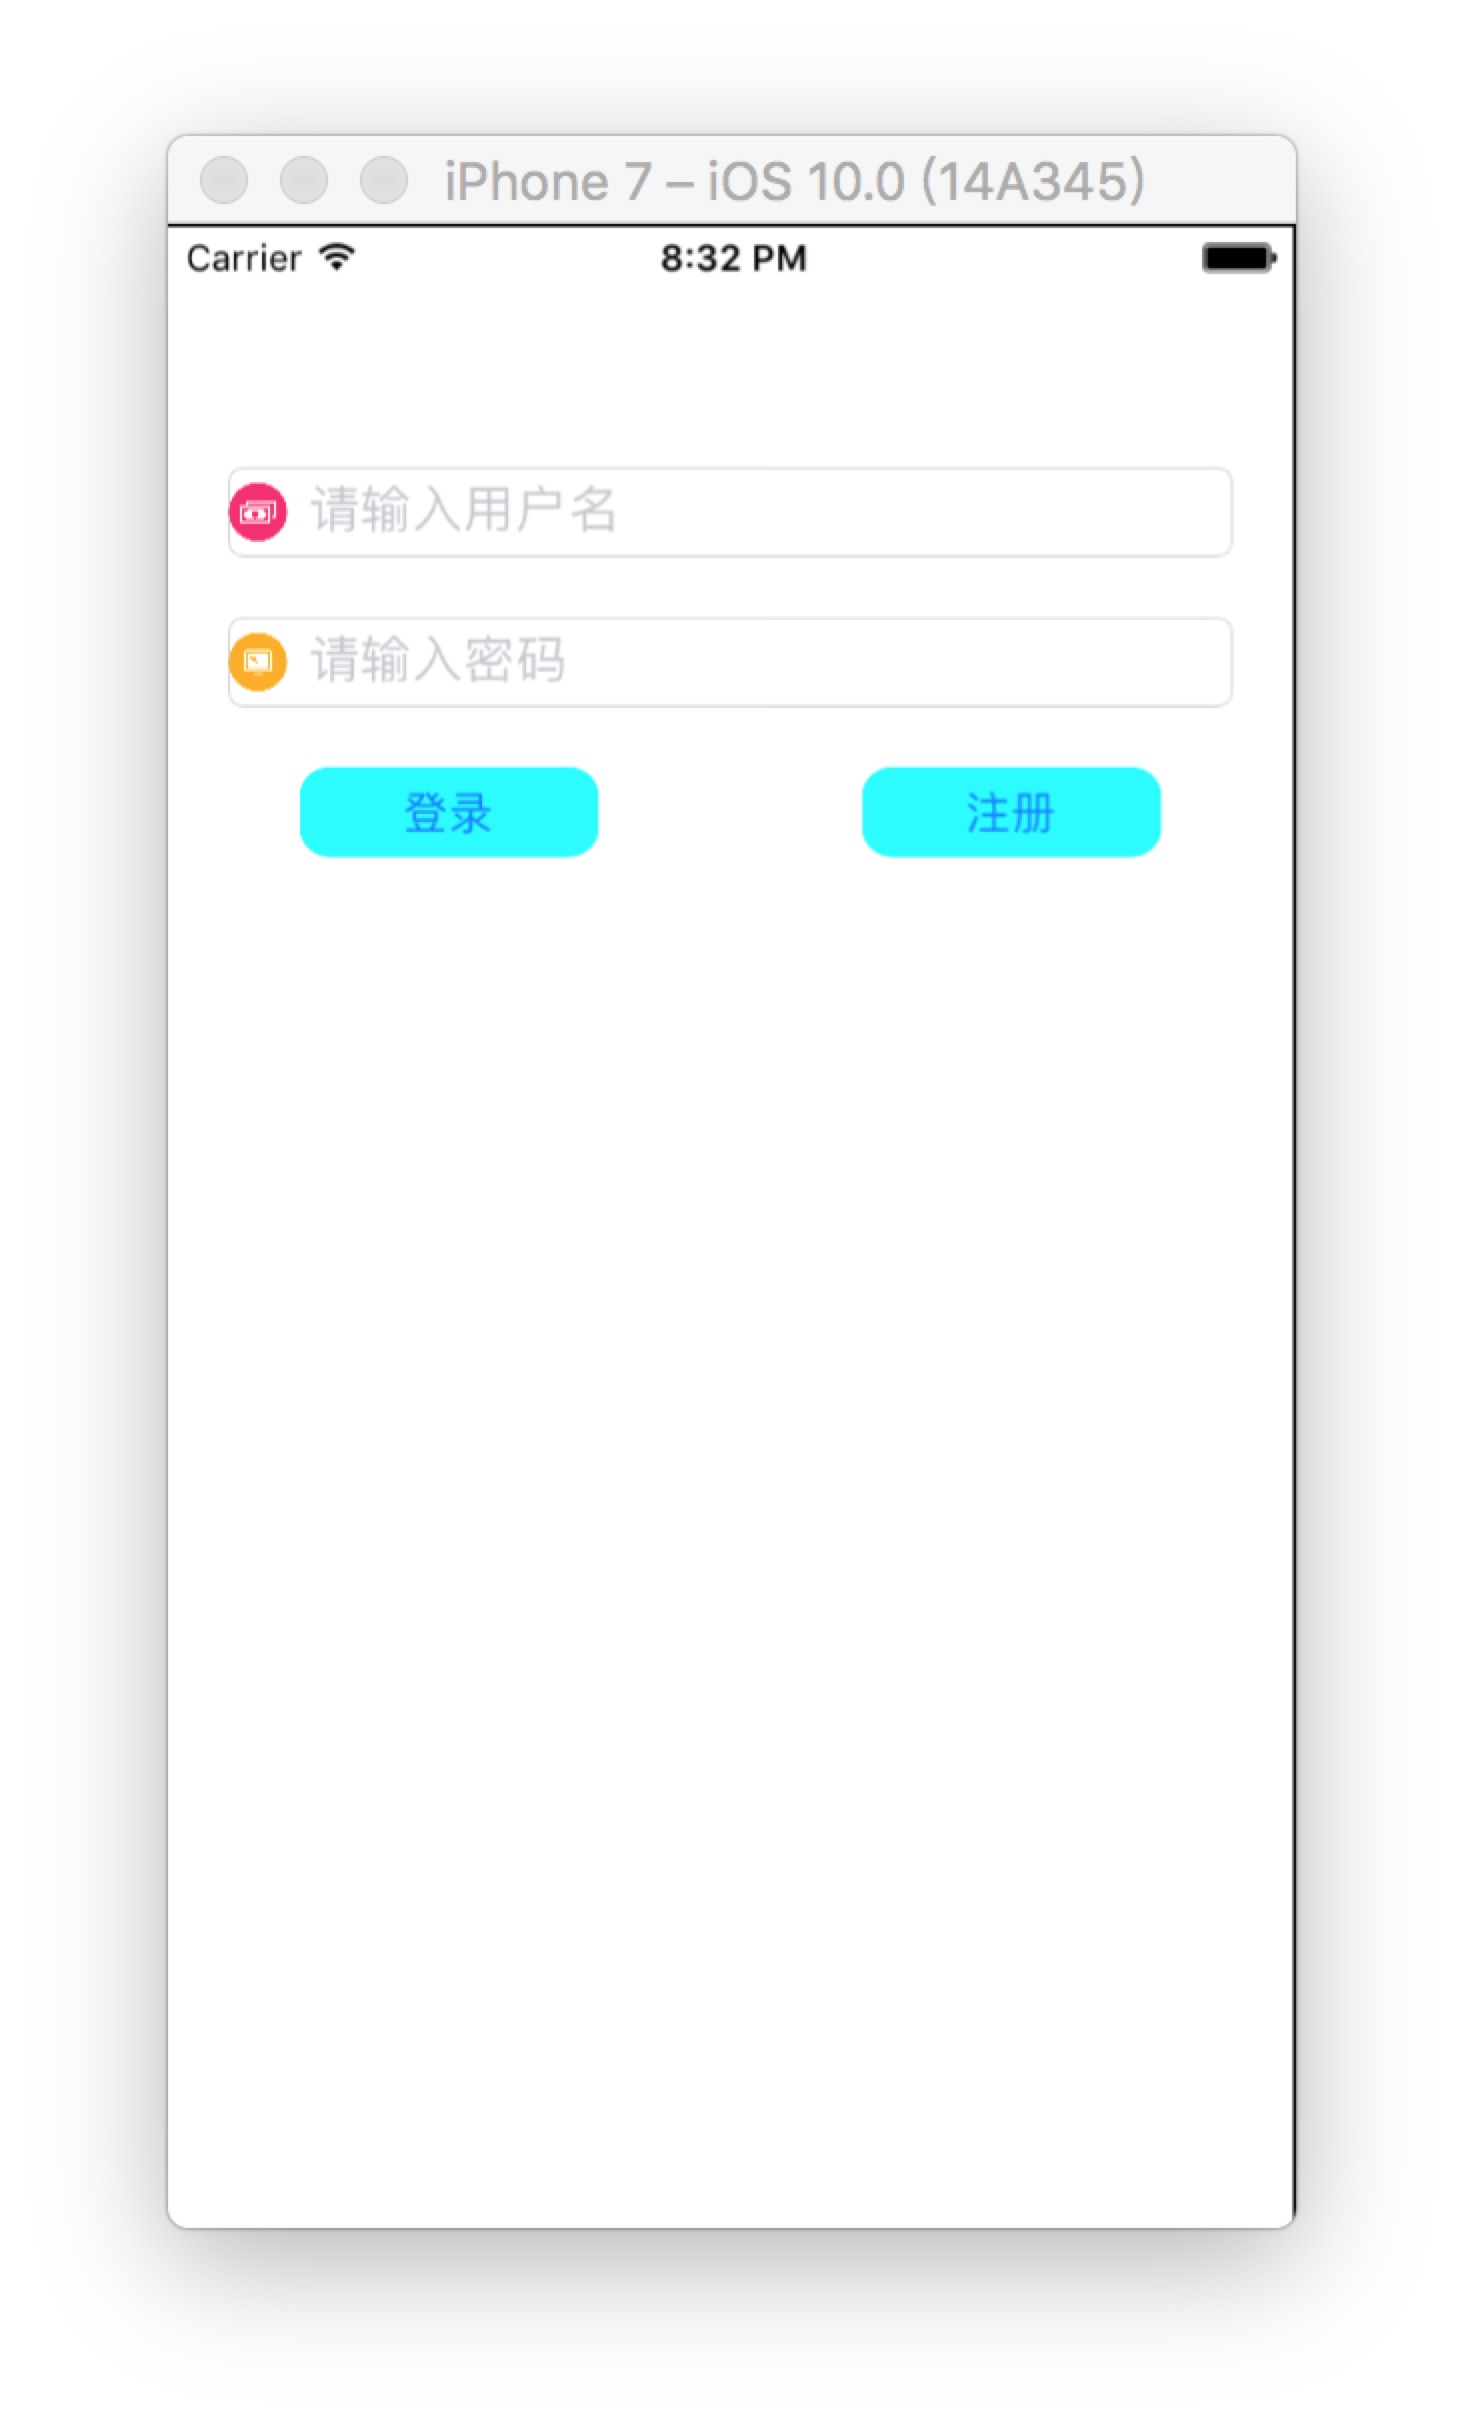
登录界面如下
简单注册代码如下
注册界面如下

在ViewController.m文件中,先来编写登录界面的代码,这里将用户名输入框和密码输入框声明成员变量,方便其他函数中使用这些对象,代码如下:
@interface ViewController ()
{
UITextField *loginText;
UITextField *passwdText;

}
@end
声明一个的常量,定义屏幕的尺寸
#define SCREEN_SIZE [UIScreen mainScreen].bounds.size
整个ViewController登录界面代码如下
#import "ViewController.h"
#import "RegisterViewController.h"
#define SCREEN_SIZE   [UIScreen mainScreen].bounds.size
@interface ViewController ()
{
UITextField *loginText;
UITextField *passwdText;

}
@end
@implementation ViewController

- (void)viewDidLoad {
[super viewDidLoad];

loginText = [[UITextField alloc]initWithFrame:CGRectMake(20, 80, SCREEN_SIZE.width-40, 30)];
loginText.borderStyle = UITextBorderStyleRoundedRect;
loginText.placeholder = @"请输入用户名";

UIImageView *loginImage = [[UIImageVi
4000
ew alloc]initWithFrame:CGRectMake(0, 0, 20, 20)];
loginImage.image = [UIImage imageNamed:@"bg_icon_bind"];

loginText.leftView = loginImage;
loginText.leftViewMode = UITextFieldViewModeAlways;
[self.view addSubview:loginText];

passwdText = [[UITextField alloc]initWithFrame:CGRectMake(20, 130, SCREEN_SIZE.width - 40, 30)];
passwdText.borderStyle = UITextBorderStyleRoundedRect;
passwdText.placeholder = @"请输入密码";
passwdText.secureTextEntry = YES;

UIImageView *passImage = [[UIImageView alloc]initWithFrame:CGRectMake(0, 0, 20, 20)];
passImage.image = [UIImage imageNamed:@"bg_icon_intro"];
passwdText.leftView  = passImage;
passwdText.leftViewMode = UITextFieldViewModeAlways;
[self.view addSubview:passwdText];

//创建登录
UIButton *loginBtn = [UIButton buttonWithType:UIButtonTypeSystem];
loginBtn.frame = CGRectMake(SCREEN_SIZE.width/4 - 50, 180, 100, 30);
[loginBtn setTitle:@"登录" forState:UIControlStateNormal];
loginBtn.layer.masksToBounds = YES;
loginBtn.layer.cornerRadius = 10;
loginBtn.backgroundColor = [UIColor cyanColor];
[loginBtn addTarget:self action:@selector(login) forControlEvents:UIControlEventTouchUpInside];
[self.view addSubview:loginBtn];

//注册按钮
UIButton *registerBtn = [UIButton buttonWithType:UIButtonTypeSystem];
registerBtn.frame = CGRectMake(SCREEN_SIZE.width/4*3 - 50, 180, 100, 30);
[registerBtn setTitle:@"注册" forState:UIControlStateNormal];
registerBtn.layer.masksToBounds = YES;
registerBtn.layer.cornerRadius = 10;
registerBtn.backgroundColor = [UIColor cyanColor];
[self.view addSubview:registerBtn];
[registerBtn addTarget:self action:@selector(register) forControlEvents:UIControlEventTouchUpInside];

}

//注册
- (void)register{
RegisterViewController *registe = [[RegisterViewController alloc]init];
[self presentViewController:registe animated:true completion:nil];
}

//登录前,先做校验
- (void)login{
if (loginText.text.length == 0) {
UIAlertController *alertController = [UIAlertController alertControllerWithTitle:@"温馨提示" message:@"登录名不能为空" preferredStyle:UIAlertControllerStyleAlert];
UIAlertAction *action = [UIAlertAction actionWithTitle:@"好的" style:UIAlertActionStyleDefault handler:^(UIAlertAction * _Nonnull action) {

}];

[alertController addAction:action];
[self presentViewController:alertController animated:YES completion:nil];
return;
}

if (passwdText.text.length == 0) {
UIAlertController *alertController = [UIAlertController alertControllerWithTitle:@"温馨提示" message:@"密码不能为空" preferredStyle:UIAlertControllerStyleAlert];
UIAlertAction *action = [UIAlertAction actionWithTitle:@"好的" style:UIAlertActionStyleDefault handler:^(UIAlertAction * _Nonnull action) {

}];

[alertController addAction:action];
[self presentViewController:alertController animated:YES completion:nil];
return;
}

UIAlertController *alertController = [UIAlertController alertControllerWithTitle:@"温馨提示" message:@"登录成功" preferredStyle:UIAlertControllerStyleAlert];
UIAlertAction *action = [UIAlertAction actionWithTitle:@"好的" style:UIAlertActionStyleDefault handler:^(UIAlertAction * _Nonnull action) {

}];
[alertController addAction:action];
[self presentViewController:alertController animated:YES completion:nil];

}

- (void)didReceiveMemoryWarning {
[super didReceiveMemoryWarning];

}

@end
登录界面如下
简单注册代码如下
#import "RegisterViewController.h"
#define SCREEN_SIZE   [UIScreen mainScreen].bounds.size
@interface RegisterViewController ()

@end

@implementation RegisterViewController

- (void)viewDidLoad {
[super viewDidLoad];
self.view.backgroundColor = [UIColor whiteColor];
UILabel *label = [[UILabel alloc]initWithFrame:CGRectMake(20, 100, SCREEN_SIZE.width - 40, 60)];
label.font = [UIFont systemFontOfSize:23];
label.text = @"注册页面";
label.textAlignment = NSTextAlignmentCenter;
[self.view addSubview:label];

//返回按钮
UIButton *btn = [UIButton buttonWithType:UIButtonTypeSystem];
btn.frame = CGRectMake(SCREEN_SIZE.width/2 - 50, 220, 100, 30);
[btn setTitle:@"返回" forState:UIControlStateNormal];
[btn addTarget:self action:@selector(backPress) forControlEvents:UIControlEventTouchUpInside];
[self.view addSubview:btn];

}

- (void)backPress{
[self dismissViewControllerAnimated:true completion:nil];
}

- (void)didReceiveMemoryWarning {
[super didReceiveMemoryWarning];.
}

@end
注册界面如下

相关文章推荐
- 用IOS做一个界面切换的效果(登录界面和注册界面和找回密码界面的切换)(用封装好的lable和textf创建界面)
- 百思不得姐第3天:登录注册界面搭建
- iOS 登录与注册的界面跳转
- iOS实战演练之关于数据交互的问题(利用XAMPP搭建本地服务器, 编写PHP代码实现iOS端注册登录功能)
- iOS登录界面和注册界面
- 1、IOS开发--iPad之仿制QQ空间(登录界面搭建+登录逻辑实现)
- iOS登录注册登录界面(UITextField)
- 1、IOS开发--iPad之仿制QQ空间(登录界面搭建+登录逻辑实现)
- iOS登录界面和注册界面
- ios UI注册登录界面
- iOS项目实例:QQ聊天界面UI搭建
- 源码推荐(8.24):一个漂亮精致的HUD,快捷搭建登录注册界面的小小库
- iOS中QQ登录界面的制作,登录页面和注册页面的切换
- Android实现注册登录界面的实例代码
- 1、IOS开发--iPad之仿制QQ空间(登录界面搭建+登录逻辑实现)
- iOS用户点击退出按钮,跳到登录界面的代码控制
- JSP作业2 - 利用html实现简单的用户登录注册界面
- (NodeJS学习文章收集三) node.js基于express框架搭建一个简单的注册登录Web功能
- iOS新功能引导提示界面实例详解
- 移动大脑-SpringMVc搭建RestFul后台服务(三)-RestFul接口编写(模拟用户注册登录)