使用NodeJS本地开发微信公众号示例
2016-10-14 21:00
288 查看
1.windows上安装NodeJS
2.新建项目目录,如
3.新建文件
4.执行

5.服务器启动,参见“2.微信本地调试服务器篇”
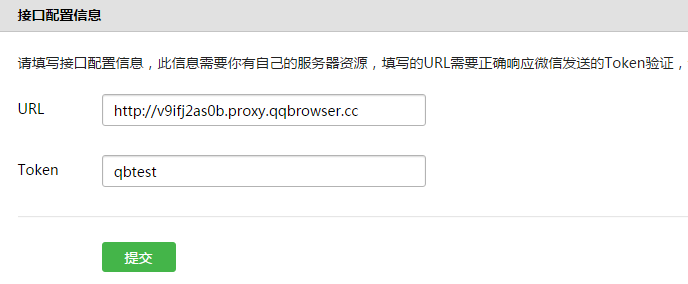
6.进入微信公众平台,填写配置信息,以测试账号为例,注意到Token填写了上文提到的
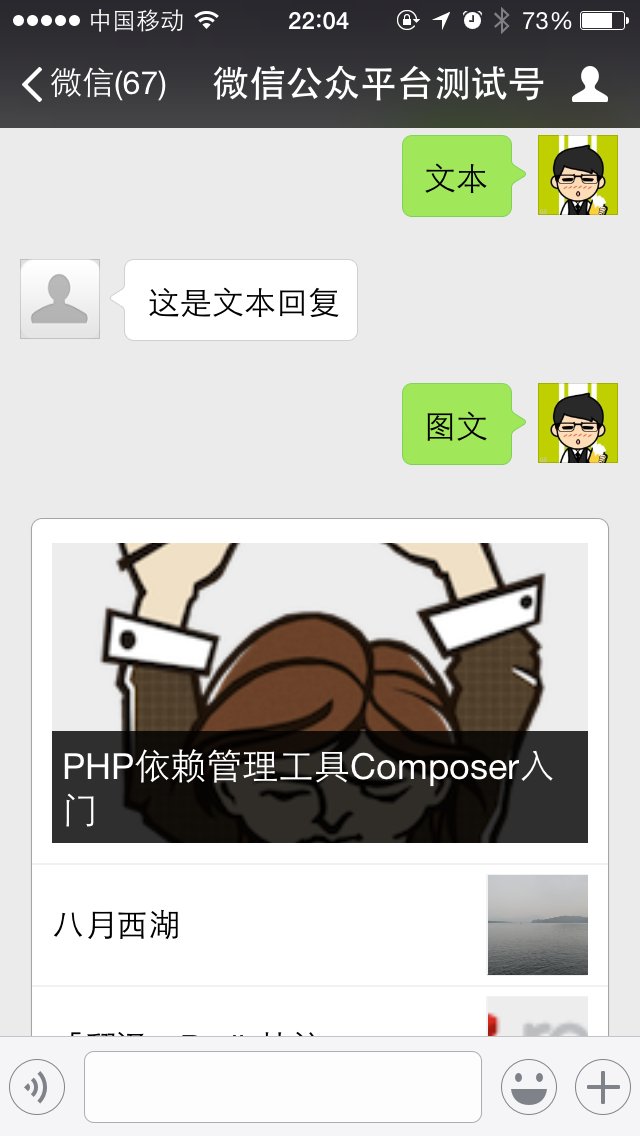
7.打开微信公众号,发消息试试
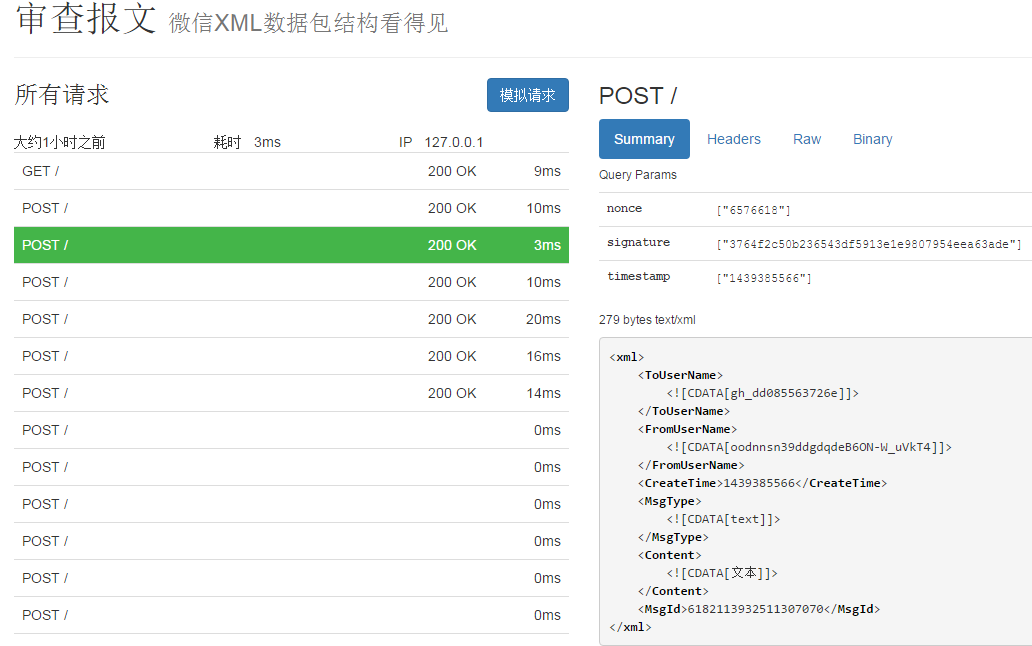
8.进入
示例中用到的所有代码和模块下载>>,下载后直接
2.新建项目目录,如
nodejs_wechat_bot,进入目录后安装
express和
weixin-api模块,具体方法是:
npm install express
npm install weixin-api
3.新建文件
index.js,写入如下内容
var weixin      = require('weixin-api');
var express     = require('express');
var app         = express();

// 接入验证
app.get('/', function(req, res) {

// 签名成功
if (weixin.checkSignature(req)) {
res.status(200).send(req.query.echostr);
} else {
res.status(200).send('fail');
}
});

// config 根据自己的实际配置填写
weixin.token = 'qbtest';

// 监听文本消息
weixin.textMsg(function(msg) {
console.log("textMsg received");
console.log(JSON.stringify(msg));

var resMsg = {};

switch (msg.content) {
case "文本" :
// 返回文本消息
resMsg = {
fromUserName : msg.toUserName,
toUserName : msg.fromUserName,
msgType : "text",
content : "这是文本回复",
funcFlag : 0
};
break;

case "音乐" :
// 返回音乐消息
resMsg = {
fromUserName : msg.toUserName,
toUserName : msg.fromUserName,
msgType : "music",
title : "音乐标题",
description : "音乐描述",
musicUrl : "音乐url",
HQMusicUrl : "高质量音乐url",
funcFlag : 0
};
break;

case "图文" :

var articles = [];
articles[0] = {
title : "PHP依赖管理工具Composer入门",
description : "PHP依赖管理工具Composer入门",
picUrl : "http://weizhifeng.net/images/tech/composer.png",
url : "http://weizhifeng.net/manage-php-dependency-with-composer.html"
};

articles[1] = {
title : "八月西湖",
description : "八月西湖",
picUrl : "http://weizhifeng.net/images/poem/bayuexihu.jpg",
url : "http://weizhifeng.net/bayuexihu.html"
};

articles[2] = {
title : "「翻译」Redis协议",
description : "「翻译」Redis协议",
picUrl : "http://weizhifeng.net/images/tech/redis.png",
url : "http://weizhifeng.net/redis-protocol.html"
};

// 返回图文消息
resMsg = {
fromUserName : msg.toUserName,
toUserName : msg.fromUserName,
msgType : "news",
articles : articles,
funcFlag : 0
}
}

weixin.sendMsg(resMsg);
});

// 监听图片消息
weixin.imageMsg(function(msg) {
console.log("imageMsg received");
console.log(JSON.stringify(msg));
});

// 监听位置消息
weixin.locationMsg(function(msg) {
console.log("locationMsg received");
console.log(JSON.stringify(msg));
});

// 监听链接消息
weixin.urlMsg(function(msg) {
console.log("urlMsg received");
console.log(JSON.stringify(msg));
});

// 监听事件消息
weixin.eventMsg(function(msg) {
console.log("eventMsg received");
console.log(JSON.stringify(msg));
});

// Start
app.post('/', function(req, res) {

// loop
weixin.loop(req, res);

});

app.listen(3000);
4.执行
node
index.js
启动node server。注意到
weixin.token被赋值了
qbtest,后面会用到。
5.服务器启动,参见“2.微信本地调试服务器篇”
6.进入微信公众平台,填写配置信息,以测试账号为例,注意到Token填写了上文提到的
qbtest
7.打开微信公众号,发消息试试
8.进入
审查报文,查看已接收和自动回复的报文
示例中用到的所有代码和模块下载>>,下载后直接
node
index.js
即可使用。

相关文章推荐
- 使用Nodejs开发微信公众号后台服务实例
- 使用NodeJs 开发微信公众号(三)微信事件交互实例
- 使用Nodejs开发微信公众号后台服务实例
- 微信公众号开发--使用crontab定时删除没用的本地素材文件
- 使用阿里云ECS服务器转发外网请求到内网(微信公众号开发本地调试环境)
- 使用 NodeJs 实现一个本地接口数据系统,无需数据库,让前端独立于后台开发
- Asp.net 2.0 自定义控件开发专题[详细探讨页面状态(视图状态和控件状态)机制及其使用场景](示例代码下载)
- Asp.net 2.0 自定义控件开发专题[详细探讨页面状态(视图状态和控件状态)机制及其使用场景](示例代码下载)
- Asp.net 2.0 自定义控件开发专题[详细探讨页面状态(视图状态和控件状态)机制及其使用场景](示例代码下载)
- Asp.net 2.0 自定义控件开发专题[详细探讨页面状态(视图状态和控件状态)机制及其使用场景](示例代码下载)
- Asp.net 2.0 自定义控件开发专题[详细探讨页面状态(视图状态和控件状态)机制及其使用场景](示例代码下载)
- Asp.net 2.0 自定义控件开发专题[详细探讨页面状态(视图状态和控件状态)机制及其使用场景](示例代码下载)
- 开发供本地使用的 Web 应用程序
- Asp.net 2.0 自定义控件开发专题[详细探讨页面状态(视图状态和控件状态)机制及其使用场景](示例代码下载)
- Asp.net 2.0 自定义控件开发专题[详细探讨页面状态(视图状态和控件状态)机制及其使用场景](示例代码下载)
- Asp.net 2.0 自定义控件开发专题[详细探讨页面状态(视图状态和控件状态)机制及其使用场景](示例代码下载)
- Asp.net 2.0 自定义控件开发专题[详细探讨页面状态(视图状态和控件状态)机制及其使用场景](示例代码下载)
- Asp.net 2.0 自定义控件开发专题[详细探讨页面状态(视图状态和控件状态)机制及其使用场景](示例代码下载)
- Asp.net 2.0 自定义控件开发专题[详细探讨页面状态(视图状态和控件状态)机制及其使用场景](示例代码下载)