Elasticsearch安装配置
2016-10-14 11:52
357 查看
环境配置
1、首先要把jdk安装好,然后下载elasticsearch-2.3.4.tar.gz
操作系统:Cent OS 6.5
ElasticSearch:2.4.3
JDK:1.7
maven:3.3.9
elasticsearch-analysis-ik:1.4.1
1、首先要把jdk安装好,然后下载elasticsearch-2.3.4.tar.gz
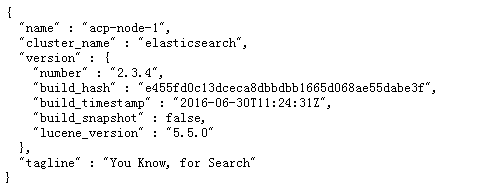
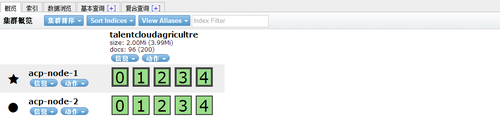
wget https://download.elastic.co/elasticsearch/release/org/elasticsearch/distribution/tar/elasticsearch/2.3.4/elasticsearch-2.3.4.tar.gz[/code]2、解压下载好的elasticsearch-2.3.4.tar.gz[root@localhost opt]# cd /opt/ [root@localhost opt]# ls elasticsearch-2.3.4.tar.gz git-1.8.3.2.tar.gz [root@localhost opt]# tar zxvf elasticsearch-2.3.4.tar.gz3、创建用户和用户组(elasticsearch 2.0.0版本后不能以root用户启动。)[root@localhost opt]# groupadd elsearch [root@localhost opt]# useradd elsearch -g elsearch -p elasticsearch4、把解压好的目录移动到/usr/local/elasticsearch[root@localhost opt]# mv elasticsearch-2.3.4 /usr/local/elasticsearch5、设置权限chown -R elsearch:elsearch /usr/local/elasticsearch6、安装es-head插件[root@localhost plugins]# cd /usr/local/elasticsearch/bin/ [root@localhost plugins]# ./plugin –install mobz/elasticsearch-head7、在浏览器中输入http://localhost:9200,http://localhost:9200/_plugin/head/如下图所示则ES启动成功。
8、若要停止服务,则输入sh elasticsearch stop[root@localhost opt]# cd /usr/local/elasticsearch/bin [root@localhost opt]# sh elasticsearch stop9、安装ik中文分词,首先要安装java 和 elasticsearch
(1)安装maven[root@localhost opt]# tar zxvf apache-maven-3.3.9-bin.tar.gz [root@localhost opt]# mv apache-maven-3.3.9 /usr/local/maven [root@localhost opt]# vim /etc/profileexport PATH=$PATH:$JAVA_HOME/bin export M2_HOME=/usr/local/maven PATH=$PATH:$JAVA_HOME/bin:$M2_HOME/bin[root@localhost opt]# source /etc/profile(2)安装elasticsearch-analysis-ik[root@localhost opt]# wget -c [root@localhost opt]# unzip master.zip [root@localhost opt]# cd elasticsearch-analysis-ik-master/ [root@localhost elasticsearch-analysis-ik-master]# cp -Rf config/* ik /usr/local/elasticsearch/config/ [root@localhost elasticsearch-analysis-ik-master]# mvn package [root@localhost elasticsearch-analysis-ik-master]# /usr/local/elasticsearch/bin/plugin --install analysis-ik --url file:///alidata/download/elasticsearch-analysis-ik-master/target/releases/elasticsearch-analysis-ik-1.4.1.zip(3)修改elasticsearch.yml,在该文件后面添加下面的内容:[root@localhost ~]# cd /usr/local/elasticsearch/config [root@localhost config]# vim elasticsearch.yml index: analysis: analyzer: ik: alias: [ik_analyzer] type: org.elasticsearch.index.analysis.IkAnalyzerProvider ik_max_word: type: ik use_smart: false ik_smart: type: ik use_smart: true index.analysis.analyzer.default.type: ik(4)重新启动elasticsearch[root@localhost config]# /usr/local/elasticsearch/bin/elasticsearch -d(5) ik分词测试,创建一个索引,名为index[root@localhost config]# curl -XPUT http://localhost:9200/index[/code]为索引index创建mapping[root@localhost config]# curl -XPOST http://localhost:9200/index/fulltext/_mapping -d' { "fulltext": { "_all": { "analyzer": "ik" }, "properties": { "content": { "type" : "string", "boost" : 8.0, "term_vector" : "with_positions_offsets", "analyzer" : "ik", "include_in_all" : true } } } }'测试[root@localhost config]# curl 'http://localhost:9200/index/_analyze?analyzer=ik&pretty=true' -d ' { "text":"www.acp.com" }'显示结果如下:{ "tokens" : [ { "token" : "text", "start_offset" : 4, "end_offset" : 8, "type" : "ENGLISH", "position" : 1 }, { "token" : "www.acp.com", "start_offset" : 11, "end_offset" : 24, "type" : "LETTER", "position" : 2 }, { "token" : "www", "start_offset" : 11, "end_offset" : 14, "type" : "acp", "position" : 3 }, { "token" : "acp", "start_offset" : 15, "end_offset" : 20, "type" : "ENGLISH", "position" : 4 }, { "token" : "com", "start_offset" : 21, "end_offset" : 24, "type" : "ENGLISH", "position" : 5 }, {

相关文章推荐
- 大数据——hadoop1.2.1+hbase0.94.11+nutch2.2.1+elasticsearch0.90.5安装配置攻略(中集)
- ElasticSearch集群的安装和配置
- ubuntu安装配置elasticSearch
- ElasticSearch安装部署,基本配置(Ubuntu14.04)
- ElasticSearch-2.0.0集群安装配置与API使用实践
- elasticsearch安装配置及中文分词
- elasticsearch 1.5 + mysql安装配置与简单使用
- Linux-CentOS 全文搜索引擎Elasticsearch的安装与配置
- 安装ElasticSearch搜索工具并配置Python驱动的方法
- elasticsearch安装参数配置注意事项
- ElasticSearch 安装配置
- hadoop1.2.1+hbase0.94.11+nutch2.2.1+elasticsearch0.90.5安装配置攻略
- Elasticsearch 免费认证插件Search-guard的部署安装及策略配置
- 分布式搜索引擎Elasticsearch安装配置
- Elasticsearch是一个分布式可扩展的实时搜索和分析引擎,elasticsearch安装配置及中文分词
- 安装fluentd时配置fluent-plugin-elasticsearch发生的错误
- elasticsearch(0.90.10)安装配置+超多插件!!
- ElasticSearch的安装配置
- 安装ElasticSearch搜索工具并配置Python驱动的方法
- elasticsearch安装配置及中文分词